DIY bi-xenon lens installation
For all the advantages of American cars, especially the old classic school, there are two common disadvantages (applies to all models): high fuel consumption and disgusting headlights. Replacing lamps with all sorts of “Night Breaker” and other “plus 50% brightness” does not give a noticeable result. The problem is a unified approach to the design of reflectors: any American headlight is blind.
There is only one way out: installing a modern gas-discharge system, that is, xenon. Simply replacing a halogen lamp with a gas flask partially solves the problem:
Chinese inventors offer many non-standard gas-discharge flasks made on halogen bases: H1, H4, HB3, etc.Supposedly for a “standard” replacement. This approach is fundamentally wrong.
Structurally, it can be a full-fledged headlight with a lens and a standard base for one of the xenon bulb standards. There are ready-made blocks in the housing: they can be installed in the body separately from the headlights. But the most common retrofit option (which is also the most economical) is a lensed module without a housing.
For reference: lensed modules can be separately for low and high beam (labeled DC and DR, respectively), or bi-xenon lenses (labeled DC/R). In the second case, mode switching is carried out using a beam-forming curtain: it is controlled by an electromagnet.
Despite the fact that the article is of a technical nature, we will consider some legal subtleties that allow you to legally use xenon in a car. There is nothing to talk about standard circuits: if gas-discharge headlights are installed by the manufacturer, everything is legal.
The technical regulations of the customs union state:
1. It is allowed to install headlights with gas-discharge light sources in discontinued vehicles. In this case, headlights from a different model are used.
2. If you independently installed (or rather are going to install) xenon modules in headlights designed for halogen lamps, approval is required from the traffic police. This procedure includes technical expertise, visits to authorities and some financial costs (in addition to the cost of equipment). After that, a note is made in the PTS about changes to the design, and ride to your health.
Whether you are going to legalize homemade xenon, or you are going to remake the headlights in such a way that not a single inspector will get to the bottom of it, the work must be performed in accordance with the standards.
And of course, the cut-off line of the low beam (in our case with the broken right section, the so-called step) must be correctly adjusted.
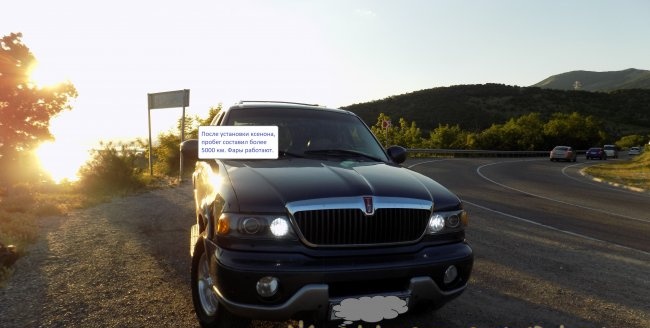
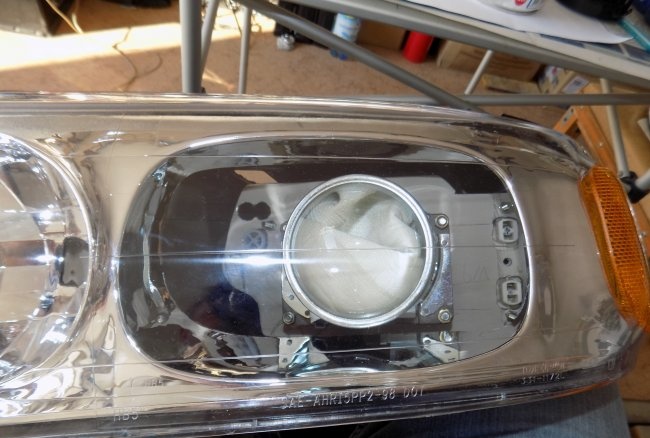
The car is a 2000 Lincoln Navigator. To say that the stock version shines poorly is an understatement. The car has been discontinued, but it is not possible to install xenon headlights from another model. Therefore, we install bi-xenon modules.
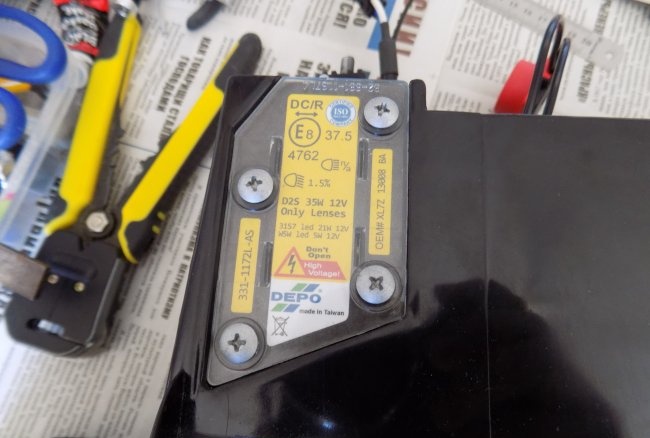
Since the process is not fast, and you need to drive every day, new standard headlights from the Taiwanese manufacturer DEPO were purchased for the experiments.
This solves a number of problems:
1. While we are installing the lenses, the car is running with old headlights.
2. If “something goes wrong”, you will not be left without a head light.
3. If necessary (problems with the traffic police, failure to pass technical inspection...) you can always roll back.
At the same time, I updated the old optics with cloudy lenses. Fortunately, the price of the set is not too steep.
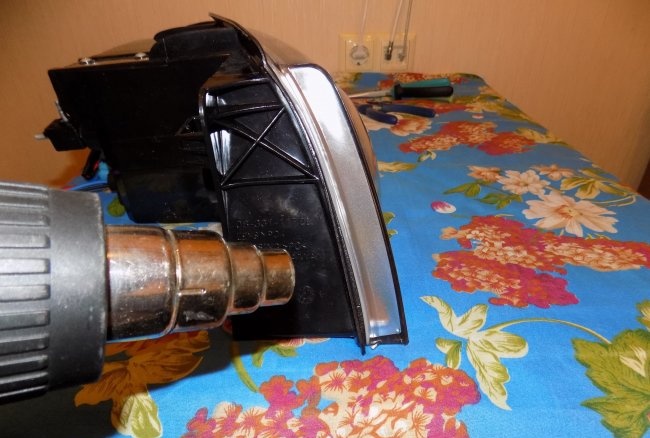
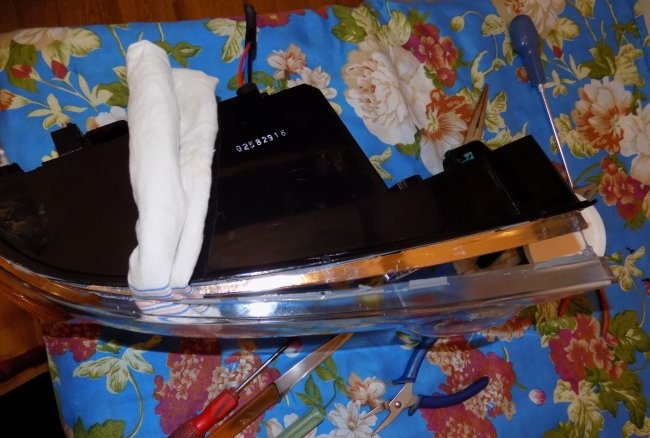
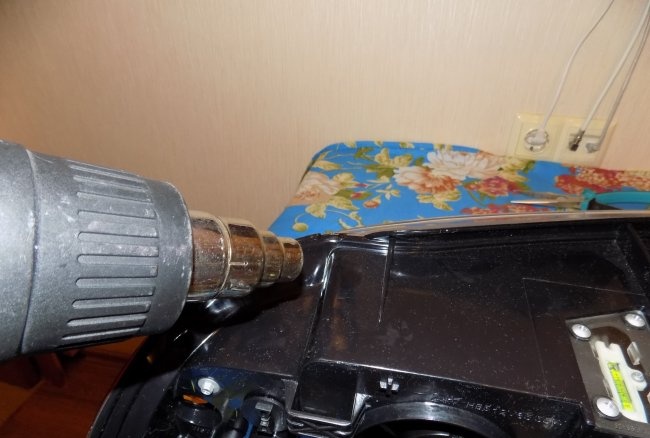
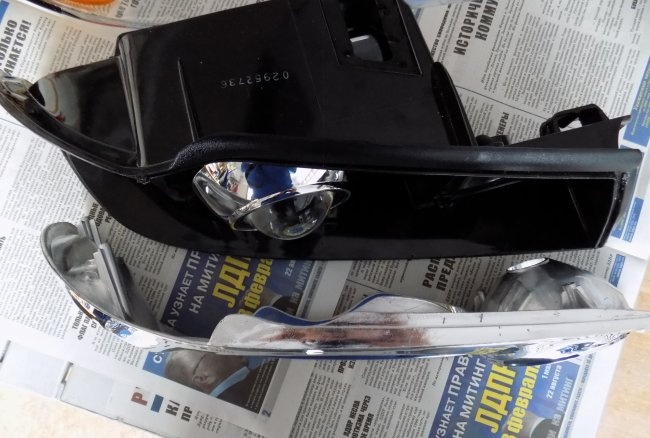
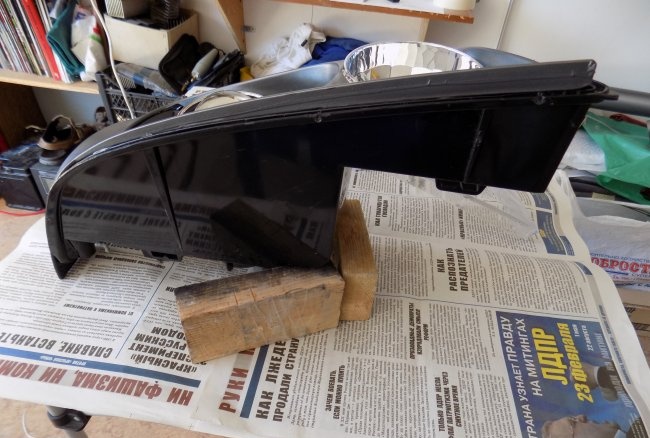
First of all, new headlights must be opened. With rare exceptions, the glass is attached to the body using a sealant. When heated to 200°C - 300°C, the glue softens and the headlight can be easily disassembled. There are many ways: put it in the oven, put it in an airtight box and heat the air inside with a hairdryer, use an infrared heater of the UFO type. I chose local heating using a hair dryer.
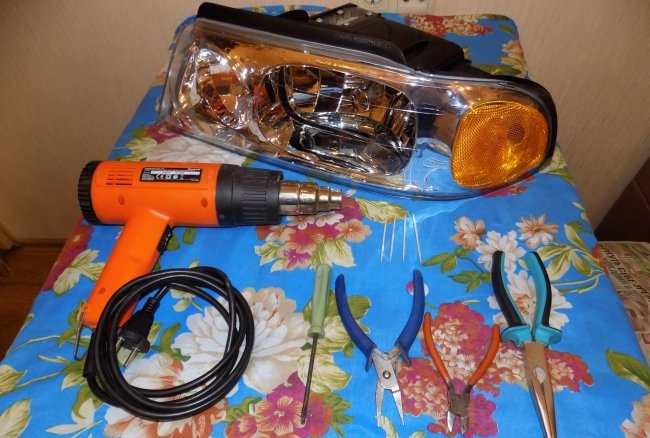
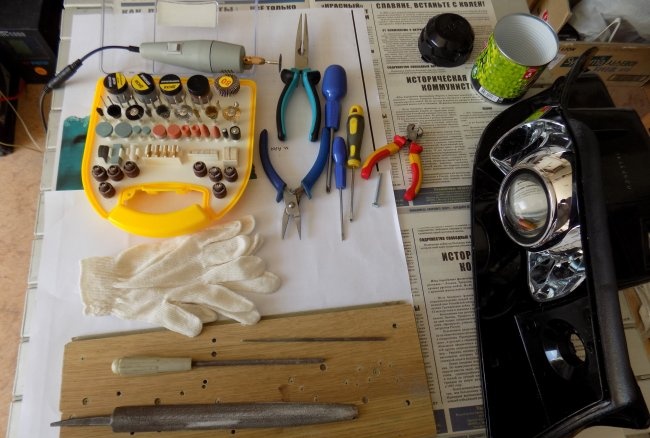
The disassembly tool is standard: a screwdriver, pliers (for removing locking rivets, if you have one), toothpicks as spacer wedges, and a hair dryer itself.
The headlight is inspected along the contour of the glass mounting for additional fasteners: screws, rivets, staples. Then it is laid on a soft surface, and heating begins from the lightest angle.
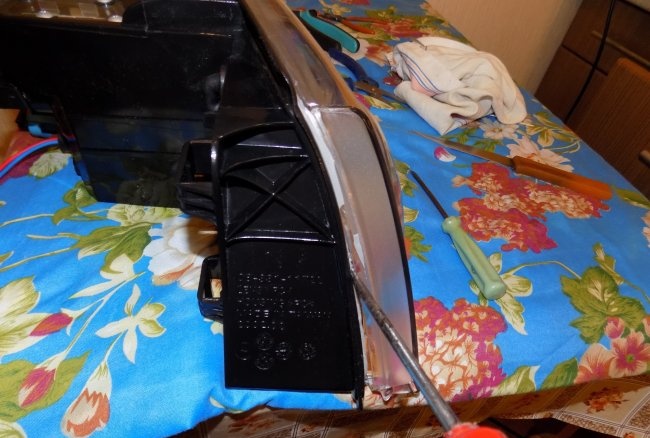
After some time, the sealant gives in. Carefully pry it up with a flat screwdriver and insert a toothpick into the gap.
When the glass has moved away a sufficient distance, you can fix the gap with a rag.
We warm up the last section.
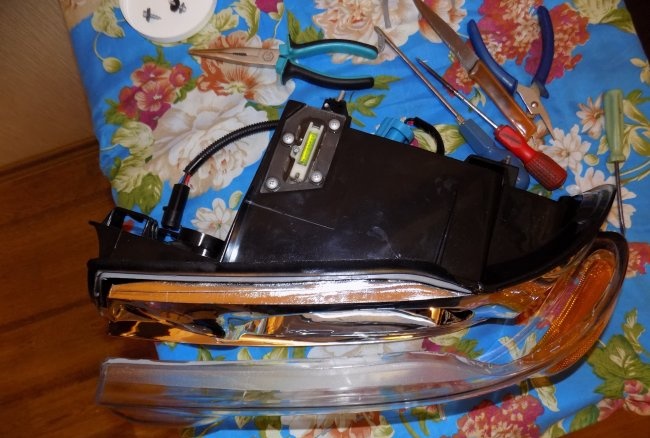
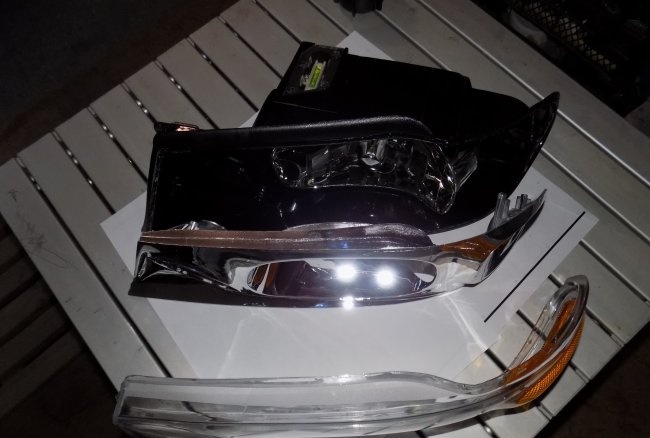
Separate the glass and leave the headlight to cool.
Heating is controlled visually. The plastic should not change color or become soft. It is better to choose a lower temperature and heat longer.
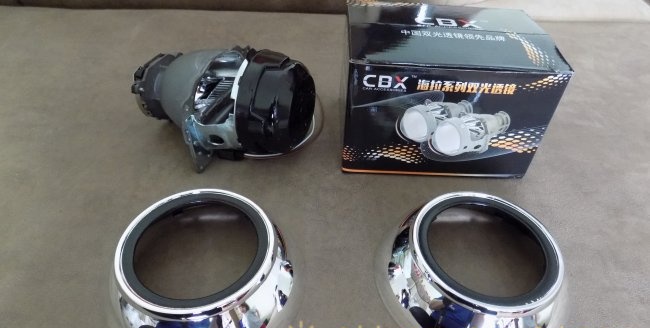
I chose a bi-xenon kit from the Chinese manufacturer "CBX". This is an enterprise whose assembly lines produce optics for various car factories. My set turned out to be a Chinese replica for Volkswagen AG, for some AUDI model. Of course, no original logos - this is a pirated factory clone. The quality of workmanship (especially the lenses) is at the highest level. In my case, the masks (decorative covers that cover the structure) came from a VW Tiguan.Of course, made in China.
Lens diameter is 3 inches. The base is standard D2S. I bought branded lamps, PHILIPS 85122 35W, color temperature 4600K. I used ignition blocks (ballast) from the Korean company Sho-Me 35W. The installation is external, fortunately you can hide anything you want behind the bumper. The ignition unit kit includes all the necessary wiring, so there is no point in rewriting the connection instructions. When purchasing such a kit you will receive all the necessary documentation.
Advice: If you plan to subsequently legalize the alteration, you must obtain a certificate for each component. Sellers know what these documents are.
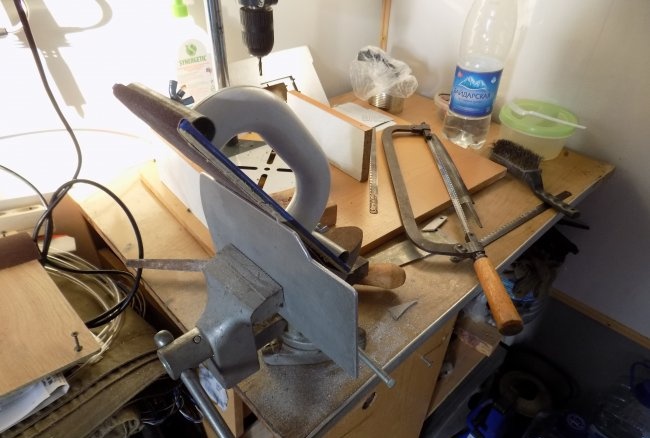
To install the bilens in the headlights, use a regular mechanic's tool (see photo).
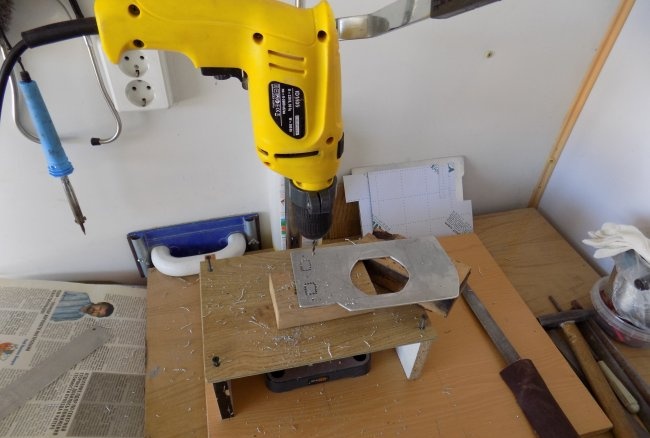
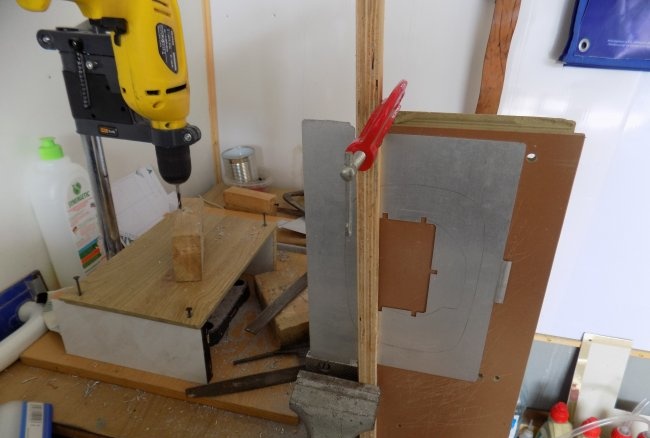
A Dremel with a set of cutters, cutters and cutting discs is very helpful. I also used a drill press (more precisely, a stand for an electric drill).
We disassemble the headlight, having previously marked the center of the halogen lamp on the glass. If you plan to preserve the chrome filling, you should work with cotton gloves.
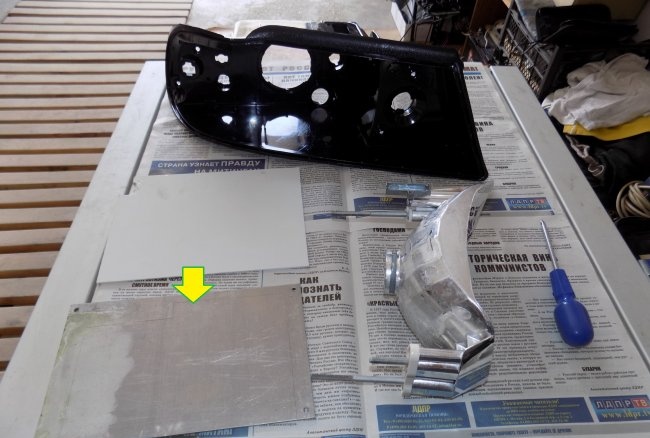
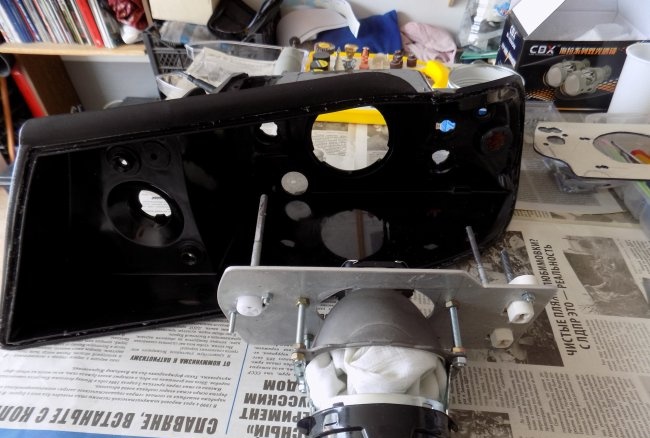
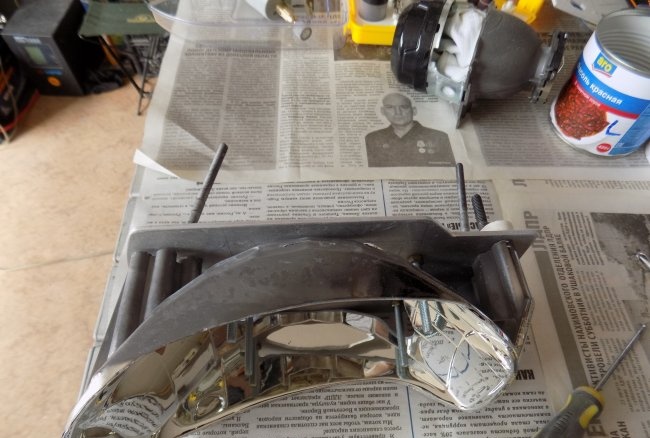
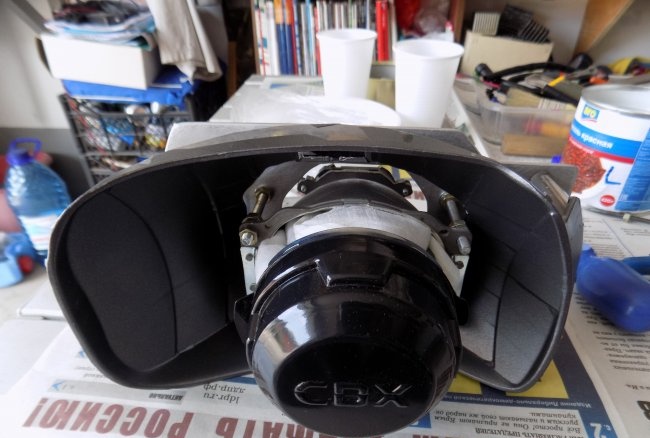
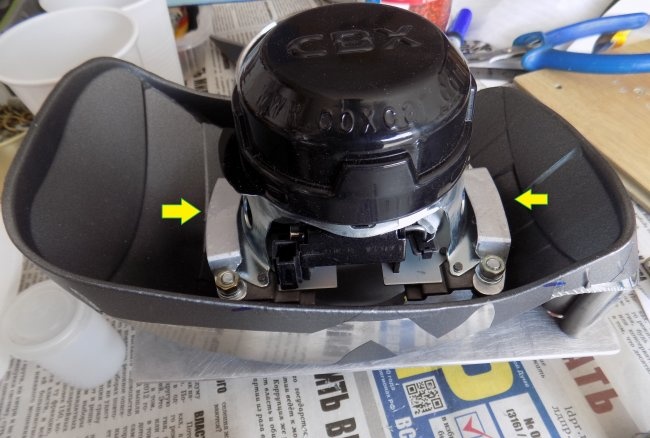
The lens is secured inside using a bracket (frame). The solution is individual (for different headlights), based on my example you can develop your own design. I left the standard reflector mount. Since I do not accept screwing bilens modules with studs onto a plastic reflector, it was decided to install 3 mm aluminum plates.
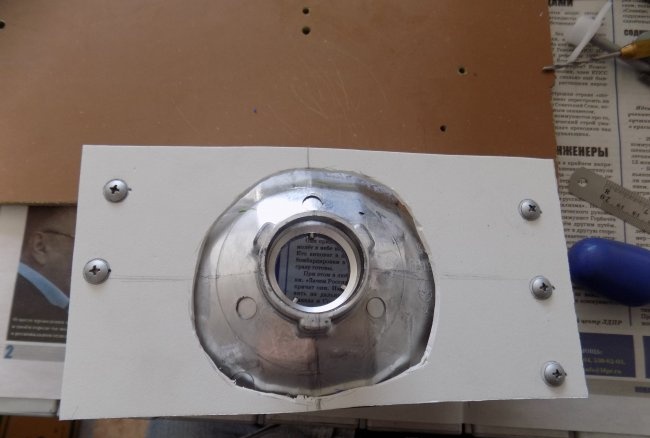
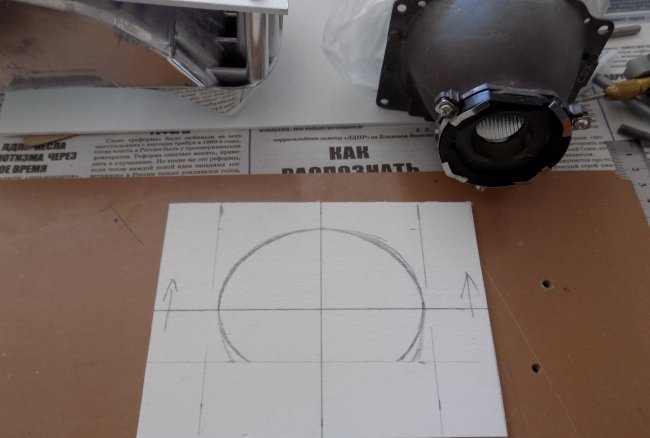
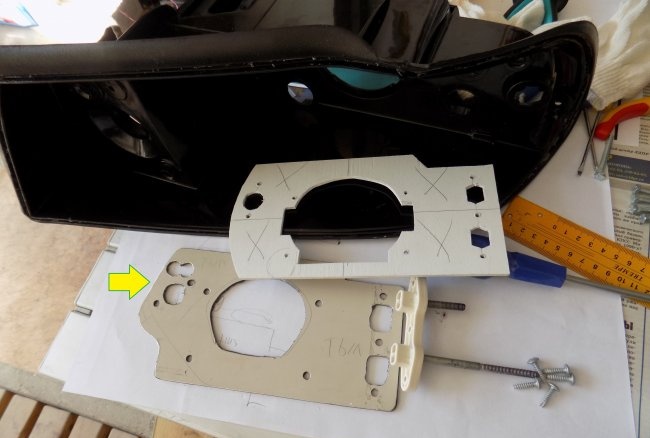
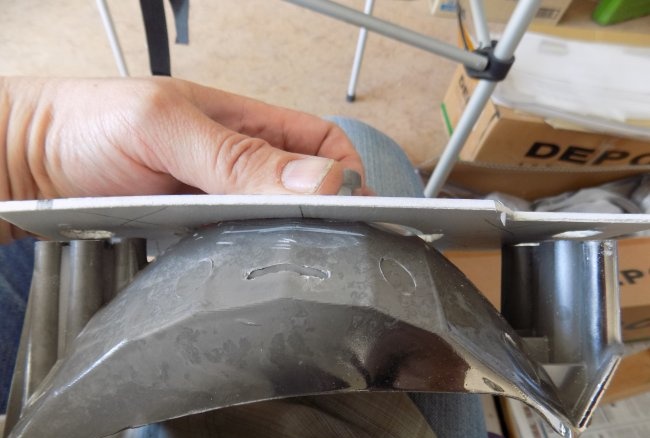
Before you start processing aluminum, you should work with temporary templates. In my case, a foamed PVC sheet 4 mm thick. Having screwed the template to the reflector (in the standard mounting locations), I marked the basic coordinate axes intersecting at right angles in the center of the hole for the lamp.
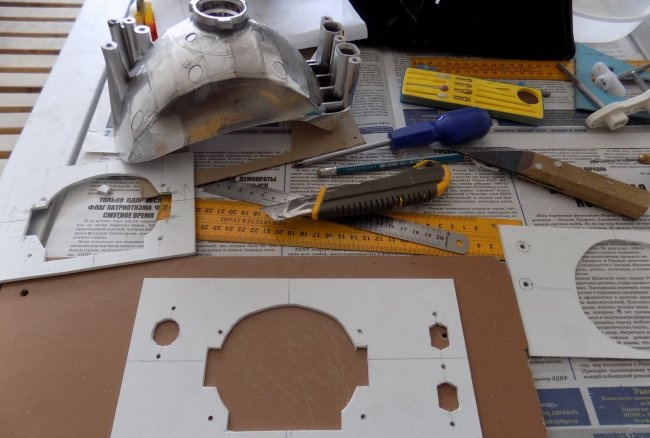
This is necessary for centering the bilens module.Then, after measuring the distance between the module mounting ears, I made and marked a second template.
And I cut it out with mounting holes for installing the lens housing.
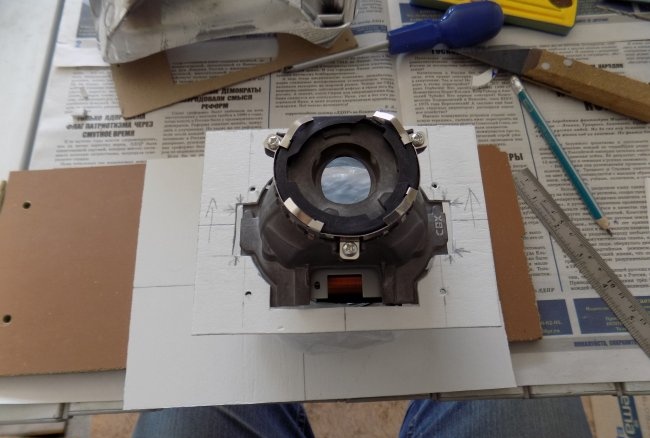
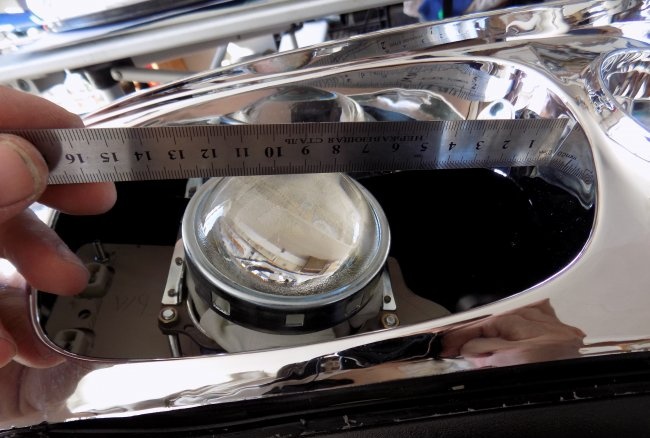
By combining the coordinate points of both templates, we obtain the exact location of the bilens installation relative to the headlight reflector mount. This is important; the center of the lens must be located on the same axis as the halogen lamp. Otherwise, the adjustment range may not be sufficient.
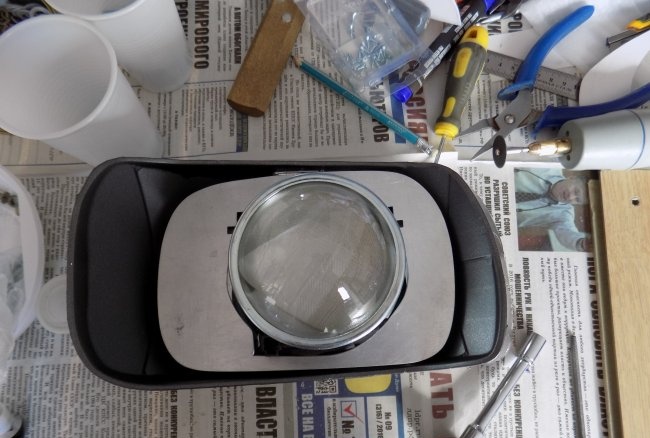
We assemble the template plate: install the standard reflector mount and the bilens body.
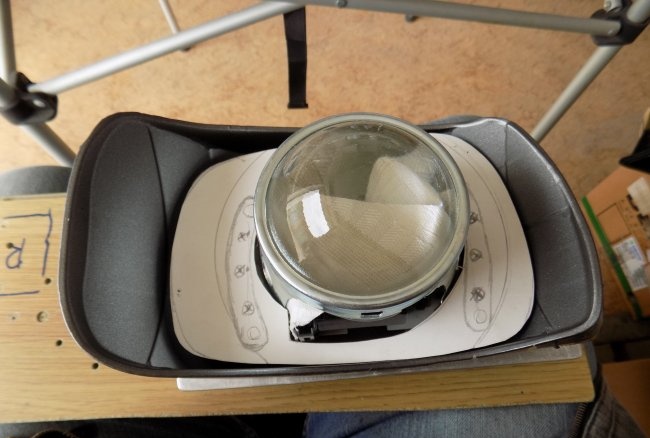
Let's try it on in the headlight housing.
If deviations are detected (even 1-2 mm), this can be easily corrected on the PVC plate.
Then we make a second template, from a tougher material. It is necessary for precise adjustment of the already switched on headlight. It is too expensive to remake the finishing aluminum plate. I took pieces of laminated acrylic, the kind used in advertising structures. It is quite rigid and can be easily altered when adjusting.
We assemble the structure and install it in the headlight housing.
We adjust the center point of the optical axis.
We check compliance with the mark on the headlight glass.
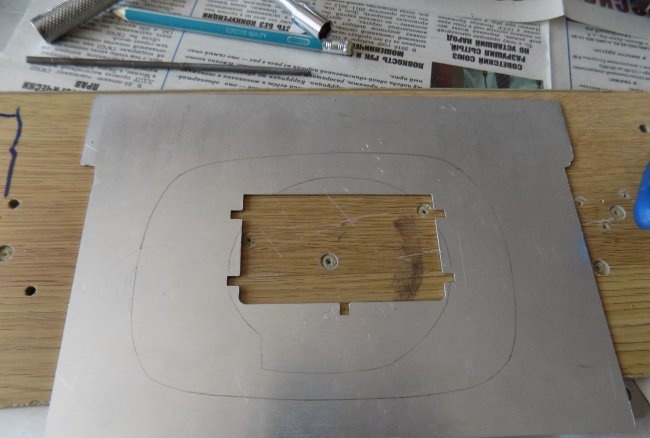
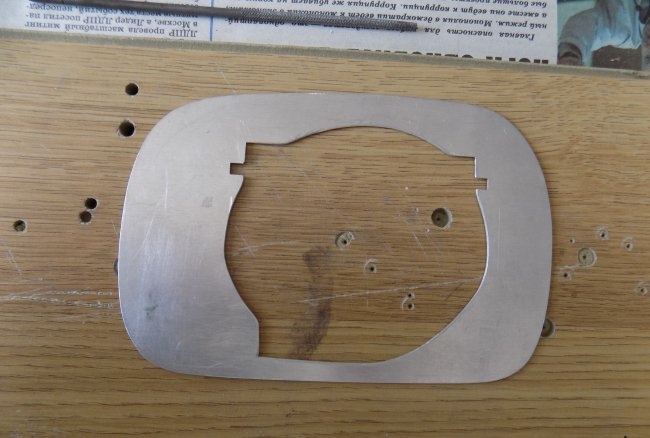
After adjusting the rigid template, we make a bracket from an aluminum plate.
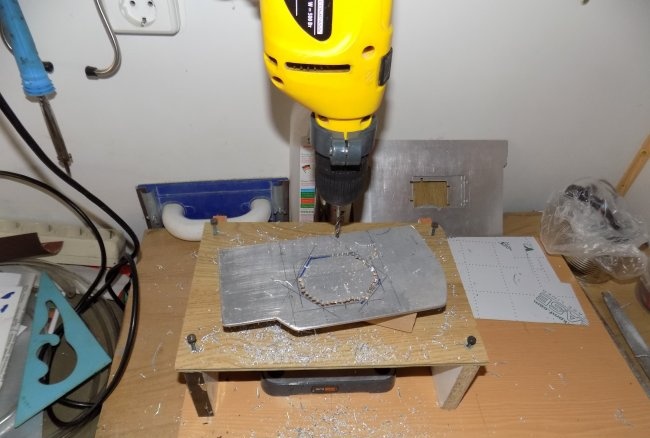
I marked the central hole on a drill press.
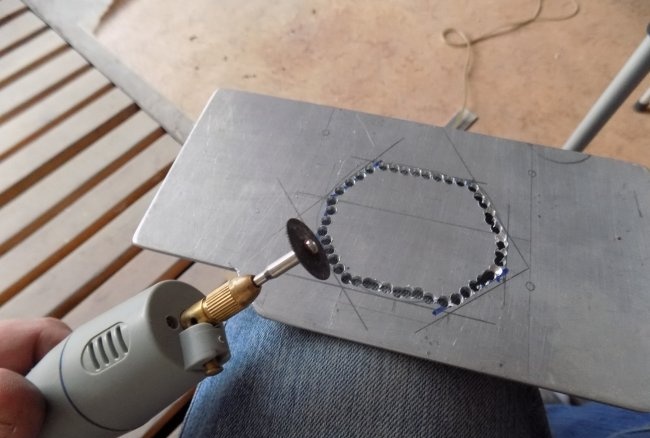
Then I finished it with a Dremel.
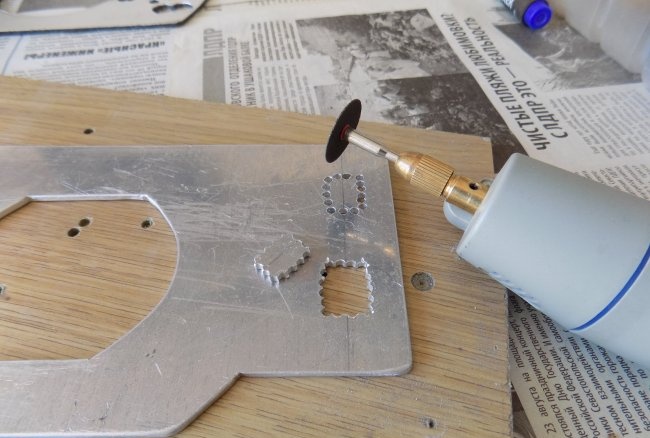
We make the remaining technological holes in the same way.
Once again I am convinced of the benefits of a Dremel. A simple file would have to work for more than one hour.
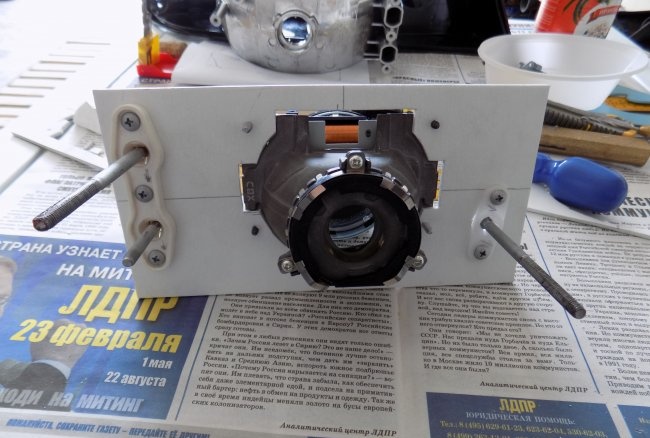
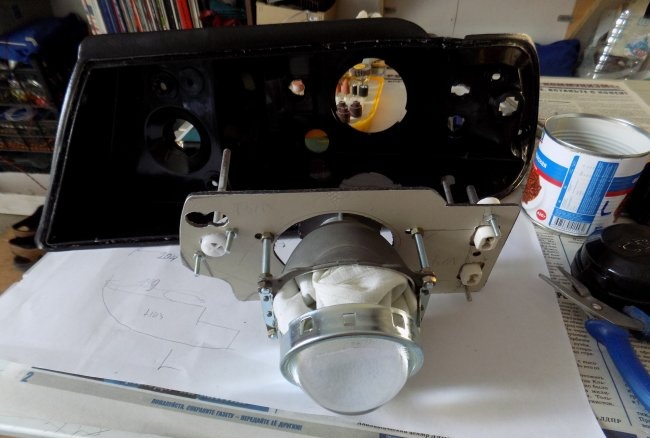
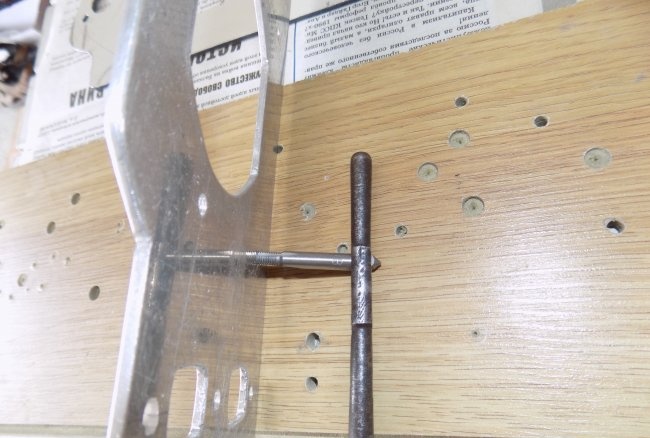
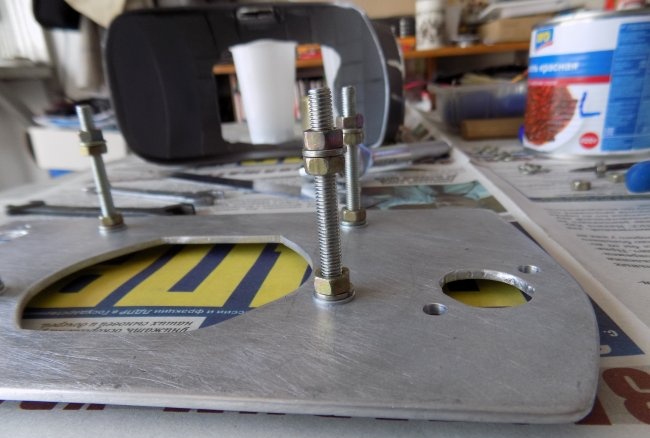
We cut threads for the studs for the lens. I used M6 bolts as studs. I recommend buying high-quality fasteners, the load from vibrations is quite serious: the lens is glass, weighs at least 100 grams.
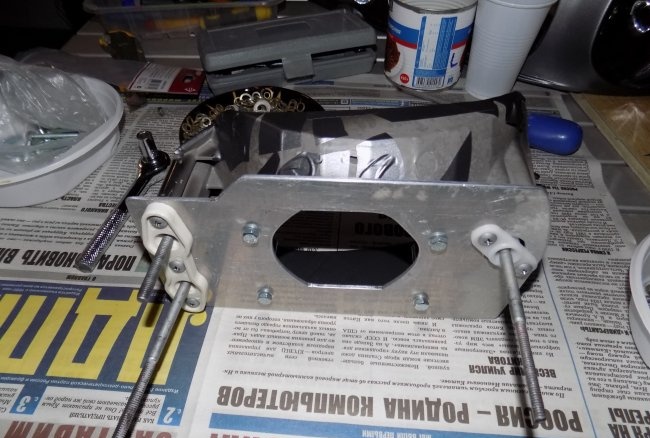
We assemble the structure for final fitting.
After assembly, install the headlight on the car, turn on the light, and check the adjustment ranges.The standard reflector and bilens mask are not yet used.
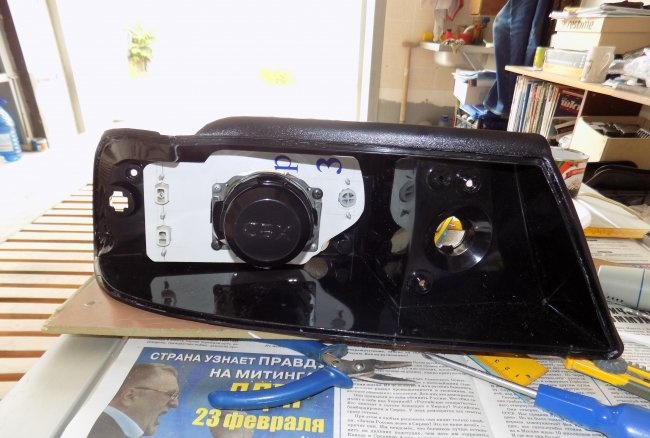
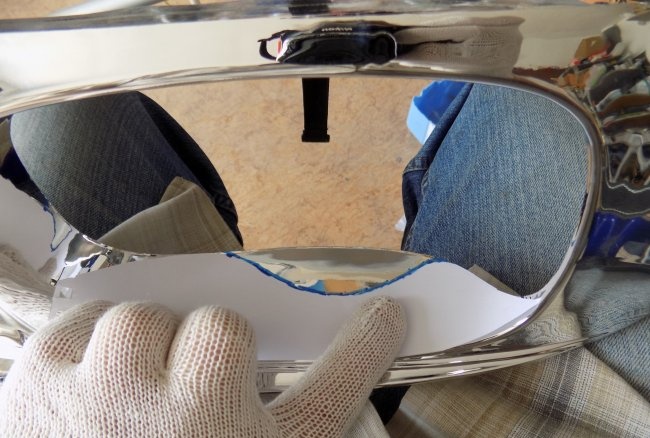
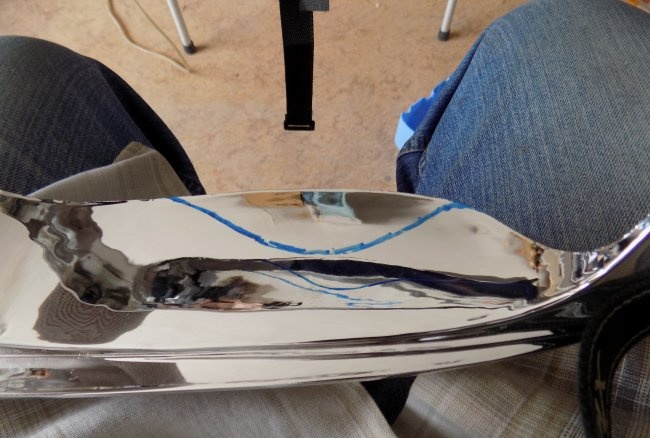
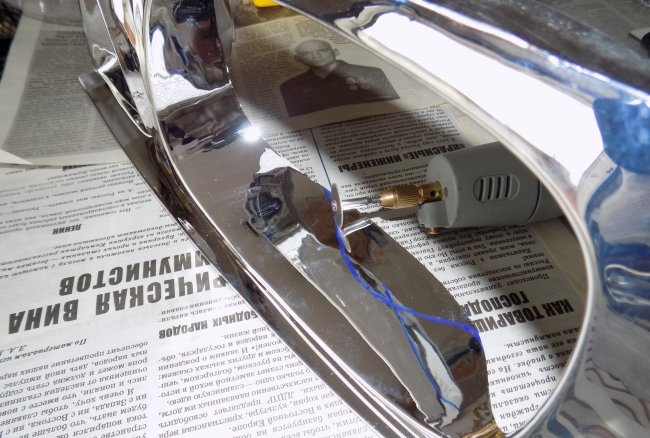
Having installed the lens in the correct position (from the point of view of beam adjustment), we mark the cutouts on the decorative frame for the mask. We use a cardboard template for marking.
This process is purely individual, and depends on the design of the headlight and the design solution you choose.
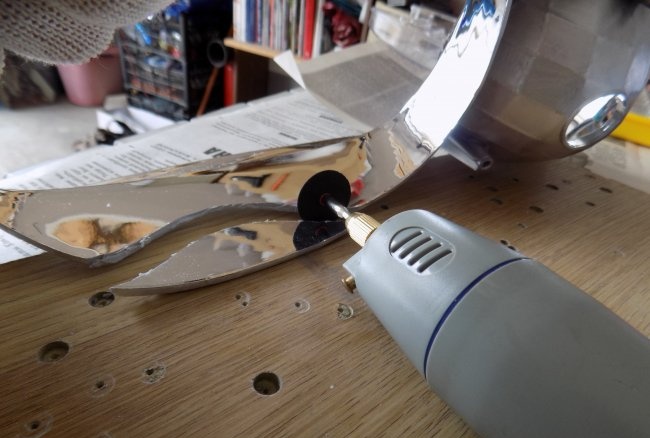
Cut out the excess plastic with a Dremel.
The cutting disc cuts through plastic like butter.
Test fitting - and revision.
Carefully process the finished cutouts with sandpaper.
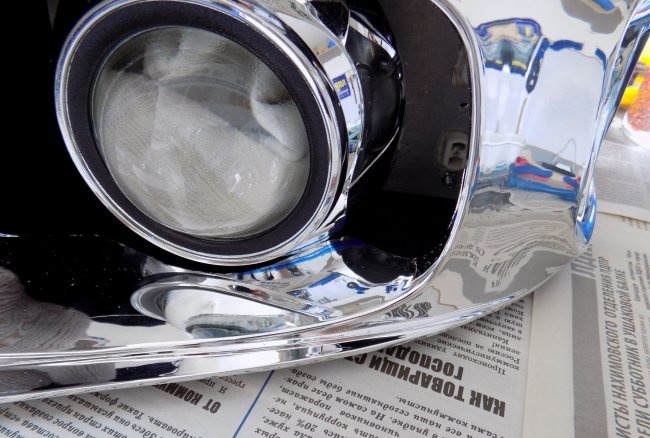
We try it on - everything is accurate, the distance to the mask is the same, the adjustment range is sufficient: the plastic does not cling to each other.
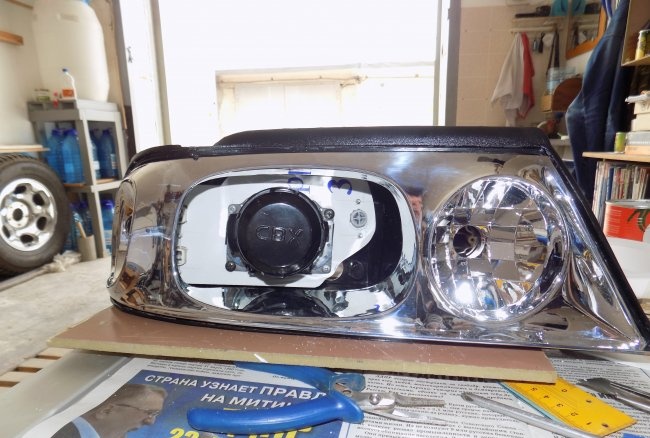
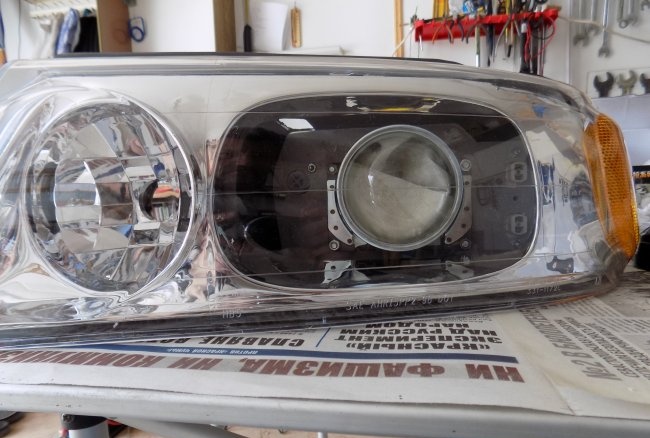
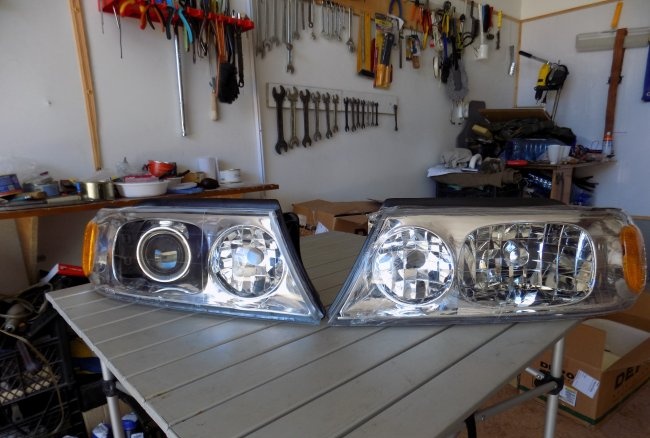
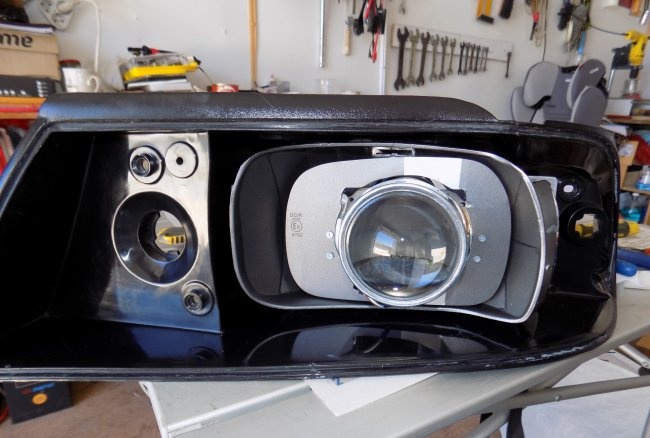
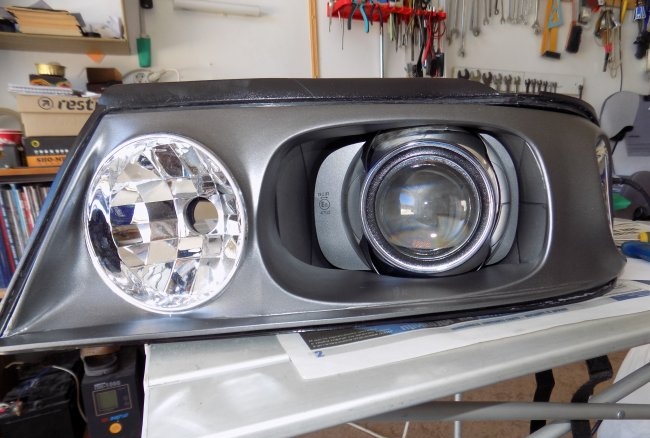
We assemble the headlight: on the left - after modification (without the standard reflector), on the right - the standard headlight.
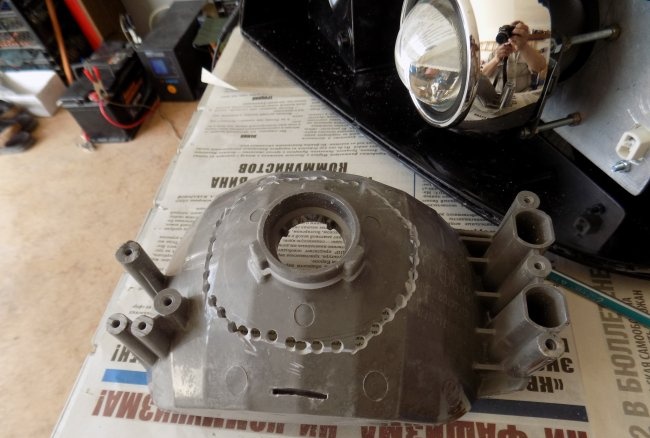
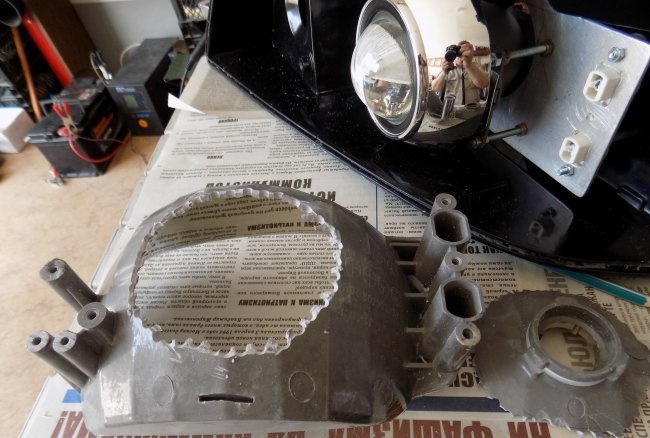
Since I decided to keep the standard reflectors behind the mask as a decorative element, we are finalizing the reflector. Marking the hole for the bi-xenon module.
Drill it out with a drill.
After finishing with a file, we get a hole of the correct shape. Aesthetics don't matter, this place will be hidden under a mask.
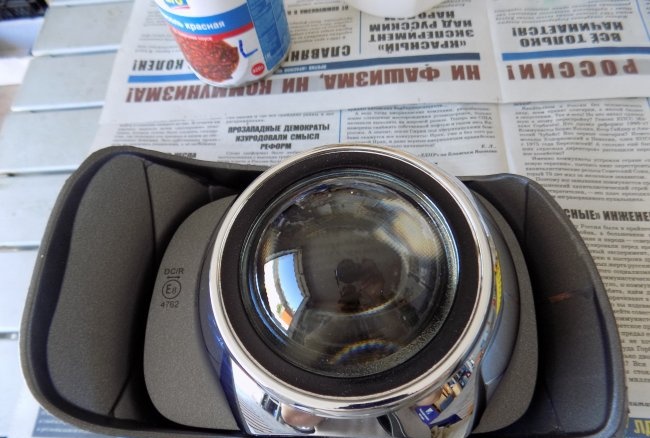
We collect, try on.
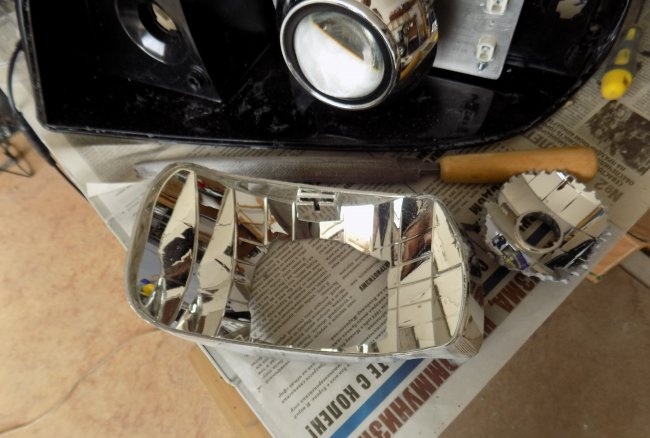
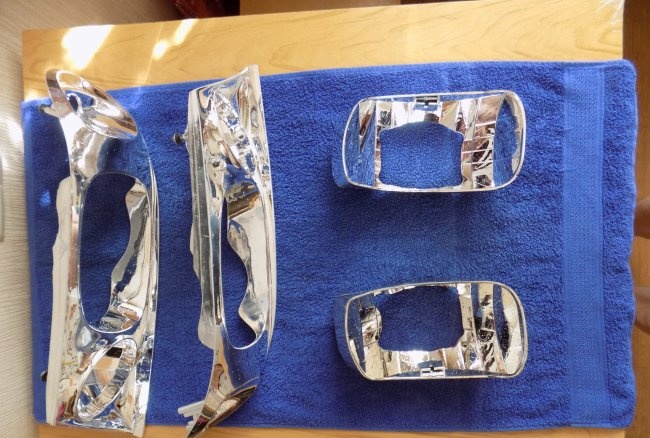
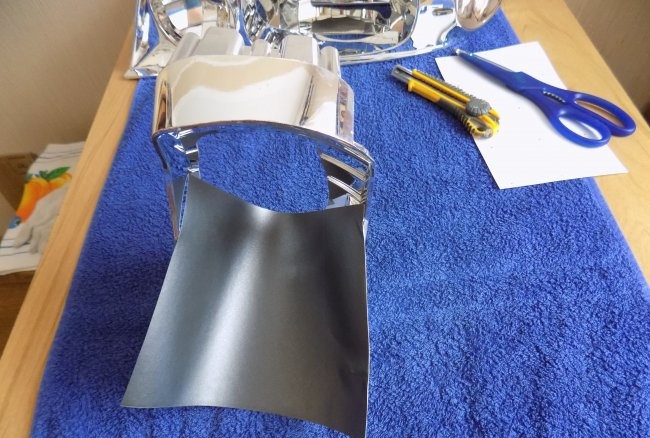
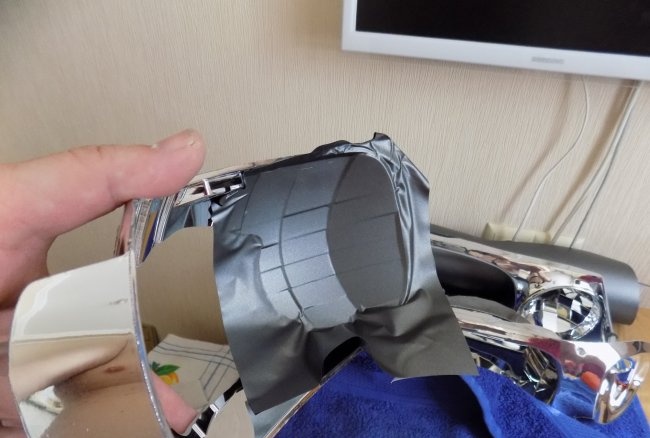
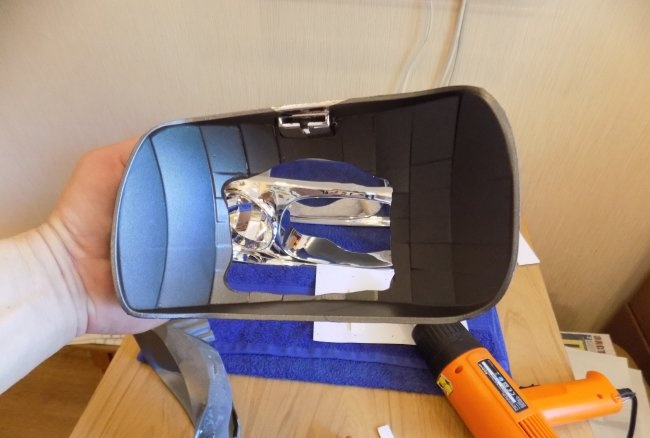
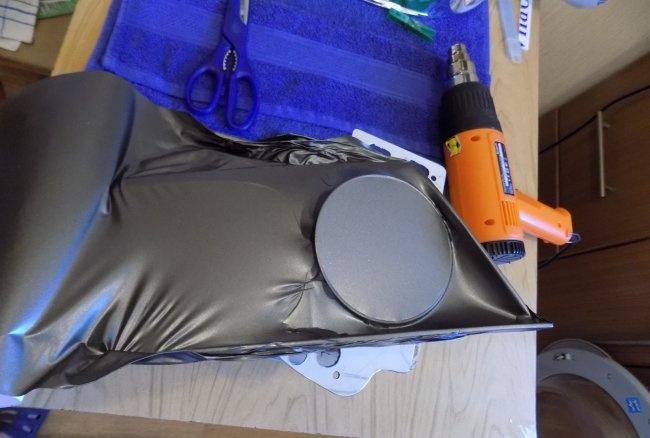
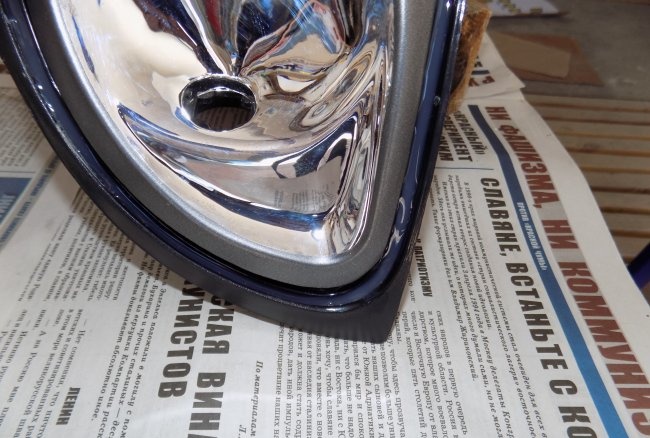
Again, this is an individual decision. I decided that the inside of the headlights should be anthracite grey, with the exception of the side reflector - DRLs and chrome masks. There is no need to remove the chrome; we cover the surface with vinyl film. In my case, a fairly high-quality product from KPMF.
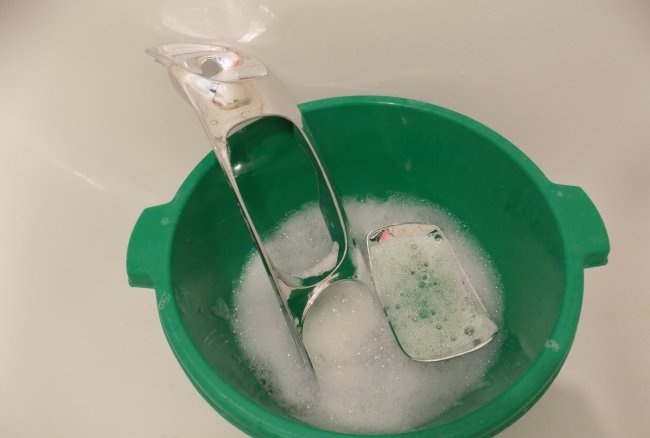
We wash the components with dishwashing detergent.
Rinse with distilled water and leave to dry. If you leave the chrome, the washing is done the same way. There is no need to wipe; after the distillate dries, there are no stains left.
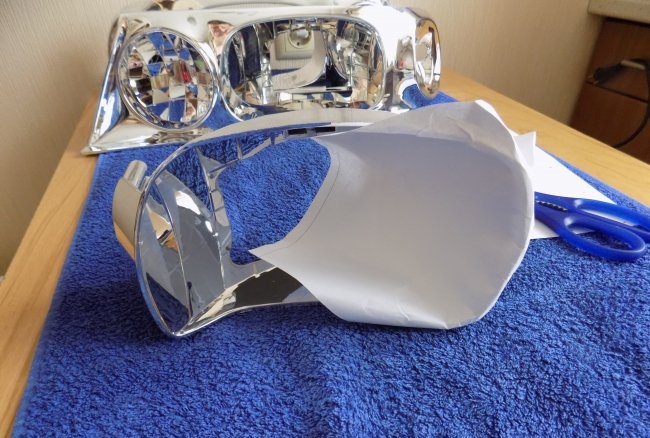
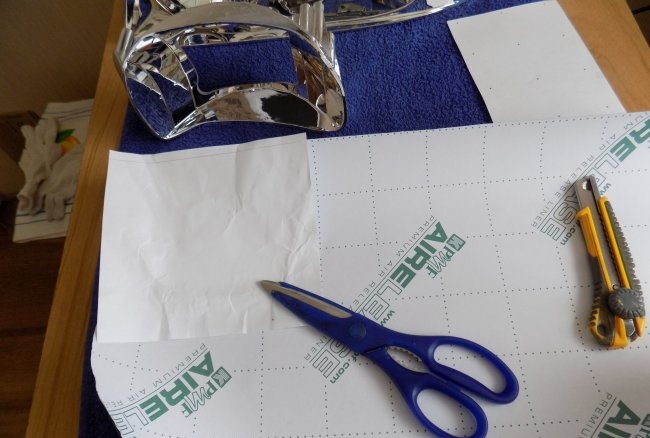
Making templates for marking vinyl film.
We cut out the pieces with a margin.
Advice: If you do not have experience working with film, entrust this process to professionals.
We glue the reflectors using a hair dryer.
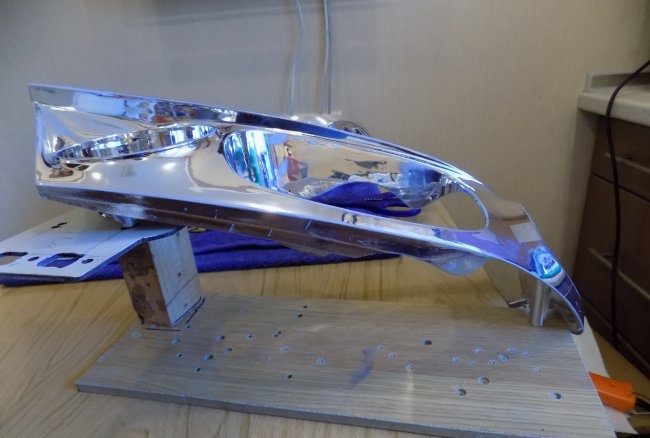
To paste the headlight frame, it is better to fix it on a temporary stand.
Quite a difficult job, but quite doable.
All fasteners must be secured with lock washers or other thread lockers. If something comes loose during operation, you will have to disassemble the headlight again.
Installation of factory fasteners.
Check the tightness of the nuts.
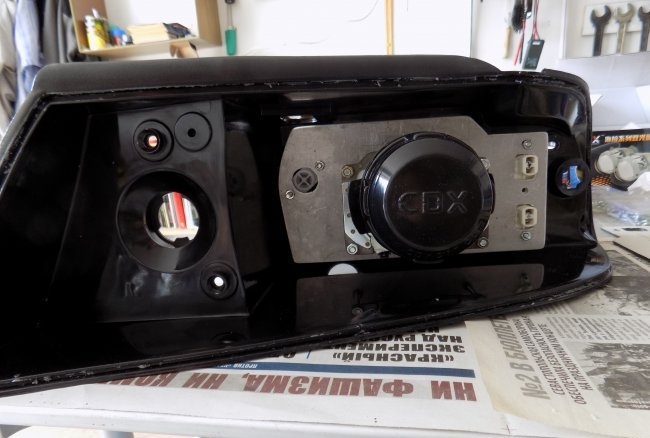
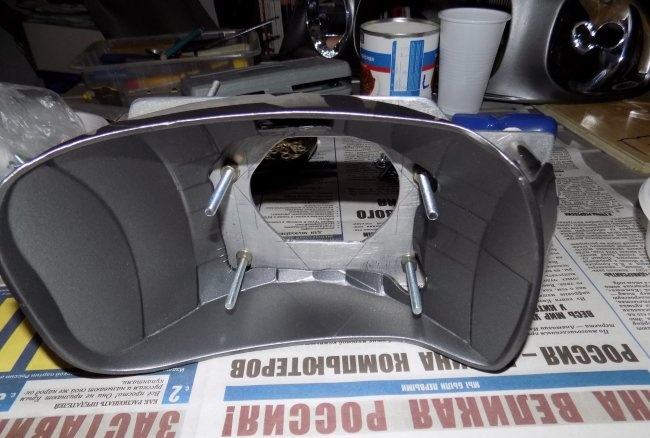
We install the bi-xenon module.
Since in my design the mounting bolts are visible from under the mask, I decided to install an additional decorative plate. As usual, first a cardboard template.
Mounting brackets made of 1 mm thick aluminum.
We cut the plate out of it.
Trying on: no fasteners visible.
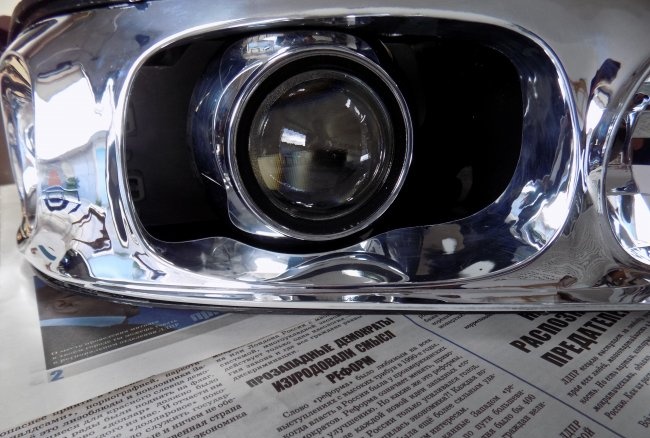
We cover the plate with vinyl. We first apply the correct markings: DC/R and the European certification mark. Traffic police inspectors will not have any unnecessary questions.
The markings are printed on a good laser printer. Select the media type: “OHP film”. After a year of use, nothing has peeled off, it looks like a factory one.
We assemble the headlight by first removing all the dust from the housing with a vacuum cleaner and wiping the lens.
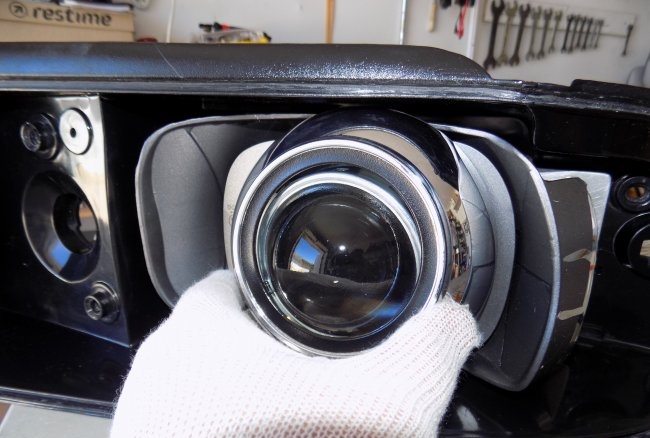
Wearing gloves, install the chrome mask.
We install the decorative insert. We check all fastenings. Once the glass is installed, this cannot be done.
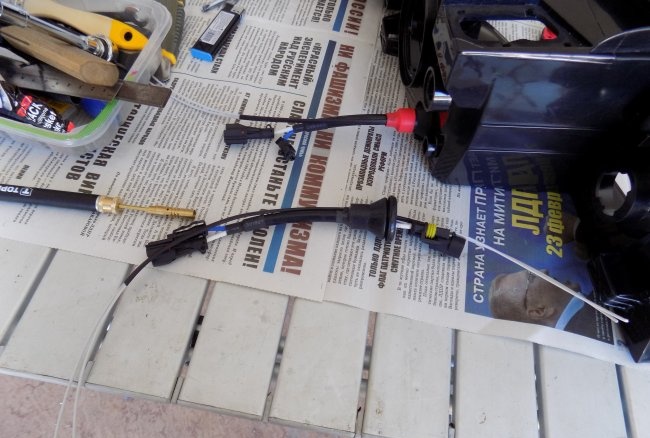
We assemble the wiring. Carefully insert the high-voltage wires into standard rubber couplings, fill them with sealant, and secure them with heat-shrinkable tubing.
It is advisable to place markings on the body that correspond to your headlight and xenon filling. Everything must look believable, otherwise there is no point in starting these decorations.
After the final check of the headlight's performance, we glue the glass.The housing must be installed horizontally.
We place in the cavities any suitable sealant for repairing headlights (glasses).
Glue the glass and leave it to dry for 24 hours. Can be secured with masking tape.
Four days off were spent on all work. One full day was spent “inventing” and testing technologies. The second headlight was assembled in a day.
The light beam can be adjusted either according to the instructions for your car (in this sense, xenon is no different from halogen). You can set the cut-off line according to the tables attached to the Customs Union Regulations.
After setting it up, I underwent a technical inspection (for compulsory motor vehicle liability insurance). He asked me to carefully check that the headlights were installed correctly. Everything turned out to be in accordance with GOST.
After running 5000 km, only positive impressions. The lighting is even, bright, without blue. No angry blinking from oncoming drivers was noticed (after all, correct alignment is important!). The headlight washer was installed additionally. I cut the injectors into the bumper and the second pump into the reservoir. My headlight range control is standard.
There is only one way out: installing a modern gas-discharge system, that is, xenon. Simply replacing a halogen lamp with a gas flask partially solves the problem:
- Firstly, this is a clear violation of technical regulations. Installation of gas-discharge lamps in headlights with a reflector (reflector) designed for halogen lamps is prohibited.
- Secondly, the reflector is designed for a point light source, that is, a spiral. The blurry cloud of luminous gas in a xenon bulb is not focused and produces a lot of stray light. It is for this reason that cars that have simply replaced halogen with xenon mercilessly blind oncoming drivers, even with low beams.
Chinese inventors offer many non-standard gas-discharge flasks made on halogen bases: H1, H4, HB3, etc.Supposedly for a “standard” replacement. This approach is fundamentally wrong.
Installing a finished headlight (or lighting module) in the form of a lens
Structurally, it can be a full-fledged headlight with a lens and a standard base for one of the xenon bulb standards. There are ready-made blocks in the housing: they can be installed in the body separately from the headlights. But the most common retrofit option (which is also the most economical) is a lensed module without a housing.
For reference: lensed modules can be separately for low and high beam (labeled DC and DR, respectively), or bi-xenon lenses (labeled DC/R). In the second case, mode switching is carried out using a beam-forming curtain: it is controlled by an electromagnet.
Legal side of the issue
Despite the fact that the article is of a technical nature, we will consider some legal subtleties that allow you to legally use xenon in a car. There is nothing to talk about standard circuits: if gas-discharge headlights are installed by the manufacturer, everything is legal.
The technical regulations of the customs union state:
1. It is allowed to install headlights with gas-discharge light sources in discontinued vehicles. In this case, headlights from a different model are used.
2. If you independently installed (or rather are going to install) xenon modules in headlights designed for halogen lamps, approval is required from the traffic police. This procedure includes technical expertise, visits to authorities and some financial costs (in addition to the cost of equipment). After that, a note is made in the PTS about changes to the design, and ride to your health.
Whether you are going to legalize homemade xenon, or you are going to remake the headlights in such a way that not a single inspector will get to the bottom of it, the work must be performed in accordance with the standards.
- The color temperature must comply with technical regulations. Optimal value: 4000K - 5000K. This is the natural color of the sun, perfectly illuminates both wet and dry roads. It does not catch the eye of road inspectors, unlike blue or purple, which in turn also poorly illuminate the path.
- At illumination levels above 2000lm (starting from a power of 35W, any gas-discharge headlight exceeds this rating), the headlights must be equipped with an automatic tilt angle correction and a cleaning system (washers, wipers).
- The use of headlight glasses with corrugations is not allowed.
And of course, the cut-off line of the low beam (in our case with the broken right section, the so-called step) must be correctly adjusted.
Theoretical calculations are completed, we proceed to the practical implementation of the project
The car is a 2000 Lincoln Navigator. To say that the stock version shines poorly is an understatement. The car has been discontinued, but it is not possible to install xenon headlights from another model. Therefore, we install bi-xenon modules.
Since the process is not fast, and you need to drive every day, new standard headlights from the Taiwanese manufacturer DEPO were purchased for the experiments.
This solves a number of problems:
1. While we are installing the lenses, the car is running with old headlights.
2. If “something goes wrong”, you will not be left without a head light.
3. If necessary (problems with the traffic police, failure to pass technical inspection...) you can always roll back.
At the same time, I updated the old optics with cloudy lenses. Fortunately, the price of the set is not too steep.
First of all, new headlights must be opened. With rare exceptions, the glass is attached to the body using a sealant. When heated to 200°C - 300°C, the glue softens and the headlight can be easily disassembled. There are many ways: put it in the oven, put it in an airtight box and heat the air inside with a hairdryer, use an infrared heater of the UFO type. I chose local heating using a hair dryer.
The disassembly tool is standard: a screwdriver, pliers (for removing locking rivets, if you have one), toothpicks as spacer wedges, and a hair dryer itself.
The headlight is inspected along the contour of the glass mounting for additional fasteners: screws, rivets, staples. Then it is laid on a soft surface, and heating begins from the lightest angle.
After some time, the sealant gives in. Carefully pry it up with a flat screwdriver and insert a toothpick into the gap.
When the glass has moved away a sufficient distance, you can fix the gap with a rag.
We warm up the last section.
Separate the glass and leave the headlight to cool.
Heating is controlled visually. The plastic should not change color or become soft. It is better to choose a lower temperature and heat longer.
Now about the lenses
I chose a bi-xenon kit from the Chinese manufacturer "CBX". This is an enterprise whose assembly lines produce optics for various car factories. My set turned out to be a Chinese replica for Volkswagen AG, for some AUDI model. Of course, no original logos - this is a pirated factory clone. The quality of workmanship (especially the lenses) is at the highest level. In my case, the masks (decorative covers that cover the structure) came from a VW Tiguan.Of course, made in China.
Lens diameter is 3 inches. The base is standard D2S. I bought branded lamps, PHILIPS 85122 35W, color temperature 4600K. I used ignition blocks (ballast) from the Korean company Sho-Me 35W. The installation is external, fortunately you can hide anything you want behind the bumper. The ignition unit kit includes all the necessary wiring, so there is no point in rewriting the connection instructions. When purchasing such a kit you will receive all the necessary documentation.
Advice: If you plan to subsequently legalize the alteration, you must obtain a certificate for each component. Sellers know what these documents are.
To install the bilens in the headlights, use a regular mechanic's tool (see photo).
A Dremel with a set of cutters, cutters and cutting discs is very helpful. I also used a drill press (more precisely, a stand for an electric drill).
We disassemble the headlight, having previously marked the center of the halogen lamp on the glass. If you plan to preserve the chrome filling, you should work with cotton gloves.
The lens is secured inside using a bracket (frame). The solution is individual (for different headlights), based on my example you can develop your own design. I left the standard reflector mount. Since I do not accept screwing bilens modules with studs onto a plastic reflector, it was decided to install 3 mm aluminum plates.
Before you start processing aluminum, you should work with temporary templates. In my case, a foamed PVC sheet 4 mm thick. Having screwed the template to the reflector (in the standard mounting locations), I marked the basic coordinate axes intersecting at right angles in the center of the hole for the lamp.
This is necessary for centering the bilens module.Then, after measuring the distance between the module mounting ears, I made and marked a second template.
And I cut it out with mounting holes for installing the lens housing.
By combining the coordinate points of both templates, we obtain the exact location of the bilens installation relative to the headlight reflector mount. This is important; the center of the lens must be located on the same axis as the halogen lamp. Otherwise, the adjustment range may not be sufficient.
We assemble the template plate: install the standard reflector mount and the bilens body.
Let's try it on in the headlight housing.
If deviations are detected (even 1-2 mm), this can be easily corrected on the PVC plate.
Then we make a second template, from a tougher material. It is necessary for precise adjustment of the already switched on headlight. It is too expensive to remake the finishing aluminum plate. I took pieces of laminated acrylic, the kind used in advertising structures. It is quite rigid and can be easily altered when adjusting.
We assemble the structure and install it in the headlight housing.
We adjust the center point of the optical axis.
We check compliance with the mark on the headlight glass.
After adjusting the rigid template, we make a bracket from an aluminum plate.
I marked the central hole on a drill press.
Then I finished it with a Dremel.
We make the remaining technological holes in the same way.
Once again I am convinced of the benefits of a Dremel. A simple file would have to work for more than one hour.
We cut threads for the studs for the lens. I used M6 bolts as studs. I recommend buying high-quality fasteners, the load from vibrations is quite serious: the lens is glass, weighs at least 100 grams.
We assemble the structure for final fitting.
After assembly, install the headlight on the car, turn on the light, and check the adjustment ranges.The standard reflector and bilens mask are not yet used.
Having installed the lens in the correct position (from the point of view of beam adjustment), we mark the cutouts on the decorative frame for the mask. We use a cardboard template for marking.
This process is purely individual, and depends on the design of the headlight and the design solution you choose.
Cut out the excess plastic with a Dremel.
The cutting disc cuts through plastic like butter.
Test fitting - and revision.
Carefully process the finished cutouts with sandpaper.
We try it on - everything is accurate, the distance to the mask is the same, the adjustment range is sufficient: the plastic does not cling to each other.
We assemble the headlight: on the left - after modification (without the standard reflector), on the right - the standard headlight.
Since I decided to keep the standard reflectors behind the mask as a decorative element, we are finalizing the reflector. Marking the hole for the bi-xenon module.
Drill it out with a drill.
After finishing with a file, we get a hole of the correct shape. Aesthetics don't matter, this place will be hidden under a mask.
We collect, try on.
The next stage is getting rid of chrome
Again, this is an individual decision. I decided that the inside of the headlights should be anthracite grey, with the exception of the side reflector - DRLs and chrome masks. There is no need to remove the chrome; we cover the surface with vinyl film. In my case, a fairly high-quality product from KPMF.
We wash the components with dishwashing detergent.
Rinse with distilled water and leave to dry. If you leave the chrome, the washing is done the same way. There is no need to wipe; after the distillate dries, there are no stains left.
Making templates for marking vinyl film.
We cut out the pieces with a margin.
Advice: If you do not have experience working with film, entrust this process to professionals.
We glue the reflectors using a hair dryer.
To paste the headlight frame, it is better to fix it on a temporary stand.
Quite a difficult job, but quite doable.
Let's start the final assembly
All fasteners must be secured with lock washers or other thread lockers. If something comes loose during operation, you will have to disassemble the headlight again.
Installation of factory fasteners.
Check the tightness of the nuts.
We install the bi-xenon module.
Since in my design the mounting bolts are visible from under the mask, I decided to install an additional decorative plate. As usual, first a cardboard template.
Mounting brackets made of 1 mm thick aluminum.
We cut the plate out of it.
Trying on: no fasteners visible.
We cover the plate with vinyl. We first apply the correct markings: DC/R and the European certification mark. Traffic police inspectors will not have any unnecessary questions.
The markings are printed on a good laser printer. Select the media type: “OHP film”. After a year of use, nothing has peeled off, it looks like a factory one.
We assemble the headlight by first removing all the dust from the housing with a vacuum cleaner and wiping the lens.
Wearing gloves, install the chrome mask.
We install the decorative insert. We check all fastenings. Once the glass is installed, this cannot be done.
We assemble the wiring. Carefully insert the high-voltage wires into standard rubber couplings, fill them with sealant, and secure them with heat-shrinkable tubing.
It is advisable to place markings on the body that correspond to your headlight and xenon filling. Everything must look believable, otherwise there is no point in starting these decorations.
After the final check of the headlight's performance, we glue the glass.The housing must be installed horizontally.
We place in the cavities any suitable sealant for repairing headlights (glasses).
Glue the glass and leave it to dry for 24 hours. Can be secured with masking tape.
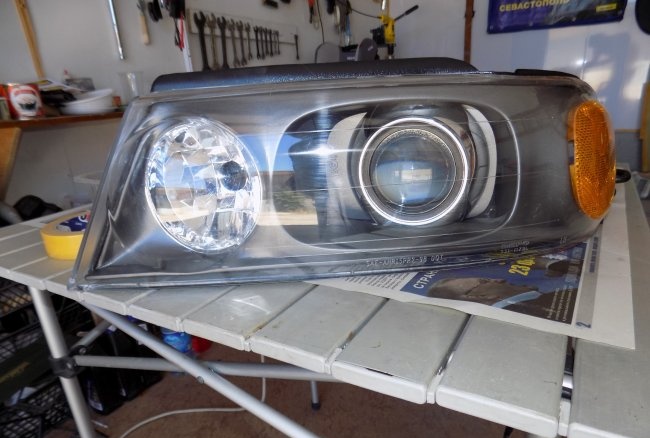
Result:
Four days off were spent on all work. One full day was spent “inventing” and testing technologies. The second headlight was assembled in a day.
The light beam can be adjusted either according to the instructions for your car (in this sense, xenon is no different from halogen). You can set the cut-off line according to the tables attached to the Customs Union Regulations.
After setting it up, I underwent a technical inspection (for compulsory motor vehicle liability insurance). He asked me to carefully check that the headlights were installed correctly. Everything turned out to be in accordance with GOST.
After running 5000 km, only positive impressions. The lighting is even, bright, without blue. No angry blinking from oncoming drivers was noticed (after all, correct alignment is important!). The headlight washer was installed additionally. I cut the injectors into the bumper and the second pump into the reservoir. My headlight range control is standard.
Similar master classes
Particularly interesting
Comments (1)

