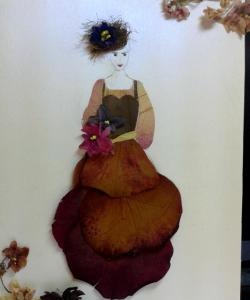
Painting “Lady with a bouquet” of dried flowers
The use of natural materials in crafts and fine arts is gaining more and more popularity every year. Pressed floristry (oshibana) is an ancient Japanese technique for creating paintings from dried flowers. Using various dried plants, decorators create unique pictures and scenes, and the entire process occurs without the use of any paints.
To create an image from dried flowers, no special equipment is required. In fact, all working raw materials can be collected in a field, a nearby park, forest, or grown on a windowsill. If you use your imagination, you can find materials anywhere: by drying the peel of a banana or eggplant, opening tea bags with hibiscus or other tea, and also drying the peel of a tangerine, cucumber, or removing it from an onion.
Leaves, flowers, fluff, peels and other materials are dried in a variety of ways, including standard press drying, vacuum drying and iron drying. Usually, after treatment, plants lose their natural color and turn pale or darken several shades.Materials such as banana turn dark brown after drying, so before starting work you need to roughly imagine what result the author wants to achieve, and then select plants of the desired color scheme.
After selecting materials, dried plants are attached to a fabric or paper canvas, forming a unique composition.
As a clear example, we recommend following the process of creating the painting “Lady with a Bouquet”, performed using the oshibana technique.
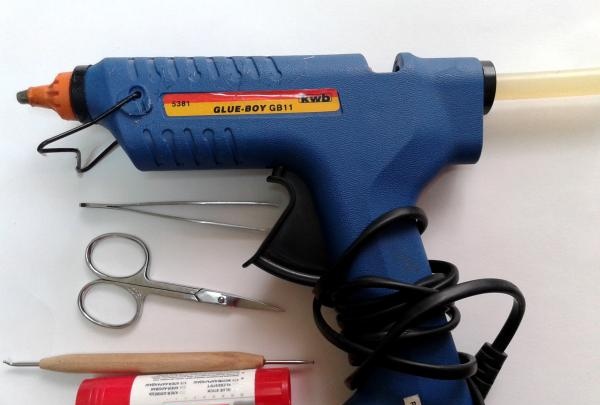
1. When starting work, in addition to dry materials, you need to prepare the following tools:
• Colorless glue (PVA is possible);
• Small scissors;
• Tweezers;
• Sharp object;
• Glue gun (for gluing large plants);
• White cardboard (colored if necessary)
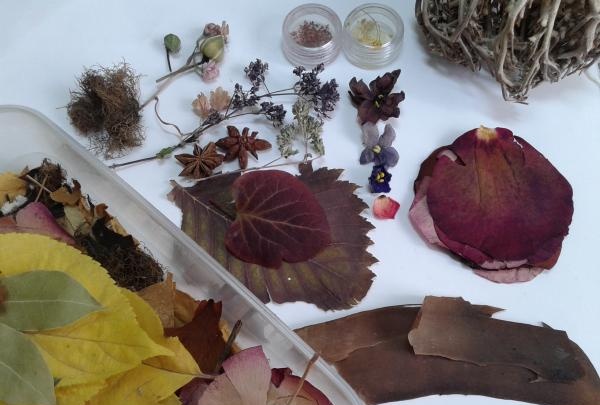
2. To create a picture you need the following materials:
• Dried rose or bell petals;
• Violet petals;
• Any yellow leaves;
• Dry banana peel;
• Dry corn silk (in other words, corn hair);
• Other decoration materials to have on hand.
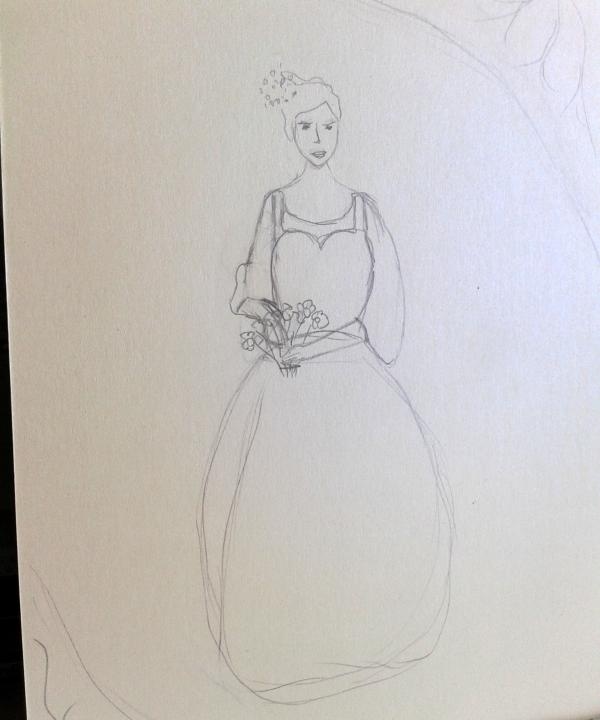
3. Before starting work, you should make a small sketch of the future painting on paper;
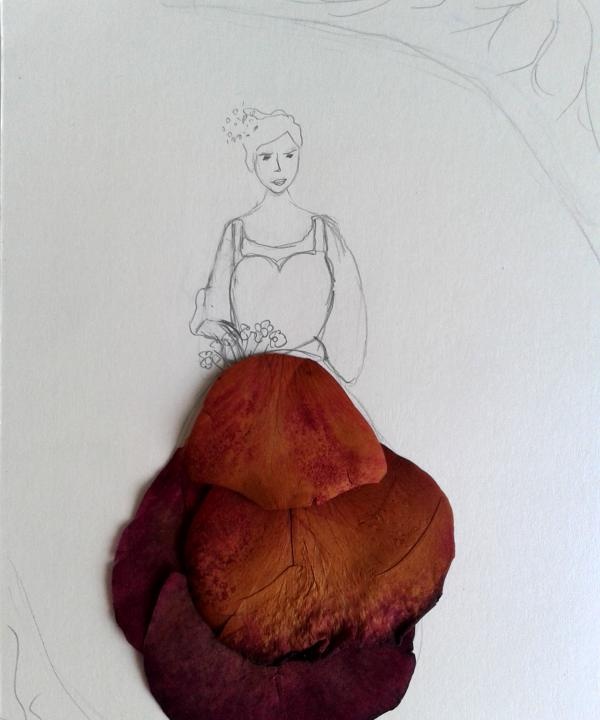
4. Apply several rose petals to the finished sketch. We place the leaves next to each other so that the result is a skirt that at least slightly repeats the drawn silhouette;
5. Apply glue to the entire length of the skirt and use tweezers to glue the petals;
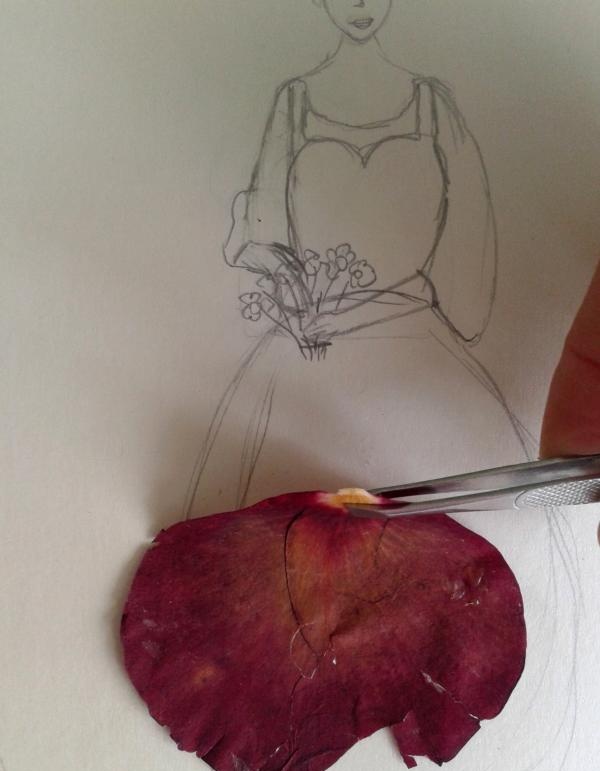
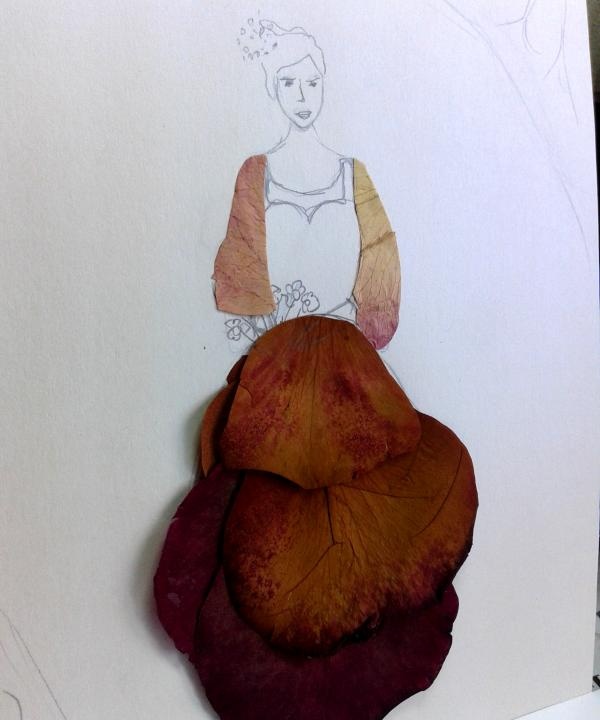
6. Moving on to the sleeves. We cut them out from petals of a lighter shade and glue them in the same way. You can first draw sleeves on the petals and then cut them out. The result should look like this.
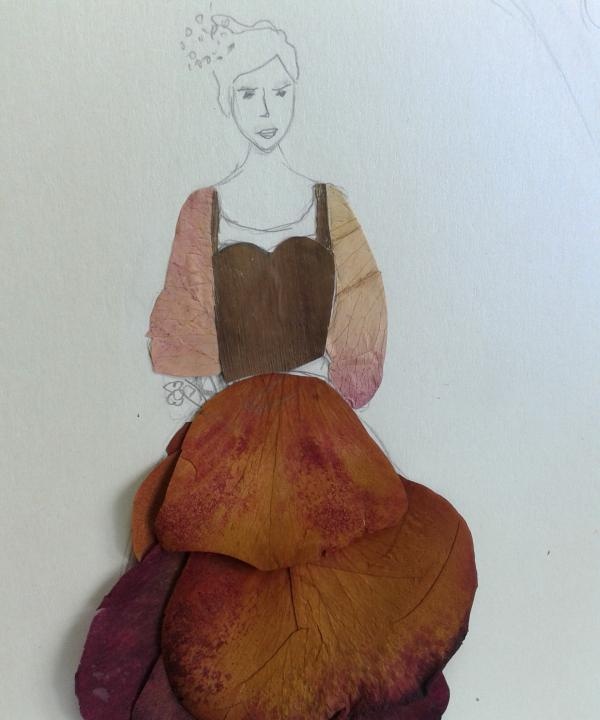
7. We design the décolleté area. Cut out a bust of the required shape from a banana peel and glue it onto the drawing;
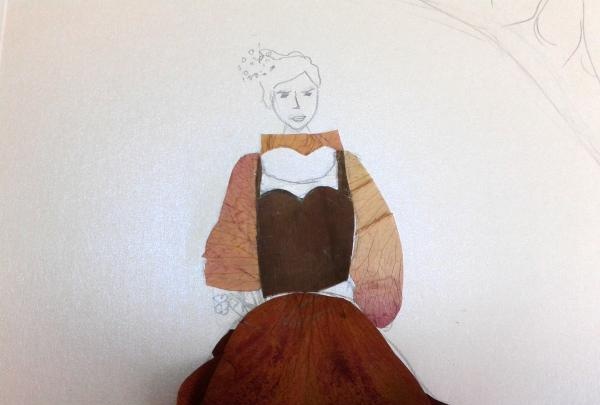
8. Next, we decorate the dress by gluing the missing part, as shown in the photo;
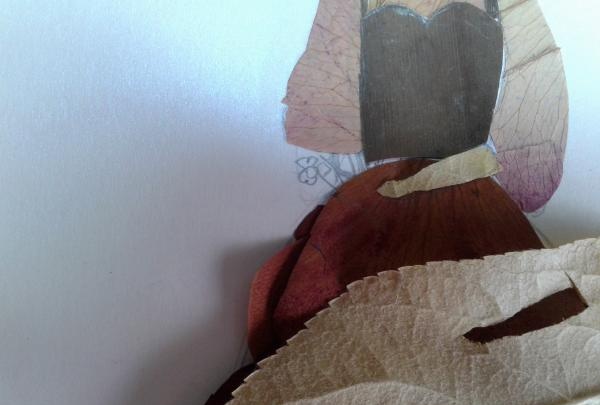
9. Cut out hands from a yellow sheet and glue them to the lady;
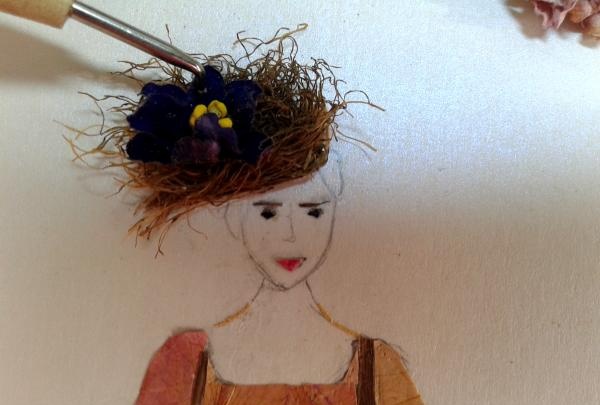
10. We make a face out of small flower particles and use a gun to apply a drop of glue to the head area. We fix the bunch of corn hair, holding it with a sharp object for a while so that the hair sticks well. Immediately decorate with dry violet;
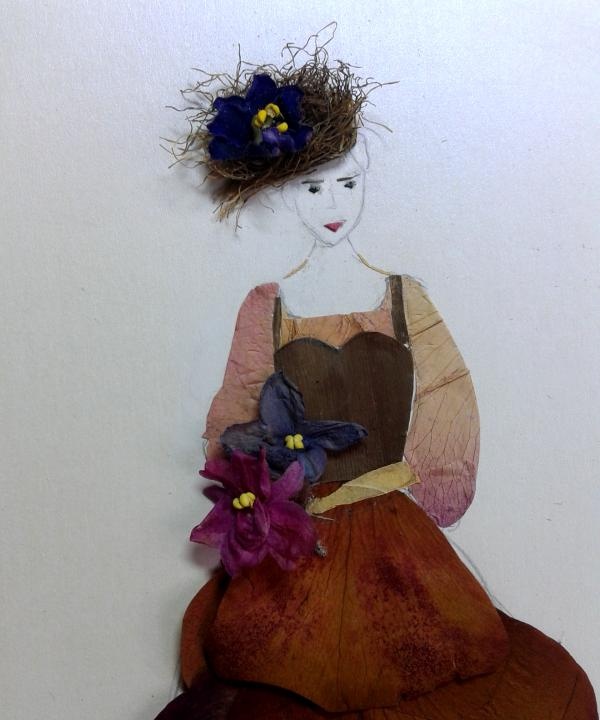
11. Glue 2 violets in the bouquet area (you can use other flowers);
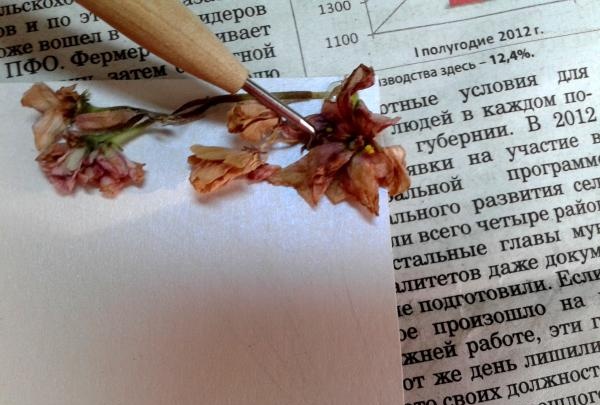
12. Decorate the corners of the picture with various dried flowers. Remove any remaining pencil residue.
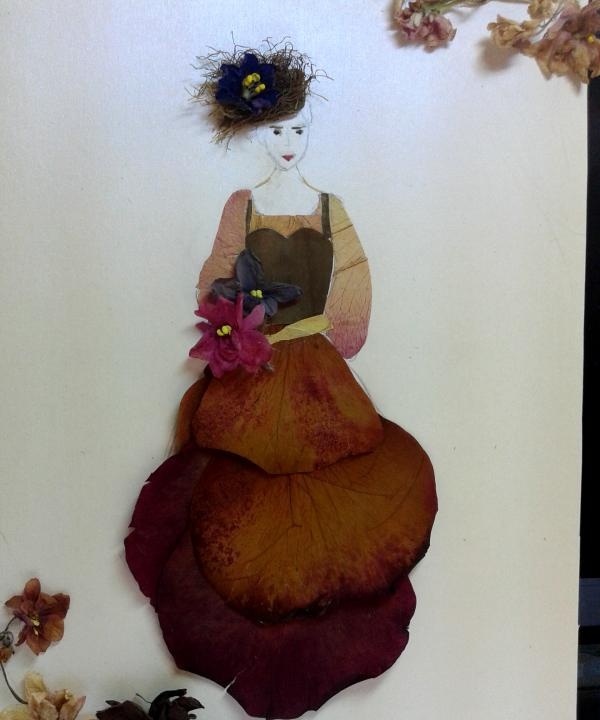
The picture of dried flowers is ready! It can be presented as a gift to family and friends or left at home and enjoy the creation of your own hands.
To create an image from dried flowers, no special equipment is required. In fact, all working raw materials can be collected in a field, a nearby park, forest, or grown on a windowsill. If you use your imagination, you can find materials anywhere: by drying the peel of a banana or eggplant, opening tea bags with hibiscus or other tea, and also drying the peel of a tangerine, cucumber, or removing it from an onion.
Leaves, flowers, fluff, peels and other materials are dried in a variety of ways, including standard press drying, vacuum drying and iron drying. Usually, after treatment, plants lose their natural color and turn pale or darken several shades.Materials such as banana turn dark brown after drying, so before starting work you need to roughly imagine what result the author wants to achieve, and then select plants of the desired color scheme.
After selecting materials, dried plants are attached to a fabric or paper canvas, forming a unique composition.
As a clear example, we recommend following the process of creating the painting “Lady with a Bouquet”, performed using the oshibana technique.
1. When starting work, in addition to dry materials, you need to prepare the following tools:
• Colorless glue (PVA is possible);
• Small scissors;
• Tweezers;
• Sharp object;
• Glue gun (for gluing large plants);
• White cardboard (colored if necessary)

2. To create a picture you need the following materials:
• Dried rose or bell petals;
• Violet petals;
• Any yellow leaves;
• Dry banana peel;
• Dry corn silk (in other words, corn hair);
• Other decoration materials to have on hand.

3. Before starting work, you should make a small sketch of the future painting on paper;

4. Apply several rose petals to the finished sketch. We place the leaves next to each other so that the result is a skirt that at least slightly repeats the drawn silhouette;

5. Apply glue to the entire length of the skirt and use tweezers to glue the petals;

6. Moving on to the sleeves. We cut them out from petals of a lighter shade and glue them in the same way. You can first draw sleeves on the petals and then cut them out. The result should look like this.

7. We design the décolleté area. Cut out a bust of the required shape from a banana peel and glue it onto the drawing;

8. Next, we decorate the dress by gluing the missing part, as shown in the photo;

9. Cut out hands from a yellow sheet and glue them to the lady;

10. We make a face out of small flower particles and use a gun to apply a drop of glue to the head area. We fix the bunch of corn hair, holding it with a sharp object for a while so that the hair sticks well. Immediately decorate with dry violet;

11. Glue 2 violets in the bouquet area (you can use other flowers);

12. Decorate the corners of the picture with various dried flowers. Remove any remaining pencil residue.

The picture of dried flowers is ready! It can be presented as a gift to family and friends or left at home and enjoy the creation of your own hands.

Author – Anastasia Kuzmina
Similar master classes
Particularly interesting
Comments (0)

