We sew a summer sundress for a girl
Many handicraft mothers know firsthand that sewing children's clothes is very easy and quick. And all because it is small in size and has simple cutting and sewing technology. And it can also be altered from adult, already tired or slightly worn out clothes. All these advantages allow you not only to quickly replenish your kids’ wardrobe, but also to significantly save the family budget.
In order to sew children's clothes, you need to be able to take basic measurements of the figure, and also stock up on a couple of good patterns for shoulder and waist clothing, which can be used to model any model you like. As for sewing and cutting skills, a basic course of technology lessons at school will be quite enough.
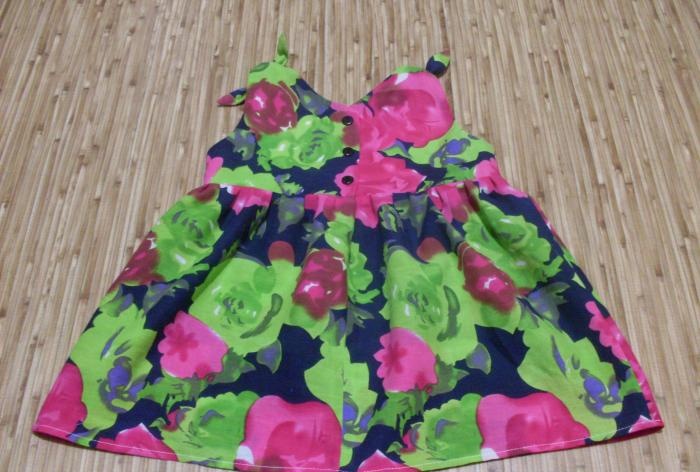
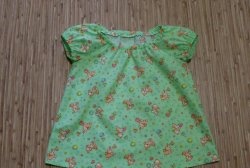
An example of a simple, but at the same time very cute product is a summer sundress for a girl. This is a product, as they say, of one evening. Cuts and sews in the blink of an eye.
The front and back are cut according to the basic patterns of the front and back, the skirt is cut simply from rectangles across the entire available width of the fabric.
Allowances for seams on parts should be given as follows: processing of the neckline, armhole, middle cut of the back - 0.7 cm; side seam, shoulder seam, skirt stitching seam, skirt stitching seams - 1 cm; The hem allowance for the bottom of the skirt is 1-1.5 cm.
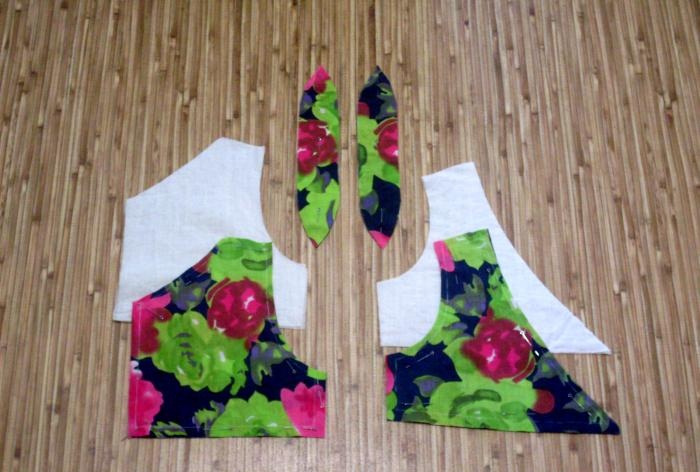
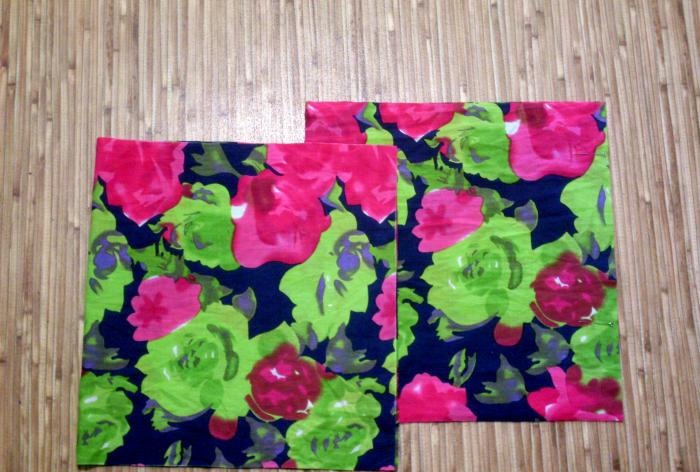
A summer sundress for a girl will include the following cut details.
Main Material(Floral Cotton):
Lining material (white cotton):
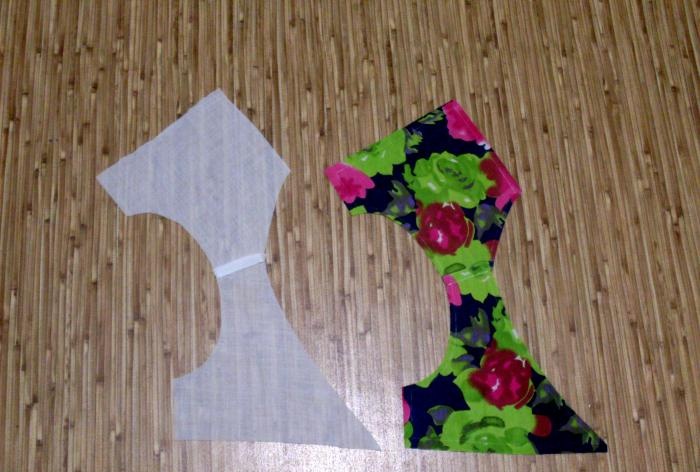
The production of a sundress should begin with procurement operations.
First of all, you need to sew the parts of the shelves and backs along the shoulder sections. This applies to both products made from the main fabric and the lining.
The parts to be joined must be placed on top of each other (face to face), aligned along the shoulder sections and fastened with a stitch.
The shoulder seam must be pressed to the back.
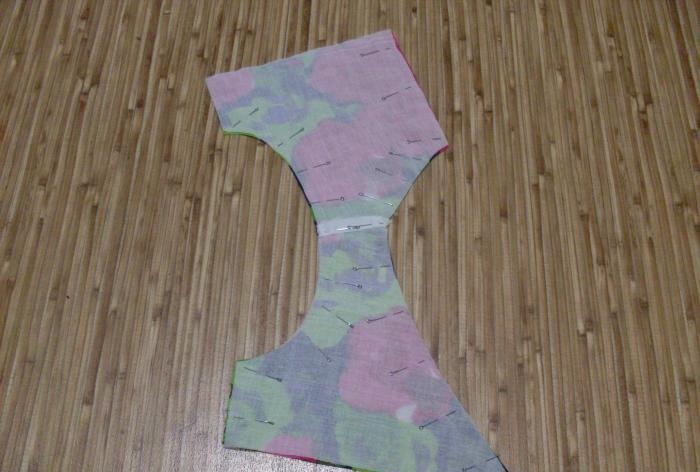
Then the upper parts of the sundress need to be trimmed with appropriate linings.
To do this, the prepared parts need to be folded face inward and pinned along all sections with tailor's pins.
After this, you need to sew a line along the armhole, neckline and middle cut of the back.
Turning seam allowances on rounded areas must be cut and pins removed.
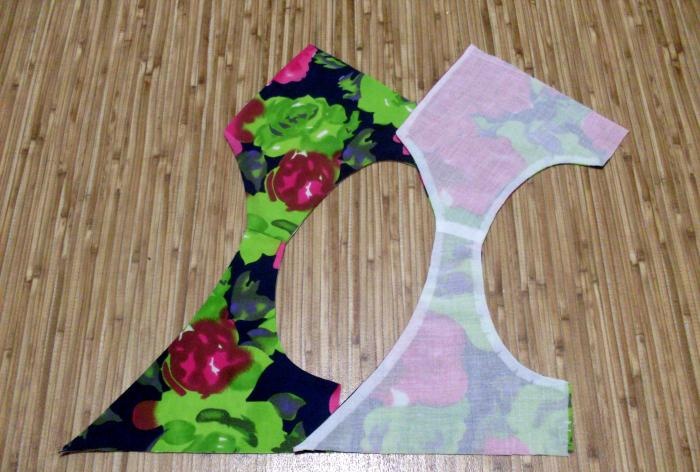
The hemmed parts of the sundress need to be turned right side out and ironed from the inside out.
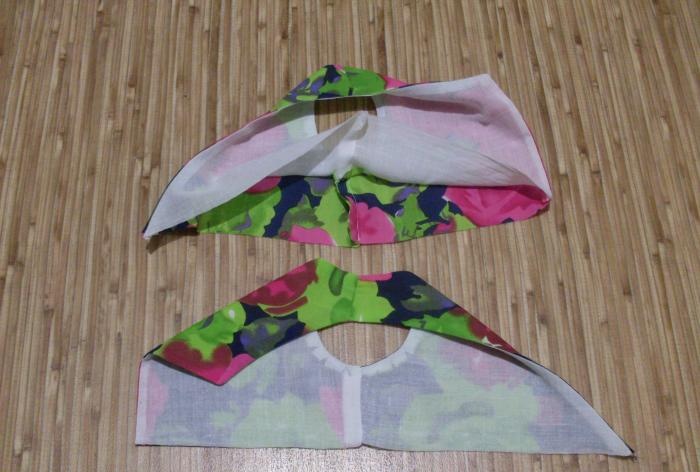
Next you need to sew the side seams of the sundress.
Afterwards they need to be ironed onto the back.
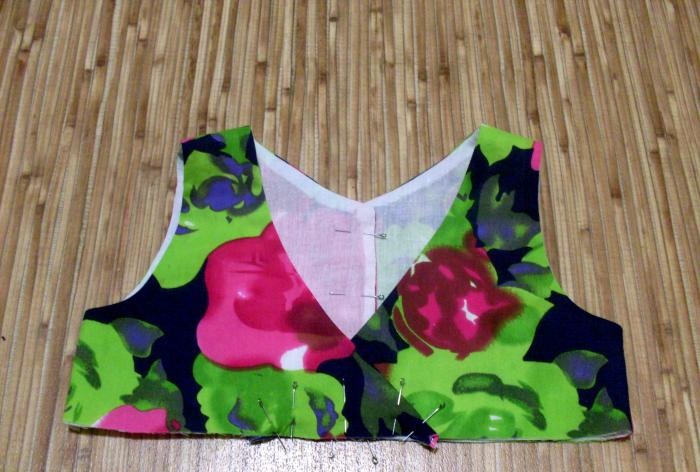
The fully prepared parts of the sundress need to be pinned together, aligning the centers of the shelves and backs.
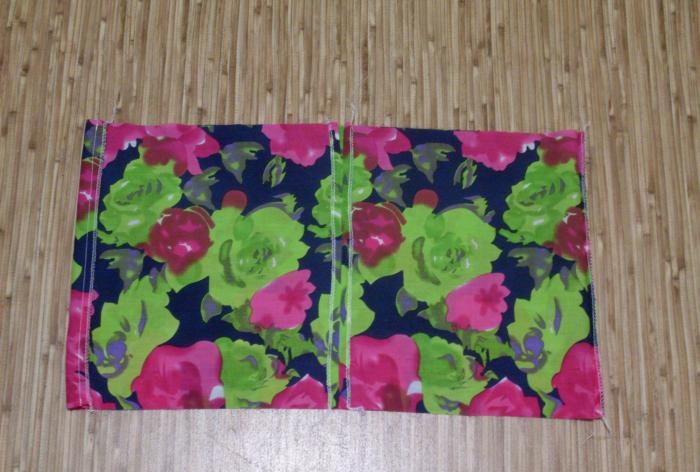
Then you need to prepare the skirt of the dress. To do this, you need to stitch its side and middle seams, and in the latter you need to leave an unsewn cut at the top about 10 cm long.
The seams need to be overlocked.The side seams should be pressed towards the back of the skirt, and the middle seam should be pressed.
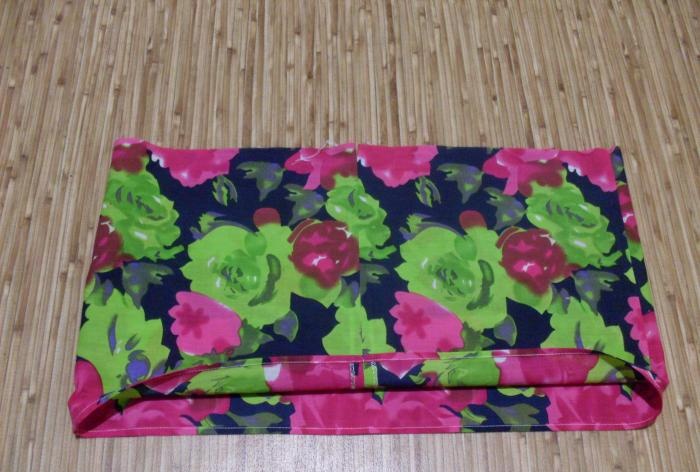
After this you need to hem the bottom of the sundress. The most practical treatment in this case would be a narrow (5-7 mm) hem seam with a closed (twice folded inward) cut.
It is best to iron the hemmed bottom immediately from the wrong side.
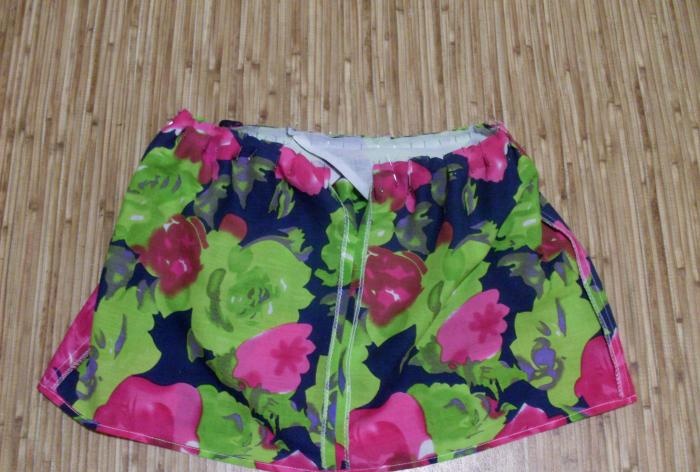
The preparation of the main parts of the sundress will be completed, and therefore you can begin installation.
The top of the sundress should be folded face to face with the skirt, aligning the waist sections, as well as pinning the side seams and the centers of the fronts.
Since according to the model the skirt is much wider than the top of the sundress, it needs to be gathered into small folds. Each of them must be secured with a pin or a hand basting stitch.
The middle seam allowance of the back of the skirt should bend around the back by 1 cm. This finishing of the finished knot will look very neat and aesthetically pleasing.
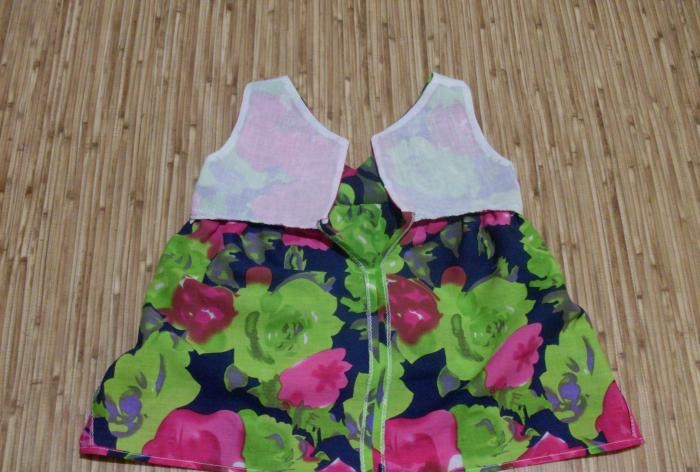
Then the skirt should be sewn to the sundress. The stitching seam should be overcast and ironed down towards the skirt.
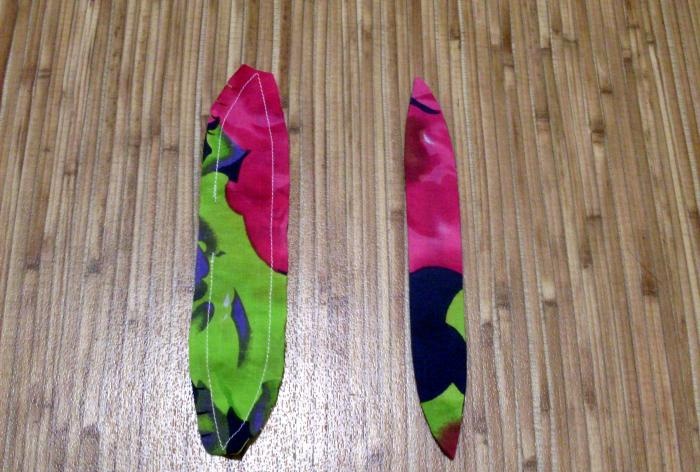
All that remains is to prepare the ties to decorate the product. The two parts of the cut out ties should be folded together face inward and stitched around the perimeter, leaving a hole in one place for turning it on the face.
The corners in the ledges of the ties must be cut out, and the allowances along the curves must be cut.
The sewn ties must be turned out and ironed.
The opening for turning inside out must be carefully sewn up using hidden hand stitches.
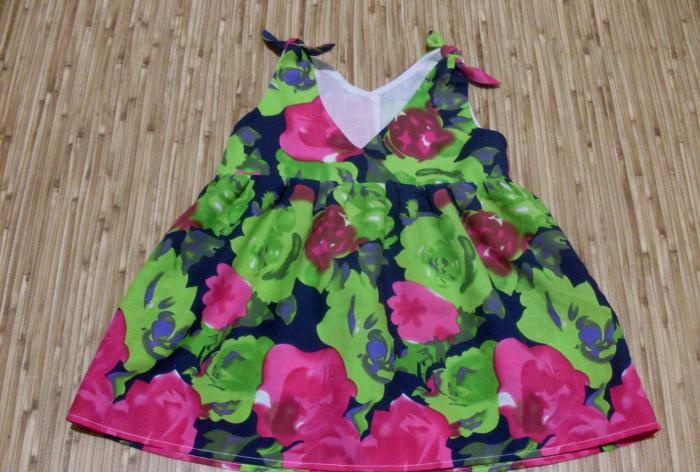

The finished ties must be tied on the shoulders of the sundress.
Finally, you need to process the overcast loops and sew buttons on the back of the product.
A light summer sundress for your beloved daughter is completely ready!
In order to sew children's clothes, you need to be able to take basic measurements of the figure, and also stock up on a couple of good patterns for shoulder and waist clothing, which can be used to model any model you like. As for sewing and cutting skills, a basic course of technology lessons at school will be quite enough.

An example of a simple, but at the same time very cute product is a summer sundress for a girl. This is a product, as they say, of one evening. Cuts and sews in the blink of an eye.
The front and back are cut according to the basic patterns of the front and back, the skirt is cut simply from rectangles across the entire available width of the fabric.
Allowances for seams on parts should be given as follows: processing of the neckline, armhole, middle cut of the back - 0.7 cm; side seam, shoulder seam, skirt stitching seam, skirt stitching seams - 1 cm; The hem allowance for the bottom of the skirt is 1-1.5 cm.


A summer sundress for a girl will include the following cut details.
Main Material(Floral Cotton):
- Shelf, 2 children;
- Back, 2 parts;
- Shoulder tie, 4 pieces;
- Skirt front, 1 piece;
- Back of the skirt, 2 parts.
Lining material (white cotton):
- Shelf lining, 2 parts;
- Back lining, 2 pieces.

The production of a sundress should begin with procurement operations.
First of all, you need to sew the parts of the shelves and backs along the shoulder sections. This applies to both products made from the main fabric and the lining.
The parts to be joined must be placed on top of each other (face to face), aligned along the shoulder sections and fastened with a stitch.
The shoulder seam must be pressed to the back.

Then the upper parts of the sundress need to be trimmed with appropriate linings.
To do this, the prepared parts need to be folded face inward and pinned along all sections with tailor's pins.
After this, you need to sew a line along the armhole, neckline and middle cut of the back.
Turning seam allowances on rounded areas must be cut and pins removed.

The hemmed parts of the sundress need to be turned right side out and ironed from the inside out.

Next you need to sew the side seams of the sundress.
Afterwards they need to be ironed onto the back.

The fully prepared parts of the sundress need to be pinned together, aligning the centers of the shelves and backs.

Then you need to prepare the skirt of the dress. To do this, you need to stitch its side and middle seams, and in the latter you need to leave an unsewn cut at the top about 10 cm long.
The seams need to be overlocked.The side seams should be pressed towards the back of the skirt, and the middle seam should be pressed.

After this you need to hem the bottom of the sundress. The most practical treatment in this case would be a narrow (5-7 mm) hem seam with a closed (twice folded inward) cut.
It is best to iron the hemmed bottom immediately from the wrong side.

The preparation of the main parts of the sundress will be completed, and therefore you can begin installation.
The top of the sundress should be folded face to face with the skirt, aligning the waist sections, as well as pinning the side seams and the centers of the fronts.
Since according to the model the skirt is much wider than the top of the sundress, it needs to be gathered into small folds. Each of them must be secured with a pin or a hand basting stitch.
The middle seam allowance of the back of the skirt should bend around the back by 1 cm. This finishing of the finished knot will look very neat and aesthetically pleasing.

Then the skirt should be sewn to the sundress. The stitching seam should be overcast and ironed down towards the skirt.

All that remains is to prepare the ties to decorate the product. The two parts of the cut out ties should be folded together face inward and stitched around the perimeter, leaving a hole in one place for turning it on the face.
The corners in the ledges of the ties must be cut out, and the allowances along the curves must be cut.
The sewn ties must be turned out and ironed.
The opening for turning inside out must be carefully sewn up using hidden hand stitches.


The finished ties must be tied on the shoulders of the sundress.
Finally, you need to process the overcast loops and sew buttons on the back of the product.
A light summer sundress for your beloved daughter is completely ready!
Similar master classes
Particularly interesting
Comments (2)

