How to knit mitts with an owl pattern
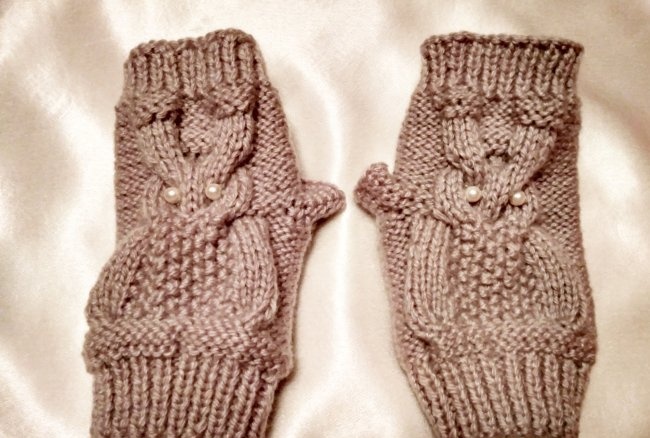
Mittens in which the upper part is not tied and the fingers remain open are called mittens. They are definitely convenient in some situations, for example, when using a smartphone - after all, you won’t be able to activate the gadget either with gloves or closed mittens. In addition, your hands are warm, and the possibility of losing mitts due to carelessness tends to zero. Nowadays the “Owl” pattern on knitting needles is very popular. It is often used when knitting hats, but it is quite possible to use it when creating various mittens, and mittens in particular.
When knitting, yarn was used in large skeins, without markings. Most likely it is a wool blend (50/50 percent wool/acrylic).
The thread is thin, twisted from two even thinner ones. In the knitting itself, double folding of the thread (from two balls) was used. In total, approximately 150 g of steel-gray yarn was used. Long paired knitting needles 2 mm and 3.5 mm.
Mitts with an owl can be knitted on 5 (hosiery) knitting needles, but in this MK only two knitting needles worked.
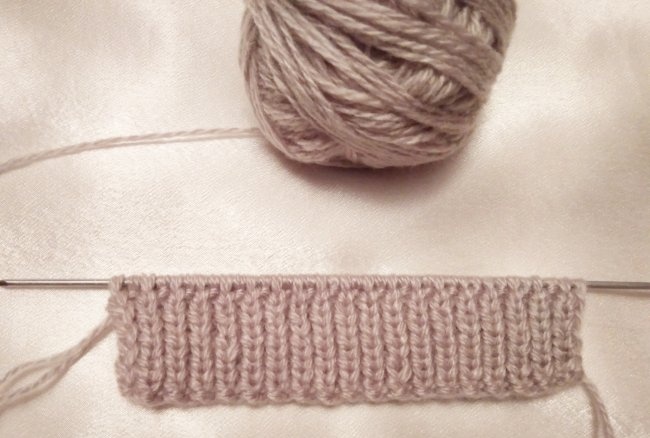
On 2 mm needles, cast on 36 stitches + 2 edge stitches (= 38 stitches)
We knit a 1x1 elastic band on them (rapport: one knit, one purl).
Knit 9 rows with an elastic band.
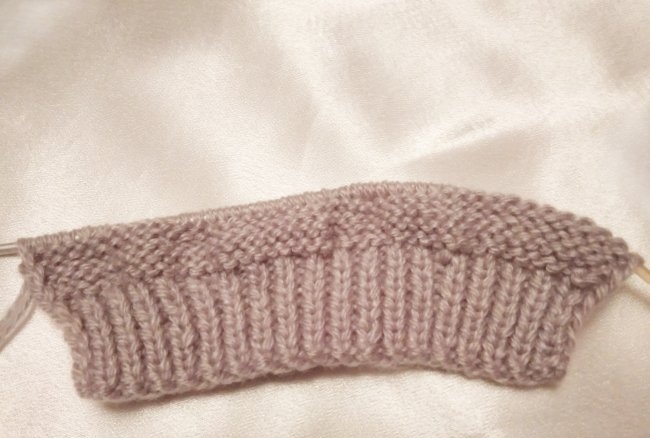
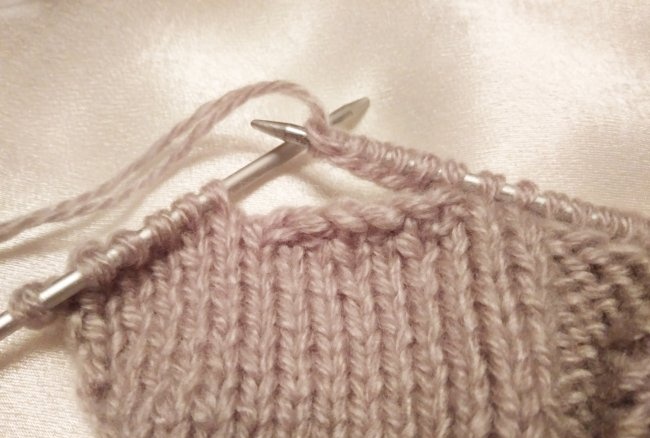
In the 10th row, evenly add 6 loops (= 42 sts + 2 edges).
Next, switch to 3.5 mm knitting needles (straight or circular doesn’t matter).
Knit 4 rows: in the front rows - purl loops, from the wrong side - facial loops (purl stitch).
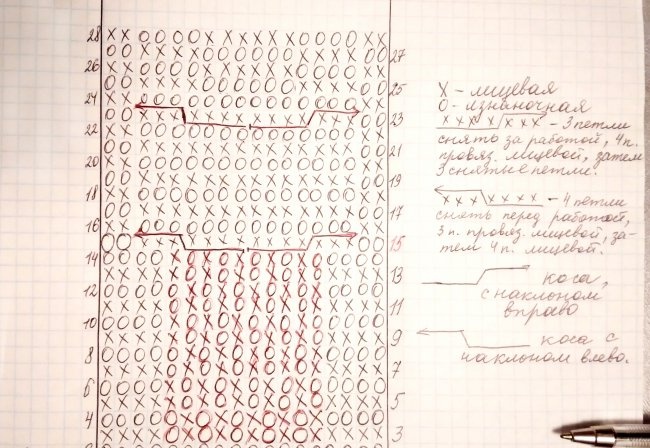
For the pattern, select 18 stitches in the middle of the existing loops. Continue knitting the outermost stitches using purl stitch.
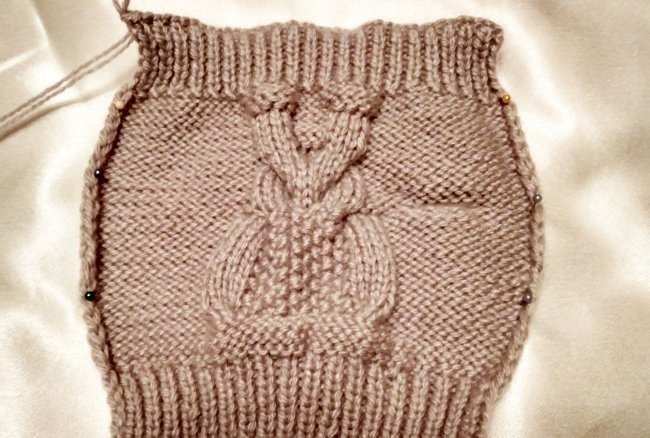
So: 1 chrome, 12 stitches in purl satin stitch, 18 stitches in the “Owl” pattern, 12 stitches in purl satin stitch, 1 chrome.
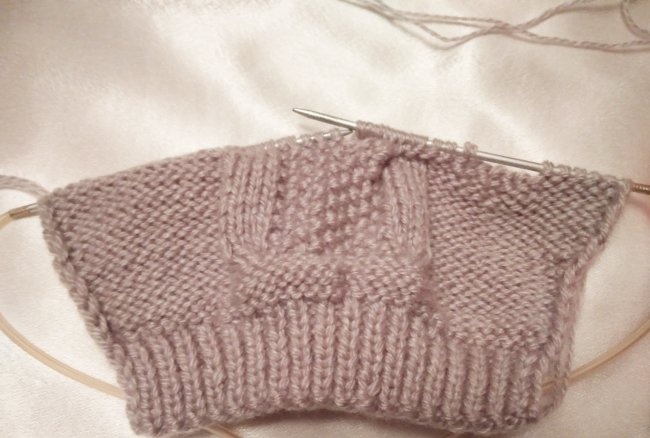
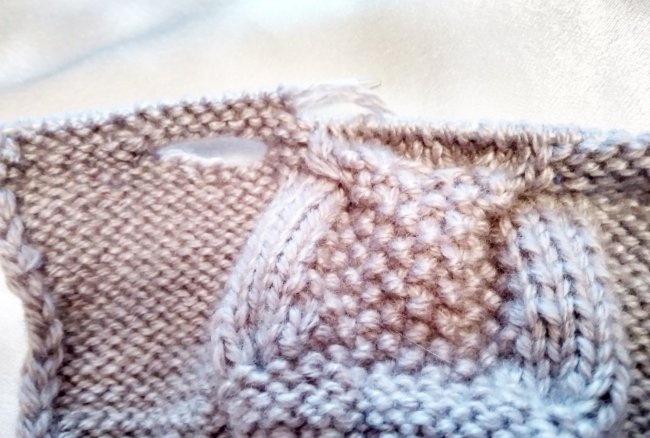
At the level of the second braid (17th row), bind off 5-6 loops on the right side of the “Owl” pattern. This will be the thumb hole.
Knit three loops, bind off 5-6 sts, continue knitting according to plan.
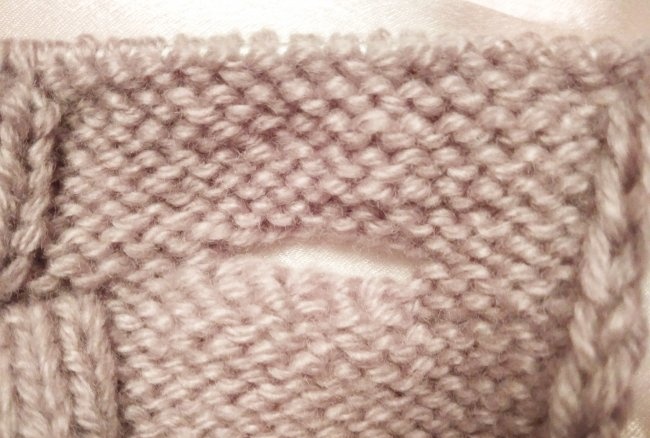
From the wrong side, on the right knitting needle above the thumb hole we place 5-6 loops, as many as were closed in the previous row.
In the next front row, these thrown loops are knitted according to the pattern - purl, and from the wrong side - knit.
This creates a hole for the thumb.
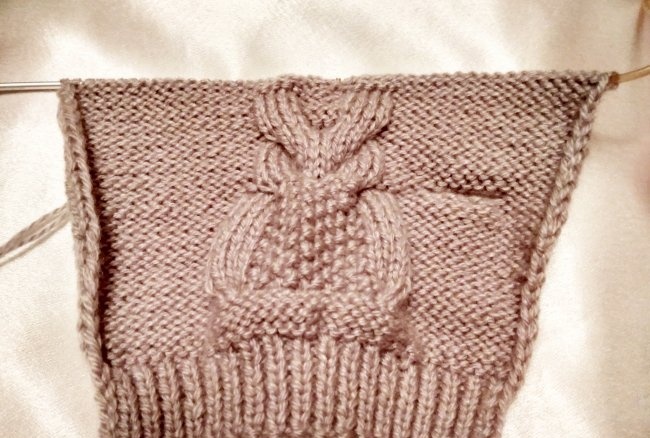
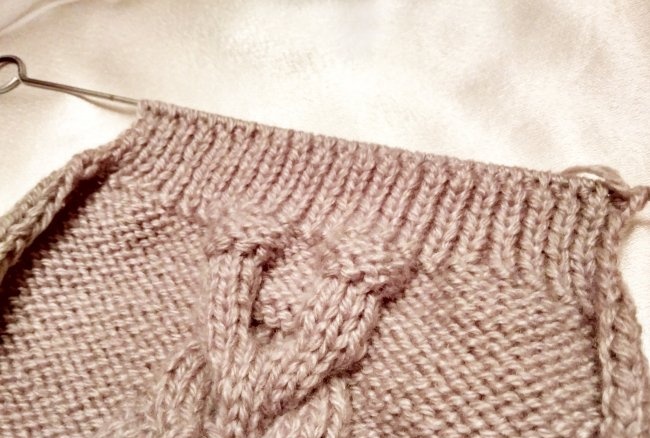
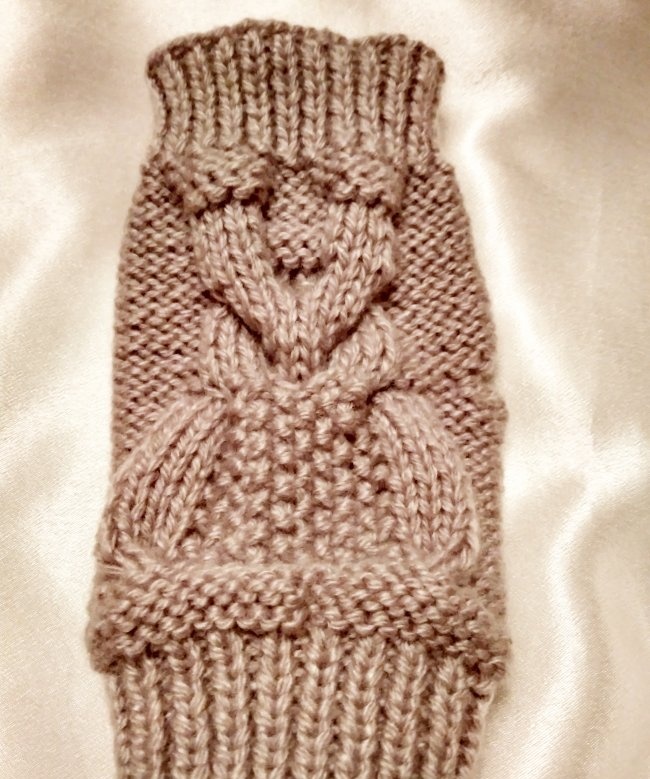
The photo shows the finished pattern.
Work 4 rows of purl stitch on all stitches.
Switch again to 2 mm knitting needles and knit with 1x1 rib.
In the first row, remove the elastic evenly (knit together 8 times in two loops) 8 loops.
Next, knit 6-8 rows with an elastic band.
How many rows of elastic to knit depends on how long the mitts you personally need and how much you want to open your fingers.
In this model, only the outer phalanges of the fingers will be open.
Close all loops.
Take a needle with a thick eye.
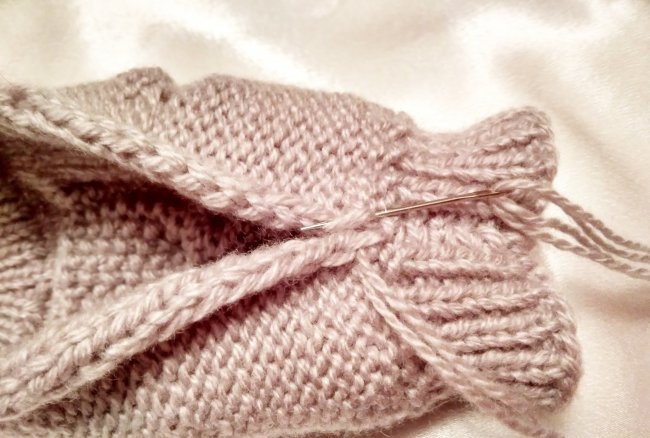
Sew the edges of the mitts using a knitted stitch.
View of the mitts from the palm side.
If this seam in the middle of the mitten bothers you, then knit on stocking needles. You will get a seamless fabric.
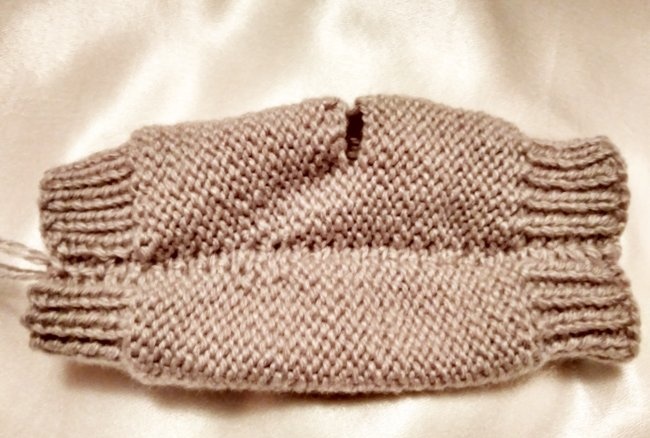
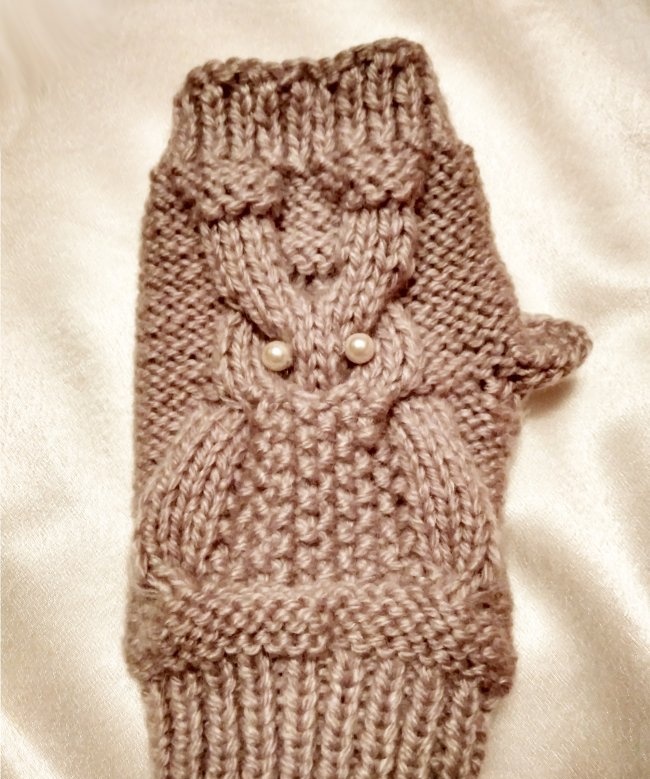
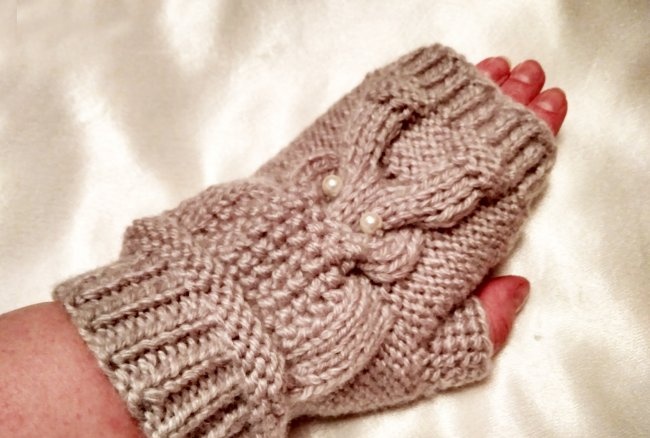
View of the mitts in a semi-finished form.The owl is very reminiscent of an eagle owl.
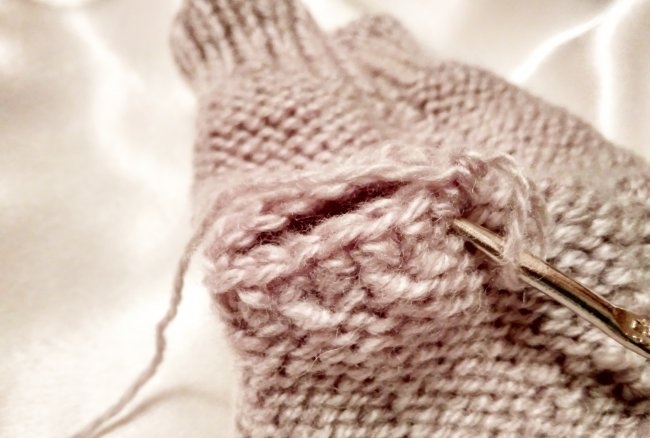
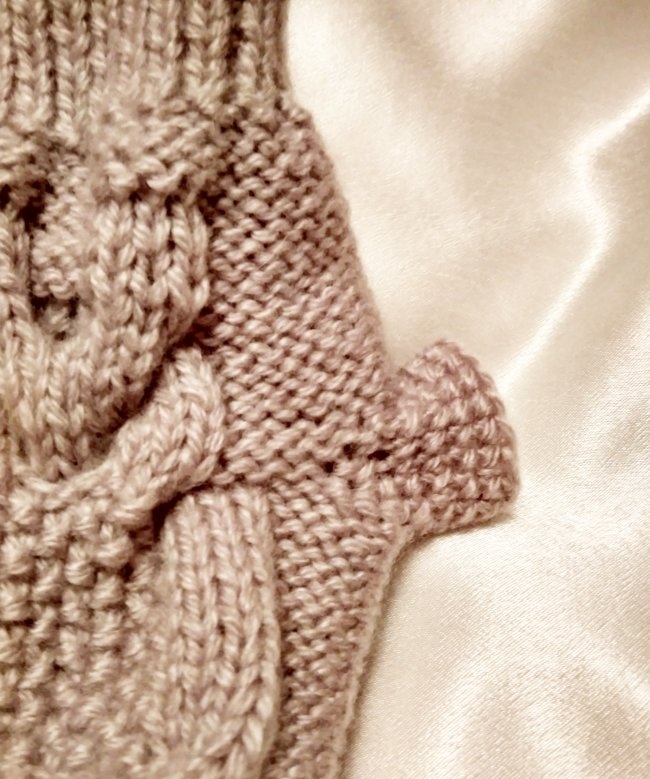
We finish knitting the thumb. Using a 3.5 mm crochet hook, crochet 4 rows of single crochet around the hole. The finger will also be only partially open.
In the mitt for the left hand, the hole for the thumb is made to the right of the “Owl” pattern, and for the right mitt, the hole will be to the left of the pattern.
View of the right mitt.
You can knit the thumb before sewing the edges of the product.
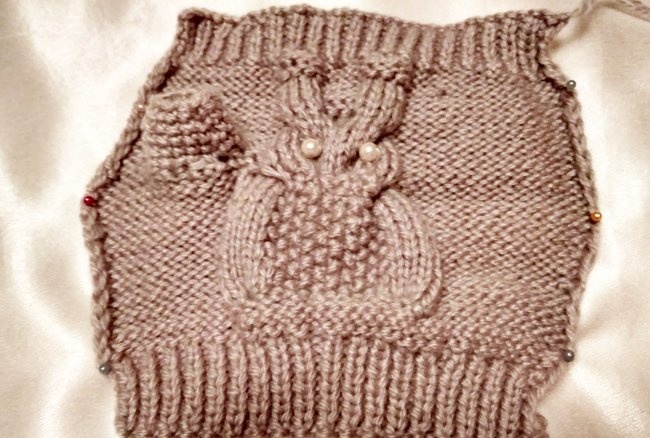
Sew on buttons or beads for eyes.
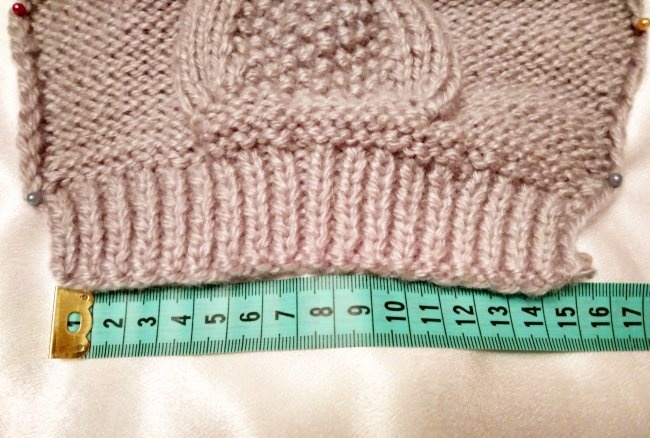
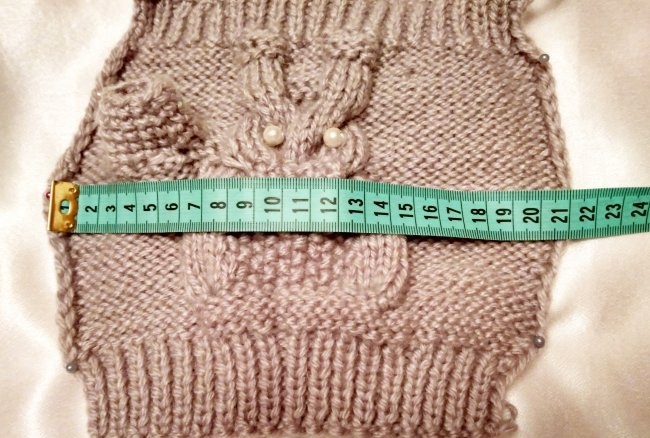
Dimensions of the product in a straightened form for calculating the knitting density.
Elastic: 36 p + 2 edging = 15 cm
Main part: 42 p + 2 edges = 20 cm.
The mitts are knitted quite quickly - a couple of evenings of very leisurely knitting. Ideal for not too frosty winters. In exceptional conditions, of course, stronger mittens are better.
Have fun crafting!
When knitting, yarn was used in large skeins, without markings. Most likely it is a wool blend (50/50 percent wool/acrylic).
The thread is thin, twisted from two even thinner ones. In the knitting itself, double folding of the thread (from two balls) was used. In total, approximately 150 g of steel-gray yarn was used. Long paired knitting needles 2 mm and 3.5 mm.
Mitts with an owl can be knitted on 5 (hosiery) knitting needles, but in this MK only two knitting needles worked.
On 2 mm needles, cast on 36 stitches + 2 edge stitches (= 38 stitches)
We knit a 1x1 elastic band on them (rapport: one knit, one purl).
Knit 9 rows with an elastic band.
In the 10th row, evenly add 6 loops (= 42 sts + 2 edges).
Next, switch to 3.5 mm knitting needles (straight or circular doesn’t matter).
Knit 4 rows: in the front rows - purl loops, from the wrong side - facial loops (purl stitch).
Further knitting follows the pattern of the “Owl” pattern.
For the pattern, select 18 stitches in the middle of the existing loops. Continue knitting the outermost stitches using purl stitch.
So: 1 chrome, 12 stitches in purl satin stitch, 18 stitches in the “Owl” pattern, 12 stitches in purl satin stitch, 1 chrome.
At the level of the second braid (17th row), bind off 5-6 loops on the right side of the “Owl” pattern. This will be the thumb hole.
Knit three loops, bind off 5-6 sts, continue knitting according to plan.
From the wrong side, on the right knitting needle above the thumb hole we place 5-6 loops, as many as were closed in the previous row.
In the next front row, these thrown loops are knitted according to the pattern - purl, and from the wrong side - knit.
This creates a hole for the thumb.
The photo shows the finished pattern.
Work 4 rows of purl stitch on all stitches.
Switch again to 2 mm knitting needles and knit with 1x1 rib.
In the first row, remove the elastic evenly (knit together 8 times in two loops) 8 loops.
Next, knit 6-8 rows with an elastic band.
How many rows of elastic to knit depends on how long the mitts you personally need and how much you want to open your fingers.
In this model, only the outer phalanges of the fingers will be open.
Close all loops.
Take a needle with a thick eye.
Sew the edges of the mitts using a knitted stitch.
View of the mitts from the palm side.
If this seam in the middle of the mitten bothers you, then knit on stocking needles. You will get a seamless fabric.
View of the mitts in a semi-finished form.The owl is very reminiscent of an eagle owl.
We finish knitting the thumb. Using a 3.5 mm crochet hook, crochet 4 rows of single crochet around the hole. The finger will also be only partially open.
In the mitt for the left hand, the hole for the thumb is made to the right of the “Owl” pattern, and for the right mitt, the hole will be to the left of the pattern.
View of the right mitt.
You can knit the thumb before sewing the edges of the product.
Sew on buttons or beads for eyes.
Finished mitt.
Dimensions of the product in a straightened form for calculating the knitting density.
Elastic: 36 p + 2 edging = 15 cm
Main part: 42 p + 2 edges = 20 cm.
The mitts are knitted quite quickly - a couple of evenings of very leisurely knitting. Ideal for not too frosty winters. In exceptional conditions, of course, stronger mittens are better.
Have fun crafting!
Similar master classes
Particularly interesting
Comments (0)

