How to paint a marbled cup yourself
With the simple marbling technique described here, your cups can gain new appeal and become the center of attention of your friends and guests. And we will show how everyone can do it with their own hands.
You will need:
• cup;
• roll of paper towels;
• nail polish;
• nail polish remover;
• spoon;
• container (for example, a plastic disposable plate);
• water;
• cup.
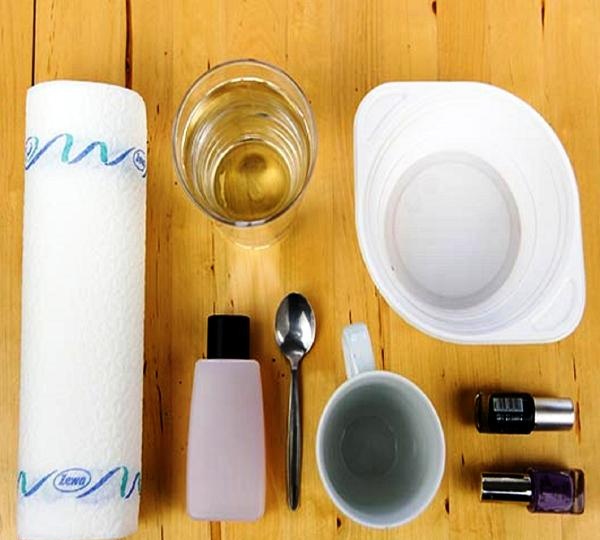
1. Preparation. First, you should lay out the necessary materials so that they are all at hand. You should try out a few colors and brands of nail polish and experiment with them a little.
2. Pour water and add nail polish to it
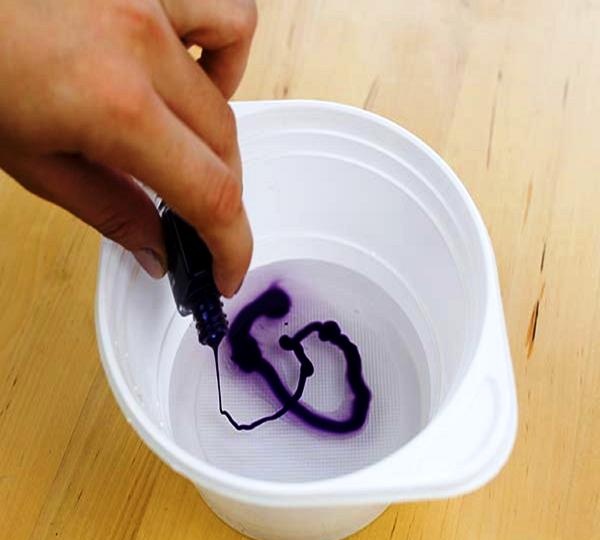
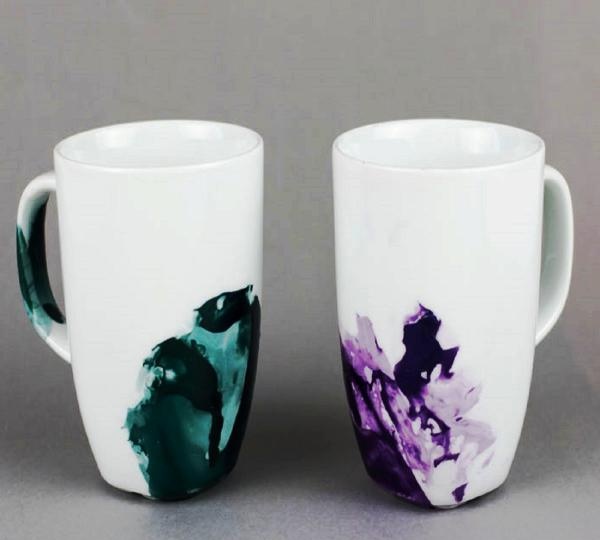
Pour slightly warm water into a disposable plastic plate, but keep in mind that you shouldn’t pour a lot of water if you want to color only the bottom of the cup (as shown in the pictures). Then you can add nail polish to the water. It should be dripped while holding the bottle directly above the surface of the water, and very carefully. This helps distribute the varnish evenly over the surface of the water.Attention! If the distance between the bottle and the water is too large, the varnish will remain in the water in the form of drops and the pattern will turn out to be lumpy and chunky.
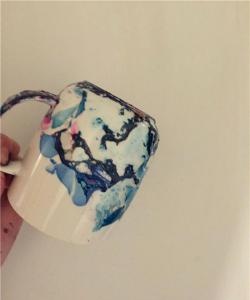
3. Coloring the cup. Now we take the cup in our hand and lower it into the water. Gently and carefully tilt it in one direction or the other so that the varnish evenly covers the entire surface provided for this. This part of the work seems to be the most difficult and requires some practice.
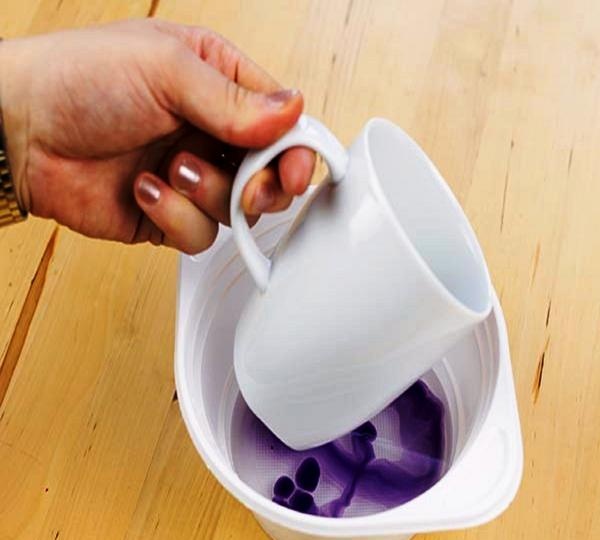
If you are not immediately satisfied with the result of the work, you can quickly and immediately after application wash it off the cup with nail polish remover, and then try to repeat the whole operation all over again. And when you are satisfied with the result of applying the varnish and the marble pattern on the cup, the cup should be left to dry for at least two hours.
Additional tips:
1. Work without distractions! Since the varnish very quickly, like a net, contracts on the surface of the water, you need to work quickly and actively.
2. Try the results with different types of nail polishes! Not every nail polish provides good results. Some varnishes spread more evenly across the surface of the water than others. And getting the desired result in this case is just a matter of trial and error.
3. Don't forget about fresh air! Remember that nail polish emits toxic fumes. Therefore, you need to work either outdoors or provide sufficient ventilation in the room or kitchen.
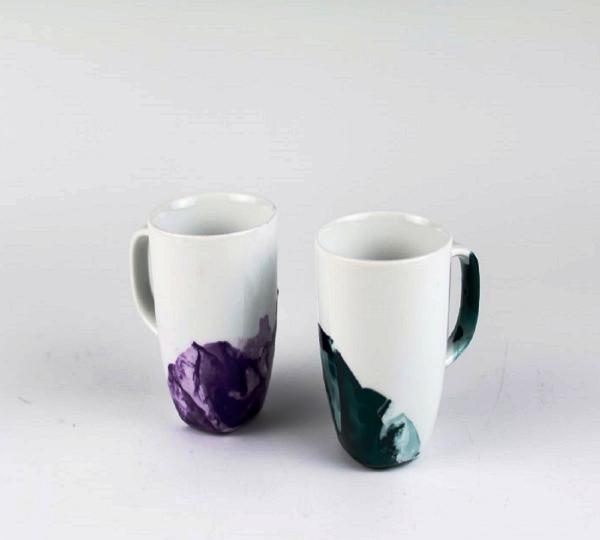
Are you satisfied with the result? Now you can drink your favorite drinks from a new cup with marbled optics!

You will need:
• cup;
• roll of paper towels;
• nail polish;
• nail polish remover;
• spoon;
• container (for example, a plastic disposable plate);
• water;
• cup.

1. Preparation. First, you should lay out the necessary materials so that they are all at hand. You should try out a few colors and brands of nail polish and experiment with them a little.
2. Pour water and add nail polish to it

Pour slightly warm water into a disposable plastic plate, but keep in mind that you shouldn’t pour a lot of water if you want to color only the bottom of the cup (as shown in the pictures). Then you can add nail polish to the water. It should be dripped while holding the bottle directly above the surface of the water, and very carefully. This helps distribute the varnish evenly over the surface of the water.Attention! If the distance between the bottle and the water is too large, the varnish will remain in the water in the form of drops and the pattern will turn out to be lumpy and chunky.
3. Coloring the cup. Now we take the cup in our hand and lower it into the water. Gently and carefully tilt it in one direction or the other so that the varnish evenly covers the entire surface provided for this. This part of the work seems to be the most difficult and requires some practice.

If you are not immediately satisfied with the result of the work, you can quickly and immediately after application wash it off the cup with nail polish remover, and then try to repeat the whole operation all over again. And when you are satisfied with the result of applying the varnish and the marble pattern on the cup, the cup should be left to dry for at least two hours.
Additional tips:
1. Work without distractions! Since the varnish very quickly, like a net, contracts on the surface of the water, you need to work quickly and actively.
2. Try the results with different types of nail polishes! Not every nail polish provides good results. Some varnishes spread more evenly across the surface of the water than others. And getting the desired result in this case is just a matter of trial and error.
3. Don't forget about fresh air! Remember that nail polish emits toxic fumes. Therefore, you need to work either outdoors or provide sufficient ventilation in the room or kitchen.

Are you satisfied with the result? Now you can drink your favorite drinks from a new cup with marbled optics!
Similar master classes
Particularly interesting
Comments (1)


