Gift bags
Any present for the holiday requires some beautiful and original packaging. Moreover, it doesn’t matter what kind of celebration it is, be it for a man or a woman, a girl or a guy, a grandmother or grandfather, or even a baby. For example, even adding a box of perfume, a postcard or some kind of souvenir requires a congratulatory bag. In these cases, what do we usually do? We run headlong to the shops and look for some beautiful bag. But what to do if there is nowhere to run, there is no time, or they have completely forgotten about it. There is a way out of this situation and it is quite simple. You can make beautiful gift bags with your own hands from cardboard, decorate them with decor and you will get a very exclusive and original packaging for your gift.
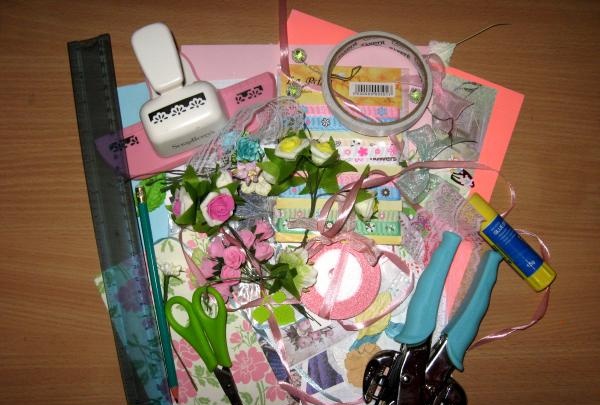
For the master class we will need to take:
• Two sheets of cardboard in pink and blue A4 format;
• Scrappaper in mint blue and pink colors;
• Color printed pictures;
• Two inscriptions “Happy Holidays”;
• White paper napkin;
• Rep ribbons white and blue with prints 10 mm wide;
• Shabby ribbons in peach-pink and blue colors;
• Paper hydrangea flowers blue and pink;
• Pink wide lace;
• Small paper flower of soft pink color;
• Pink and blue satin ribbons 3-5 mm wide for handles;
• For decoration: pearl half-beads, buttons, paper butterflies;
• Eyelet and eyelet installer (if you don’t have one, you can get by with a simple office hole punch to make holes for the handles);
• Curb hole punch, if available;
• Ruler, double-sided tape, glue stick, pencil, scissors and glue gun.
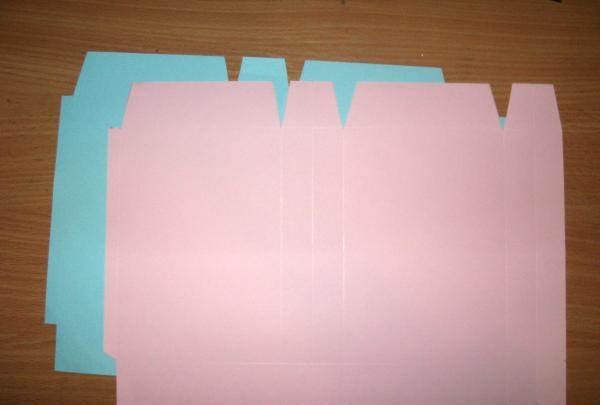
We lay out the diagram on the table, take sheets of cardboard and use them to make the bases of the bags.


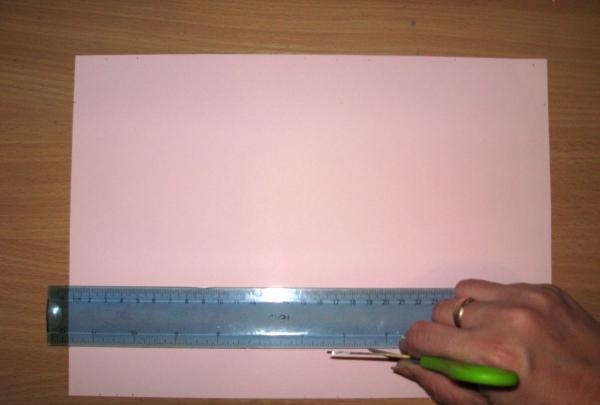
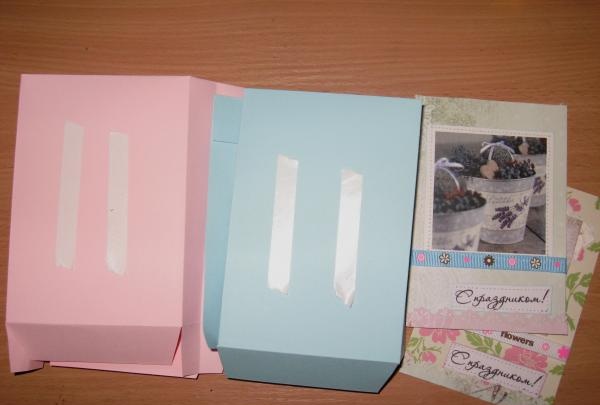
Take one sheet of cardboard and unfold it horizontally. We clearly transfer all the dimensions onto the cardboard and draw bend lines under the ruler.
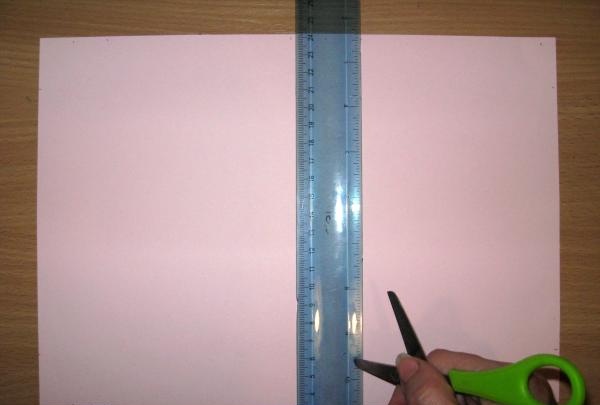
We do the same on the second sheet of cardboard and fold our package blanks along the bends.
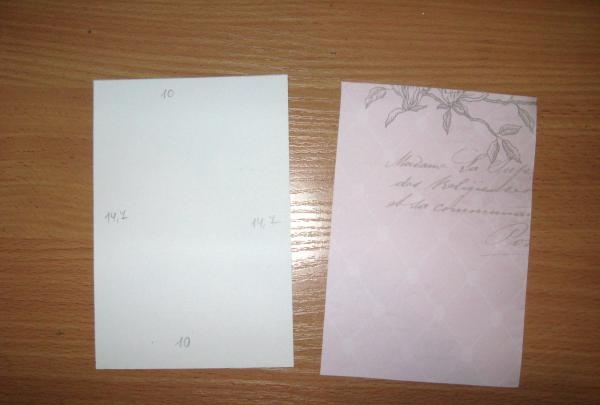
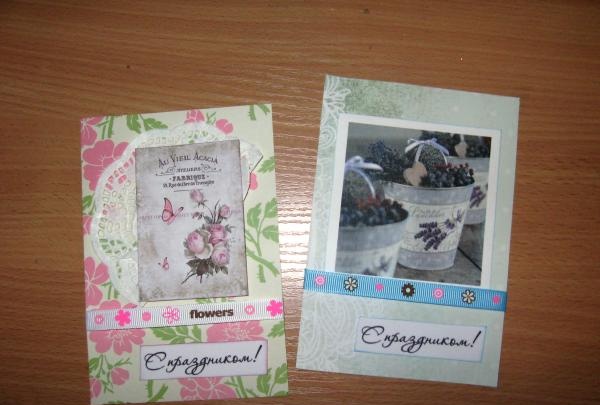
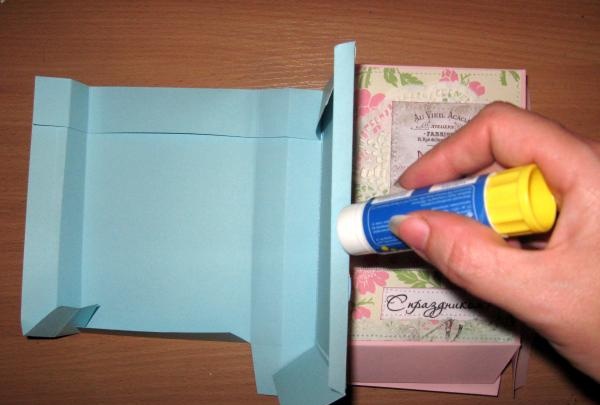
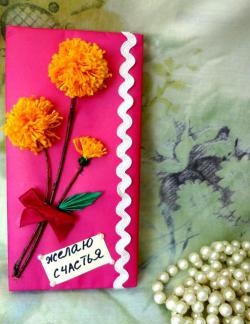
Now we cut out two 10*14.7 cm rectangles from scrap paper, one sheet for each bag. We glue a napkin onto one, laying it out beautifully, on top is a picture, on the second picture, on the bottom we glue inscriptions, and under the pictures we put a ribbon.
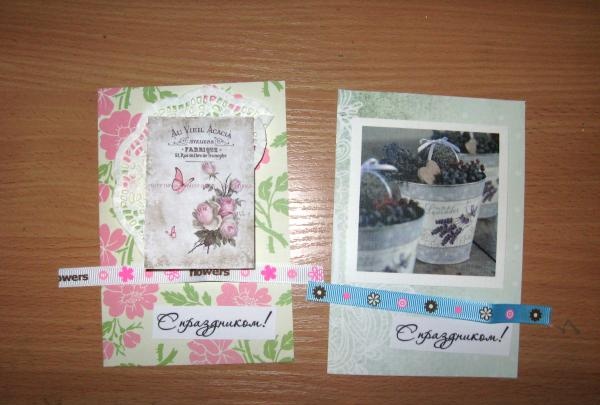
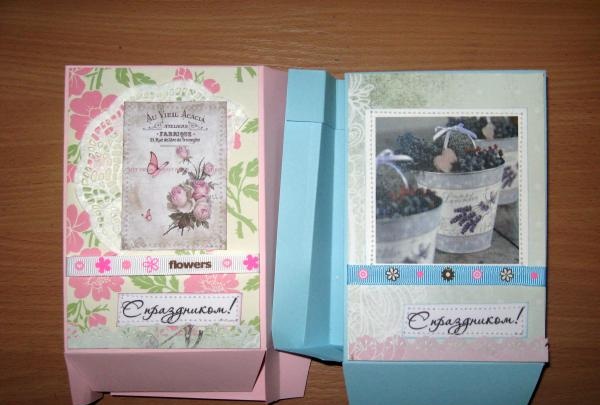
We wrap the ribbons and glue them to the back with double-sided tape. Now we sew on the pictures and inscriptions with a machine, now we glue these scrap blanks onto each side of the bag. At the bottom you can also glue openwork strips of paper made with a border hole punch.
We stitch each side of the bag using a machine.
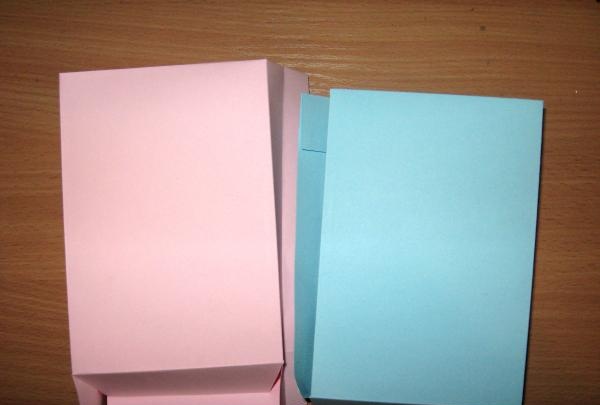
Now we will need to glue the bags along the side tails. First we spread and glue the sides with a glue stick, and then glue the bottom. We collect both bags.
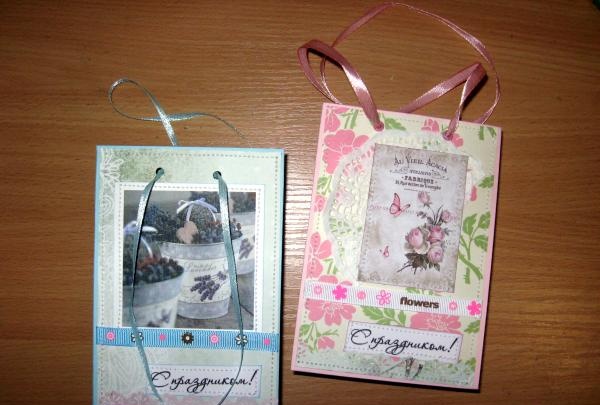
Now we use a hole puncher or installer to make two holes on each side. If there are eyelets, then insert the eyelets into the holes and secure them; if not, simply insert ribbons on both sides.
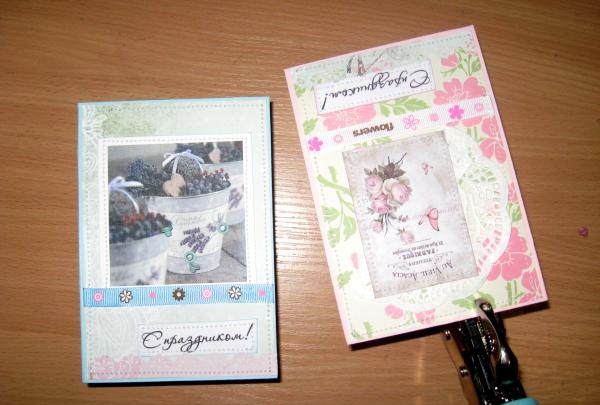
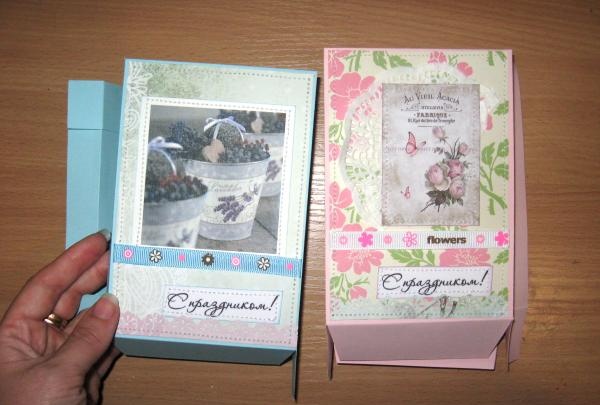
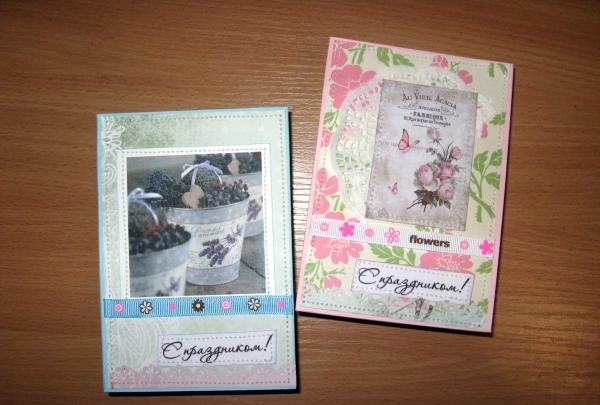
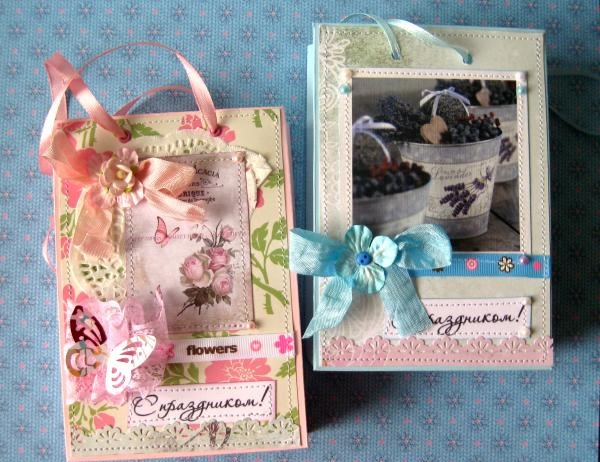
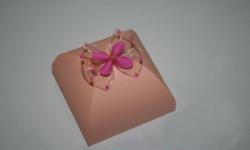
Now all we have to do is glue on the shabby bows, flowers, buttons, lace and butterfly.
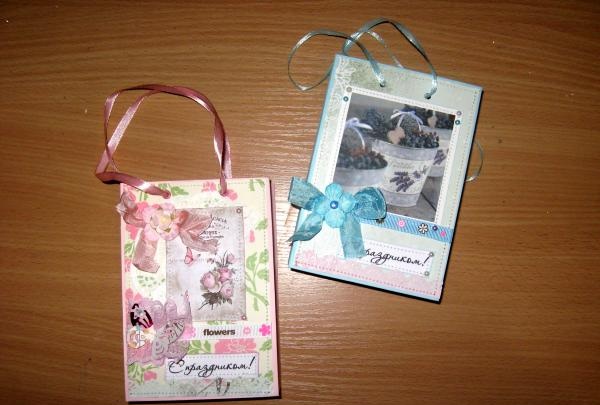
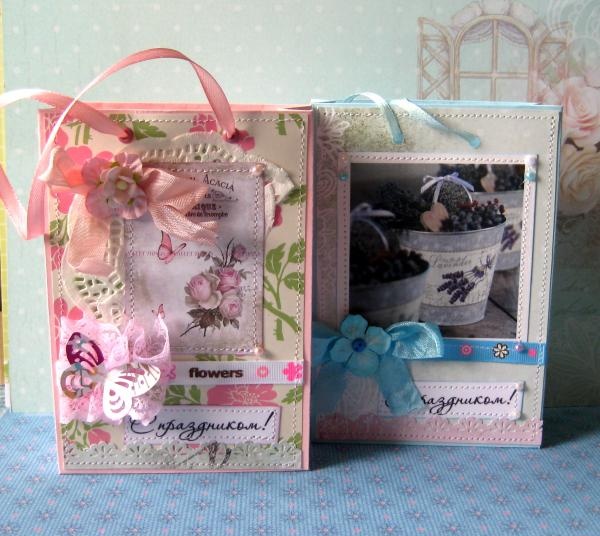
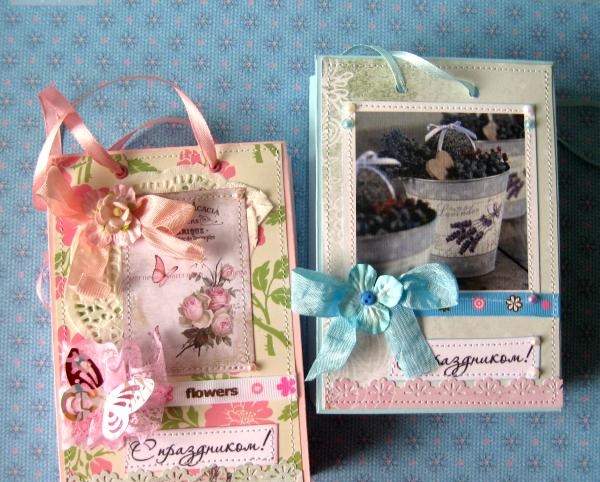
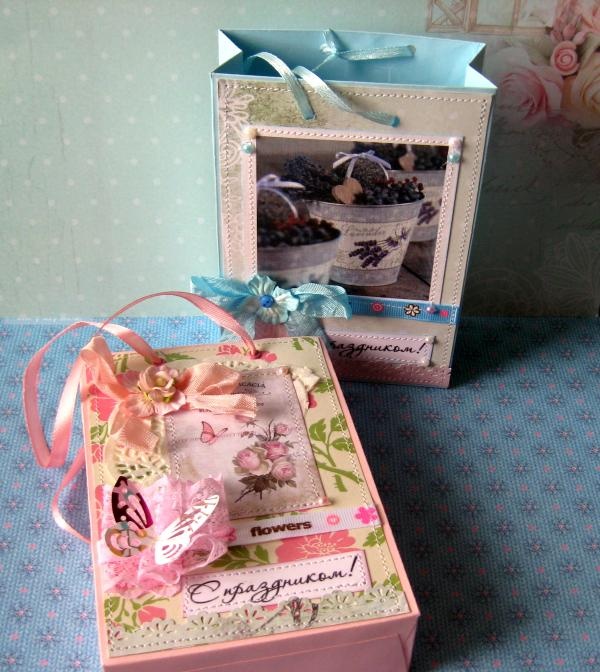
The packages are ready.You can put gifts in them and present them for any occasion! Thanks for your attention and good luck!
For the master class we will need to take:
• Two sheets of cardboard in pink and blue A4 format;
• Scrappaper in mint blue and pink colors;
• Color printed pictures;
• Two inscriptions “Happy Holidays”;
• White paper napkin;
• Rep ribbons white and blue with prints 10 mm wide;
• Shabby ribbons in peach-pink and blue colors;
• Paper hydrangea flowers blue and pink;
• Pink wide lace;
• Small paper flower of soft pink color;
• Pink and blue satin ribbons 3-5 mm wide for handles;
• For decoration: pearl half-beads, buttons, paper butterflies;
• Eyelet and eyelet installer (if you don’t have one, you can get by with a simple office hole punch to make holes for the handles);
• Curb hole punch, if available;
• Ruler, double-sided tape, glue stick, pencil, scissors and glue gun.
We lay out the diagram on the table, take sheets of cardboard and use them to make the bases of the bags.
Take one sheet of cardboard and unfold it horizontally. We clearly transfer all the dimensions onto the cardboard and draw bend lines under the ruler.
We do the same on the second sheet of cardboard and fold our package blanks along the bends.
Now we cut out two 10*14.7 cm rectangles from scrap paper, one sheet for each bag. We glue a napkin onto one, laying it out beautifully, on top is a picture, on the second picture, on the bottom we glue inscriptions, and under the pictures we put a ribbon.
We wrap the ribbons and glue them to the back with double-sided tape. Now we sew on the pictures and inscriptions with a machine, now we glue these scrap blanks onto each side of the bag. At the bottom you can also glue openwork strips of paper made with a border hole punch.
We stitch each side of the bag using a machine.
Now we will need to glue the bags along the side tails. First we spread and glue the sides with a glue stick, and then glue the bottom. We collect both bags.
Now we use a hole puncher or installer to make two holes on each side. If there are eyelets, then insert the eyelets into the holes and secure them; if not, simply insert ribbons on both sides.
Now all we have to do is glue on the shabby bows, flowers, buttons, lace and butterfly.
The packages are ready.You can put gifts in them and present them for any occasion! Thanks for your attention and good luck!
Similar master classes


Particularly interesting


Comments (0)
