Simple DIY mini air conditioner
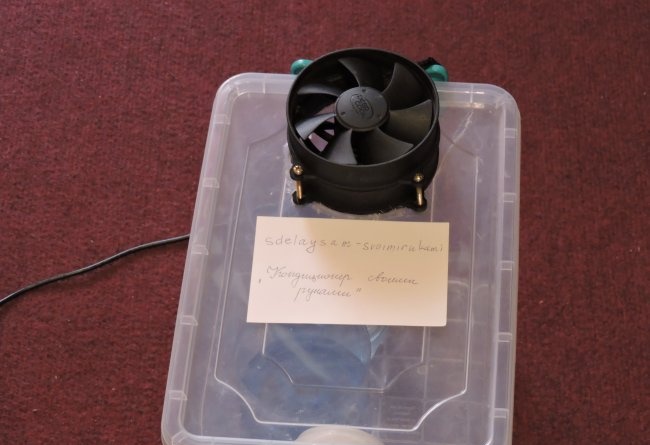
If you have been thinking about buying an air conditioner for a long time, but are not ready to spend a large sum on this purchase, the master class will be especially useful for you. A homemade air conditioner made by yourself will keep your home cool at any time of the year. To construct this invention, a minimum of experience, time and financial investment will be required.
Consumables:
Additional tools:
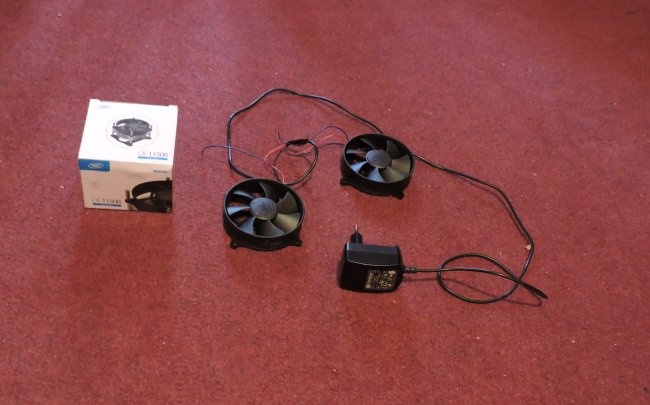
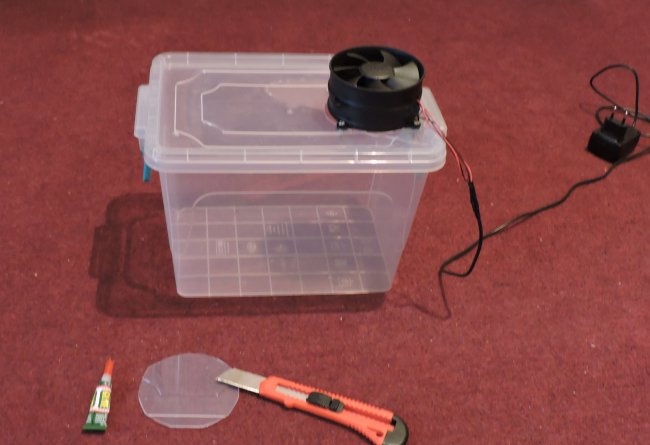
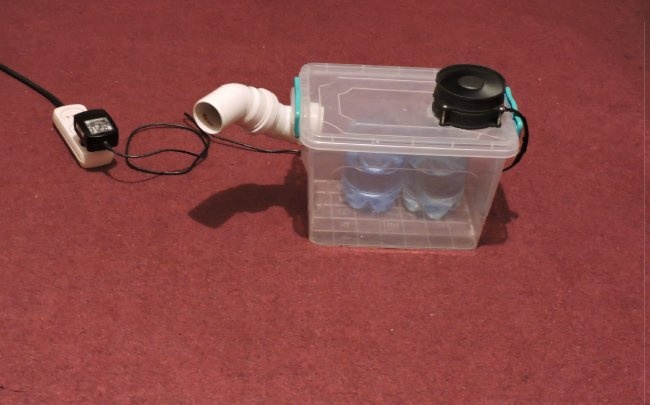
The manufacture of an air conditioner should begin by connecting the power supply and computer cooler. At first glance, coolers are capable of cooling the insides of a computer and their power is not enough to provide a similar effect for an entire room. In fact, the powerful air circulation occurring inside the box creates a strong flow that instantly spreads over the entire area. If the connection is made correctly, the coolers will work immediately after they are connected to the outlet.
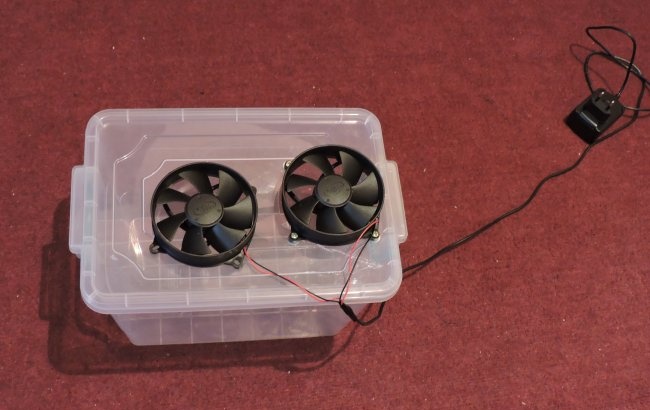
Insert the cooler into the cut hole and secure with silicone glue to prevent air from escaping through the cracks. If you have chosen a plastic box to make the air conditioner, you will have to work hard to cut out the hole: place the cooler on top and trace it with a pen, and then strictly follow the marks to make a hole with a knife or scissors. It will be easier if you make marks on the plastic with a thin drill, and then start cutting according to the marks.
Using long screws, screw the second cooler to the first.Instead of two small coolers, you can use one powerful one. The power of the cooler directly depends on the degree of cooling.
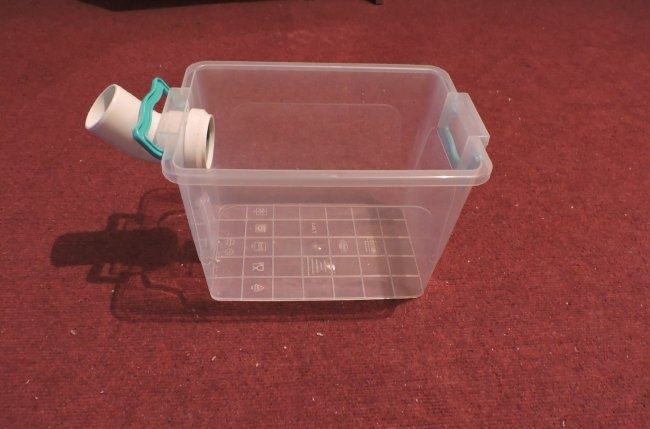
Remove the cover and start cutting a hole for the outlet pipe. The structure should be fixed with silicone glue.
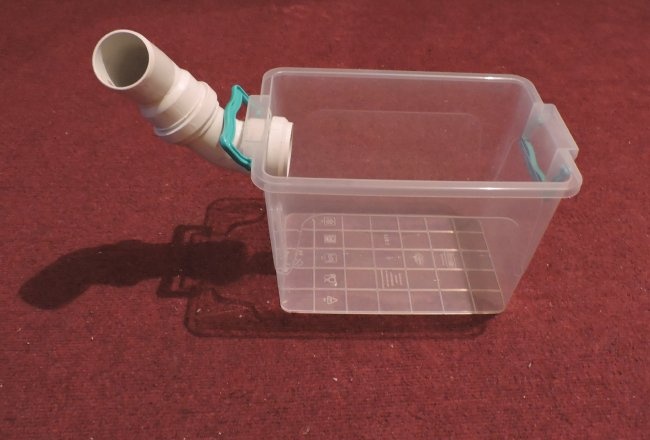
Put on a second pipe that will direct the air flow. It should not be fixed with glue, otherwise you will lose the ability to twist it and direct air. You can make two holes for the pipe so that the air spreads faster throughout the room.
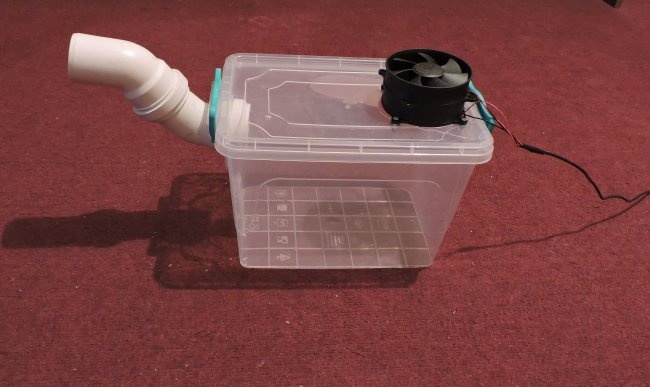
Put the lid on and make sure that the air entering the box comes out only through the pipe. If small cracks are noticeable, they should be sealed with silicone glue.
Now all that’s left to do is get a few ice cubes out of the freezer. Ice placed in 1.5-liter bottles will melt within an hour and a half after the air conditioner starts operating, so try to freeze the water in advance. The more ice, the more powerful and cooler the air flow. The air conditioner works well without the ice pack, but then you get the equivalent of a fan.
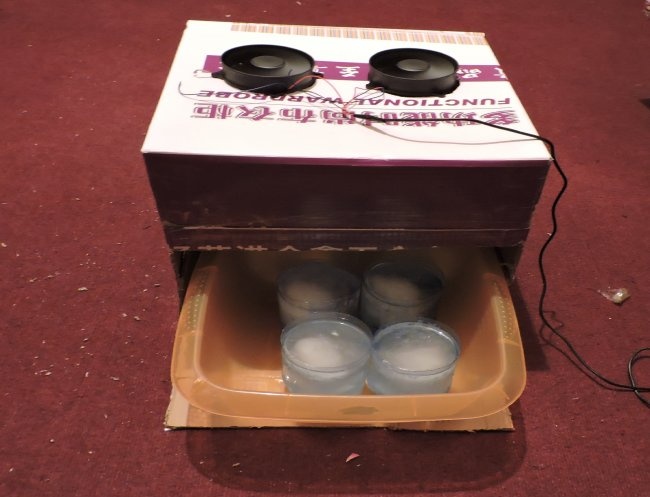
If you were unable to find a suitable plastic box, you can assemble it from thick paper. In terms of quality characteristics, a cardboard box is in no way inferior to a plastic one, although it looks less attractive. The situation can be corrected by covering the old cardboard with film. The ice, which rapidly evaporates inside the box, will soon render the cardboard unusable, so a cardboard box will last you for a maximum of one season. For convenience, insert the ice blanks into a plastic bowl so as not to damage the cardboard again.
You have the right to change the number of coolers or pipes, or the shape of the box.The main thing that you get in the end is a convenient and practical design that can cool a small room and become an excellent alternative to a fan or an expensive air conditioner.
Advantages of a mini air conditioner:
- Low cost (500-1000 rubles). Compared to the equipment offered by manufacturers, a home air conditioner is at least 20 times cheaper and does not require subsequent additional investments.
- Speed of production (1.5-2 hours). If you really want to get an air conditioner today, in the best case scenario, manufacturers will deliver and install it in a few hours, when you can do it faster with a homemade air conditioner.
- Availability of consumables. You will find most of the materials and tools for your air conditioner at home, but you will find the rest at the construction market or department store.
- Low energy consumption. Experts have calculated that an air conditioner without an energy-saving system operates 450 hours a year, which costs 1,000 rubles.Not much, but a homemade air conditioner will cost even less.
- Possibility of rearrangement to any place in the apartment. A homemade air conditioner is lightweight, so it can be moved from the kitchen to the bedroom, from the bedroom to the living room, and periodically change its location.
- Safety. The air flow coming from a homemade air conditioner is not so powerful, so it is impossible to catch a cold under it. This guarantees the safety of you and your children.
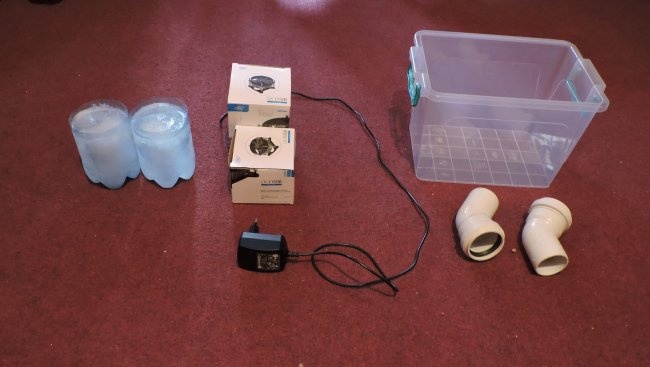
Consumables:
- Computer cooler – 2 pcs.
- Large plastic or cardboard box – 1 pc.
- Outlet pipes – 2 pcs.
- Power supply (12 W) – 1 pc.
- Plastic bottles, cut in half - 2-4 pcs.
Additional tools:
- Knife.
- Super glue.
- Silicone glue.
- Insulating tape.
The manufacture of an air conditioner should begin by connecting the power supply and computer cooler. At first glance, coolers are capable of cooling the insides of a computer and their power is not enough to provide a similar effect for an entire room. In fact, the powerful air circulation occurring inside the box creates a strong flow that instantly spreads over the entire area. If the connection is made correctly, the coolers will work immediately after they are connected to the outlet.
Insert the cooler into the cut hole and secure with silicone glue to prevent air from escaping through the cracks. If you have chosen a plastic box to make the air conditioner, you will have to work hard to cut out the hole: place the cooler on top and trace it with a pen, and then strictly follow the marks to make a hole with a knife or scissors. It will be easier if you make marks on the plastic with a thin drill, and then start cutting according to the marks.
Using long screws, screw the second cooler to the first.Instead of two small coolers, you can use one powerful one. The power of the cooler directly depends on the degree of cooling.
Remove the cover and start cutting a hole for the outlet pipe. The structure should be fixed with silicone glue.
Put on a second pipe that will direct the air flow. It should not be fixed with glue, otherwise you will lose the ability to twist it and direct air. You can make two holes for the pipe so that the air spreads faster throughout the room.
Put the lid on and make sure that the air entering the box comes out only through the pipe. If small cracks are noticeable, they should be sealed with silicone glue.
Now all that’s left to do is get a few ice cubes out of the freezer. Ice placed in 1.5-liter bottles will melt within an hour and a half after the air conditioner starts operating, so try to freeze the water in advance. The more ice, the more powerful and cooler the air flow. The air conditioner works well without the ice pack, but then you get the equivalent of a fan.
If you were unable to find a suitable plastic box, you can assemble it from thick paper. In terms of quality characteristics, a cardboard box is in no way inferior to a plastic one, although it looks less attractive. The situation can be corrected by covering the old cardboard with film. The ice, which rapidly evaporates inside the box, will soon render the cardboard unusable, so a cardboard box will last you for a maximum of one season. For convenience, insert the ice blanks into a plastic bowl so as not to damage the cardboard again.
You have the right to change the number of coolers or pipes, or the shape of the box.The main thing that you get in the end is a convenient and practical design that can cool a small room and become an excellent alternative to a fan or an expensive air conditioner.
Similar master classes
Particularly interesting
Comments (3)

