Original do-it-yourself guitar painting
Creative people are characterized by individuality. A bright, memorable image, like the cutting of a precious stone, can highlight the artist’s talent and make him recognizable among his admirers.
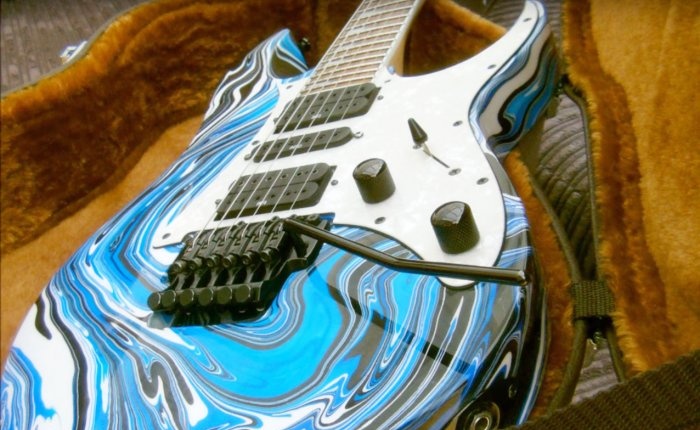
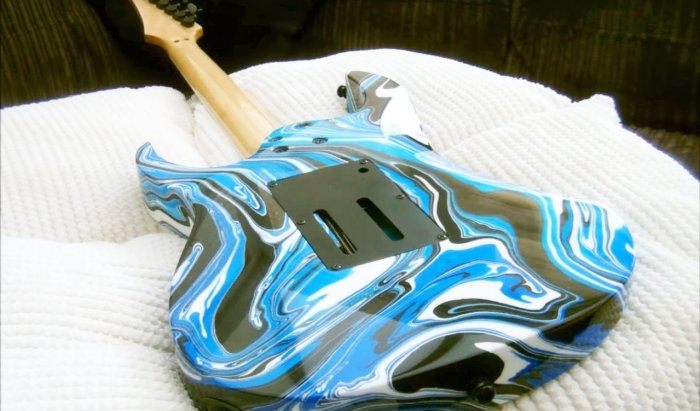
Today we will talk about an unusual technology for painting a guitar and more. Its peculiarity is that the result is completely unique, because it is created by nature itself by spontaneously mixing colors and shades of paint. No one will have another instrument like this!
The name Swirling literally means twisting, swirling, whirling. Designers immediately fell in love with it, giving their creations incredible dynamics from endless lines.
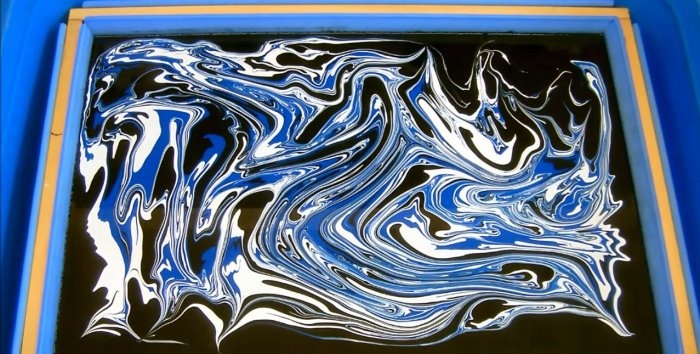
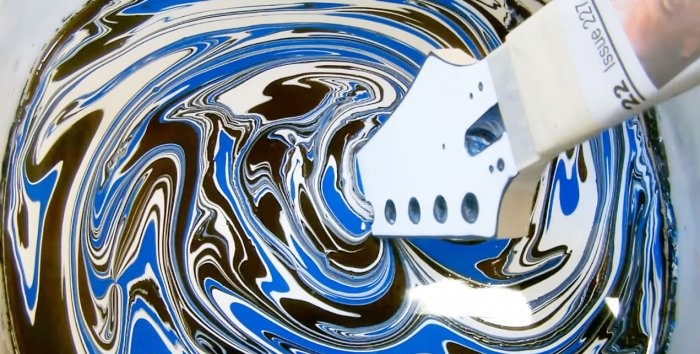
And indeed, from the outside it seems that someone, with an invisible hand, created a storm in a paint tray, forgetting to mix all the different colors together. The whole point is that the paint itself is on the surface, and no additional tools are used for painting - brushes, rollers, etc.
So, for a creative experiment we will need:
The tools are as follows:
1. Before preparing the solution, it is necessary to prepare the surface of the musical instrument itself to be treated. Remove strings, tuners and other removable parts. Separate the neck from the guitar body. This will make it easier for you to immerse it in a container with a solution.
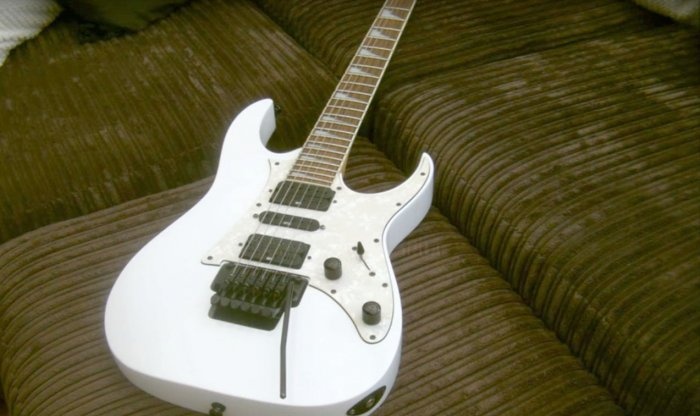
2. The surface to be finished must be cleaned of grease and varnish. In cases where there is no base color on the wood, it can be applied in advance as a base. This moment is intended for the amateur, and is not a prerequisite for swirling. As you can see in the photo, the master's base color for the guitar is white. With a base coat, you won't need a primer. But if we are talking about clean wood, it must first be primed. The primer should be selected from the same chemical group as the paints.
3. All places that will need to remain untouched by paint must be taped with masking tape. You can attach a kind of fingerboard made of wooden slats to the soundboard so as not to leave fingerprints after immersion in the bath with the solution.
4. The solution for swirling is prepared from water and sodium tetraborate or boric acid, at the rate of 1 teaspoon/1 liter of water. The proportion is checked by immersing paint in it, which should remain on the surface. For swirling, 3-4 shades of paint are usually used. However, there are no rules here. The thickness of the lines can be varied by hand.
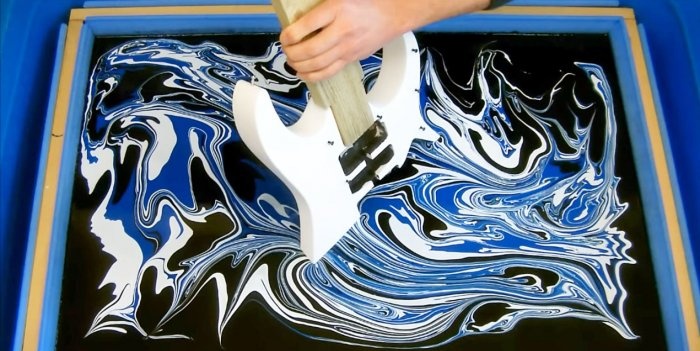
5. Slowly immersing the element in the solution, move it along the resulting paint film, as if collecting paint on it. Remember, the technology is designed for one dive, and you will not have a second chance to create a unique drawing!
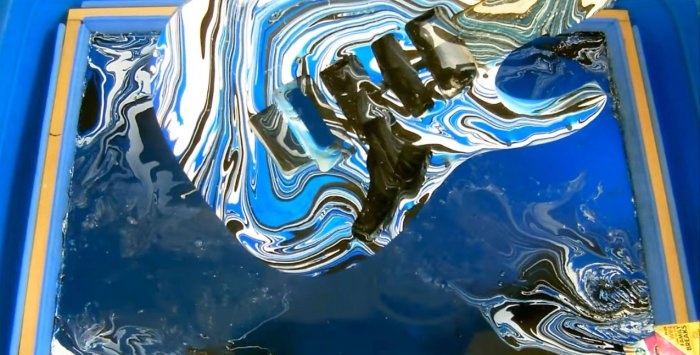
6. Once the guitar element to be painted is above the surface, shake off any remaining solution and leave it to dry. Drying time depends on the type of paint, usually 12-24 hours at a temperature of +20 degrees Celsius.
7. The pattern formed by the paint lines must be fixed. A clear or amber waterproof varnish, such as polyurethane, is suitable for this. They cover the entire surface of the guitar, including the rear, hidden areas.
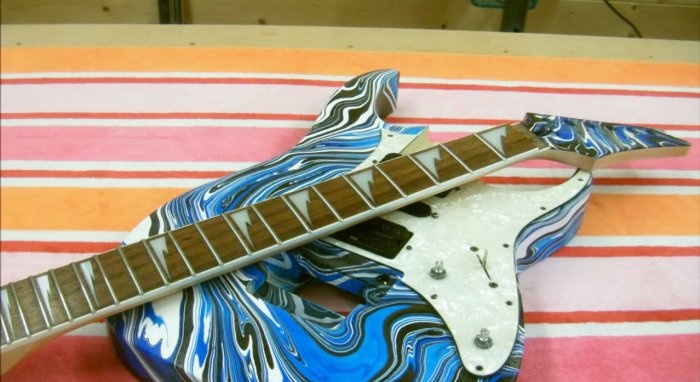
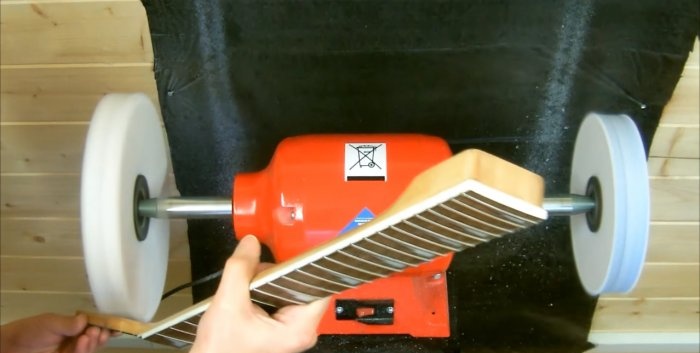
8. The final part will be polishing the varnish surface. Some craftsmen use sharpening machines with felt wheels for this. But if you have no experience in this, it’s not worth the risk, since felt heats up the surface very quickly and must be used extremely carefully. For manual polishing, a zero-grit sandpaper with a grit of 1000-2000 is suitable. After final assembly, the instrument will become a truly unique masterpiece of creativity and design!
Swirling is still in trend today. It is enjoyed by web designers, furniture makers, artists and creators of patterns on glass and fabrics. However, this finishing method is also perfect for restoring an old guitar that has scratches, chips or unwanted inscriptions. And a complete update will give it a second life, allowing it to delight everyone around you with its unique sound.
Today we will talk about an unusual technology for painting a guitar and more. Its peculiarity is that the result is completely unique, because it is created by nature itself by spontaneously mixing colors and shades of paint. No one will have another instrument like this!
A few words about the technology itself
The name Swirling literally means twisting, swirling, whirling. Designers immediately fell in love with it, giving their creations incredible dynamics from endless lines.
And indeed, from the outside it seems that someone, with an invisible hand, created a storm in a paint tray, forgetting to mix all the different colors together. The whole point is that the paint itself is on the surface, and no additional tools are used for painting - brushes, rollers, etc.
So, for a creative experiment we will need:
- Container for solution.
- Water.
- Paint (oil, PF) in several colors.
- Transparent glossy varnish.
The tools are as follows:
- Painting stick-stirrer to add swirl to the coating.
- Masking tape (scotch tape).
- Sandpaper.
- Varnish brush.
Swirling painting process
1. Before preparing the solution, it is necessary to prepare the surface of the musical instrument itself to be treated. Remove strings, tuners and other removable parts. Separate the neck from the guitar body. This will make it easier for you to immerse it in a container with a solution.
2. The surface to be finished must be cleaned of grease and varnish. In cases where there is no base color on the wood, it can be applied in advance as a base. This moment is intended for the amateur, and is not a prerequisite for swirling. As you can see in the photo, the master's base color for the guitar is white. With a base coat, you won't need a primer. But if we are talking about clean wood, it must first be primed. The primer should be selected from the same chemical group as the paints.
3. All places that will need to remain untouched by paint must be taped with masking tape. You can attach a kind of fingerboard made of wooden slats to the soundboard so as not to leave fingerprints after immersion in the bath with the solution.
4. The solution for swirling is prepared from water and sodium tetraborate or boric acid, at the rate of 1 teaspoon/1 liter of water. The proportion is checked by immersing paint in it, which should remain on the surface. For swirling, 3-4 shades of paint are usually used. However, there are no rules here. The thickness of the lines can be varied by hand.
5. Slowly immersing the element in the solution, move it along the resulting paint film, as if collecting paint on it. Remember, the technology is designed for one dive, and you will not have a second chance to create a unique drawing!
6. Once the guitar element to be painted is above the surface, shake off any remaining solution and leave it to dry. Drying time depends on the type of paint, usually 12-24 hours at a temperature of +20 degrees Celsius.
7. The pattern formed by the paint lines must be fixed. A clear or amber waterproof varnish, such as polyurethane, is suitable for this. They cover the entire surface of the guitar, including the rear, hidden areas.
8. The final part will be polishing the varnish surface. Some craftsmen use sharpening machines with felt wheels for this. But if you have no experience in this, it’s not worth the risk, since felt heats up the surface very quickly and must be used extremely carefully. For manual polishing, a zero-grit sandpaper with a grit of 1000-2000 is suitable. After final assembly, the instrument will become a truly unique masterpiece of creativity and design!
Practical advice
- Before you start painting your guitar in the Swirling style, first practice on scrap pieces of plywood or wood. Once you get the hang of it and can confidently handle the process of painting, drying and varnishing, start creating a masterpiece.
- Adhesion and compatibility of various types of paint, as well as their solvents, are not always suitable for this technology. You should not experiment with the nitro group of varnishes/solvents, for which water is contraindicated in principle. Try using inexpensive paints in combination with a reagent and water to start with. Expensive and branded analogues certainly will not make the surface being treated worse.
- To obtain a perfectly finished surface, craftsmen use closed rooms, cleared of dust - finishing chambers. If you are in doubt about the final result, after painting, contact professional painters, such as auto repair shops, who will do the job perfectly using spray guns.
Swirling is still in trend today. It is enjoyed by web designers, furniture makers, artists and creators of patterns on glass and fabrics. However, this finishing method is also perfect for restoring an old guitar that has scratches, chips or unwanted inscriptions. And a complete update will give it a second life, allowing it to delight everyone around you with its unique sound.
Watch the video
Similar master classes
Particularly interesting
Comments (1)

