Mechanical water leakage prevention system
Many people are familiar with the problem of water leaks in apartments, due to a damaged faucet or a burst hose. To prevent such a misfortune from happening, or rather, to prevent it, I propose to make a homemade product from common parts and materials.
HOW THIS SYSTEM WORKS
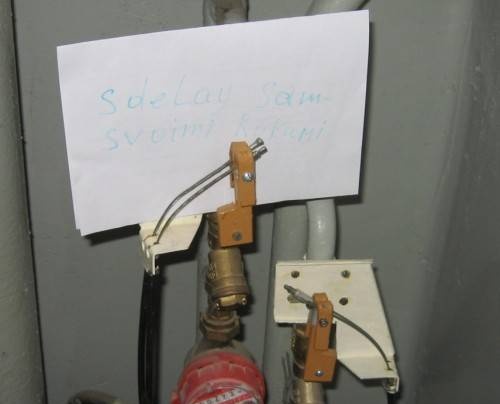
We place a sensor mechanism on the floor, connected by a cable to the ball valve.
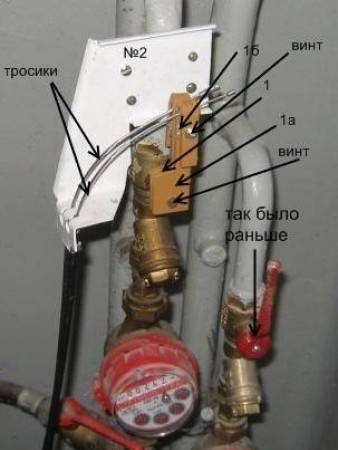
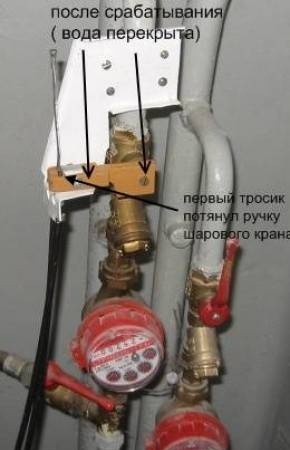
When water gets on the element (paper tape), the paper ruptures. The spring compresses and pulls the cable, which turns off the tap.


This water shut-off system uses ball valves that are already installed equal.
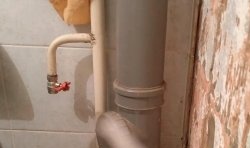
The system allows you to shut off the water manually. We turn the handle to the side, and the cable remains motionless. In the photo you can see two cables: the first goes to the sensor in the toilet, the second - in the bathroom. When water gets on the floor in one of the rooms, a sensor is triggered, a spring pulls a cable, which pulls the handle of the ball valve and shuts off the water supply to the apartment.
SYSTEM REQUIREMENTS TO PREVENT WATER LEAKAGE
The photo shows that some elements are made of stainless steel (for more durable operation and better sliding). After the mechanism operates, wipe it from moisture with a napkin, only then insert a fresh tape. Cables should not have more than 2 bends at an angle of 90 degrees and a length of no more than 2 meters. The ball valve and the sensor can be located in different rooms.
HOW TO MAKE A SYSTEM TO PREVENT WATER LEAKS
The base is a wooden block (length-360mm, width-50mm, height-25-30mm), one short end has an angle of 93 degrees. The sensor is a strip of paper cut from a student's notebook and attached to the bottom of the base with several buttons.
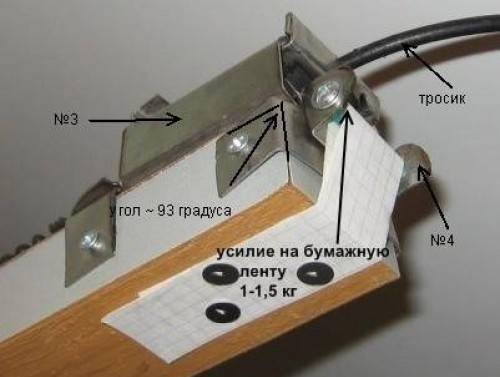
In the manufacture of part No. 3, an oak block of 150x20x50mm was used. All the bends were made around it, and then the block was taken out and cuts were made with a grinder to attach the cable.
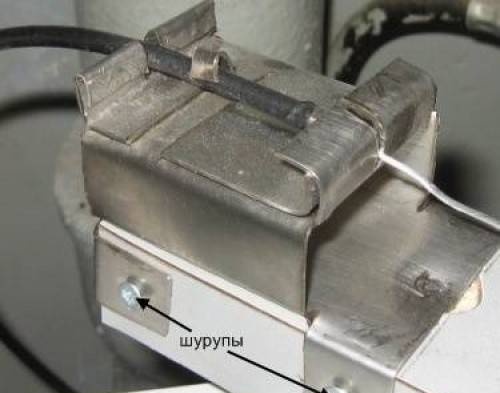
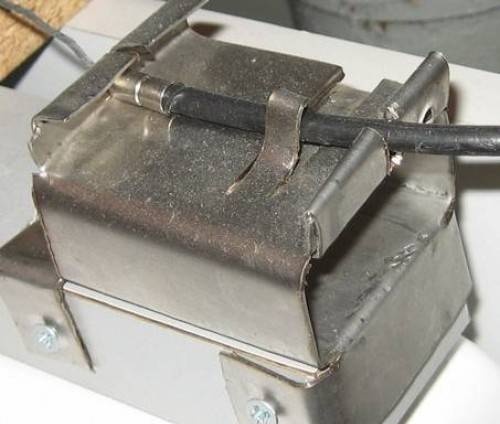
Parts 3 and 4 should be made of stainless steel, for better sliding of part No. 4. It is better to first try to make part No. 3 from cardboard. The bends are shown with red lines.
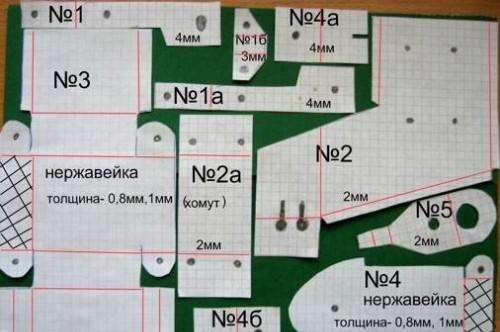
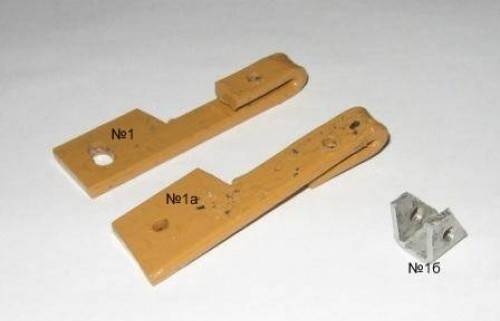
When manufacturing part No. 1, a problem arises - an expanded hole with a diameter of 6 mm.
I solved it in the following way: I drilled one hole and inserted a six screw into it from the inside. The screw should completely cover the hole. After this, a second hole is drilled.
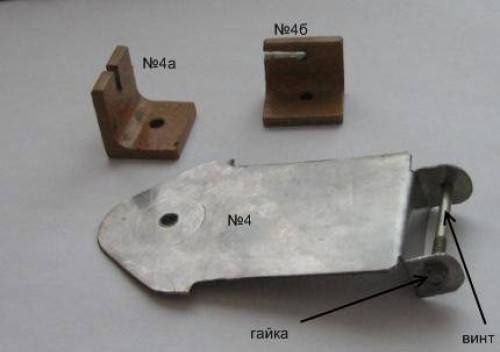
Parts 4, 4a, 4b, the spring are twisted together with one screw from below (a cable is first threaded into the grooves of parts 4a and 4b).
ADJUSTING THE SYSTEM
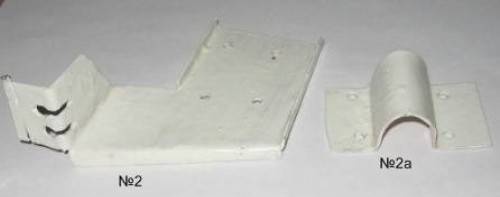
When manufacturing and adjusting the system, it is advisable to use a device - a piece of pipe more than 20 cm long with a thread with a ball valve screwed onto it.Using this device, you can check the operation of the entire mechanism not at home, but in the garage, workshop, or show the operation of the system to your friends. The device is also useful when drilling holes to connect parts No. 2 and 2a. To do this, you need to clamp these parts in a vice with the device pipe pre-inserted between them. The handle of the ball valve must be in the closed position, and the slots for the cables in the handle and parts. No. 2 must match. After this, holes are drilled simultaneously in parts No. 2 and No. 2a.
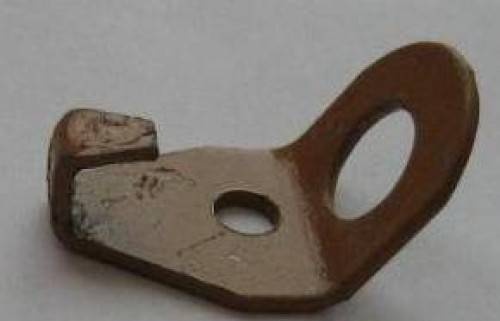
Part No. 5 has two holes: the first is for the finger (when we tension the spring), the second is for the hook. Part No. 5 can be used to adjust the tension of the spring by twisting it along the coils.
The base (wooden block 360 x 50 x 25) can be made to a longer length, and after adjustment, the excess part of the block can be cut off. The length of my base is selected for a specific spring.
When stretched, the spring force is about 10 kilograms, at the end of actuation it is 4.5 kg. The main condition: a constant force of 1 to 1.5 kilograms must be applied to the paper tape (to change this force, you need to reduce or increase the angle). To measure, you can use a household spring scale.
I bought a spring at a hardware store (a door spring) and cut it into three parts. I took the stainless steel from an old Riga washing machine. I bought the cable in a store, removed the excess part of the braid with sandpaper, and lubricated it with household grease. I bought a threaded pipe at the market..
The short end of the block should have an angle of 93 degrees, the same angle should be at parts 3 and 4 together with their common contact.
I carried out the tests in a damp room, a year later I tried to wet the paper tape - everything worked - the ball valve was closed completely automatically.
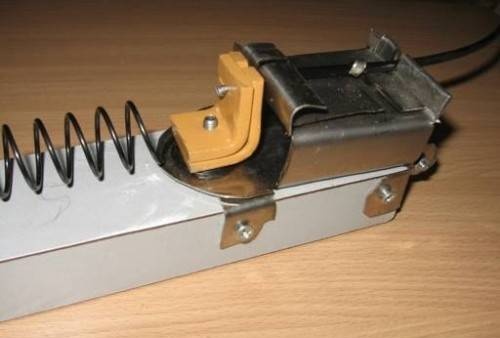
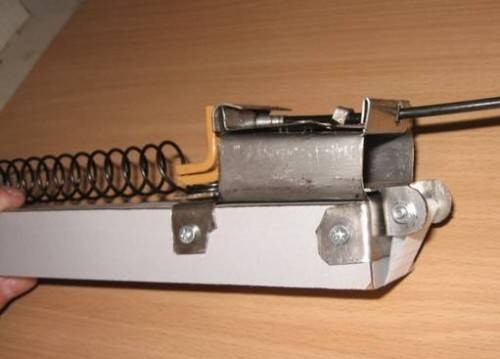
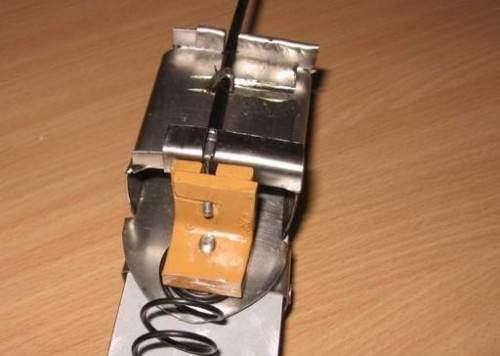

General form:


