How to make hanging shelves in a garage or workshop that don't take up space
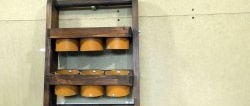
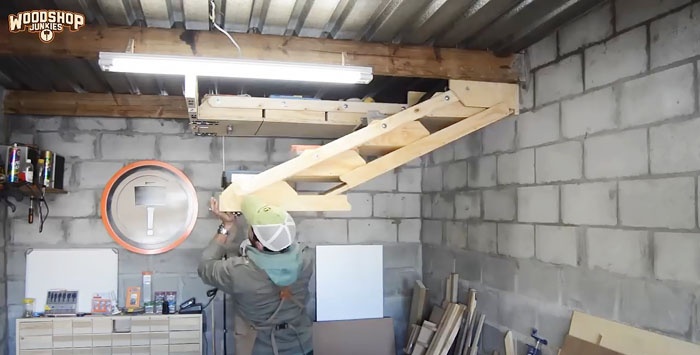
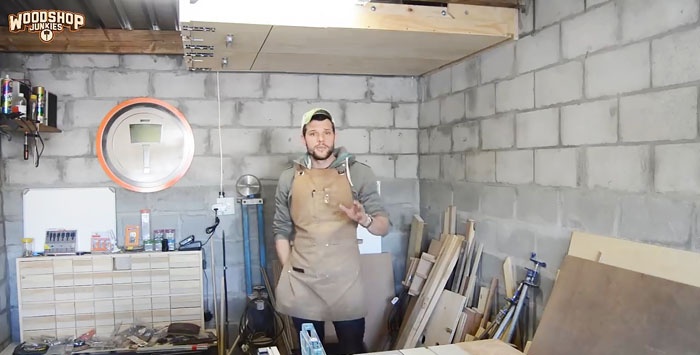
Not every car owner or master has the opportunity to have a spacious garage or workshop and store all the tools and small spare parts in it, and this causes a lot of inconvenience. Sometimes rooms are so small that it is impossible to place ordinary shelves near the walls. There is a very original solution to the problem - to make them hanging. They are placed along the walls only in the working position, and the rest of the time they are attached to the ceiling. The only condition is that you must have at least basic carpentry skills.
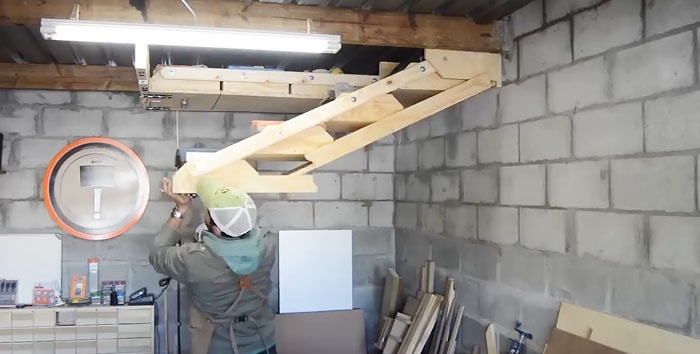
For manufacturing you need a circular saw, you can use a hand saw or an electric jigsaw. You need a drilling machine, a drill, a set of drills, wood glue and a set of hardware for fixing the elements. Such shelves are mounted in unheated rooms, the dimensions are consistent with the pitch and width of the rafter beams.
Draw a sketch of the shelf detailing each element. You will need a few details.
1. Base. The length is equal to the height from the ceiling to the floor.
2. Bottoms and sides of drawers.Dimensions are selected taking into account the expected number of tools and spare parts. The distance between the shelves is approximately 30 cm, the amount is a multiple of the height of the shelf. In our case, 8 boxes will be installed.
3. Details of the stop fixed to the wall. In our case there will be two rows of boxes, we must keep this in mind when drawing up the sketch.
4. Partitions, turning bars, etc.
The number and nomenclature of elements may change taking into account the model you personally come up with.
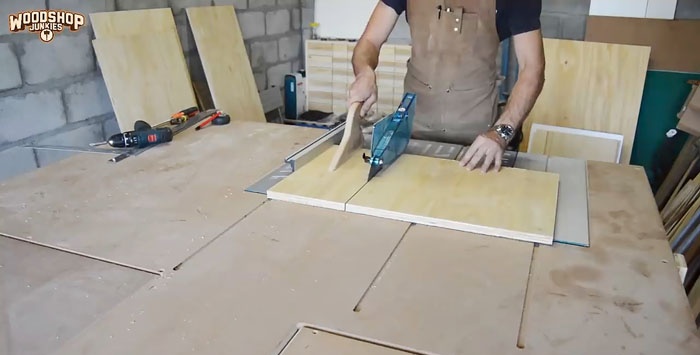
Work begins with the manufacture of part of the shelves fixed to the wall. Using a circular saw, cut a large sheet into pieces and prepare all structural elements.
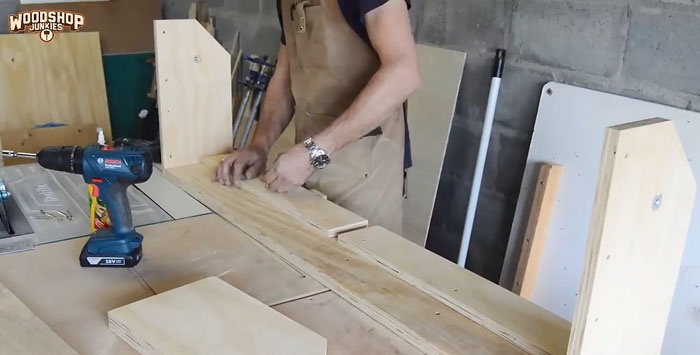
Cut off part of the sheet, it will be firmly nailed to the wall, cut out six elements to fix the three load-bearing brackets. Our plywood is thin; it will be glued together in the future to increase the strength of the parts. Accordingly, not three, but six parts are required.
Drill holes in them for the rolling axis, cut off the corners that will interfere with lifting. Holes are made in all parts; after gluing, their depth doubles. Before drilling, the parts are firmly fixed, in this way coaxiality is achieved.
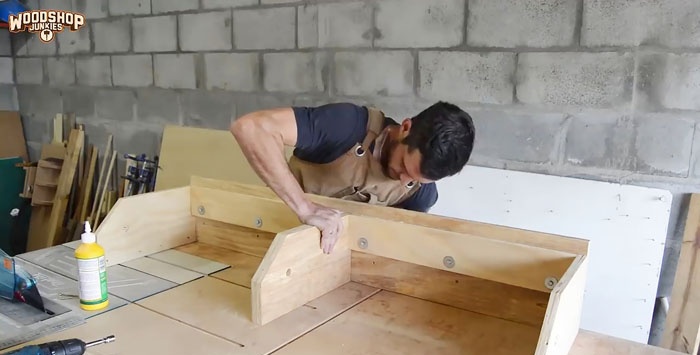
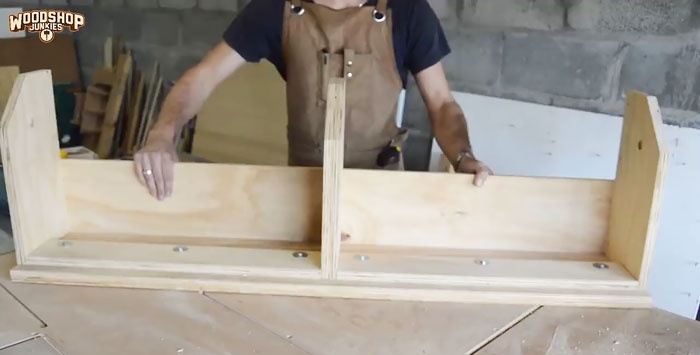
Due to the fact that the shelves are movable, one corner must be cut so that it does not touch the base while lifting the structure. The boxes are fixed with special elements that, when lifted, constantly hold them in a horizontal position. If you do not remove the corners, they will rest against the wall of the shelf and the device will not function. You can cut along a radius or a straight line, it doesn’t matter. The main condition is to ensure free rotation.
Proceed to assembling the blanks into a single structure.First, attach two strips to the shield, and then fix the sides. It must be secured with dowels and self-tapping screws, and special carpentry fixed nuts must be inserted into the holes of the axles. Attach the assembled part to the wall; use a level to maintain horizontality. It should be fixed very firmly with dowels, check the reliability. The part must support your weight; it holds the entire structure.
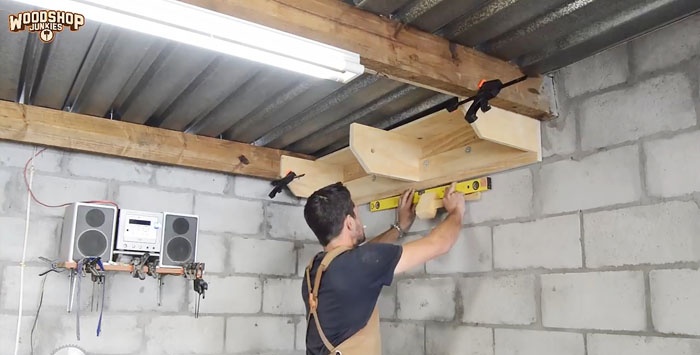
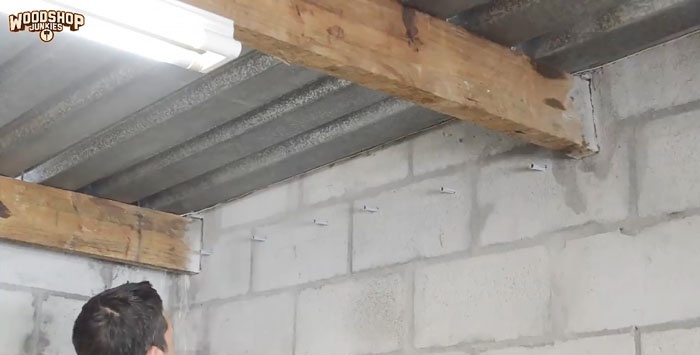
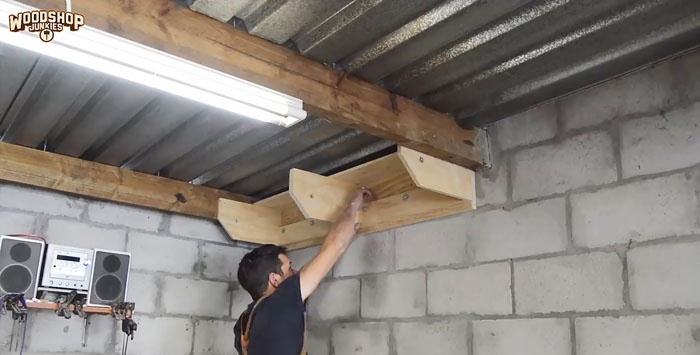
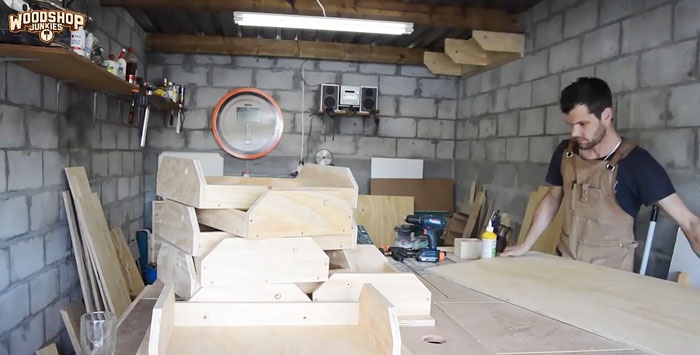
Start sawing the parts for the pivoting drawers, but you need to remove two corners of the sides. The side walls will be double, accordingly, it is necessary to double the number of blanks.
Assembly is done according to the method described above; you can only use self-tapping screws, but then it is recommended to increase their number.
The finished boxes will then be attached to the back panel of the shelf and will be able to constantly maintain a horizontal position when it is lifted. This effect is achieved by the peculiarities of their fixation.
The back side of the drawers is attached to the back wall with piano hinges or any other hinges; they create a movable fulcrum. On the opposite side of the box there is a through hole for the second rotation axis.
Use a sander to sand the surfaces of the drawers and attach the hinges to the bottom.
Prepare long planks. They will be located on the sides of the drawers and fixed to them with hinges. The length of the slats is equal to the length of the back wall.
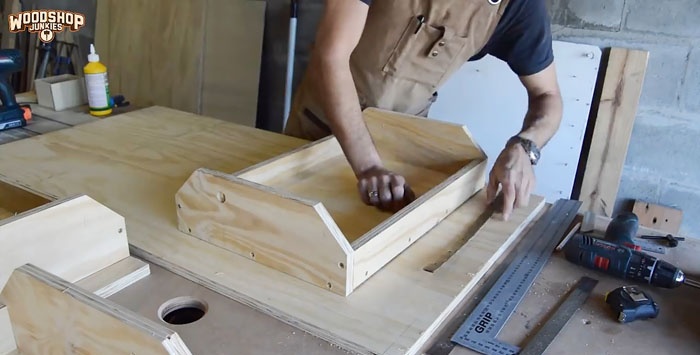
Drill holes for the hinges. In our case, a plastic pipe is used as a hinge; the same holes should be prepared. The location of the holes depends on the distance between the boxes.
Attach the hinges of the drawers to the wall, place them evenly and in such a way that they do not touch each other when turning.

Insert pieces of plastic pipe into the holes; they serve as hinges perfectly. The length of the pipe is equal to the total thickness of the walls of the boxes and long slats.
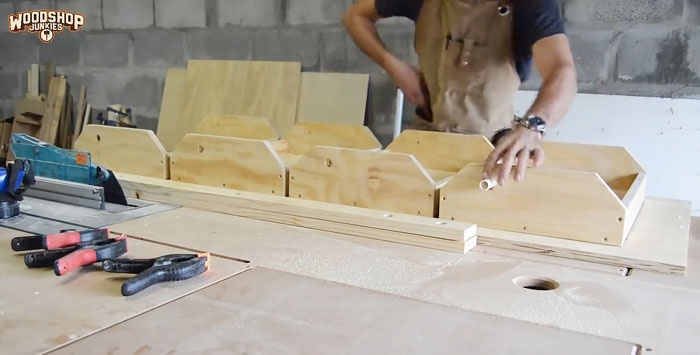
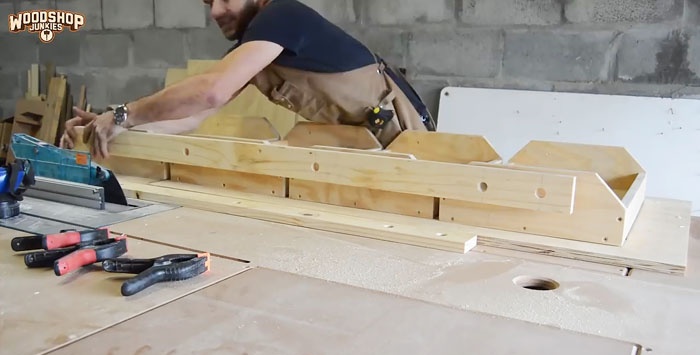
Connect the two extreme elements and check their functionality: raise and lower them. They must make all movements freely and remain in a horizontal position at all times. There are problems - fix them, everything is normal - start assembling the shelves.
At the top of the wall, fix three strong hinges and screw them to the element installed on the wall.
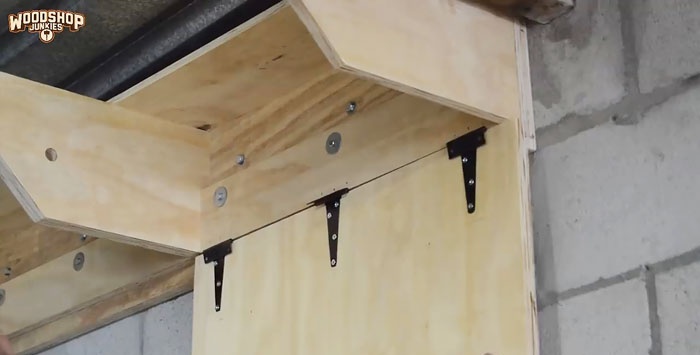
Screw the first drawer onto the hinges to the end of the bottom of the wall.
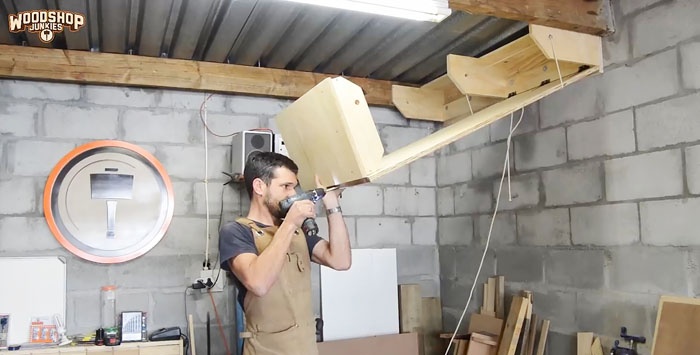
Insert plastic tubes into the holes and place two long strips on them. They are the ones that hold the drawers in an upright position when the shelf is raised to the ceiling.
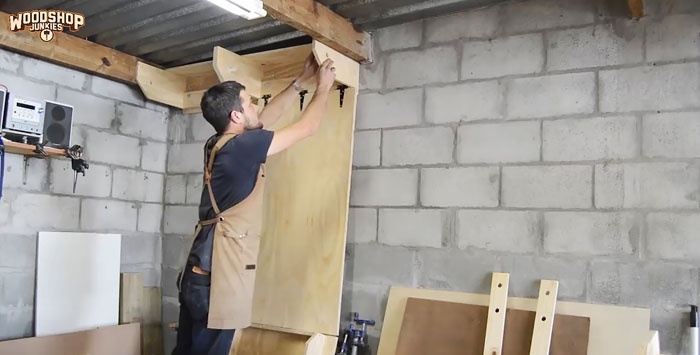
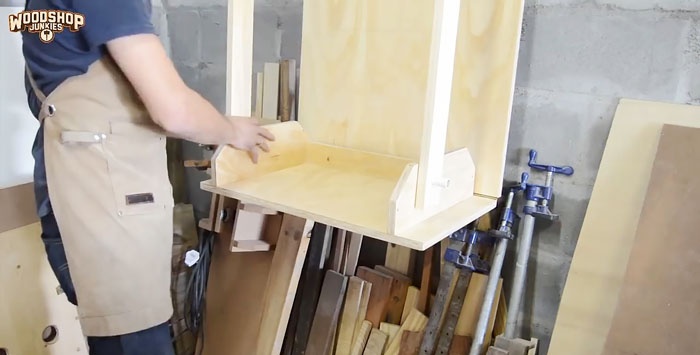
Insert all the boxes into the tubes one by one and screw them with hinges to the wall.
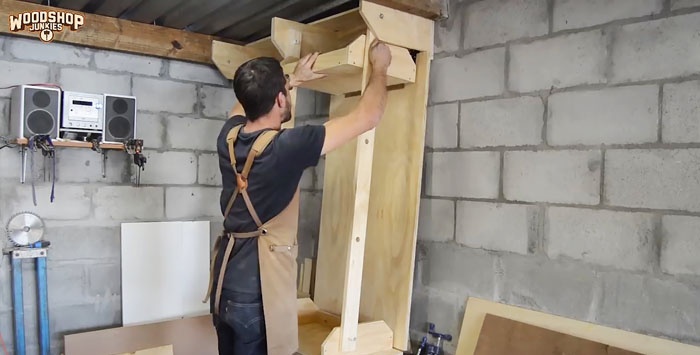
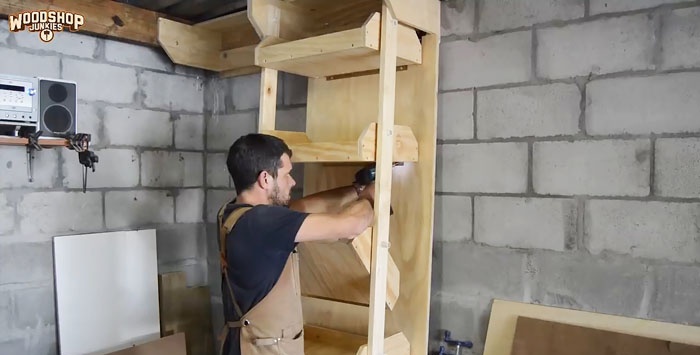
If there are doubts about the strength of plastic tubes, then you can make a wooden axis; the outer diameter must correspond to the nominal diameter of the tubes. Cut the axle into pieces of appropriate length and hammer into the tubes.
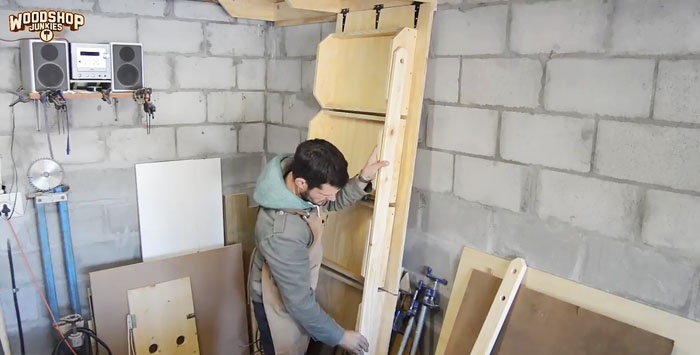
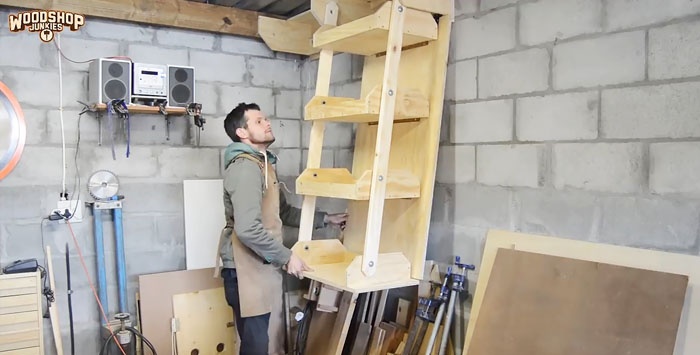
If the corners of long planks abut when lifted, then their corners must also be cut off. To improve the appearance, process on a milling machine. You can immediately increase the diameter of the holes slightly. The tubes in them should rotate freely and sit rigidly in the walls of the boxes. To reduce friction, large washers can be placed between the slats and drawers.
Drill holes in the center of each hinge and connect all the elements with countersunk bolts. This will prevent spontaneous separation of the structure.Saw off the long ends of the bolts with a hacksaw, cover the nuts with caps.
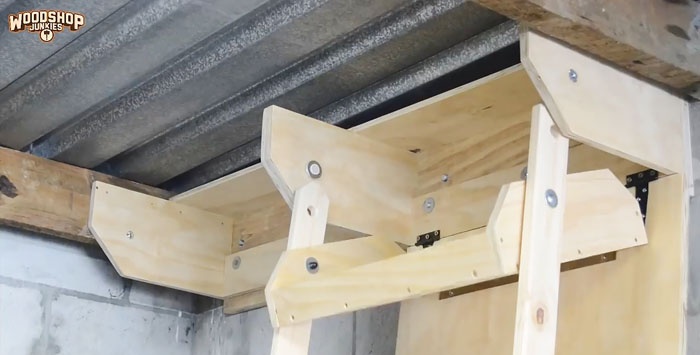
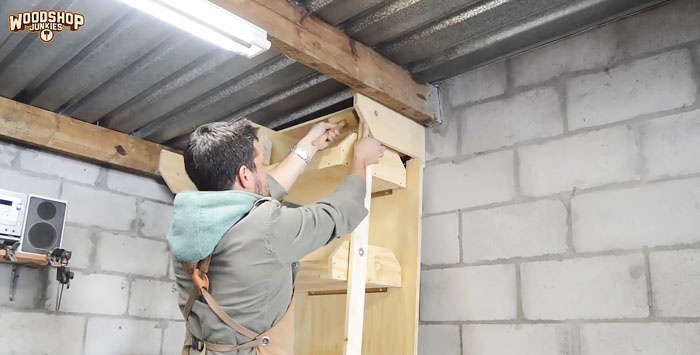
Check functionality. Everything is in order - using the same scheme, attach the long slats to the shelf part installed on the wall, tighten with bolts.
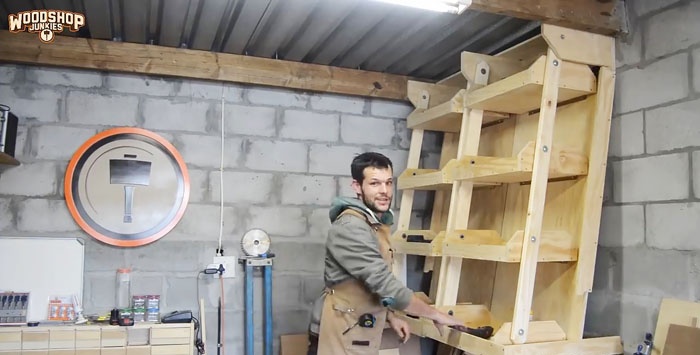
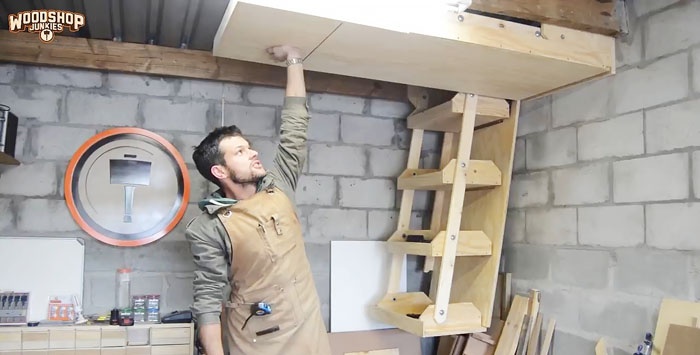
To facilitate lifting the structure, gas lifts or springs can be installed. Using the same technology, you can make a second, third, etc. shelf.
It is recommended to nail two stops to the bottom; they will support the structure at the selected angle, which will facilitate access to the drawers and improve the design of the room.
This completes all the difficult work. All that remains is to figure out how to fix the shelf in the raised position. But first you need to make a wooden frame and nail it securely to the floor beams.
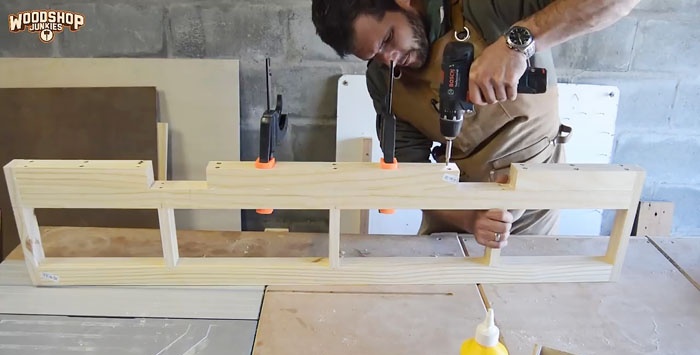
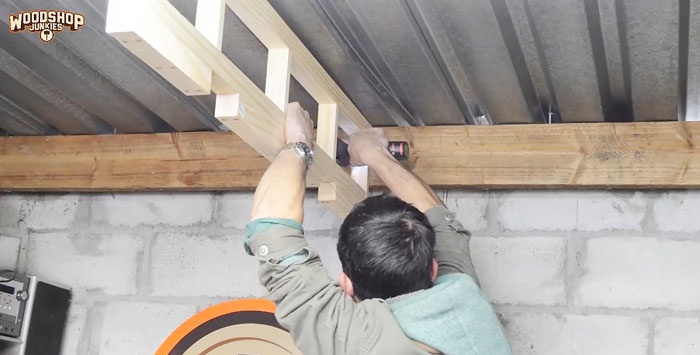
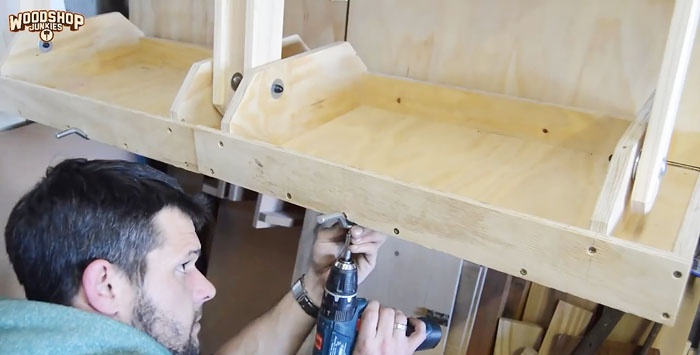
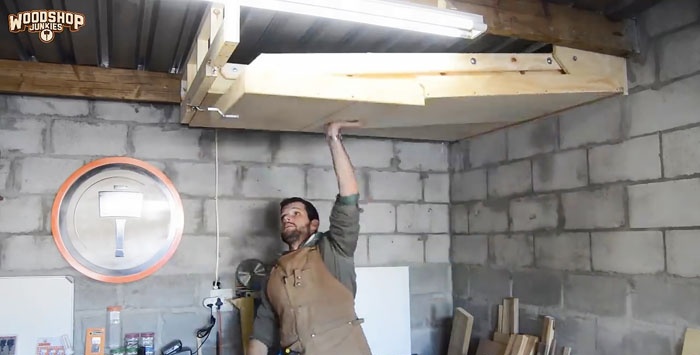
Automatic latches are then secured to the shelves and frame. The shelf is held in the raised position; to lower it, you need to move the latches. There are many options, choose the one that is simplest and most convenient for you.
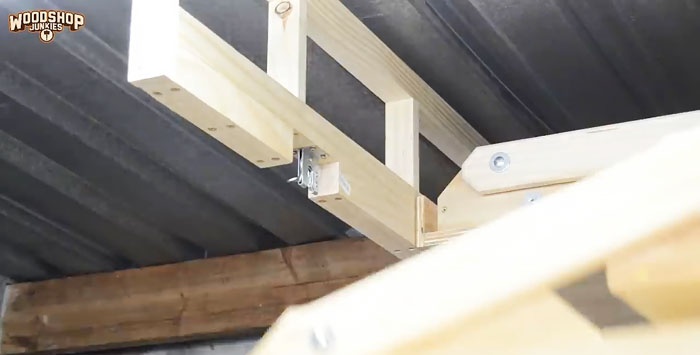
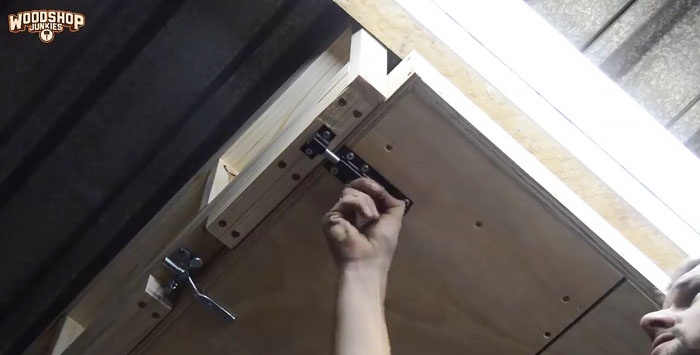
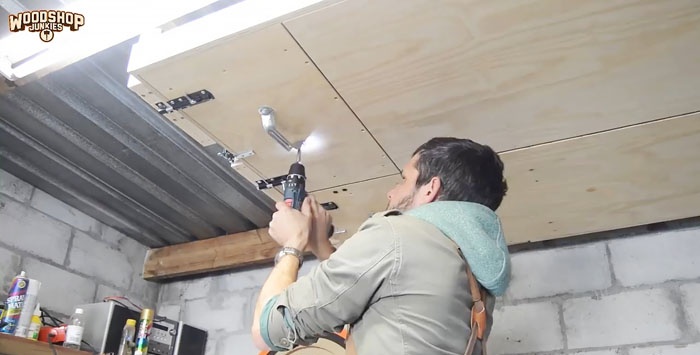
The shelf is very convenient, and in terms of complexity it falls into the category of simple products. Dimensions vary depending on the specific features of the structure, do not be afraid to make your own decisions. To improve the appearance of the surface, you can cover it with stain or any wood paint.
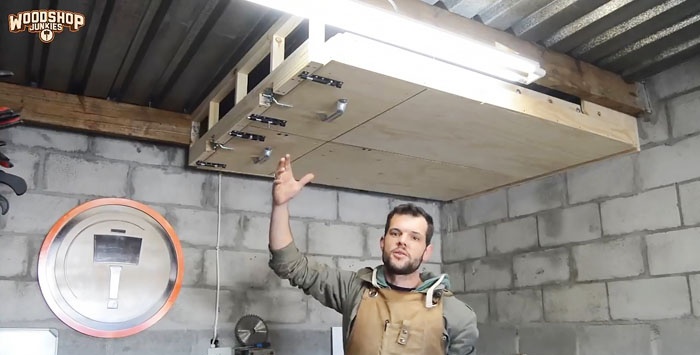
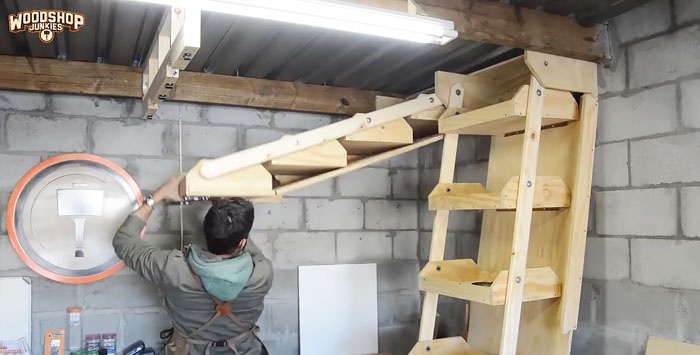
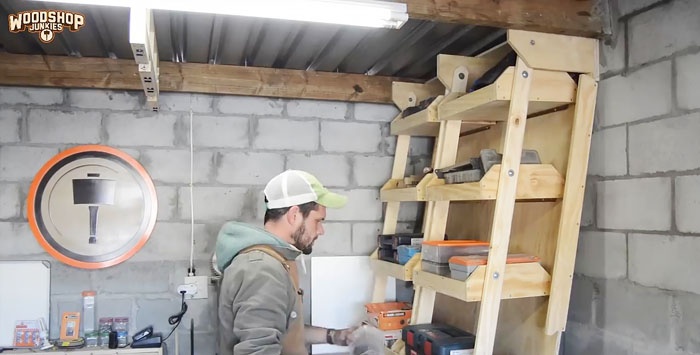

Required materials and tools
For manufacturing you need a circular saw, you can use a hand saw or an electric jigsaw. You need a drilling machine, a drill, a set of drills, wood glue and a set of hardware for fixing the elements. Such shelves are mounted in unheated rooms, the dimensions are consistent with the pitch and width of the rafter beams.
Shelf manufacturing process
Draw a sketch of the shelf detailing each element. You will need a few details.
1. Base. The length is equal to the height from the ceiling to the floor.
2. Bottoms and sides of drawers.Dimensions are selected taking into account the expected number of tools and spare parts. The distance between the shelves is approximately 30 cm, the amount is a multiple of the height of the shelf. In our case, 8 boxes will be installed.
3. Details of the stop fixed to the wall. In our case there will be two rows of boxes, we must keep this in mind when drawing up the sketch.
4. Partitions, turning bars, etc.
The number and nomenclature of elements may change taking into account the model you personally come up with.
First stage

Work begins with the manufacture of part of the shelves fixed to the wall. Using a circular saw, cut a large sheet into pieces and prepare all structural elements.

Cut off part of the sheet, it will be firmly nailed to the wall, cut out six elements to fix the three load-bearing brackets. Our plywood is thin; it will be glued together in the future to increase the strength of the parts. Accordingly, not three, but six parts are required.
Drill holes in them for the rolling axis, cut off the corners that will interfere with lifting. Holes are made in all parts; after gluing, their depth doubles. Before drilling, the parts are firmly fixed, in this way coaxiality is achieved.


Due to the fact that the shelves are movable, one corner must be cut so that it does not touch the base while lifting the structure. The boxes are fixed with special elements that, when lifted, constantly hold them in a horizontal position. If you do not remove the corners, they will rest against the wall of the shelf and the device will not function. You can cut along a radius or a straight line, it doesn’t matter. The main condition is to ensure free rotation.
Proceed to assembling the blanks into a single structure.First, attach two strips to the shield, and then fix the sides. It must be secured with dowels and self-tapping screws, and special carpentry fixed nuts must be inserted into the holes of the axles. Attach the assembled part to the wall; use a level to maintain horizontality. It should be fixed very firmly with dowels, check the reliability. The part must support your weight; it holds the entire structure.


Second phase

Start sawing the parts for the pivoting drawers, but you need to remove two corners of the sides. The side walls will be double, accordingly, it is necessary to double the number of blanks.
Assembly is done according to the method described above; you can only use self-tapping screws, but then it is recommended to increase their number.
The finished boxes will then be attached to the back panel of the shelf and will be able to constantly maintain a horizontal position when it is lifted. This effect is achieved by the peculiarities of their fixation.
The back side of the drawers is attached to the back wall with piano hinges or any other hinges; they create a movable fulcrum. On the opposite side of the box there is a through hole for the second rotation axis.
Use a sander to sand the surfaces of the drawers and attach the hinges to the bottom.
Prepare long planks. They will be located on the sides of the drawers and fixed to them with hinges. The length of the slats is equal to the length of the back wall.

Drill holes for the hinges. In our case, a plastic pipe is used as a hinge; the same holes should be prepared. The location of the holes depends on the distance between the boxes.
Attach the hinges of the drawers to the wall, place them evenly and in such a way that they do not touch each other when turning.

Insert pieces of plastic pipe into the holes; they serve as hinges perfectly. The length of the pipe is equal to the total thickness of the walls of the boxes and long slats.


Connect the two extreme elements and check their functionality: raise and lower them. They must make all movements freely and remain in a horizontal position at all times. There are problems - fix them, everything is normal - start assembling the shelves.
Assembly
At the top of the wall, fix three strong hinges and screw them to the element installed on the wall.

Screw the first drawer onto the hinges to the end of the bottom of the wall.

Insert plastic tubes into the holes and place two long strips on them. They are the ones that hold the drawers in an upright position when the shelf is raised to the ceiling.


Insert all the boxes into the tubes one by one and screw them with hinges to the wall.


If there are doubts about the strength of plastic tubes, then you can make a wooden axis; the outer diameter must correspond to the nominal diameter of the tubes. Cut the axle into pieces of appropriate length and hammer into the tubes.


If the corners of long planks abut when lifted, then their corners must also be cut off. To improve the appearance, process on a milling machine. You can immediately increase the diameter of the holes slightly. The tubes in them should rotate freely and sit rigidly in the walls of the boxes. To reduce friction, large washers can be placed between the slats and drawers.
Drill holes in the center of each hinge and connect all the elements with countersunk bolts. This will prevent spontaneous separation of the structure.Saw off the long ends of the bolts with a hacksaw, cover the nuts with caps.


Check functionality. Everything is in order - using the same scheme, attach the long slats to the shelf part installed on the wall, tighten with bolts.


To facilitate lifting the structure, gas lifts or springs can be installed. Using the same technology, you can make a second, third, etc. shelf.
It is recommended to nail two stops to the bottom; they will support the structure at the selected angle, which will facilitate access to the drawers and improve the design of the room.
This completes all the difficult work. All that remains is to figure out how to fix the shelf in the raised position. But first you need to make a wooden frame and nail it securely to the floor beams.


Automatic latches are then secured to the shelves and frame. The shelf is held in the raised position; to lower it, you need to move the latches. There are many options, choose the one that is simplest and most convenient for you.


Conclusion
The shelf is very convenient, and in terms of complexity it falls into the category of simple products. Dimensions vary depending on the specific features of the structure, do not be afraid to make your own decisions. To improve the appearance of the surface, you can cover it with stain or any wood paint.


Watch the video
Similar master classes
Particularly interesting
Comments (0)

