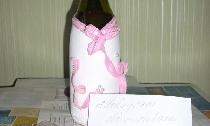
Decorative bottle “Memories of the Sea”
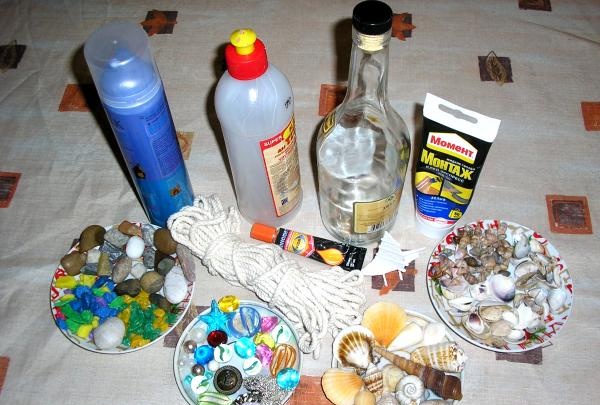
Necessary materials:
When we come from a vacation from warm regions, we almost always bring with us shells, pebbles, corals, etc. I suggest making a decorative bottle from them that will remind you of your vacation. If you choose a bottle with a cork, then you can pour gifts brought from vacation into it for storage, and you can also give it to loved ones.
1. Prepare all necessary materials. Wash and dry the bottle.
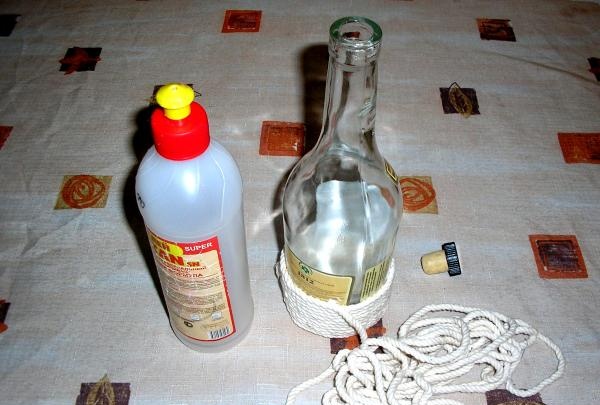
2. We begin gluing the cord from the bottom of the bottle. Apply Titan glue to the bottle in a circle in a narrow strip (about 2-3 cm) and glue the cord, laying it tightly turn by turn. Periodically it is necessary to check the horizontality of the turns, avoiding waviness; the further you go, the more difficult the alignment will be.
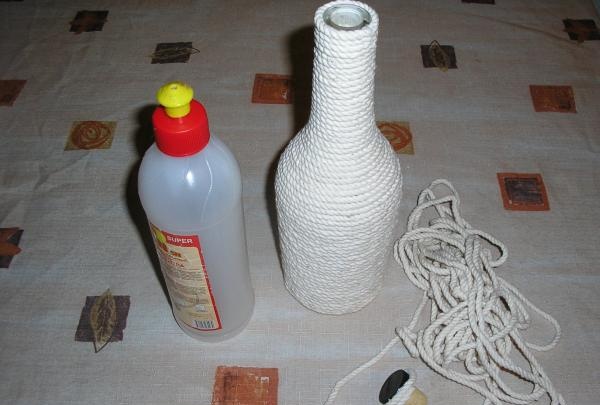
3.After the entire bottle is covered with cord, it is necessary to wrap the lid, laying the cord on the glue, starting from the side surface, gradually moving to the top, completely covering the top of the lid with the cord, securing it in the center.
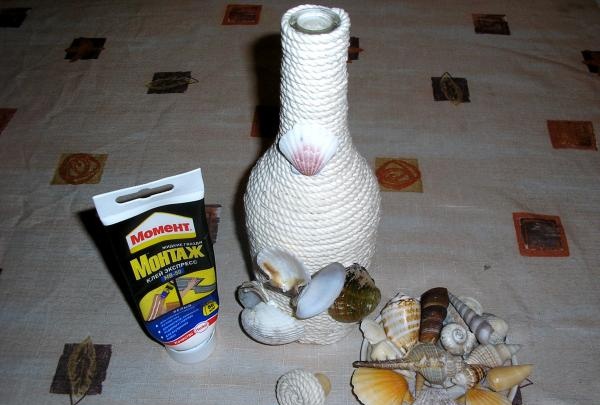
4.Now let's start decorating the bottle. We determine the area that will be decorated and outline a rough drawing. For fastening we use transparent Moment Montazh glue (you can also use a glue gun, but in this case it will not be possible to move the shells to a better place). First, glue on large shells and stones. It is better to attach larger shells and pebbles at the bottom of the bottle. After this, you need to wait a while for the glue to harden (20 minutes).
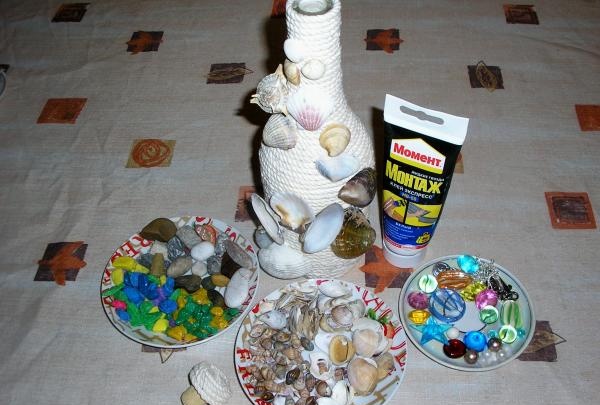
5. Next, we begin to fill the remaining space with small pebbles, shells, and corals. Again we wait about 20 minutes. We carefully look at where there are empty spaces or irregularities, glue on more small shells, you can also use fragments of shells, they also look nice for decorative purposes. When you are satisfied with the picture in front of you, you can start decorating with coins, colored pieces of glass, beads, chains, and you can also use multi-colored aquarium soil. But we must keep in mind that the main “actors” in our decor should be marine “finds”; the amount of colored decor should be minimal.
6. But I tied the cord separately around the neck of the bottle, wrapped it three times, and tied knots at the ends so that it would not unravel. I also attached a crab, some artificial seaweed, and pieces of coral.
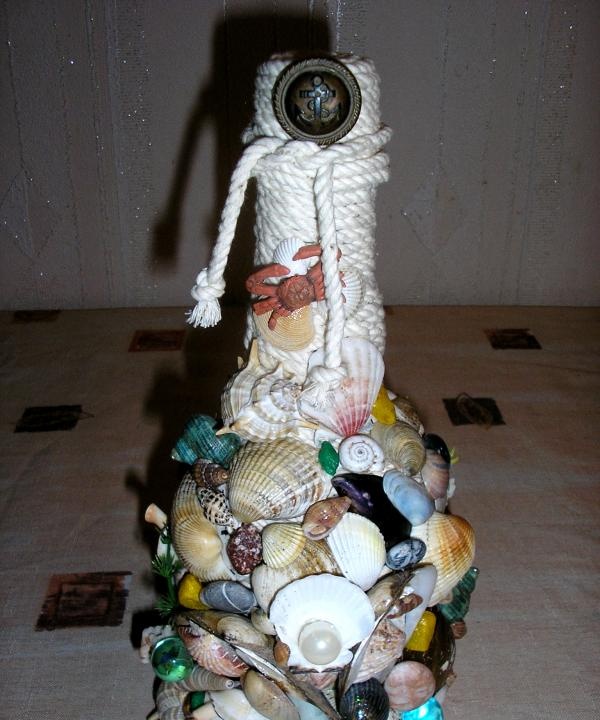
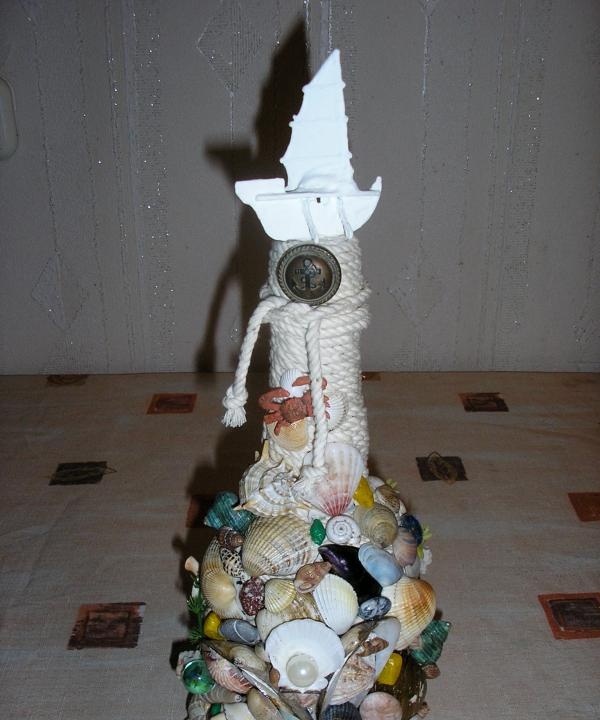
After the bottle is decorated, you can decorate the cap. I used a nautical style button (with an anchor design), maybe you have a small anchor available.On top you can attach a figurine of a sailboat or whatever you want in a nautical style. We close the bottle with a lid and admire the result.
- Beautifully shaped bottle.
- White linen cord.
- Decorative materials (beads, colored glass, chains, marine-style buttons, coins, marine-themed figurines, artificial seaweed).
- Natural material (colorful sea pebbles, aquarium soil, large and small shells, corals).
- Glue (“Titanium”, “Moment Montazh” transparent).
When we come from a vacation from warm regions, we almost always bring with us shells, pebbles, corals, etc. I suggest making a decorative bottle from them that will remind you of your vacation. If you choose a bottle with a cork, then you can pour gifts brought from vacation into it for storage, and you can also give it to loved ones.
1. Prepare all necessary materials. Wash and dry the bottle.

2. We begin gluing the cord from the bottom of the bottle. Apply Titan glue to the bottle in a circle in a narrow strip (about 2-3 cm) and glue the cord, laying it tightly turn by turn. Periodically it is necessary to check the horizontality of the turns, avoiding waviness; the further you go, the more difficult the alignment will be.

3.After the entire bottle is covered with cord, it is necessary to wrap the lid, laying the cord on the glue, starting from the side surface, gradually moving to the top, completely covering the top of the lid with the cord, securing it in the center.

4.Now let's start decorating the bottle. We determine the area that will be decorated and outline a rough drawing. For fastening we use transparent Moment Montazh glue (you can also use a glue gun, but in this case it will not be possible to move the shells to a better place). First, glue on large shells and stones. It is better to attach larger shells and pebbles at the bottom of the bottle. After this, you need to wait a while for the glue to harden (20 minutes).

5. Next, we begin to fill the remaining space with small pebbles, shells, and corals. Again we wait about 20 minutes. We carefully look at where there are empty spaces or irregularities, glue on more small shells, you can also use fragments of shells, they also look nice for decorative purposes. When you are satisfied with the picture in front of you, you can start decorating with coins, colored pieces of glass, beads, chains, and you can also use multi-colored aquarium soil. But we must keep in mind that the main “actors” in our decor should be marine “finds”; the amount of colored decor should be minimal.

6. But I tied the cord separately around the neck of the bottle, wrapped it three times, and tied knots at the ends so that it would not unravel. I also attached a crab, some artificial seaweed, and pieces of coral.

After the bottle is decorated, you can decorate the cap. I used a nautical style button (with an anchor design), maybe you have a small anchor available.On top you can attach a figurine of a sailboat or whatever you want in a nautical style. We close the bottle with a lid and admire the result.

Similar master classes
Particularly interesting
Comments (0)


