Felt hat
The small women's hat was born thanks to the ancient Egyptians. It just so happened that it was they who first began to decorate their heads with something like a modern headdress. Only kings and queens could wear it, so it is not surprising that it was richly decorated with gold, pearls and precious stones. The royal headdress was a true work of art, which, however, had a serious drawback - too much weight.
Modern headdresses are quite light, but no less beautiful and amazing things. So, a small felt hat is a great addition to an outfit, be it a fancy dress costume, an evening dress, or an outfit for a photo shoot. It always attracts attention and makes the image more mysterious and enigmatic. You can create such a hat with your own hands. Ribbons, beads, braid, veil, rhinestones, feathers, flowers, jewelry made of polymer clay are perfect as decorations; the flight of imagination is limitless. The hat can be given any shape. The master class presented below will give you the opportunity to create an exclusive women's hat.
To make a felt hat we need:
1.A sheet of felt (the denser it is, the better it holds its shape).
2. Threads (it’s not at all necessary to match the tone; in the process they will hide behind the decor, but you shouldn’t take highly contrasting ones either).
3. A needle (it’s better to take a small and thin one, it will be easier for it to sew tiny details of the hat).
4. Two flat round objects for the template (a CD is perfect for the brim of the cap and, in our case, a magnet for the bottom).
5. Scissors (the sharper they are, the smoother the details of the hat will be).
6. Measuring tape.
7. Chalk.
8. Jewelry for decoration (veil, feathers, semi-pearls, etc.).
The preparation is over, now the manufacturing process itself.
On a piece of felt we sketch out the future fields, bottom and crown with chalk.
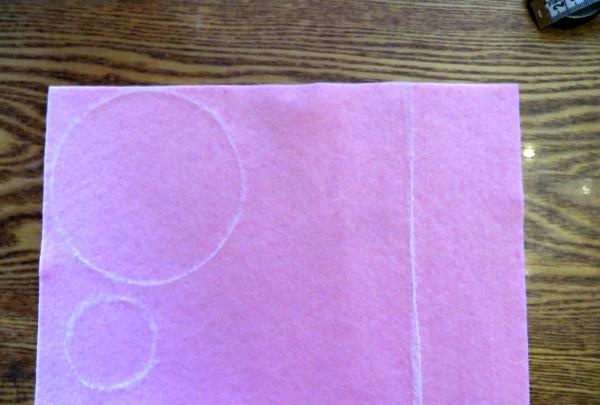
Carefully cut out and shake off the chalk; in the future this opportunity will not arise.
We sew the crown to the bottom of the hat, grabbing the top layer of felt. Thus, the seams will be practically invisible.
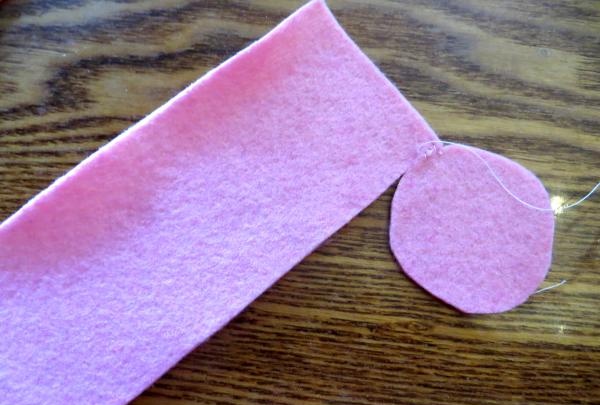
We turn it right side out, hiding the seams inside.
We sew a lace ribbon along the lower edge of the crown.
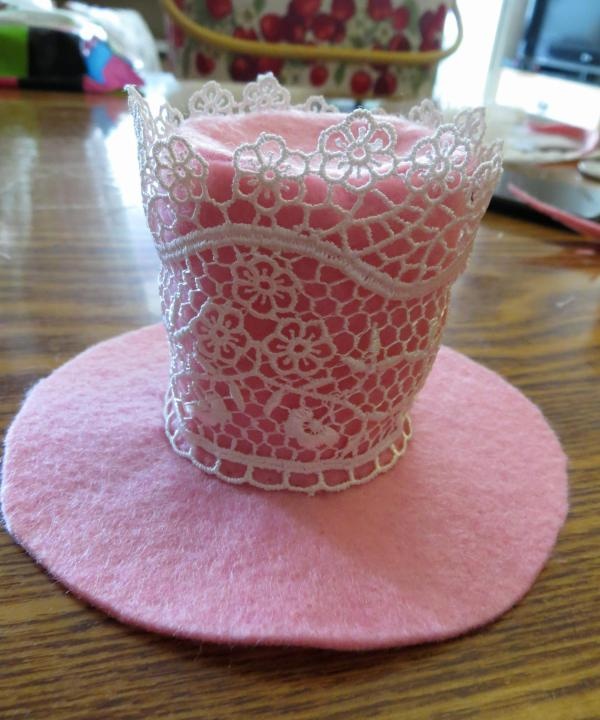
The higher it is, the better it will hide the seam of the crown and bottom. The top seam can be decorated with a satin ribbon, placing it on glue. In our case, it is hidden by a lace ribbon, so there is no need to overload the hat with decor.
We sew on the brim of the hat, also capturing the top layer of felt.
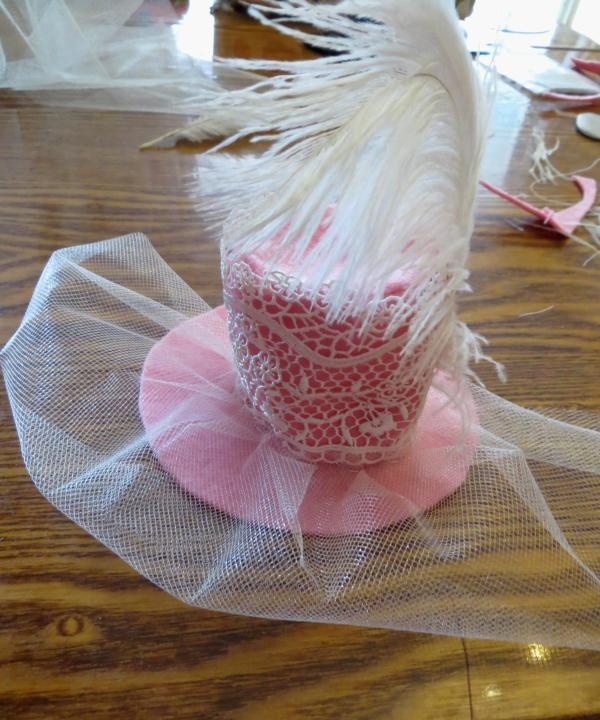
The seam, again, can be hidden behind decor (ribbon, rhinestones, buttons, etc.).
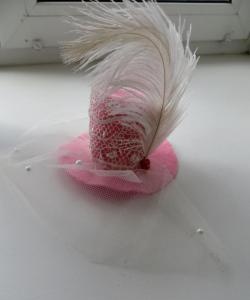
Folding the veil like an accordion and leaving about 1 cm on the fold, sew it to the base of the crown.
We mask the seam of the lace ribbon on the side using a feather, sewing it to the hat.
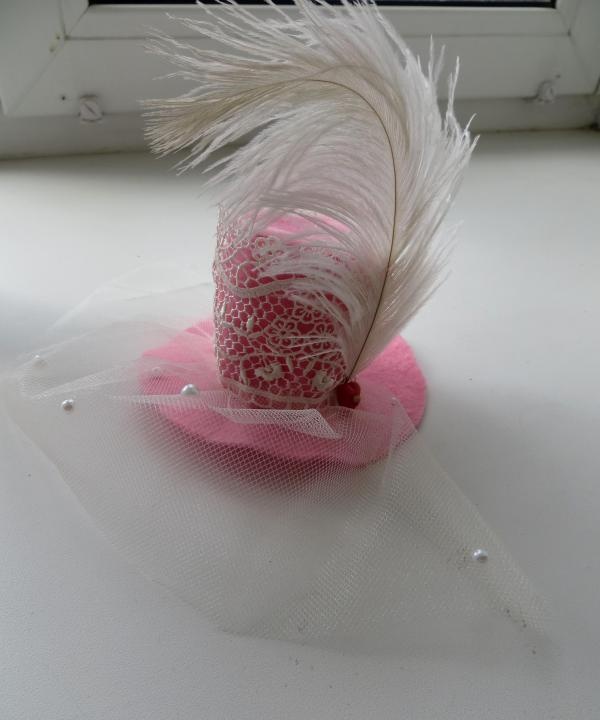
Then we begin to fantasize, decorating the finished hat in every possible way. We glue a figurine to the edge of the feather, and artificial semi-pearls on the veil and cap.
You can sew a bobby pin, clip or hoop to the base of the finished hat.This is how you can get a unique addition to your outfit by spending just an hour.
Modern headdresses are quite light, but no less beautiful and amazing things. So, a small felt hat is a great addition to an outfit, be it a fancy dress costume, an evening dress, or an outfit for a photo shoot. It always attracts attention and makes the image more mysterious and enigmatic. You can create such a hat with your own hands. Ribbons, beads, braid, veil, rhinestones, feathers, flowers, jewelry made of polymer clay are perfect as decorations; the flight of imagination is limitless. The hat can be given any shape. The master class presented below will give you the opportunity to create an exclusive women's hat.
To make a felt hat we need:
1.A sheet of felt (the denser it is, the better it holds its shape).
2. Threads (it’s not at all necessary to match the tone; in the process they will hide behind the decor, but you shouldn’t take highly contrasting ones either).
3. A needle (it’s better to take a small and thin one, it will be easier for it to sew tiny details of the hat).
4. Two flat round objects for the template (a CD is perfect for the brim of the cap and, in our case, a magnet for the bottom).
5. Scissors (the sharper they are, the smoother the details of the hat will be).
6. Measuring tape.
7. Chalk.
8. Jewelry for decoration (veil, feathers, semi-pearls, etc.).
The preparation is over, now the manufacturing process itself.
On a piece of felt we sketch out the future fields, bottom and crown with chalk.

Carefully cut out and shake off the chalk; in the future this opportunity will not arise.
We sew the crown to the bottom of the hat, grabbing the top layer of felt. Thus, the seams will be practically invisible.

We turn it right side out, hiding the seams inside.
We sew a lace ribbon along the lower edge of the crown.

The higher it is, the better it will hide the seam of the crown and bottom. The top seam can be decorated with a satin ribbon, placing it on glue. In our case, it is hidden by a lace ribbon, so there is no need to overload the hat with decor.
We sew on the brim of the hat, also capturing the top layer of felt.

The seam, again, can be hidden behind decor (ribbon, rhinestones, buttons, etc.).
Folding the veil like an accordion and leaving about 1 cm on the fold, sew it to the base of the crown.
We mask the seam of the lace ribbon on the side using a feather, sewing it to the hat.

Then we begin to fantasize, decorating the finished hat in every possible way. We glue a figurine to the edge of the feather, and artificial semi-pearls on the veil and cap.
You can sew a bobby pin, clip or hoop to the base of the finished hat.This is how you can get a unique addition to your outfit by spending just an hour.
Similar master classes
Particularly interesting
Comments (0)

