Decorating a fence with cement decorations
You can easily give your old cement fence a uniqueness and beauty that sets it apart from dozens of plain, gray fences. To do this, you only need half a bucket of cement mortar and a little imagination. All work on decorating a fence with cement decoration is divided into five stages.
• Select a picture.
• Wall preparation.
• Mixing the solution.
• Sketch.
• Execution of scenery.
Selecting a picture.
The Internet or your own imagination will help you decide on a suitable design. This could be a bunch of grapes, leaves, flowers, etc. The main thing is that the drawing does not contain small details. It will be more difficult to create such a decoration, and it will look worse than a simple one.
Preparing the wall.
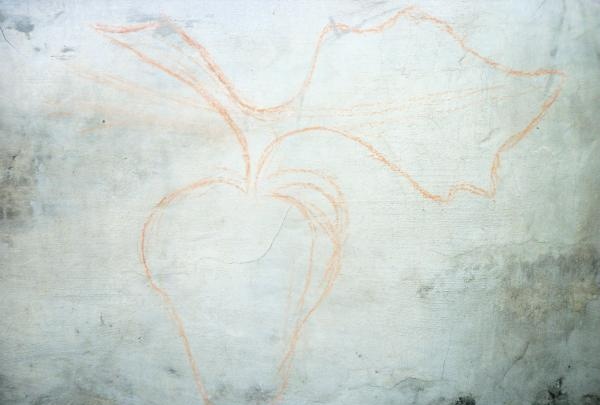
Having decided on the pattern and its location on the wall, we draw its approximate contours.
Next, at this stage you need to ensure a good connection between the future decoration and the fence. To do this, you need to make shallow cuts at the site of the future decoration using a grinder or some sharp object.
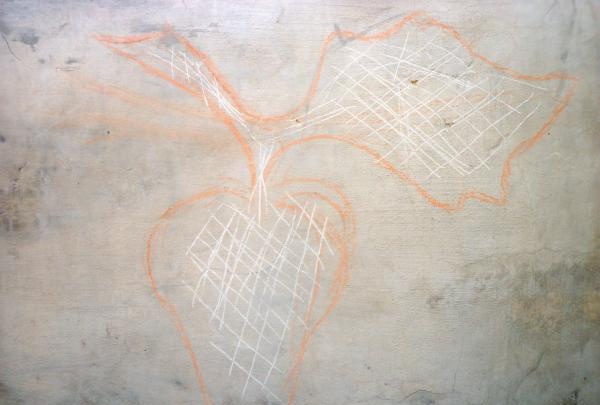
Such procedures will ensure the strength of the connection and will prevent the fake from detaching and falling in the future.
Mixing the solution.
To make the decoration, you need a regular solution of sand, cement and water. Three to four parts of sand need to be moved with one part of cement. Pour water into the resulting mixture and mix it all thoroughly. Water must be added until there are no dry lumps left in the solution.
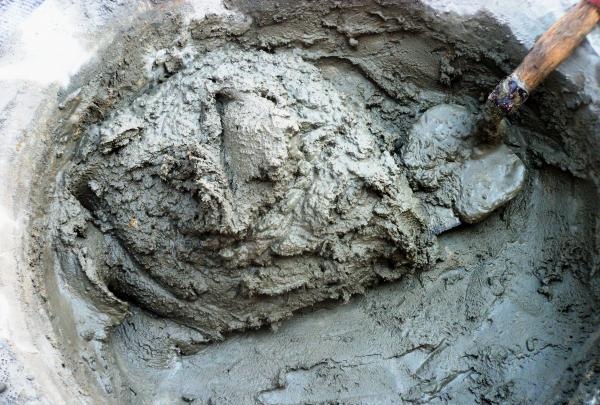
But do not overdo it - it is difficult to work with a very liquid solution. You can add a drop of detergent to the finished mixture. This will make the solution more elastic, it will not “shrink” quickly.
Sketch.
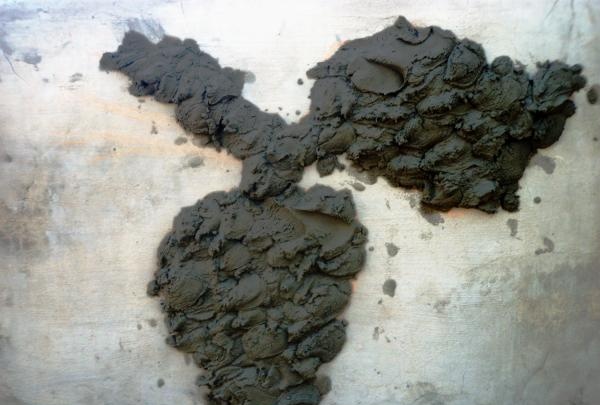
The prepared solution should be applied with a trowel to the site of the future decoration in a thin layer (1.5 - 3 cm). In order for the solution to adhere well and not fall off, the throws must be sharp and clear. You shouldn’t press the “cakes” that are poorly stuck to the fence with a trowel - it’s better to tear them off and throw them again. There is also no need to smooth the cakes.
Execution of decoration.
After sketching the solution, you need to give it a little time to “set.” And after ten to fifteen minutes you can start painting. Using a twig, the required design or pattern is scraped out, and excess cement is removed.
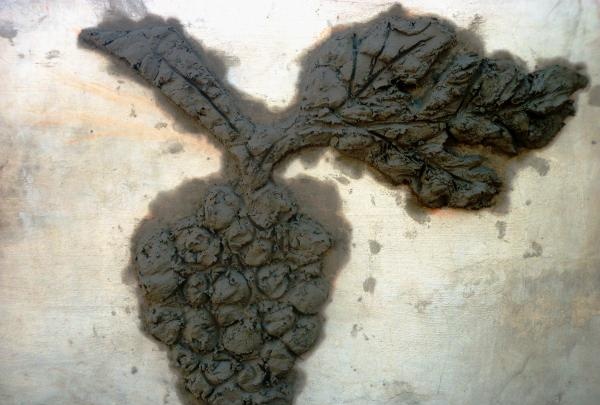
Next, using a regular paint brush, periodically wetting it in water, smoothes out all the sharpness and roughness of the decoration. If necessary, you can use a foam grater, which is very convenient for smoothing surfaces.
That's it, the decoration is ready!
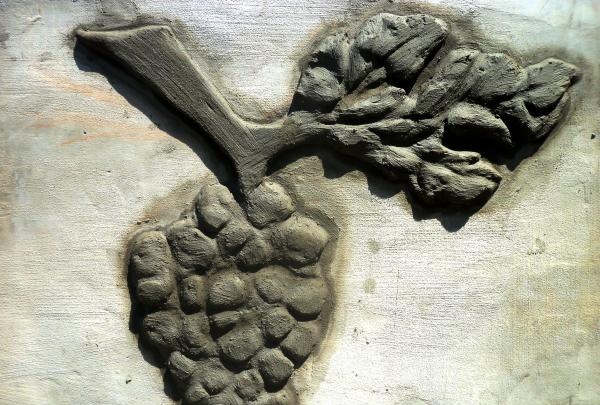
After the decoration has dried, you can paint it either with pure cement dissolved in water, or with added colored pigment. This will give the product a unique touch. It is possible to paint your work of art with ordinary paints, but it is not advisable, since simple paint can fade and peel over time.
Brick patterns on fences are also made in a similar way.
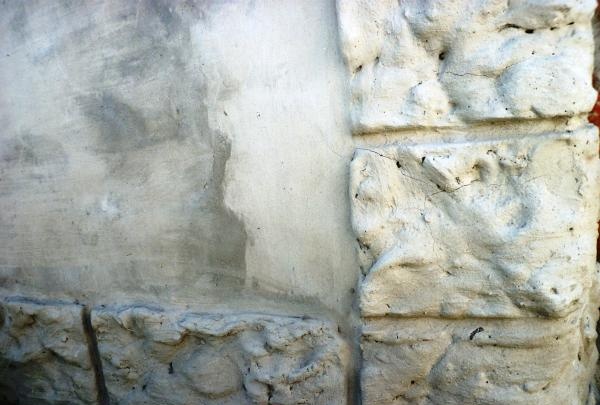
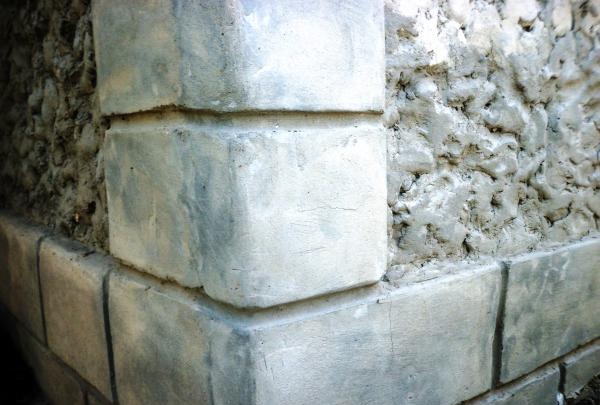
Only here you don’t have to be an artist at all - all the lines are marked using a level and a tape measure.
This is how you can easily and simply give a second wind and new freshness to an old, gray cement fence!
• Select a picture.
• Wall preparation.
• Mixing the solution.
• Sketch.
• Execution of scenery.
Selecting a picture.
The Internet or your own imagination will help you decide on a suitable design. This could be a bunch of grapes, leaves, flowers, etc. The main thing is that the drawing does not contain small details. It will be more difficult to create such a decoration, and it will look worse than a simple one.
Preparing the wall.
Having decided on the pattern and its location on the wall, we draw its approximate contours.

Next, at this stage you need to ensure a good connection between the future decoration and the fence. To do this, you need to make shallow cuts at the site of the future decoration using a grinder or some sharp object.

Such procedures will ensure the strength of the connection and will prevent the fake from detaching and falling in the future.
Mixing the solution.
To make the decoration, you need a regular solution of sand, cement and water. Three to four parts of sand need to be moved with one part of cement. Pour water into the resulting mixture and mix it all thoroughly. Water must be added until there are no dry lumps left in the solution.

But do not overdo it - it is difficult to work with a very liquid solution. You can add a drop of detergent to the finished mixture. This will make the solution more elastic, it will not “shrink” quickly.
Sketch.
The prepared solution should be applied with a trowel to the site of the future decoration in a thin layer (1.5 - 3 cm). In order for the solution to adhere well and not fall off, the throws must be sharp and clear. You shouldn’t press the “cakes” that are poorly stuck to the fence with a trowel - it’s better to tear them off and throw them again. There is also no need to smooth the cakes.

Execution of decoration.
After sketching the solution, you need to give it a little time to “set.” And after ten to fifteen minutes you can start painting. Using a twig, the required design or pattern is scraped out, and excess cement is removed.

Next, using a regular paint brush, periodically wetting it in water, smoothes out all the sharpness and roughness of the decoration. If necessary, you can use a foam grater, which is very convenient for smoothing surfaces.
That's it, the decoration is ready!

After the decoration has dried, you can paint it either with pure cement dissolved in water, or with added colored pigment. This will give the product a unique touch. It is possible to paint your work of art with ordinary paints, but it is not advisable, since simple paint can fade and peel over time.
Brick patterns on fences are also made in a similar way.


Only here you don’t have to be an artist at all - all the lines are marked using a level and a tape measure.
This is how you can easily and simply give a second wind and new freshness to an old, gray cement fence!
Similar master classes
Particularly interesting
Comments (1)


