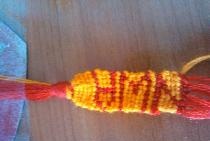
Bracelet made of felt and floss in ethno style
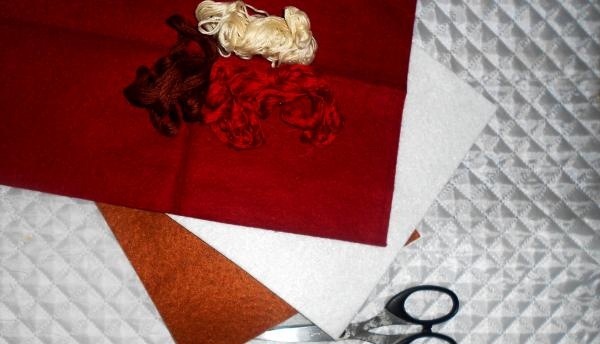
With today's variety and availability of materials for needlework, making jewelry with your own hands is not only simple, but also very exciting. For a bracelet with ethnic-style patterns, you will need multi-colored felt and floss threads. I was making a bracelet for a white tunic with red embroidery, so I chose felt in three colors - burgundy, brown and white. I picked the threads to match.
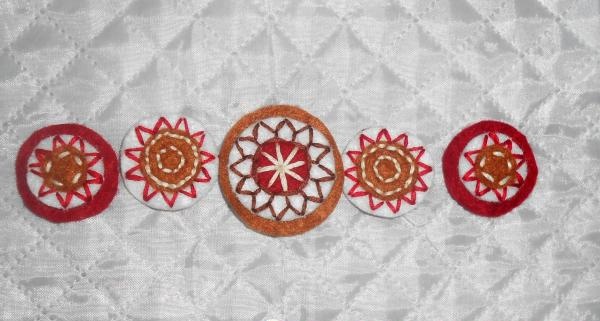
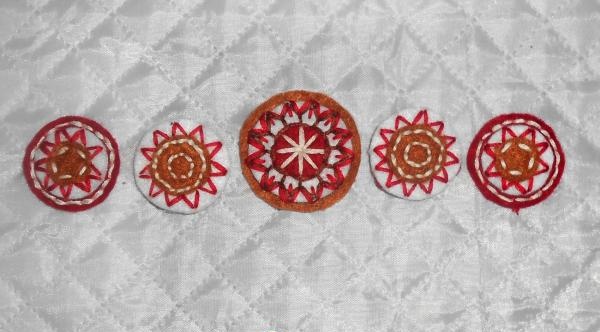
We measure the circumference of the wrist. The bracelet should not be tight, so add a few centimeters. I got 20 cm. The bracelet consists of 5 round parts and a clasp. We determine the diameter of the large circles: the central one is 4 cm, the rest are 3 cm each. The rest will go to the fastener. First we draw circle patterns on paper, and then cut them out of felt. Each part needs two, since the main circles will be double-sided and will hide all the rough seams. The bracelet will also be denser.
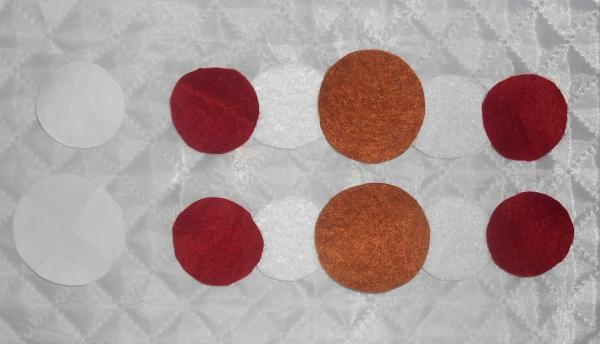
Now we define the alternation of colors. The brown circle is central, next to it are white circles, and then burgundy ones. When the base of the bracelet is ready, cut out circles for decoration with a smaller diameter.Also in different colors.
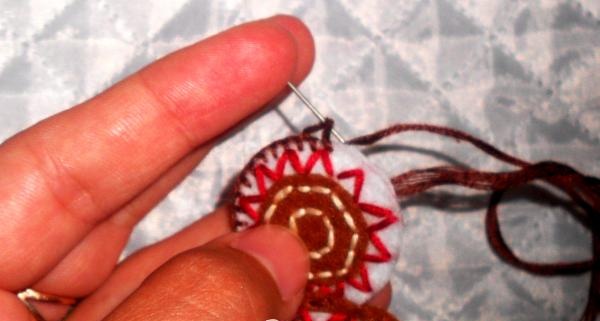
We fold the bracelet by color and you can start making the pattern. We make it with floss threads. We start with the top pieces so that the purl stitches remain inside.
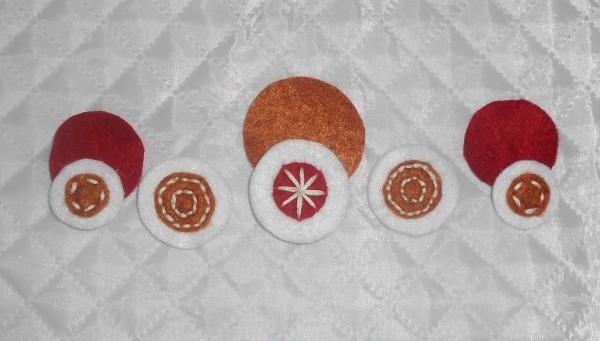
We come up with any patterns that come to mind. I mostly use stitches and zigzags.
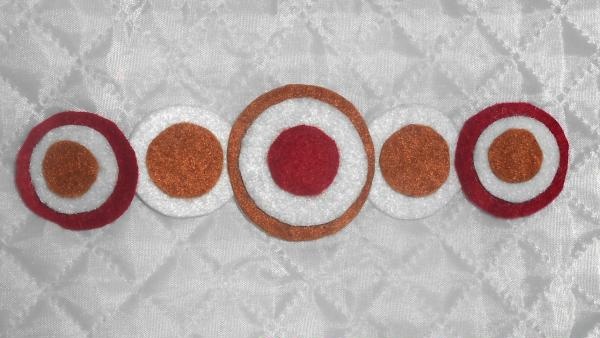
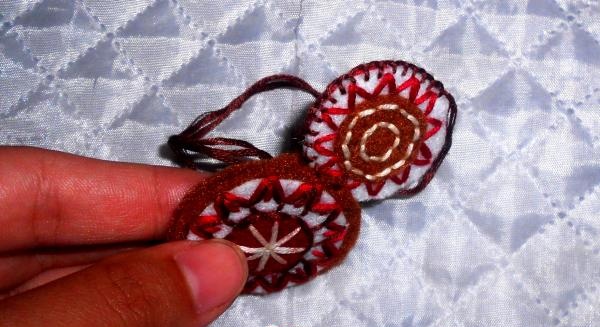
When all the patterns are finished, we begin to assemble the bracelet. First, fold two pairs of white circles and sew them together with a decorative stitch.
Brown and burgundy circles are sewn at the top and bottom, as a white circle is sewn into them on the sides.
We make the fastener as follows: cut out two identical parts from thin burgundy felt and sew them together. There is only one piece of thick white felt, so it will have a slot for a button. The burgundy part of the clasp is longer than the white part.

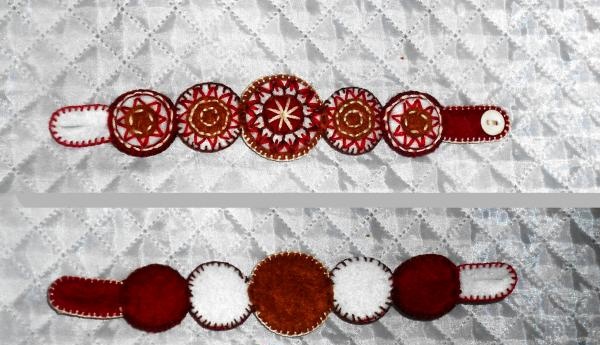
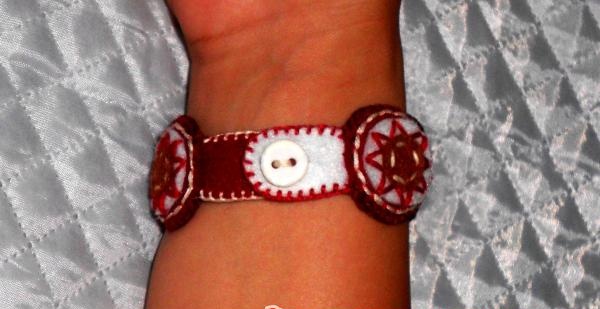
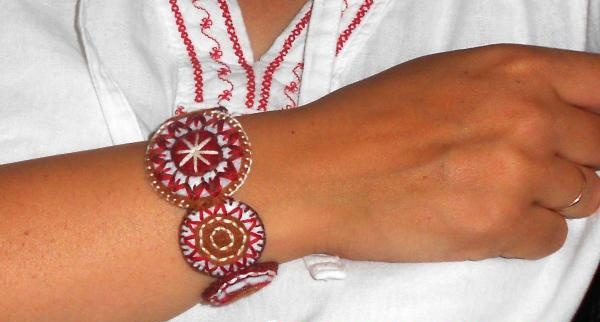
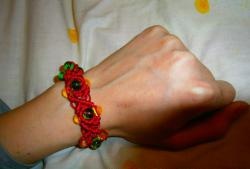
Sew on a button and make a slit. The good thing about felt is that it doesn’t fray or tear, so the button hole won’t widen. This is how the handmade bracelet turned out:
We measure the circumference of the wrist. The bracelet should not be tight, so add a few centimeters. I got 20 cm. The bracelet consists of 5 round parts and a clasp. We determine the diameter of the large circles: the central one is 4 cm, the rest are 3 cm each. The rest will go to the fastener. First we draw circle patterns on paper, and then cut them out of felt. Each part needs two, since the main circles will be double-sided and will hide all the rough seams. The bracelet will also be denser.
Now we define the alternation of colors. The brown circle is central, next to it are white circles, and then burgundy ones. When the base of the bracelet is ready, cut out circles for decoration with a smaller diameter.Also in different colors.
We fold the bracelet by color and you can start making the pattern. We make it with floss threads. We start with the top pieces so that the purl stitches remain inside.
We come up with any patterns that come to mind. I mostly use stitches and zigzags.
When all the patterns are finished, we begin to assemble the bracelet. First, fold two pairs of white circles and sew them together with a decorative stitch.
Brown and burgundy circles are sewn at the top and bottom, as a white circle is sewn into them on the sides.
We make the fastener as follows: cut out two identical parts from thin burgundy felt and sew them together. There is only one piece of thick white felt, so it will have a slot for a button. The burgundy part of the clasp is longer than the white part.
Sew on a button and make a slit. The good thing about felt is that it doesn’t fray or tear, so the button hole won’t widen. This is how the handmade bracelet turned out:
Similar master classes


Particularly interesting
Comments (0)
