Textile educational book
One of the popular topics used to create educational textile books is Russian folk tales. Simple, understandable, kind, they are easily remembered by children, becoming their most favorite fairy tales.
Before starting work, you need to think about what kind of fairy tales it will be devoted to, how many pages are planned, what will be depicted on them, how many heroes there will be, etc.
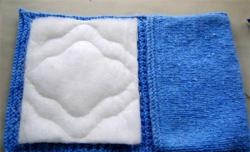
Based on this plan, you should cut out the required number of pages, as well as covers, and also a thin padding polyester as a lining in the pages so that the book turns out soft and pleasant to the touch.
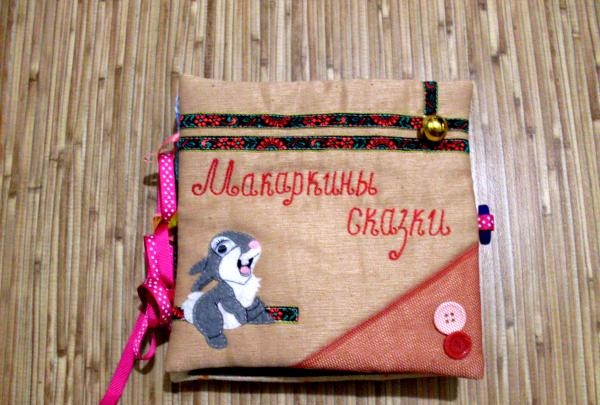
The cut out pages need to be sewn onto padding polyester. Then you should begin to draw up the details of the book. Here it is advisable to adhere to the Russian style so that the design of the book matches the theme. For example, a braid with an ethnic pattern, a combination of colors in embroidery characteristic of Russian folk costume, a special font, etc. can help with this.
When making an educational book for a specific child, you can give it his name. For example, call it “Makarka’s Fairy Tales”, since the book is being made for Makar.
An educational book should be attractive to a child from its very first cover, so it would be appropriate to place some cute children's applique here, as well as a mini-task - a finger trainer (you should move buttons sewn under the mesh from one corner of the page to another).
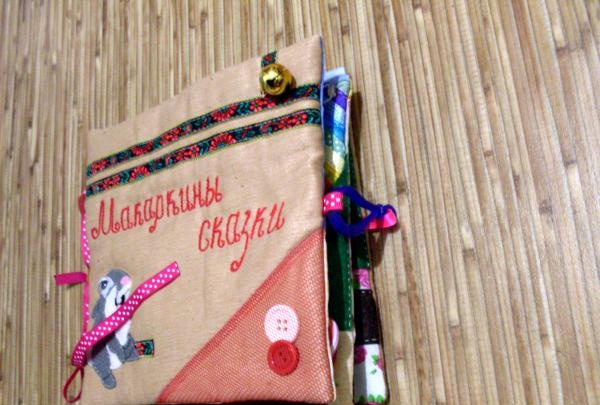
You should also think in advance about how the book being made will be fastened. This must be done immediately in order to provide the necessary allowances for processing or to prepare some elements. In general, the book can be fastened with Velcro, a carabiner, a button, a loop and a button, or tied with ribbons - it all depends on the desire of the craftswoman.
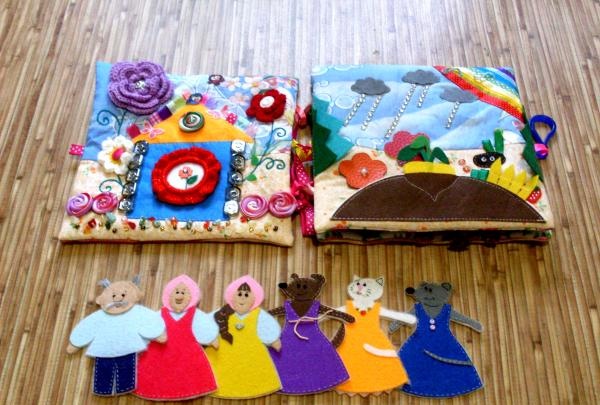
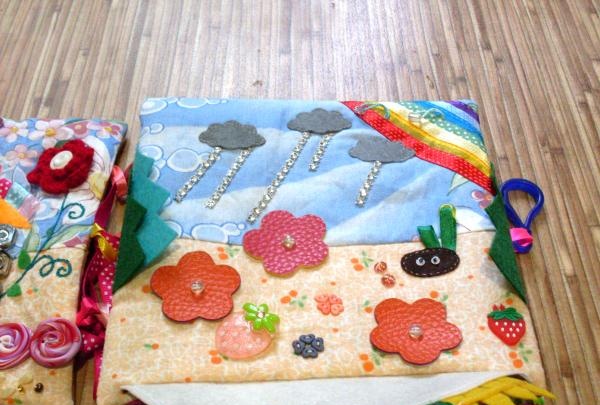
One of the most famous Russian folk tales is “Turnip”. It can be placed on 2 pages of the book at once. On one you can depict the house where the heroes of the fairy tale live, and on the other - the vegetable garden in which the turnip grew. The characters themselves should be detachable (that is, they can be held in your hands, they are not sewn to the page), and the bed with turnips can also be made half detachable, and behind it you can place a clearing with flowers and berries. It is best to make book characters from hard felt.
The turnip can also be detached and inserted into an improvised bed, like in a pocket.
Flowers in the meadow can also be removed and put on beads.
If a book is made for a very young child who wants to taste the details and elements of the book, it should be made in such a way that there are as few flying parts as possible.
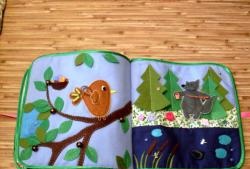
But we must not forget that even sewn elements should still be voluminous, textured, and interesting. This could be, for example, crocheted flowers, pebbles on a path, beads, felt appliqués, etc.
By telling a Russian fairy tale from a book, you can attract the child’s attention to such natural phenomena as rainbows, rain, sunny weather - the more varied and interesting the material presented on the pages, the better, the more new and interesting things the little reader will learn.
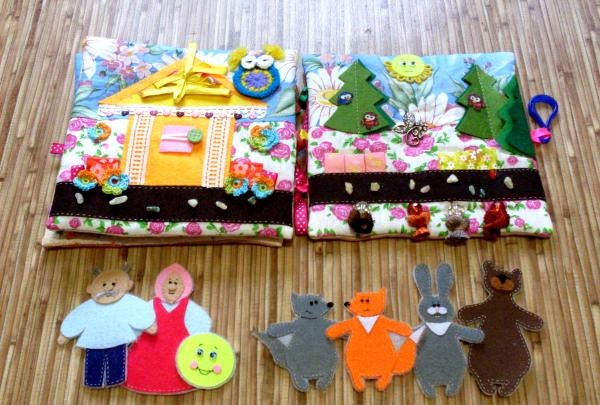
Another fairy tale that cannot be ignored is “Kolobok”. You can also devote an entire spread to her. Similar to the first fairy tale, here you can imagine the house where the woman and grandfather live, and the forest in which Kolobok met animals. In addition, you can show the path along which the main character rolled.
Quite often in Russian fairy tales the same characters are found, so it is quite possible that in the textile book being produced, the characters from one fairy tale will automatically move into another.
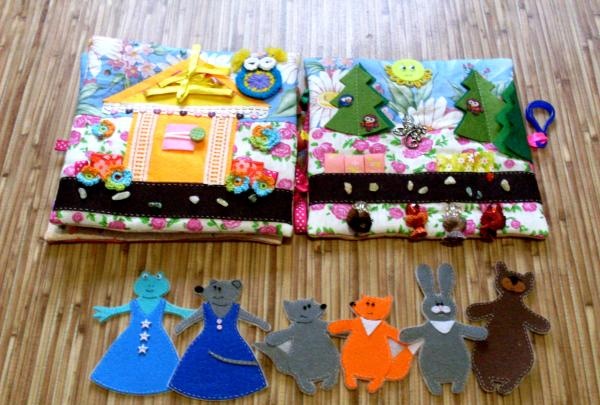
Also on the same spread you can play the fairy tale “Teremok”.
To make playing with the book more interesting, here you can also place several tasks for developing finger motor skills, for example, miniature lacing on the roof of a house, a window shutter that closes with a loop and button, etc.
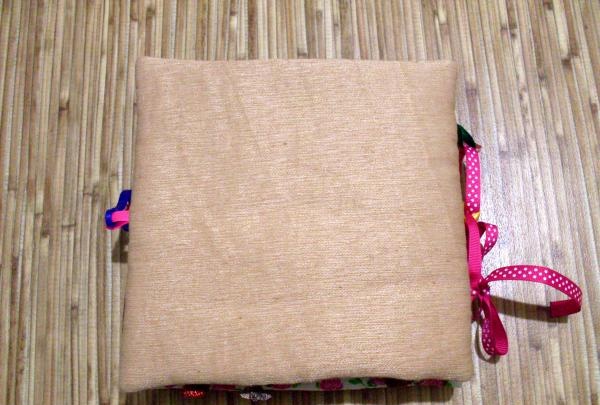
The back cover of the book can be left simple, undesigned, but, if desired, it can be made interesting by sewing on a bright applique or a small pocket for a sweet surprise or cards with riddles.
Completely decorated pages need to be sewn together in twos, folded facing inward. Then they should be turned out, ironed, and the hole for turning inside out should be carefully sewn up by hand.
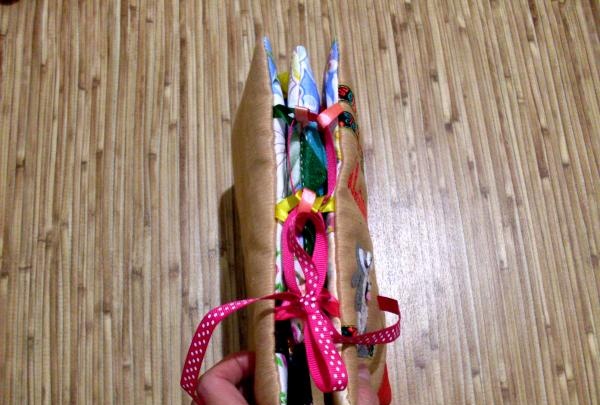
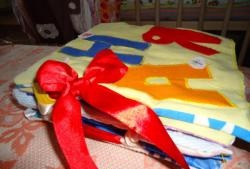
You can assemble the pages into a solid book using specially sewn loops of ribbons and a long ribbon.
The educational book is ready!

Before starting work, you need to think about what kind of fairy tales it will be devoted to, how many pages are planned, what will be depicted on them, how many heroes there will be, etc.
Based on this plan, you should cut out the required number of pages, as well as covers, and also a thin padding polyester as a lining in the pages so that the book turns out soft and pleasant to the touch.
The cut out pages need to be sewn onto padding polyester. Then you should begin to draw up the details of the book. Here it is advisable to adhere to the Russian style so that the design of the book matches the theme. For example, a braid with an ethnic pattern, a combination of colors in embroidery characteristic of Russian folk costume, a special font, etc. can help with this.
When making an educational book for a specific child, you can give it his name. For example, call it “Makarka’s Fairy Tales”, since the book is being made for Makar.
An educational book should be attractive to a child from its very first cover, so it would be appropriate to place some cute children's applique here, as well as a mini-task - a finger trainer (you should move buttons sewn under the mesh from one corner of the page to another).

You should also think in advance about how the book being made will be fastened. This must be done immediately in order to provide the necessary allowances for processing or to prepare some elements. In general, the book can be fastened with Velcro, a carabiner, a button, a loop and a button, or tied with ribbons - it all depends on the desire of the craftswoman.


One of the most famous Russian folk tales is “Turnip”. It can be placed on 2 pages of the book at once. On one you can depict the house where the heroes of the fairy tale live, and on the other - the vegetable garden in which the turnip grew. The characters themselves should be detachable (that is, they can be held in your hands, they are not sewn to the page), and the bed with turnips can also be made half detachable, and behind it you can place a clearing with flowers and berries. It is best to make book characters from hard felt.
The turnip can also be detached and inserted into an improvised bed, like in a pocket.
Flowers in the meadow can also be removed and put on beads.
If a book is made for a very young child who wants to taste the details and elements of the book, it should be made in such a way that there are as few flying parts as possible.
But we must not forget that even sewn elements should still be voluminous, textured, and interesting. This could be, for example, crocheted flowers, pebbles on a path, beads, felt appliqués, etc.
By telling a Russian fairy tale from a book, you can attract the child’s attention to such natural phenomena as rainbows, rain, sunny weather - the more varied and interesting the material presented on the pages, the better, the more new and interesting things the little reader will learn.

Another fairy tale that cannot be ignored is “Kolobok”. You can also devote an entire spread to her. Similar to the first fairy tale, here you can imagine the house where the woman and grandfather live, and the forest in which Kolobok met animals. In addition, you can show the path along which the main character rolled.
Quite often in Russian fairy tales the same characters are found, so it is quite possible that in the textile book being produced, the characters from one fairy tale will automatically move into another.

Also on the same spread you can play the fairy tale “Teremok”.
To make playing with the book more interesting, here you can also place several tasks for developing finger motor skills, for example, miniature lacing on the roof of a house, a window shutter that closes with a loop and button, etc.

The back cover of the book can be left simple, undesigned, but, if desired, it can be made interesting by sewing on a bright applique or a small pocket for a sweet surprise or cards with riddles.
Completely decorated pages need to be sewn together in twos, folded facing inward. Then they should be turned out, ironed, and the hole for turning inside out should be carefully sewn up by hand.

You can assemble the pages into a solid book using specially sewn loops of ribbons and a long ribbon.
The educational book is ready!
Similar master classes
Particularly interesting
Comments (0)

