DIY wireless mouse repair
A mouse is a device that helps the user work on a computer. If it breaks down, many users do not know how to switch from the keyboard to the required system icons. This situation leads to the end of the session and the search for service centers for repairing electronic equipment, or to the purchase of a new device. If you have such qualities as perseverance, attentiveness, and the ability to work with a tester and a soldering iron, then you can easily, based on the information provided, quickly determine the cause of the device failure and even repair it. Let's consider repairing a wireless mouse yourself.
Causes of failure.
Since the mouse is a reliable piece of equipment, in many cases the damage will be minor. It can happen due to:
1. Poor contact between the battery and the control board.
2. Failure of one of the electronic components.
3. Damage to the computer's USB port.
Identification of the cause of the malfunction and methods for its elimination.
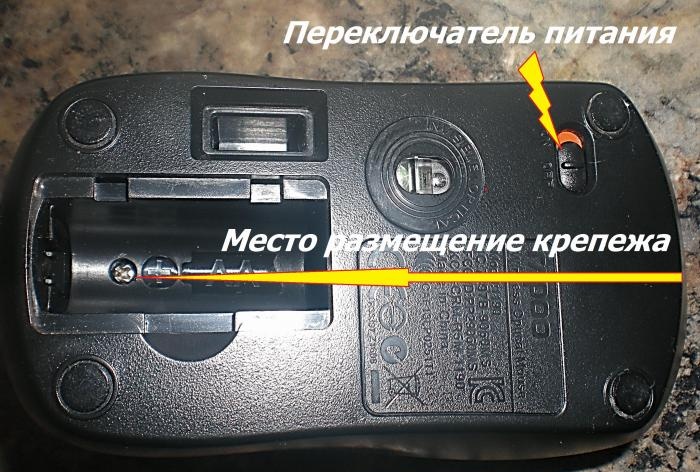
To begin examining a broken device, you need to disconnect it from the power supply, remove the wireless communication module from the USB computer and remove the battery.To get to the control board in most models, it is enough to unscrew the fasteners located under the battery and use a flat-head screwdriver to disconnect the upper part of the case from the latches.

Visually or using multimeter In the position of checking semiconductor devices, examine the plus and minus marks, connecting wires and soldering points for the presence of oxides and mechanical damage. Due to strong vibrations and mechanical stress, microcracks may occur at the junctions of elements with board tracks.
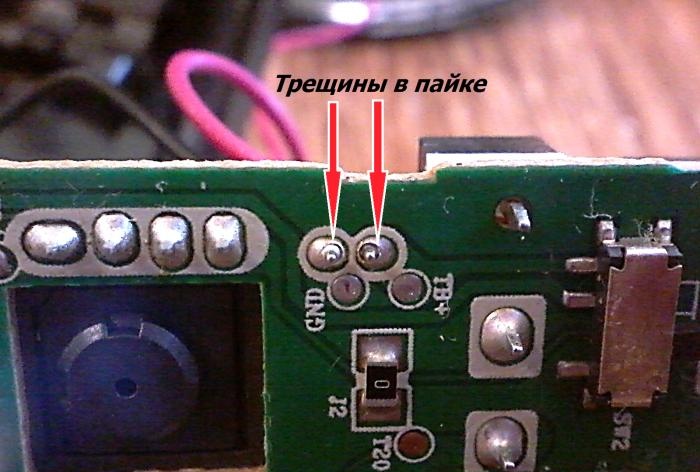
To identify them, you need to very carefully inspect and loosen the fastenings of the wires and electronic components of the board. When identifying suspicious or defective areas, they should be properly soldered.
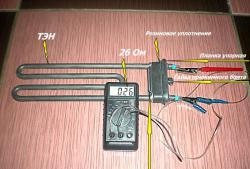
If the measures described above do not restore the device’s functionality, check its resistance at the power terminals. It should be in the range of 400 - 600 Ohms. If the ohmmeter shows zero, then there is a short circuit in the electronic circuit; if it shows one, there is an open circuit. In these situations, it is necessary to check the electronic components. Any charred or swollen devices found must be replaced.
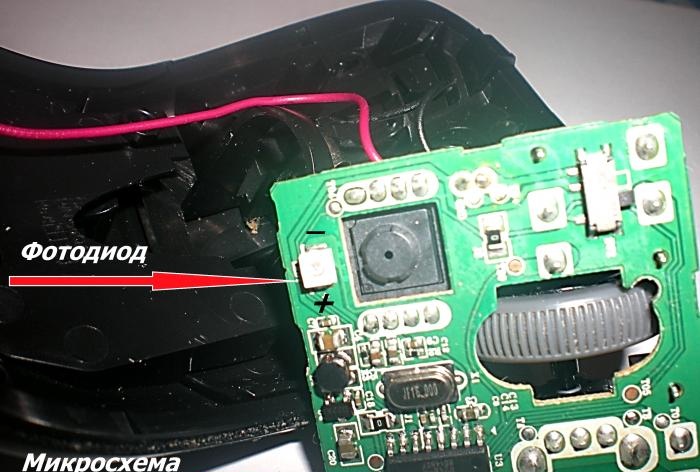
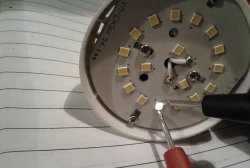
To check the health of the photodiode, connect the probe from the “V+” port to its positive input, and the probe from the “COM” port to the negative input. Wherein multimeter switched to diode test mode. Turn on your phone's camera and point its lens at the photodiode. A serviceable element will light up in the displays.
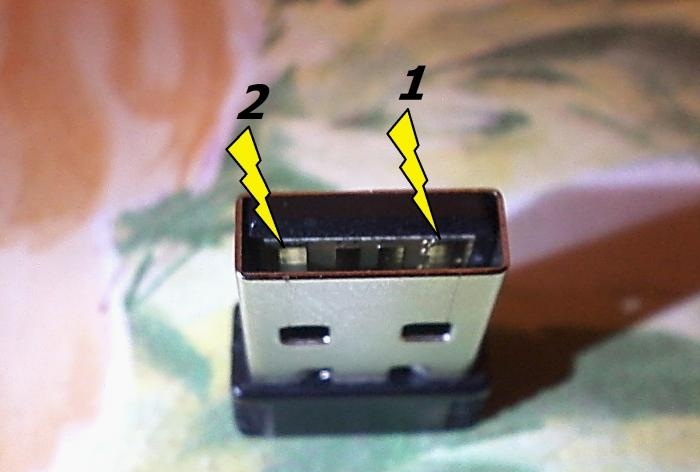
If after all the above measures the mouse does not work, check the serviceability of the wireless module with a USB plug. Use the probe from the “COM” port to touch track 2, and with the other probe touch track 1. The readings should be 600 - 800 Ohms.
To check a computer's USB port, simply connect a working device, such as a keyboard or memory drive, to it. If the software responds after connecting, it means the port is working.
In other cases, when the failure could not be eliminated, the microcircuit needs to be replaced.
Causes of failure.
Since the mouse is a reliable piece of equipment, in many cases the damage will be minor. It can happen due to:
1. Poor contact between the battery and the control board.
2. Failure of one of the electronic components.
3. Damage to the computer's USB port.
Identification of the cause of the malfunction and methods for its elimination.
To begin examining a broken device, you need to disconnect it from the power supply, remove the wireless communication module from the USB computer and remove the battery.To get to the control board in most models, it is enough to unscrew the fasteners located under the battery and use a flat-head screwdriver to disconnect the upper part of the case from the latches.
Visually or using multimeter In the position of checking semiconductor devices, examine the plus and minus marks, connecting wires and soldering points for the presence of oxides and mechanical damage. Due to strong vibrations and mechanical stress, microcracks may occur at the junctions of elements with board tracks.
To identify them, you need to very carefully inspect and loosen the fastenings of the wires and electronic components of the board. When identifying suspicious or defective areas, they should be properly soldered.
If the measures described above do not restore the device’s functionality, check its resistance at the power terminals. It should be in the range of 400 - 600 Ohms. If the ohmmeter shows zero, then there is a short circuit in the electronic circuit; if it shows one, there is an open circuit. In these situations, it is necessary to check the electronic components. Any charred or swollen devices found must be replaced.
To check the health of the photodiode, connect the probe from the “V+” port to its positive input, and the probe from the “COM” port to the negative input. Wherein multimeter switched to diode test mode. Turn on your phone's camera and point its lens at the photodiode. A serviceable element will light up in the displays.
If after all the above measures the mouse does not work, check the serviceability of the wireless module with a USB plug. Use the probe from the “COM” port to touch track 2, and with the other probe touch track 1. The readings should be 600 - 800 Ohms.
To check a computer's USB port, simply connect a working device, such as a keyboard or memory drive, to it. If the software responds after connecting, it means the port is working.
In other cases, when the failure could not be eliminated, the microcircuit needs to be replaced.
Similar master classes

Particularly interesting
Comments (7)
