How to make a box in the bathroom
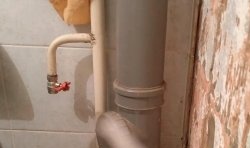
When repairing plumbing units, it often becomes necessary to close cast iron sewer pipes, which, to put it mildly, do not look the best. One of the most acceptable options is to install a box made of metal profiles.
The assembled frame can be covered with plasterboard, plastic panels or gypsum fiber sheets. The choice of cladding option depends on the finishing of the plumbing room.
If you decide to use plastic panels, then the frame is sewn with them immediately, directly onto the metal profile. But as practice suggests, it is better to cover the box with moisture-resistant plasterboard or gypsum fiber sheet.
The advantages of gypsum materials are obvious. You can put wallpaper on them, lay tiles or mosaics. You can finish it with decorative plaster or simply paint it. It all depends on the thickness of the wallet and the imagination of the homeowner.
In this article we will talk about installing a box under ceramic tiles. During installation, moisture-resistant gypsum fiber sheet (GVLV) was used. Moreover, it was mounted in two layers to increase rigidity.
Tools required for installation:
Materials:
Operating procedure
First, we find the most protruding sections of the pipes. This is done using a square and a building level. It is necessary to check the vertical inclination of the pipes with a level. Then, applying the square to the wall and moving it towards the pipe, we mark the points that are most outside the dimensions. This must be done on both sides of the sewer riser.
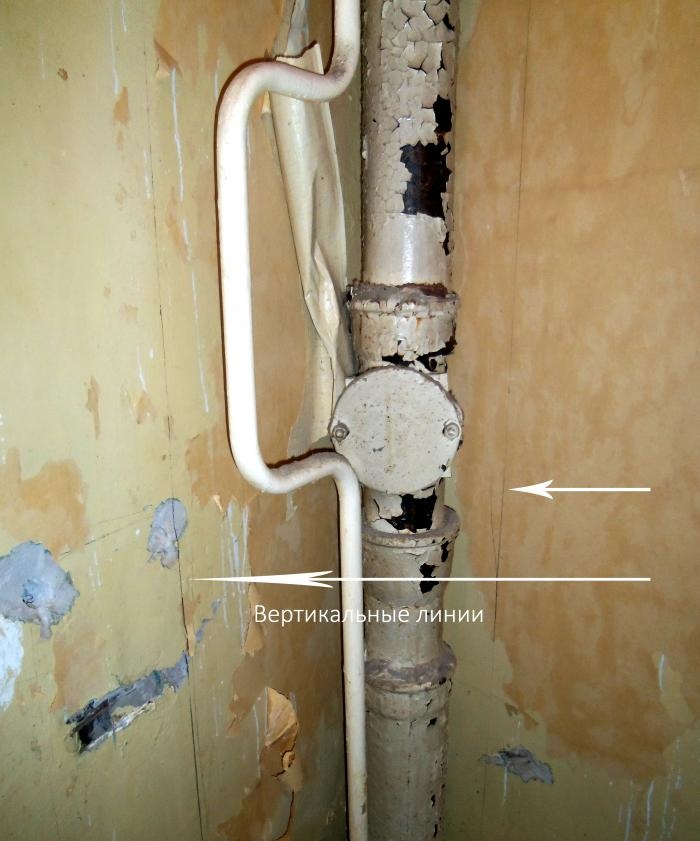
We retreat three centimeters from the previously made marks and draw two vertical lines using a level. We measure the distance from the floor to the ceiling and use metal scissors to cut off pieces of the guide profile of the appropriate length.
Using the previously drawn lines, we fasten the guide profiles to the wall using dowels with a diameter of 6 mm and self-tapping screws measuring 3.5x35 mm. You can also use dowel-nails of the same parameters. It is better to drill holes in concrete walls with a hammer drill, but for brick buildings you can also use an impact drill.
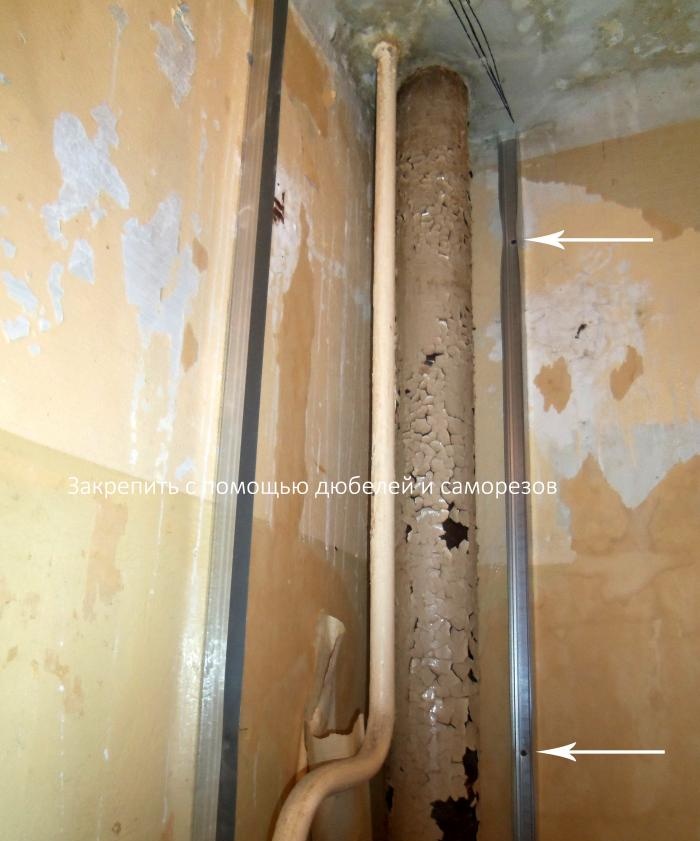
In some bathrooms, the partitions between the bathtub and toilet are made of lightweight concrete. They are thin, only about 60 mm thick. It is necessary to drill the holes very carefully, especially if tiles are already laid on the other side.
In order not to break through such a wall, you must:
• Turn off the impact mode of the hammer drill and work without it, in drilling mode.
• At the end of the drill, make a stop equal to the length of the screw by winding a little insulating tape or putting on a drilled wine stopper.
Next you need to draw the dimensions of the box on the ceiling. Applying a square to the walls, draw perpendicular lines along the ceiling with a pencil. The intersection point of these lines will be the angle of the structure. We measure both distances from the walls using a tape measure.
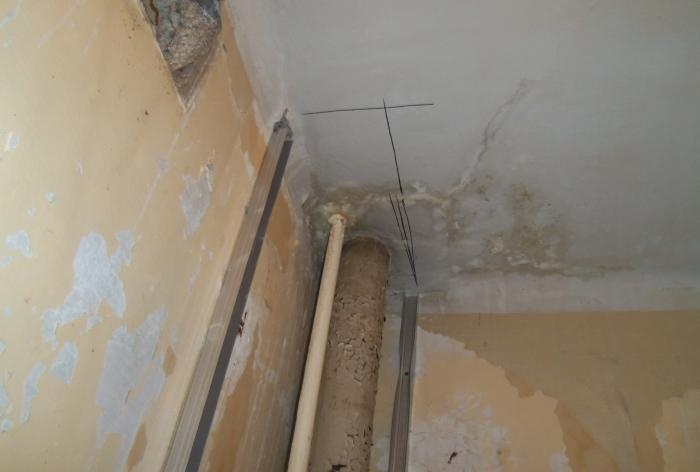
We first cut the guide profile to the overall size. Then we cut it at the inflection point and fold it at an angle of 90 degrees, as shown in the figure.
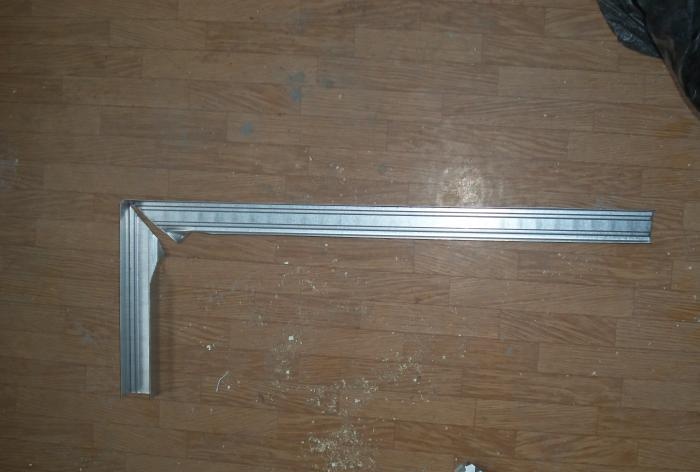
Then we fix it to the ceiling with dowels and self-tapping screws. You can do it simpler and mount the corner of the box from two sections.
Now we need to find the bottom corner point of our design. We cut the ceiling profile from floor to ceiling. We insert it into the upper corner profile and adjust it using a level so that it stands strictly vertical in both planes.
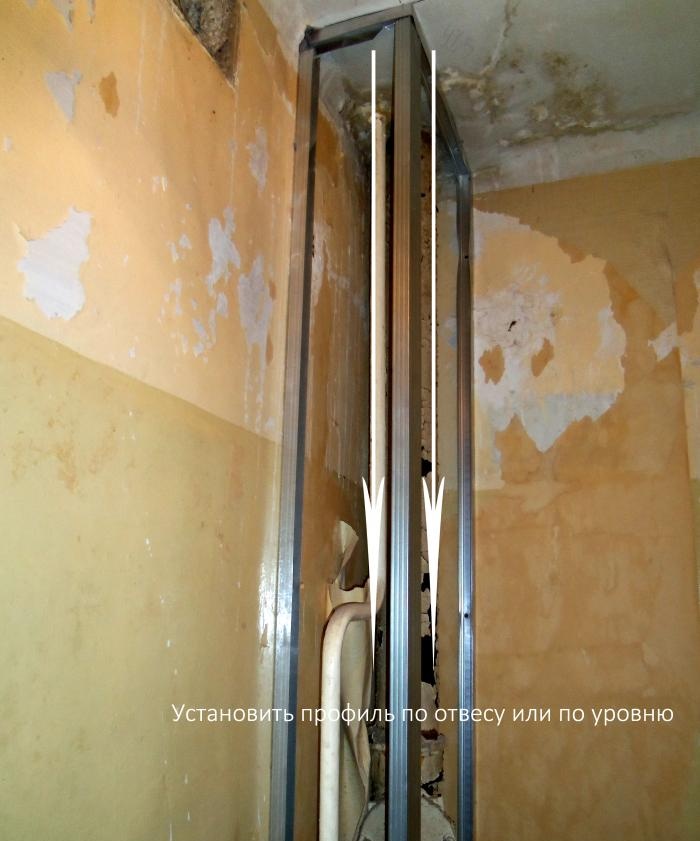
The outer corner of the profile will also be the lower corner point.
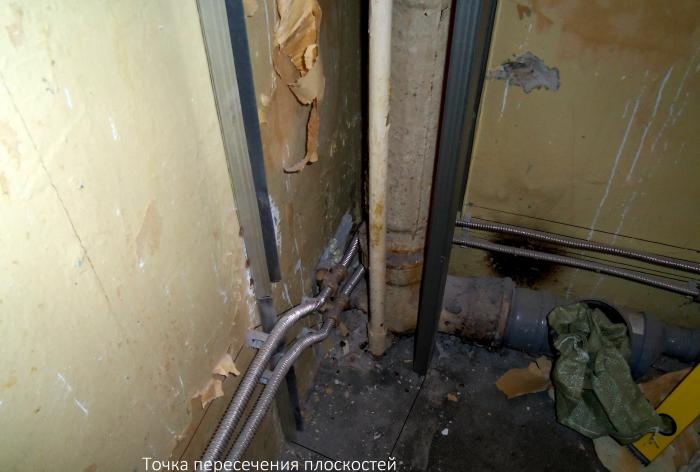
We make the lower corner in the same way as the upper corner profile. It will be shorter due to the presence of horizontal sewerage. We fix it to the floor, just like the upper structure.
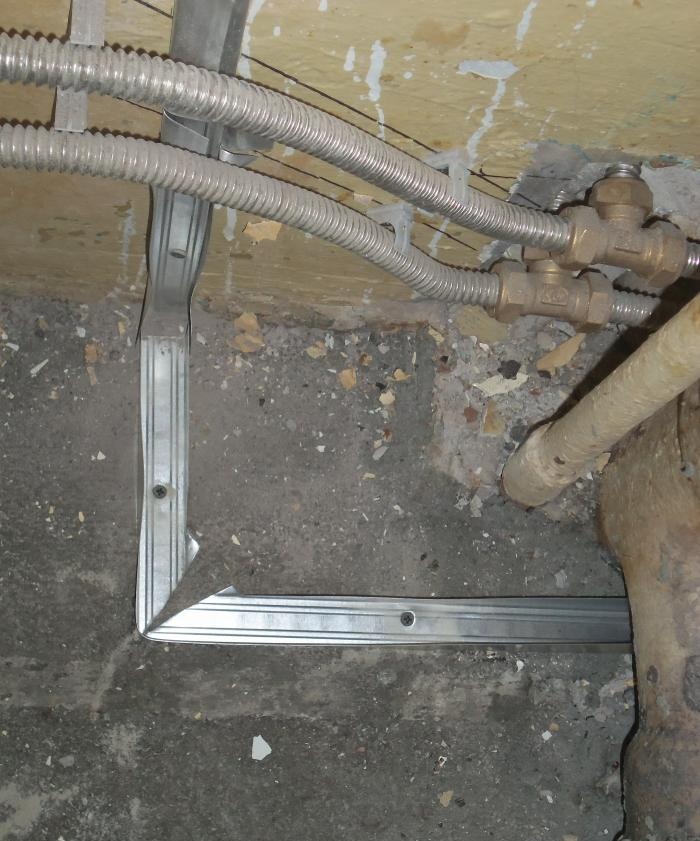
We install the cut ceiling profile first in the lower corner and then in the upper. Then, using a drill with a 4 mm diameter drill installed, we make holes in both profiles. We secure the entire structure with aluminum rivets.
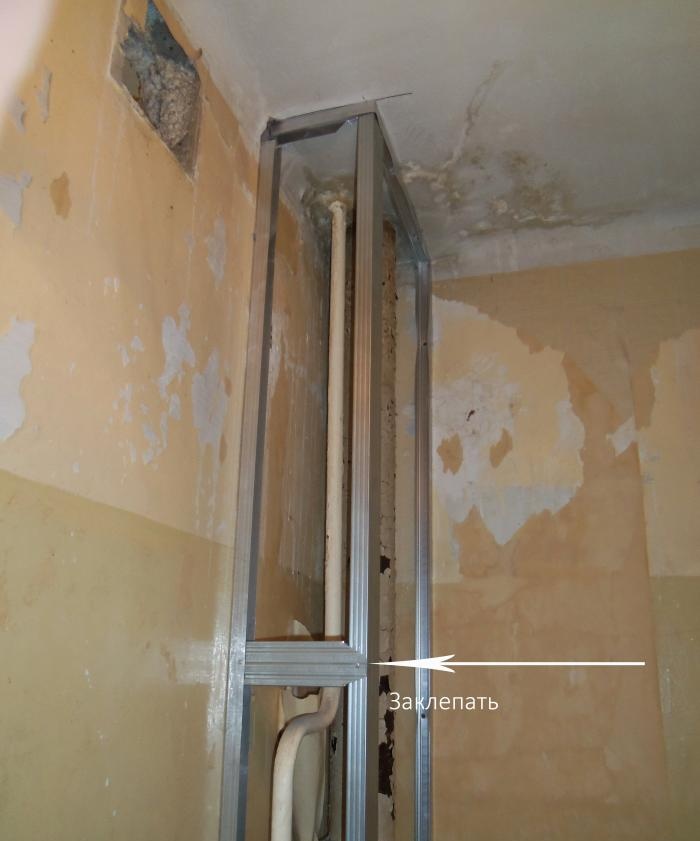
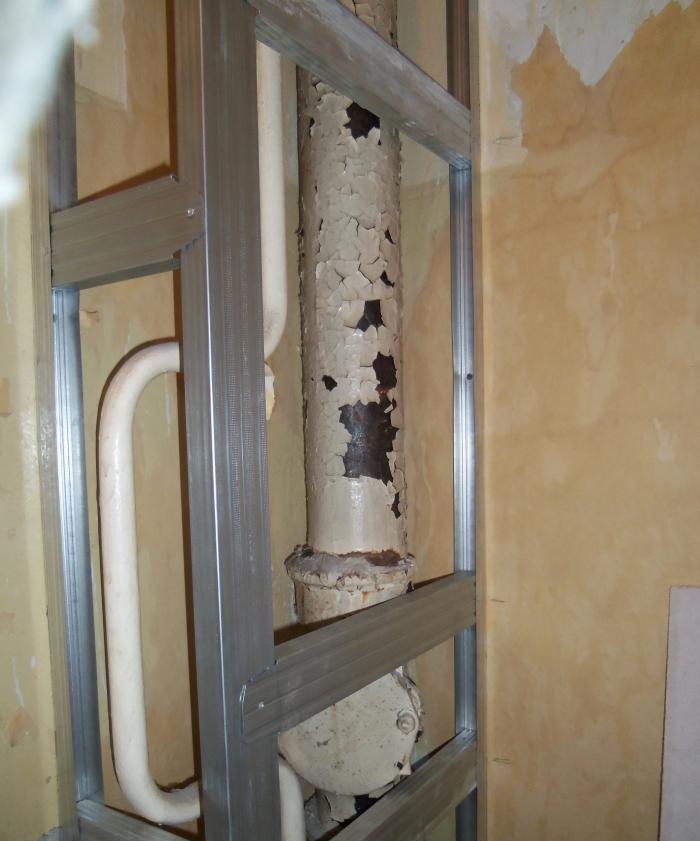
Next, we add several stiffening ribs to enhance the load-bearing capacity of the metal frame. It is necessary to ensure that when drilling holes, the profiles do not move to the side. It is advisable to install stiffeners at the joints of gypsum sheets.
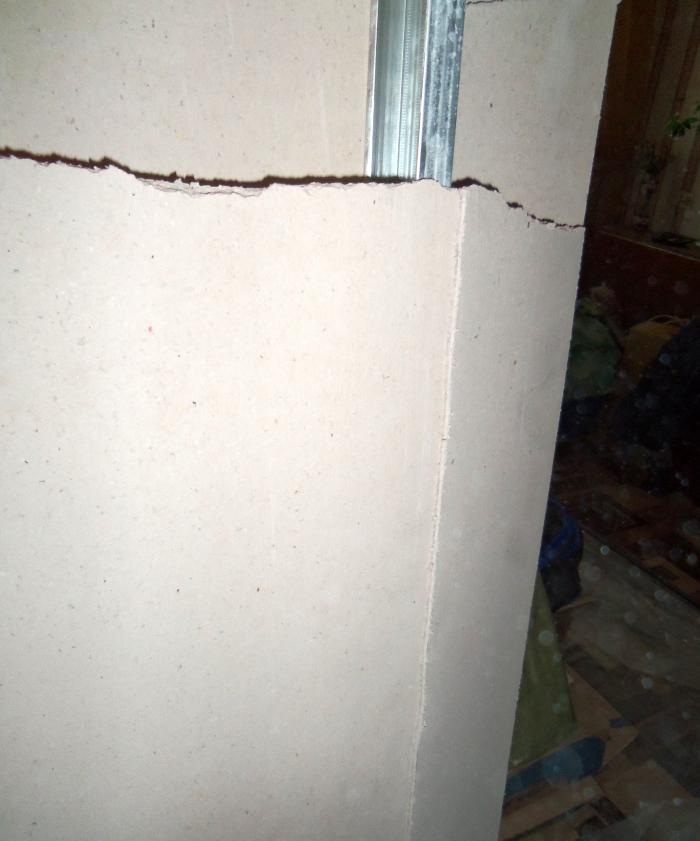
Now it's time for the sheathing.We take the dimensions and cut the gypsum fiber sheet. The box can also be sewn up from pieces. The main thing to remember when installing the second layer of GVLV is that the joints of the first sheet should not coincide with the second.
Cutting gypsum fiber sheet is a little more difficult than cutting drywall. First, cut through the GVLV with a knife along the marked line. Then we place a profile or block under the cut and break the sheet. Gypsum fiber sheet is a rather fragile material and requires careful handling.
We screw the cut pieces to the profile with self-tapping screws measuring 3.5x25 mm. You can use self-tapping screws for GVLV. But it is better to pre-drill the profile, so it will deform less. You can use a special countersink with a built-in drill with a diameter of 2.8 or 3 mm. Then the GVLV and the profile are pierced, and an additional hole is formed in the sheet under the screw head.
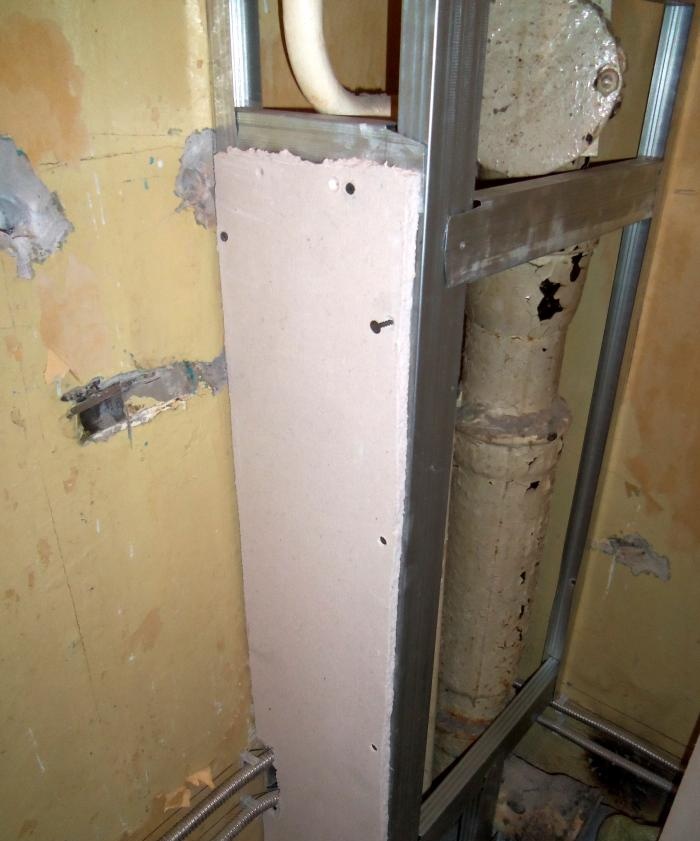
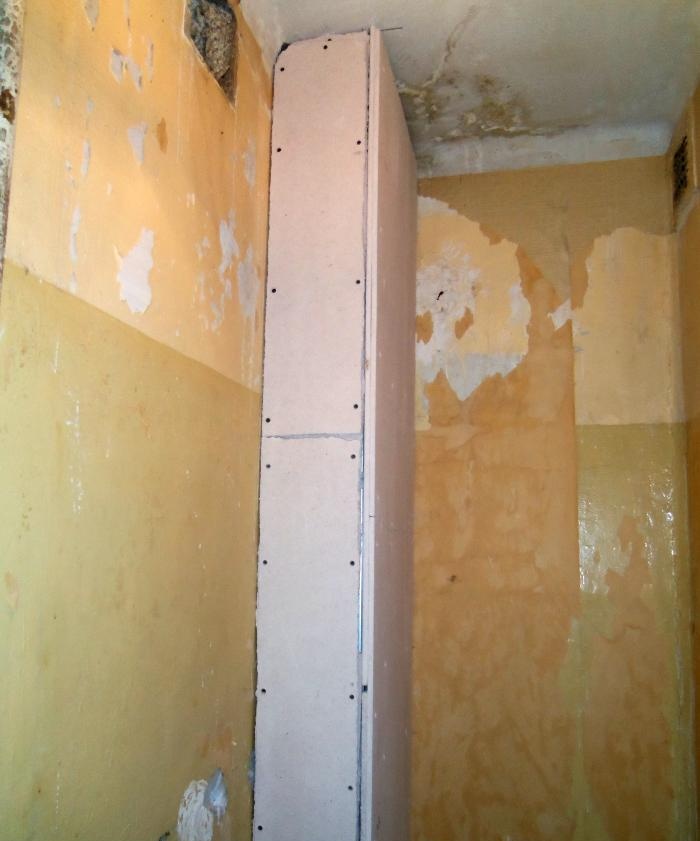
The second layer is mounted with longer screws measuring 3.5x35 mm. The pitch with which the screws are screwed is approximately 150 mm. After installing the GVLV, it is primed for better adhesion of the finishing coating to the gypsum. If painting or wallpapering is meant, then the gypsum fiber sheet is also puttied.
The assembled frame can be covered with plasterboard, plastic panels or gypsum fiber sheets. The choice of cladding option depends on the finishing of the plumbing room.
If you decide to use plastic panels, then the frame is sewn with them immediately, directly onto the metal profile. But as practice suggests, it is better to cover the box with moisture-resistant plasterboard or gypsum fiber sheet.
The advantages of gypsum materials are obvious. You can put wallpaper on them, lay tiles or mosaics. You can finish it with decorative plaster or simply paint it. It all depends on the thickness of the wallet and the imagination of the homeowner.
In this article we will talk about installing a box under ceramic tiles. During installation, moisture-resistant gypsum fiber sheet (GVLV) was used. Moreover, it was mounted in two layers to increase rigidity.
Tools required for installation:
- Hammer and drill with a diameter of 6 mm.
- Metal scissors.
- Drill.
- Drill diameter 4 mm.
- Countersink with built-in drill with a diameter of 2.8 or 3 mm.
- Screwdriver.
- Building level or plumb line.
- Roulette.
- Riveter for aluminum blind rivets.
- Marker or pencil.
- Square.
Materials:
- Guide profile PN 27x28 – 3 pcs.
- Ceiling profile PP 60x27 – 2 pcs.
- Aluminum rivets with a diameter of 4 mm – 20 pcs.
- Dowels with a diameter of 6x40 mm or dowel-nails 6x40 mm – 20 pcs.
- Self-tapping screws 3.5x25 mm – 100 pcs.
- Self-tapping screws 3.5x35 mm – 100 pcs.
- Moisture-resistant gypsum fiber sheet – 1 pc.
Operating procedure
First, we find the most protruding sections of the pipes. This is done using a square and a building level. It is necessary to check the vertical inclination of the pipes with a level. Then, applying the square to the wall and moving it towards the pipe, we mark the points that are most outside the dimensions. This must be done on both sides of the sewer riser.

We retreat three centimeters from the previously made marks and draw two vertical lines using a level. We measure the distance from the floor to the ceiling and use metal scissors to cut off pieces of the guide profile of the appropriate length.
Using the previously drawn lines, we fasten the guide profiles to the wall using dowels with a diameter of 6 mm and self-tapping screws measuring 3.5x35 mm. You can also use dowel-nails of the same parameters. It is better to drill holes in concrete walls with a hammer drill, but for brick buildings you can also use an impact drill.

In some bathrooms, the partitions between the bathtub and toilet are made of lightweight concrete. They are thin, only about 60 mm thick. It is necessary to drill the holes very carefully, especially if tiles are already laid on the other side.
In order not to break through such a wall, you must:
• Turn off the impact mode of the hammer drill and work without it, in drilling mode.
• At the end of the drill, make a stop equal to the length of the screw by winding a little insulating tape or putting on a drilled wine stopper.
Next you need to draw the dimensions of the box on the ceiling. Applying a square to the walls, draw perpendicular lines along the ceiling with a pencil. The intersection point of these lines will be the angle of the structure. We measure both distances from the walls using a tape measure.

We first cut the guide profile to the overall size. Then we cut it at the inflection point and fold it at an angle of 90 degrees, as shown in the figure.

Then we fix it to the ceiling with dowels and self-tapping screws. You can do it simpler and mount the corner of the box from two sections.
Now we need to find the bottom corner point of our design. We cut the ceiling profile from floor to ceiling. We insert it into the upper corner profile and adjust it using a level so that it stands strictly vertical in both planes.

The outer corner of the profile will also be the lower corner point.

We make the lower corner in the same way as the upper corner profile. It will be shorter due to the presence of horizontal sewerage. We fix it to the floor, just like the upper structure.

We install the cut ceiling profile first in the lower corner and then in the upper. Then, using a drill with a 4 mm diameter drill installed, we make holes in both profiles. We secure the entire structure with aluminum rivets.

Next, we add several stiffening ribs to enhance the load-bearing capacity of the metal frame. It is necessary to ensure that when drilling holes, the profiles do not move to the side. It is advisable to install stiffeners at the joints of gypsum sheets.

Now it's time for the sheathing.We take the dimensions and cut the gypsum fiber sheet. The box can also be sewn up from pieces. The main thing to remember when installing the second layer of GVLV is that the joints of the first sheet should not coincide with the second.
Cutting gypsum fiber sheet is a little more difficult than cutting drywall. First, cut through the GVLV with a knife along the marked line. Then we place a profile or block under the cut and break the sheet. Gypsum fiber sheet is a rather fragile material and requires careful handling.

We screw the cut pieces to the profile with self-tapping screws measuring 3.5x25 mm. You can use self-tapping screws for GVLV. But it is better to pre-drill the profile, so it will deform less. You can use a special countersink with a built-in drill with a diameter of 2.8 or 3 mm. Then the GVLV and the profile are pierced, and an additional hole is formed in the sheet under the screw head.

The second layer is mounted with longer screws measuring 3.5x35 mm. The pitch with which the screws are screwed is approximately 150 mm. After installing the GVLV, it is primed for better adhesion of the finishing coating to the gypsum. If painting or wallpapering is meant, then the gypsum fiber sheet is also puttied.

Similar master classes
Particularly interesting
Comments (2)


