Remote controlled spotlight
In this master class I will be converting a floodlight with a motion sensor into a spotlight with a remote control.
The motion sensor is certainly good, but in some places it is not as useful as remote activation. I am making this lantern for the garage, where it is always dark, and where there are many “blind” spots if you use a motion sensor.
If you use a spotlight without modification, then for it to light up you need to get into the sensor’s coverage area, which is not always possible. And by the time you get to this zone, you can break your legs. Also, the sensor’s visibility can be blocked by objects, cars, distances - a long corridor, for example.
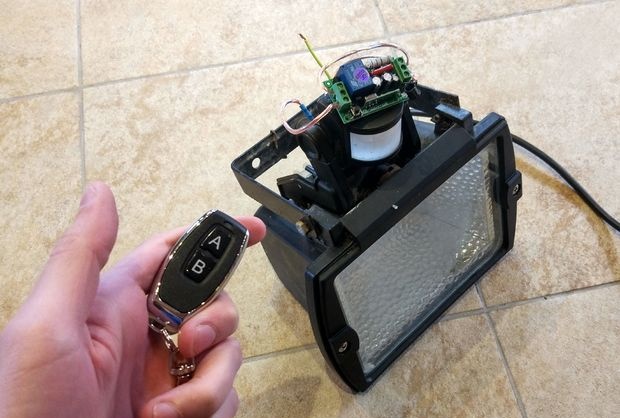
Another thing is the remote sensor. When I wanted to turn it on, I wanted to turn it off. The keychain switch is always on the belt or attached to the keys, which is very, very convenient.
There are many advantages, there are quite a few objects where this design can be used. Moreover, I took a switch with two remote controls. Another one for my father. There are many options. The main thing is that the remote control switch is designed for a voltage of 220 volts and a current of 10 amperes.
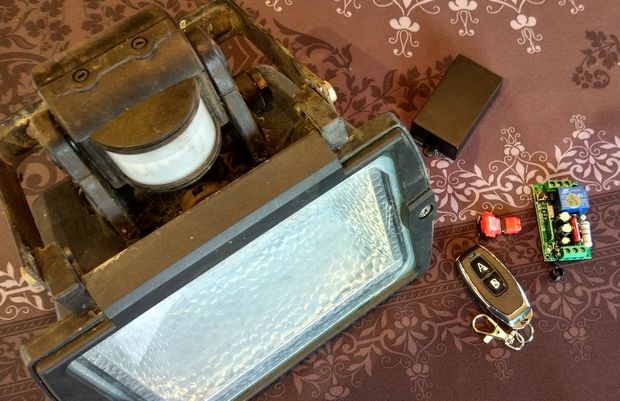
Spotlight.I took the old ones, but you can buy a new LED one.
- LED Spotlight.
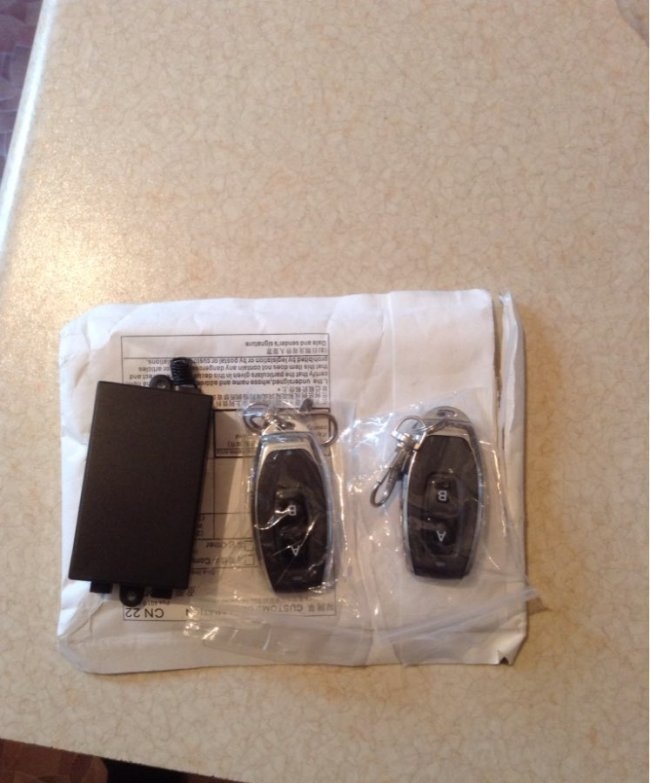
- Wireless light switch. With two remotes.
(active links to the store)
There are a lot of different remote switches on Aliexpress. Your task is to choose a voltage of 220-230 volts (since most switches are 12 volts) and a current that will be greater than the current consumed by your spotlight.
Here are cheaper models without a housing, with one remote control, etc.
- Cheaper option with one remote control in the case.
All options - see.
Tool available: screwdrivers, pliers, wire cutters, etc.
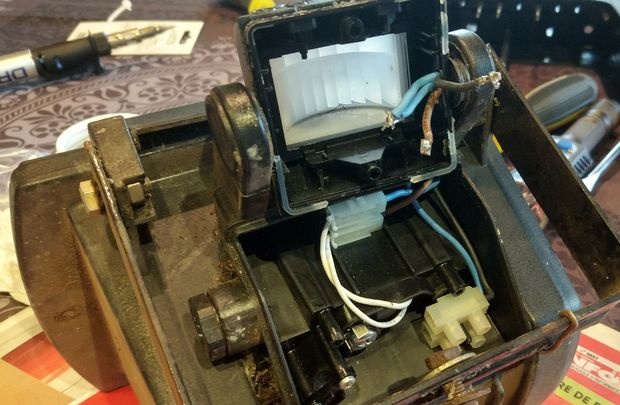
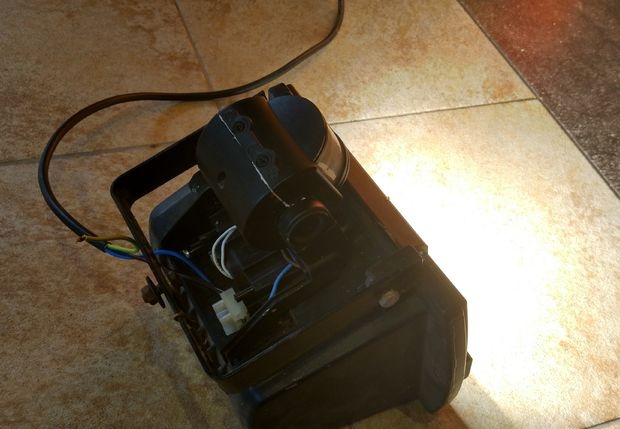
Let's disassemble the motion sensor. Unsolder the wires from the motion sensor. I still have the passport from the spotlight, and I know where the wires that went to the sensor go. You can disassemble the spotlight if you don’t know where and where the wires come from.
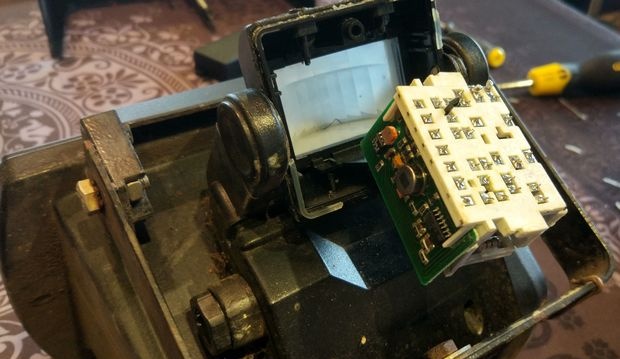
The wires are short, I will lengthen them.
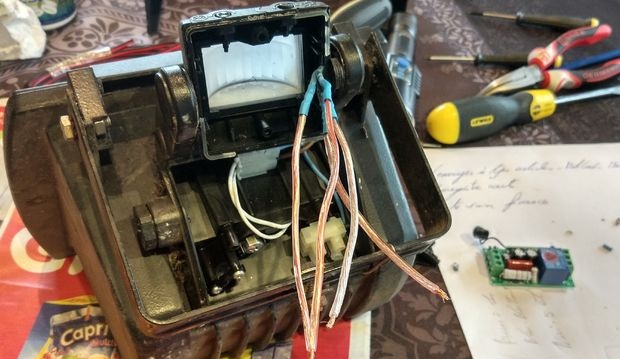
I extended the wires by soldering others. I put on the heat shrink tube and blew it with a hairdryer.
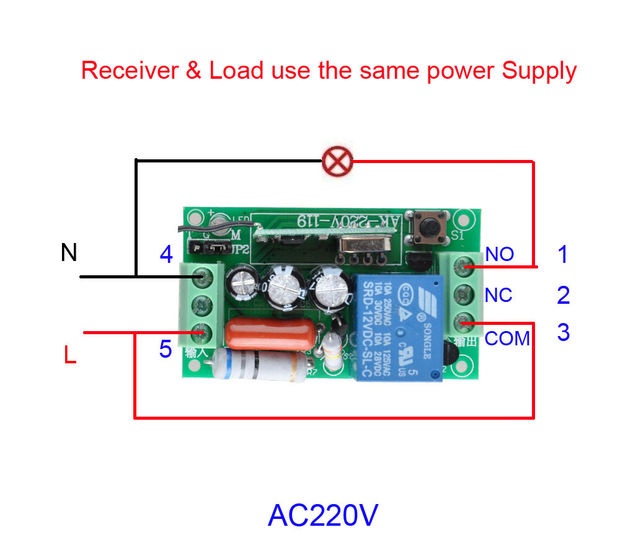
Connection diagram to the remote control switch.
We connect according to the diagram.
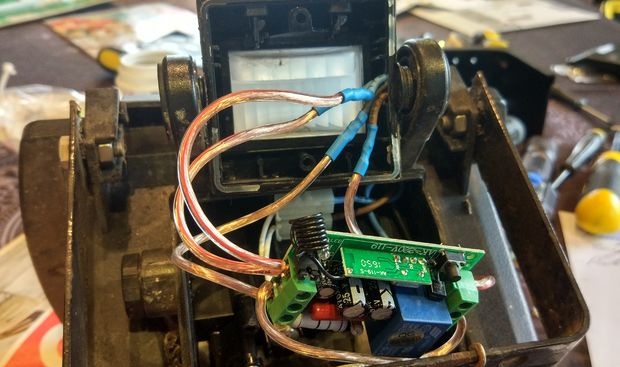
Let's check.
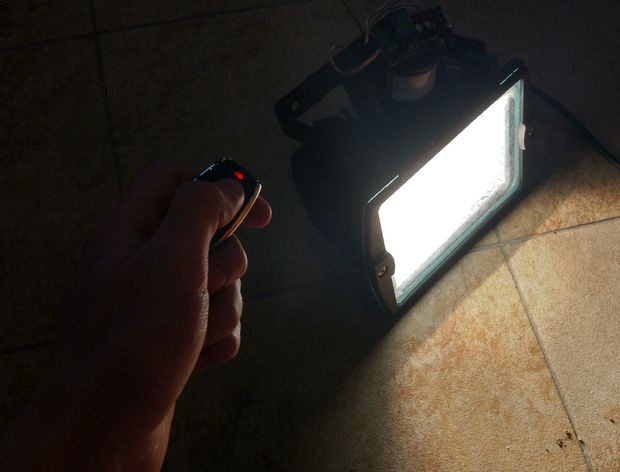
If everything works, insert the circuit into the case. Lubricate the lid with sealant (can be silicone) for a tight seal and close it. We tighten the screws and nuts.
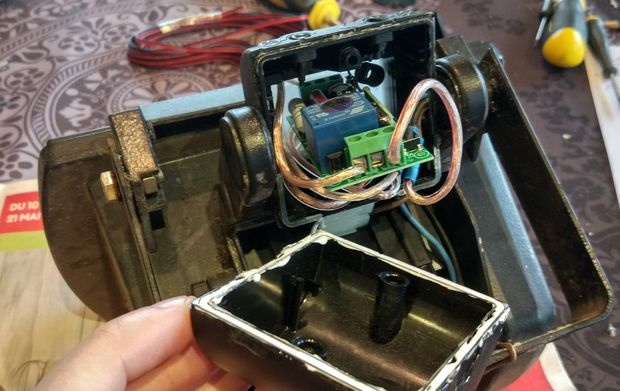
Be careful when performing any manipulations! Voltage of 230 volts is dangerous to life.
This is the kind of simple modernization we got. I hope you find it useful.
The motion sensor is certainly good, but in some places it is not as useful as remote activation. I am making this lantern for the garage, where it is always dark, and where there are many “blind” spots if you use a motion sensor.
If you use a spotlight without modification, then for it to light up you need to get into the sensor’s coverage area, which is not always possible. And by the time you get to this zone, you can break your legs. Also, the sensor’s visibility can be blocked by objects, cars, distances - a long corridor, for example.

Another thing is the remote sensor. When I wanted to turn it on, I wanted to turn it off. The keychain switch is always on the belt or attached to the keys, which is very, very convenient.
There are many advantages, there are quite a few objects where this design can be used. Moreover, I took a switch with two remote controls. Another one for my father. There are many options. The main thing is that the remote control switch is designed for a voltage of 220 volts and a current of 10 amperes.
What do we need?

Spotlight.I took the old ones, but you can buy a new LED one.
- LED Spotlight.
- Wireless light switch. With two remotes.
(active links to the store)
There are a lot of different remote switches on Aliexpress. Your task is to choose a voltage of 220-230 volts (since most switches are 12 volts) and a current that will be greater than the current consumed by your spotlight.
Here are cheaper models without a housing, with one remote control, etc.
- Cheaper option with one remote control in the case.
All options - see.
Tool available: screwdrivers, pliers, wire cutters, etc.
Let's disassemble the motion sensor. Unsolder the wires from the motion sensor. I still have the passport from the spotlight, and I know where the wires that went to the sensor go. You can disassemble the spotlight if you don’t know where and where the wires come from.

The wires are short, I will lengthen them.

I extended the wires by soldering others. I put on the heat shrink tube and blew it with a hairdryer.

Connection diagram to the remote control switch.

We connect according to the diagram.

Let's check.

If everything works, insert the circuit into the case. Lubricate the lid with sealant (can be silicone) for a tight seal and close it. We tighten the screws and nuts.

Be careful when performing any manipulations! Voltage of 230 volts is dangerous to life.
This is the kind of simple modernization we got. I hope you find it useful.

Similar master classes
Particularly interesting
Comments (5)

