How to connect the motor from a washing machine to 220 V
Hi all! Washing machines often break down and are thrown into landfills. But some parts and parts of machines can still serve and bring a lot of benefits. A classic example is sandpaper and a washing machine motor.
Today I will tell and show you how to correctly connect an electric motor from a modern washing machine to a 220 V AC network.
I would like to say right away that such engines do not need a starting capacitor. All you need is the correct connection and the engine will spin in the direction you want.
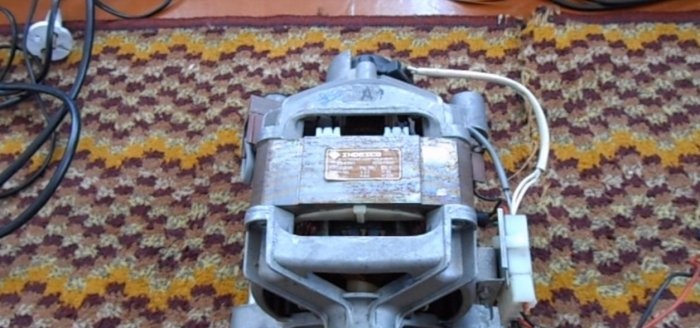
Washing machine motors are commutator motors. In my case, the connection block has six wires, in yours there may only be four.
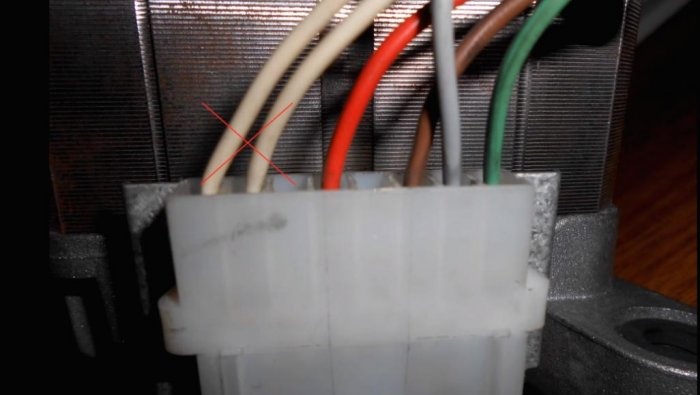
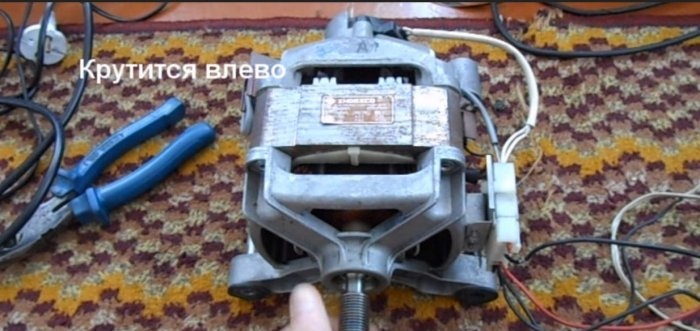
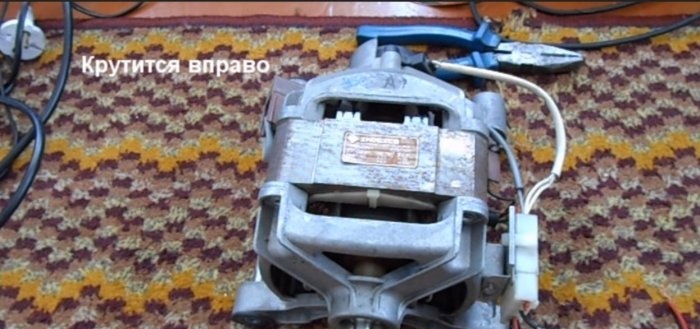
This is what she looks like. We don't need the first, white two wires. This is the output from the engine speed sensor. We mentally exclude them or even bite them off with pliers.
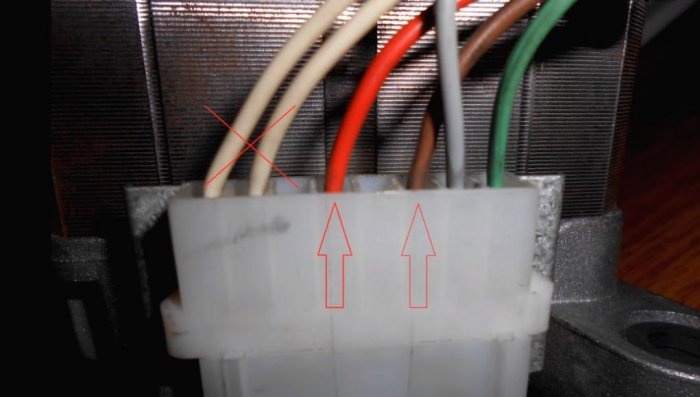
Next are the wires: red and brown - these are wires from the stator windings.
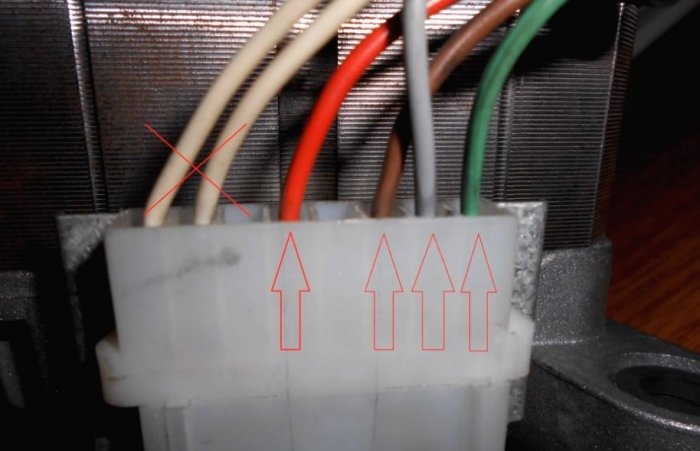
The last two wires: gray and green - wires from the rotor brushes.
Everything seems clear. Now about connecting all the windings into a single circuit.
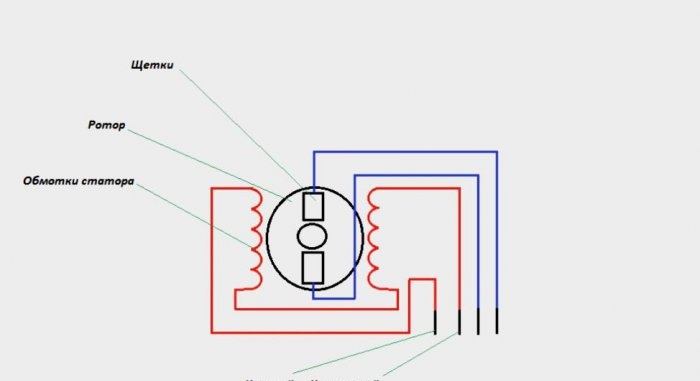
Motor winding diagram.The stator windings are connected in series with each other, so two wires come out of them.
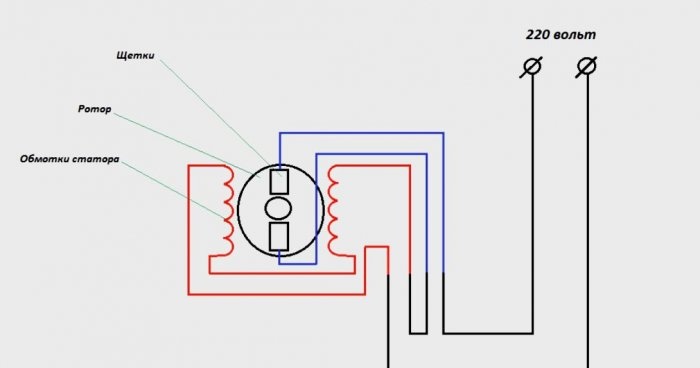
We just need to connect the stator and rotor windings in series. Yes, everything turns out to be very, very simple.
We connect and check.
The motor shaft rotates to the left.
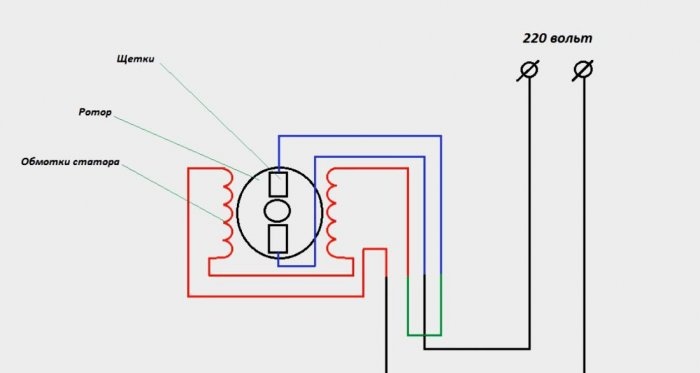
You just need to swap the rotor brush wires with each other and that’s it. This is what it will look like on the diagram:
Spin the other way.
You can also make a reverse switch and change the direction of shaft rotation when needed.
For more detailed instructions on connecting the engine to a 220 V network, see the video.
Today I will tell and show you how to correctly connect an electric motor from a modern washing machine to a 220 V AC network.
I would like to say right away that such engines do not need a starting capacitor. All you need is the correct connection and the engine will spin in the direction you want.
Washing machine motors are commutator motors. In my case, the connection block has six wires, in yours there may only be four.
This is what she looks like. We don't need the first, white two wires. This is the output from the engine speed sensor. We mentally exclude them or even bite them off with pliers.
Next are the wires: red and brown - these are wires from the stator windings.
The last two wires: gray and green - wires from the rotor brushes.
Everything seems clear. Now about connecting all the windings into a single circuit.
Scheme
Motor winding diagram.The stator windings are connected in series with each other, so two wires come out of them.
Connection to 220 V network
We just need to connect the stator and rotor windings in series. Yes, everything turns out to be very, very simple.
We connect and check.
The motor shaft rotates to the left.
How to change the direction of rotation?
You just need to swap the rotor brush wires with each other and that’s it. This is what it will look like on the diagram:
Spin the other way.
You can also make a reverse switch and change the direction of shaft rotation when needed.
Watch the video
For more detailed instructions on connecting the engine to a 220 V network, see the video.
Similar master classes
How to turn a washing machine motor into a 220 V generator
Connecting the washing machine motor, reverse and regulator
Sharpener from a washing machine engine
Electric generator - conversion of a washing machine engine
How to start a stepper motor without electronics
Connecting a three-phase motor according to a star and delta circuit
Particularly interesting

Cable antenna for digital TV in 5 minutes

A selection of simple and effective schemes.

Three-phase voltage from single-phase in 5 minutes

Starting a three-phase motor from a single-phase network without a capacitor

Eternal flashlight without batteries

How to make an inexpensive but very powerful LED lamp
Comments (21)

