5 ways to unscrew the oil filter
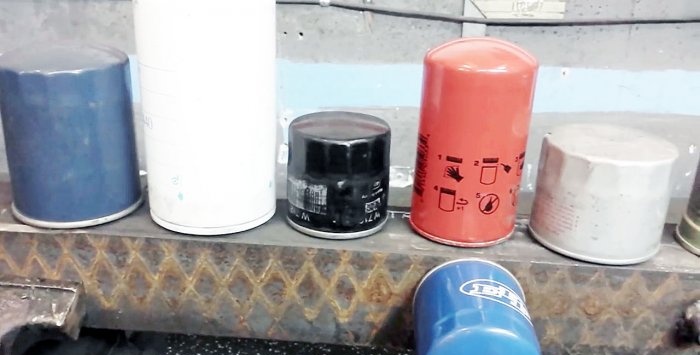
This replaceable element has to be changed on the car engine every 7-15 thousand kilometers along with the next engine oil change. It is usually attached to the engine at the bottom, and is not easy to get to and even more difficult to unscrew since you can't grab it with both hands.
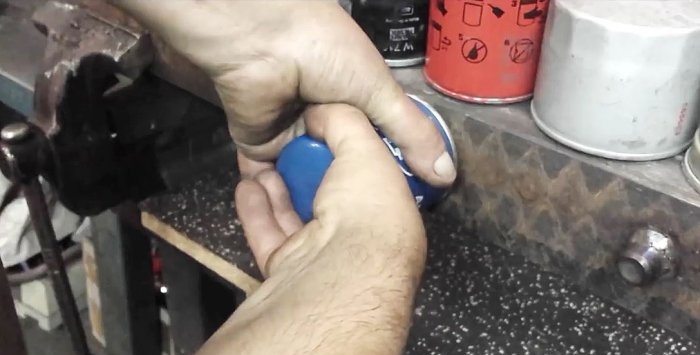
In addition, during the time from replacement to replacement, the filter housing becomes covered with dust, dirt, various oily deposits, and your hands, not finding the necessary grip, slide along the surface of the part.
What to do if you couldn’t unscrew this replacement product with just your hands?
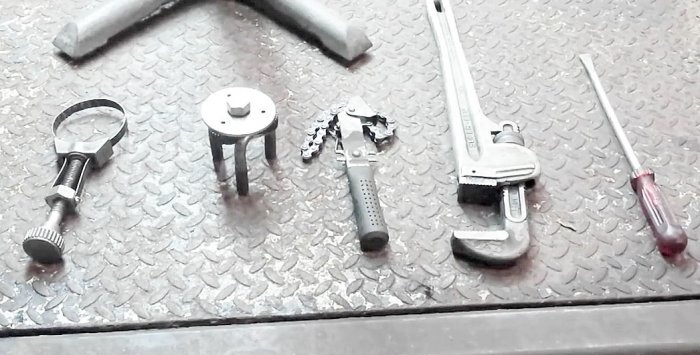
You should use the following simple, but quite convenient and effective devices.
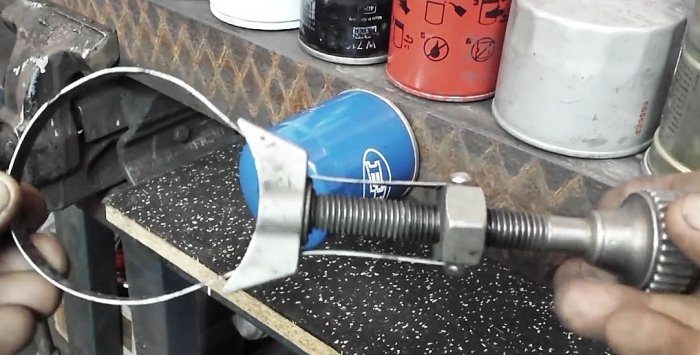
The device consists of a metal strip whose ends pass through slots in the curly bracket, symmetrically located relative to its center, into which a bolt with a nut screwed onto it rests.
The tape forms a loop-girth, and its ends are secured to two opposite faces of the movable nut by means of short screws.If the bolt is unscrewed, the nut slides down and the diameter of the loop increases. When the bolt is screwed in, the nut goes up and the loop shortens. The bracket in its lower part is made along a circular arc.
The puller loop is loosely placed on the oil filter housing and, by screwing in the bolt, is tightened due to the fact that the nut rises along the bolt and pulls the ends of the metal loop along with it.
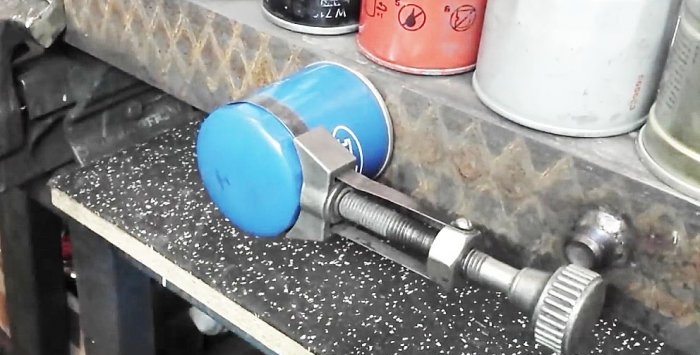
When the loop tightly clasps the filter body, the puller becomes a kind of lever, rigidly attached to the unit being removed. Now all that remains is to apply a little force to the puller-lever counterclockwise to tear the filter from its seat.
After this, the puller can be removed and the filter can be unscrewed using the fingers of just one hand.
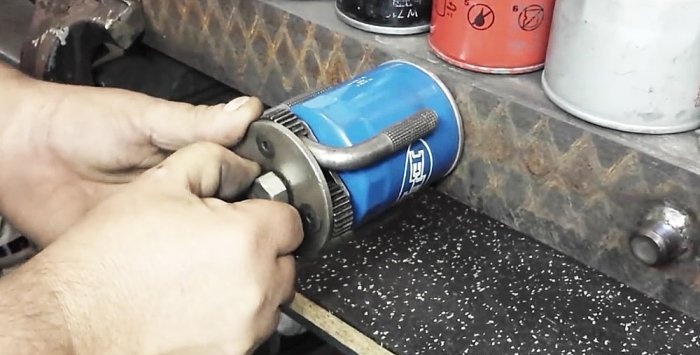
It is a kind of semblance of a planetary mechanism: one central cylindrical gear and three satellite gears of the same size and type, each of which meshes with the first.
The outer gears are located around the central one evenly around the circumference, that is, at 120 degrees to one another. All of them are fixed with their axes on a strong and rigid round disk and a triangular plate with rounded corners on the back of the gears.
The central gear is driven into rotation by a wrench through a nut located with the face of the plate on the extension of the axis of the central gear. At the same time, the side satellite gears also begin to rotate within less than one revolution around their axis, which is quite enough for the operation of this type of clamp.
The oil disc housing is clamped using L-shaped brackets of circular cross-section, which are welded with the short side perpendicular to the generatrices of the side gears directly in the center, so that the angle between them is also strictly 120 degrees. Moreover, the long rods of the brackets should be parallel to each other and oriented in the direction opposite to the location of the nut. For better grip, the long sides of the staples, from at least the middle to the end, are equipped with a protruding longitudinal notch.
If the staples are positioned radially, then the conventional cylinder inside them has a maximum diameter. Rotating the nut to the left or right brings the brackets closer together, and the diameter of the conditional cylinder decreases.
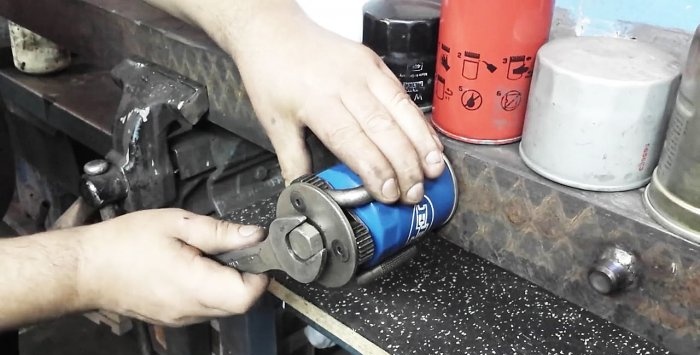
Using this device is quite simple: grab the oil filter housing with brackets and use a wrench to turn the nut to the left, thereby twisting the filter from its seat. When you rotate the nut to the right, the filter will, on the contrary, tighten.
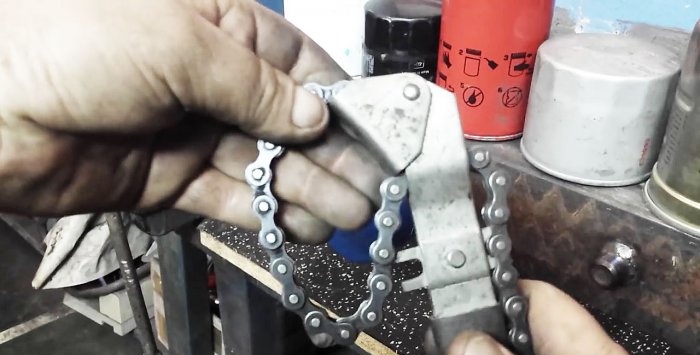
The main element in it is a piece of chain, which at one end is fixed in the “horn” of the handle along with a swinging bracket, the other end is free. But to prevent the chain from jumping out of the horn, a pin is threaded into the end link, the ends of which are separated.
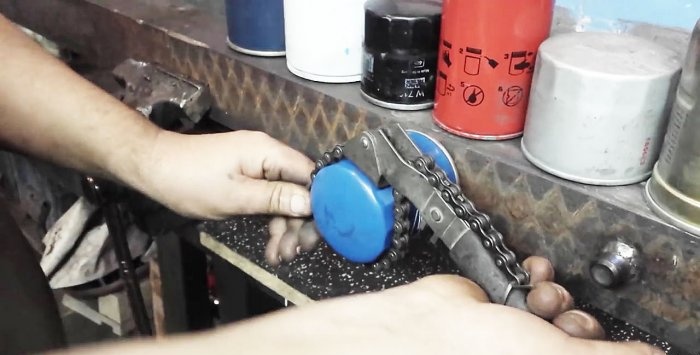
To unscrew the oil filter, the chain is thrown onto its body, pulled up by the free end and thrown onto two teeth on the handle. They prevent the chain clamp tightened around the filter housing from coming apart and loosening the clamp.
Now all you have to do is turn the puller handle counterclockwise by hand, and the filter will easily unscrew. If you throw the chain in the opposite direction, then by rotating the handle clockwise, the filter can be installed in its original place and tightened until it stops.
After unscrewing or tightening is completed, it is enough to remove the force from the handle, and the chain will loosen by itself and it can be removed from the filter housing.
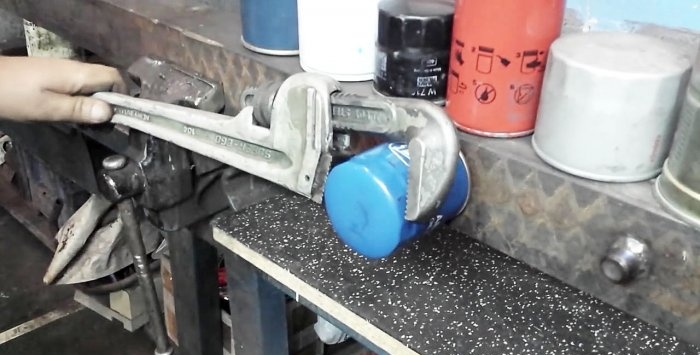
Perhaps this is the most convenient device if its dimensions allow the jaws to be spread to fit around the oil filter housing, the diameter of which can sometimes exceed 100 mm. It also requires a space commensurate with the length of the adjustable wrench. How can you find it on the engine of not only a passenger car, but also a truck? Therefore, this method is almost useless in practical terms.
Modern oil filters installed on car engines are mostly disposable. Therefore, after the first use, they are useless. This means there is nothing to feel sorry for them.
Hence the last “barbaric” method of unscrewing the oil filter using a strong and preferably long screwdriver with a sharp tip and a strong handle.
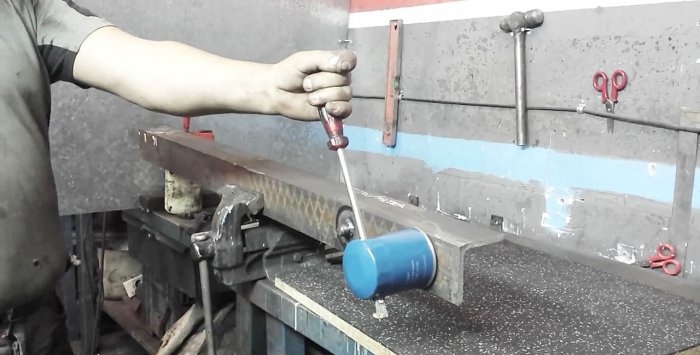
We point the tip of the screwdriver towards the filter generatrix, as close as possible to the bottom of the removable part. Holding the screwdriver perpendicular to the surface of the case, we strike the end of the handle with a hammer until we break through the upper and opposite walls. The tip of the screwdriver should come out.
Thus, we created an improvised lever to which it is enough to apply a slight counterclockwise force, and the filter will be easily unscrewed. Moreover, the longer the screwdriver, the less force required to unscrew it. The disadvantage is the same as in the previous case: a lot of space is required.
How to unscrew the oil filter if the first three devices are not at hand, and there is no room to use the last two. You should try using sandpaper.
To do this, you need to put gloves on your hands, cut off a proportionate piece of coarse sandpaper, wrap it around the filter body and try to move the filter with both hands. Usually this is possible, because all you need to overcome is the crushing force of the ring rubber gasket to seal the filter and the tightening of the thread.
In addition, during the time from replacement to replacement, the filter housing becomes covered with dust, dirt, various oily deposits, and your hands, not finding the necessary grip, slide along the surface of the part.
What to do if you couldn’t unscrew this replacement product with just your hands?
You should use the following simple, but quite convenient and effective devices.
1. Puller in the form of a metal strip and a bolt with a nut
The device consists of a metal strip whose ends pass through slots in the curly bracket, symmetrically located relative to its center, into which a bolt with a nut screwed onto it rests.
The tape forms a loop-girth, and its ends are secured to two opposite faces of the movable nut by means of short screws.If the bolt is unscrewed, the nut slides down and the diameter of the loop increases. When the bolt is screwed in, the nut goes up and the loop shortens. The bracket in its lower part is made along a circular arc.
The puller loop is loosely placed on the oil filter housing and, by screwing in the bolt, is tightened due to the fact that the nut rises along the bolt and pulls the ends of the metal loop along with it.
When the loop tightly clasps the filter body, the puller becomes a kind of lever, rigidly attached to the unit being removed. Now all that remains is to apply a little force to the puller-lever counterclockwise to tear the filter from its seat.
After this, the puller can be removed and the filter can be unscrewed using the fingers of just one hand.
2. Crab type puller
It is a kind of semblance of a planetary mechanism: one central cylindrical gear and three satellite gears of the same size and type, each of which meshes with the first.
The outer gears are located around the central one evenly around the circumference, that is, at 120 degrees to one another. All of them are fixed with their axes on a strong and rigid round disk and a triangular plate with rounded corners on the back of the gears.
The central gear is driven into rotation by a wrench through a nut located with the face of the plate on the extension of the axis of the central gear. At the same time, the side satellite gears also begin to rotate within less than one revolution around their axis, which is quite enough for the operation of this type of clamp.
The oil disc housing is clamped using L-shaped brackets of circular cross-section, which are welded with the short side perpendicular to the generatrices of the side gears directly in the center, so that the angle between them is also strictly 120 degrees. Moreover, the long rods of the brackets should be parallel to each other and oriented in the direction opposite to the location of the nut. For better grip, the long sides of the staples, from at least the middle to the end, are equipped with a protruding longitudinal notch.
If the staples are positioned radially, then the conventional cylinder inside them has a maximum diameter. Rotating the nut to the left or right brings the brackets closer together, and the diameter of the conditional cylinder decreases.
Using this device is quite simple: grab the oil filter housing with brackets and use a wrench to turn the nut to the left, thereby twisting the filter from its seat. When you rotate the nut to the right, the filter will, on the contrary, tighten.
3. Chain puller
The main element in it is a piece of chain, which at one end is fixed in the “horn” of the handle along with a swinging bracket, the other end is free. But to prevent the chain from jumping out of the horn, a pin is threaded into the end link, the ends of which are separated.
To unscrew the oil filter, the chain is thrown onto its body, pulled up by the free end and thrown onto two teeth on the handle. They prevent the chain clamp tightened around the filter housing from coming apart and loosening the clamp.
Now all you have to do is turn the puller handle counterclockwise by hand, and the filter will easily unscrew. If you throw the chain in the opposite direction, then by rotating the handle clockwise, the filter can be installed in its original place and tightened until it stops.
After unscrewing or tightening is completed, it is enough to remove the force from the handle, and the chain will loosen by itself and it can be removed from the filter housing.
4. Adjustable wrench
Perhaps this is the most convenient device if its dimensions allow the jaws to be spread to fit around the oil filter housing, the diameter of which can sometimes exceed 100 mm. It also requires a space commensurate with the length of the adjustable wrench. How can you find it on the engine of not only a passenger car, but also a truck? Therefore, this method is almost useless in practical terms.
5. Powerful screwdriver
Modern oil filters installed on car engines are mostly disposable. Therefore, after the first use, they are useless. This means there is nothing to feel sorry for them.
Hence the last “barbaric” method of unscrewing the oil filter using a strong and preferably long screwdriver with a sharp tip and a strong handle.
We point the tip of the screwdriver towards the filter generatrix, as close as possible to the bottom of the removable part. Holding the screwdriver perpendicular to the surface of the case, we strike the end of the handle with a hammer until we break through the upper and opposite walls. The tip of the screwdriver should come out.
Thus, we created an improvised lever to which it is enough to apply a slight counterclockwise force, and the filter will be easily unscrewed. Moreover, the longer the screwdriver, the less force required to unscrew it. The disadvantage is the same as in the previous case: a lot of space is required.
Note in conclusion
How to unscrew the oil filter if the first three devices are not at hand, and there is no room to use the last two. You should try using sandpaper.
To do this, you need to put gloves on your hands, cut off a proportionate piece of coarse sandpaper, wrap it around the filter body and try to move the filter with both hands. Usually this is possible, because all you need to overcome is the crushing force of the ring rubber gasket to seal the filter and the tightening of the thread.
Watch the video
Similar master classes
A simple DIY oil filter remover

Is it worth installing a magnet on the oil filter?

Save time and money: Change the oil in your car
A device for quickly changing oil in gasoline vehicles

How to make a compact heater from an old oil filter
How to make a puller for removing steering ends and ball joints
Particularly interesting
Comments (8)

