How to make a puller for removing steering ends and ball joints
When carrying out independent repairs to the car's chassis, it becomes necessary to remove ball joints and steering ends.
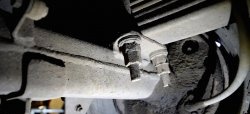
Thanks to its design feature, namely the cone-shaped base, the support (tip) is securely fixed in its seat.
During prolonged operation of the vehicle, the shrinkage of the support increases many times. The working surfaces of the supports and the mounting socket stick very closely to each other. In addition, moisture can form between the base and the seat, which subsequently causes corrosion. As a result of this, the contact becomes even more dense.
Therefore, to remove chassis elements, special devices are used - pullers, which help remove the finger.
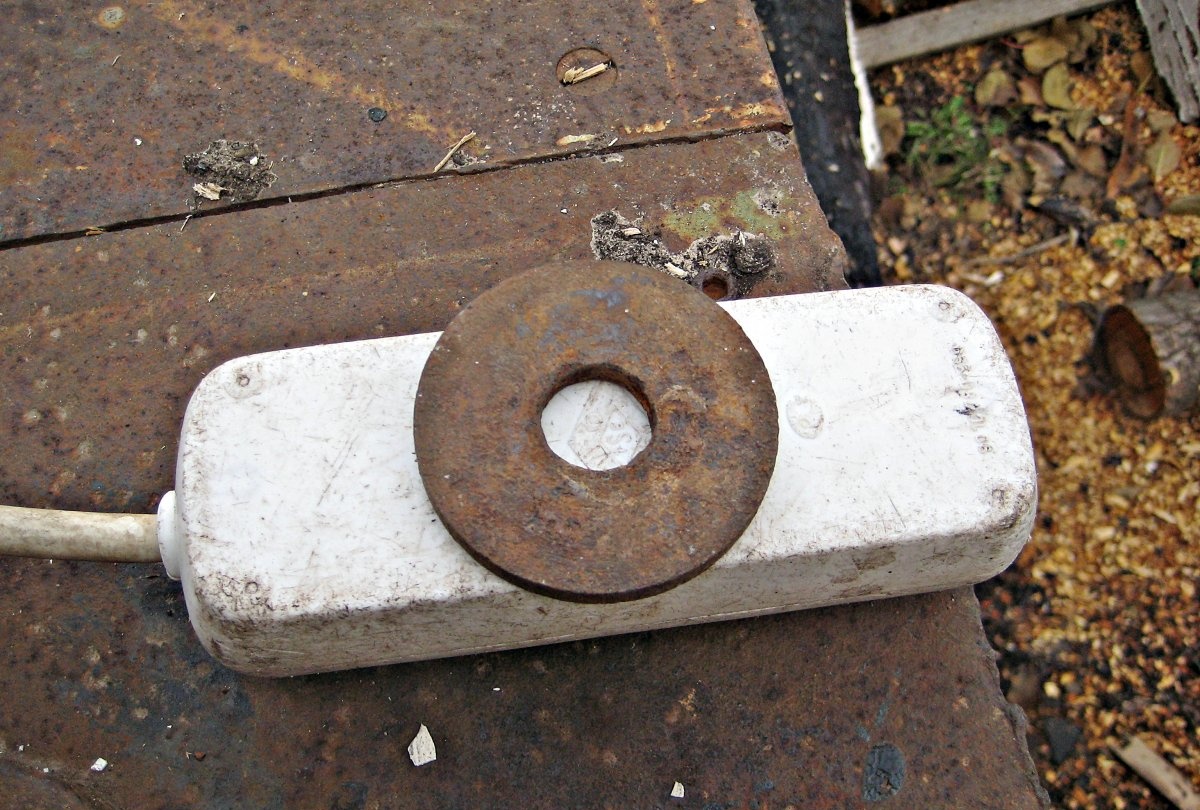
1. First, we need a washer with a thickness of 5 mm or more (sheet iron of the appropriate thickness).

2. We clamp the washer in the planks and make a cut, the width of which should be up to 2 cm.
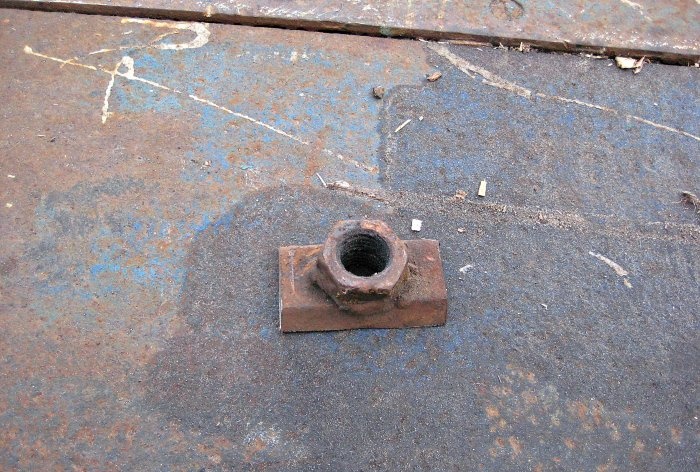
3. Next you will need a 19mm nut.
4. We weld the nut to the sheet iron, having previously drilled a hole in the iron for the passage of the bolt (in this case, a ready-made hexagon with a nut is used, which has been cut to the required dimensions).
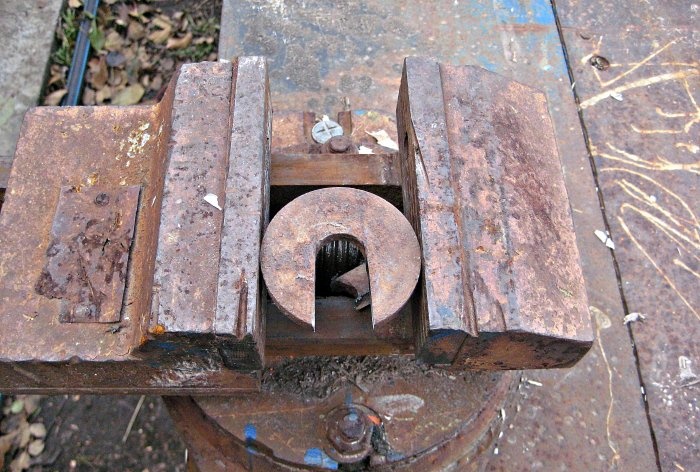
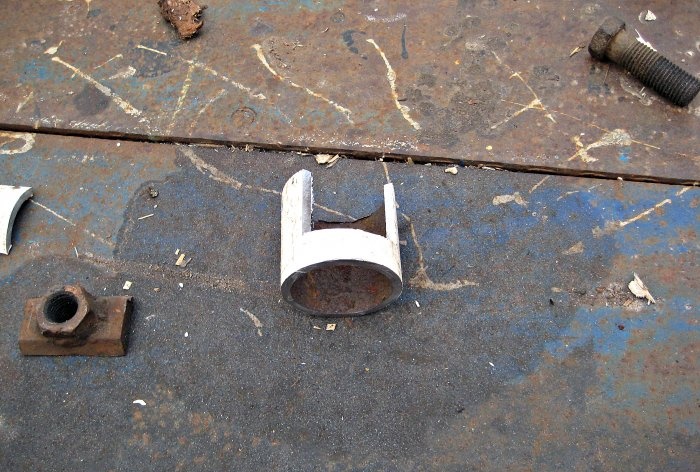
5. Next you need to take a piece of pipe. The diameter of the pipe should be 50 mm and the length 55-60 mm. We make a cut in the pipe 42 mm wide and 45 mm deep.
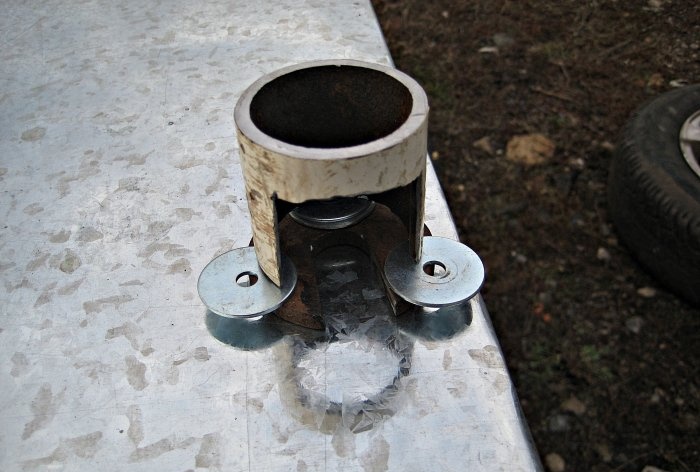
6. We place the prepared pipe on a washer with a cutout through washers at least 1 mm thick. This is done in order to provide a gap between the pipe and the washer, for good welding and filling the seam with metal. We install the pipe and washer with the cut in accordance with the photo.
7. After the pipe with the washer has been secured by welding, remove the washers and weld the seam well.

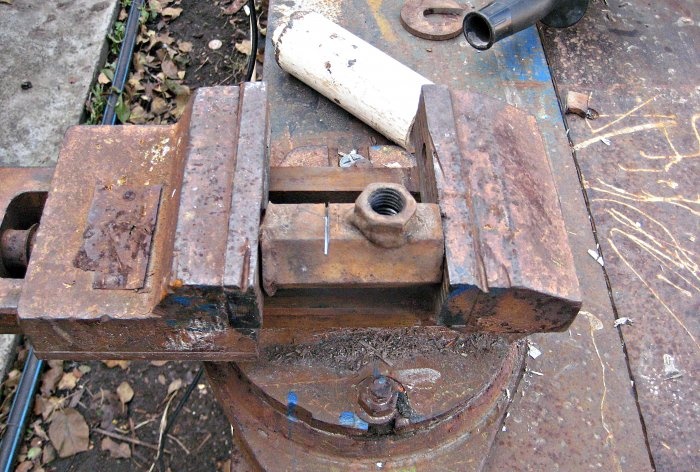
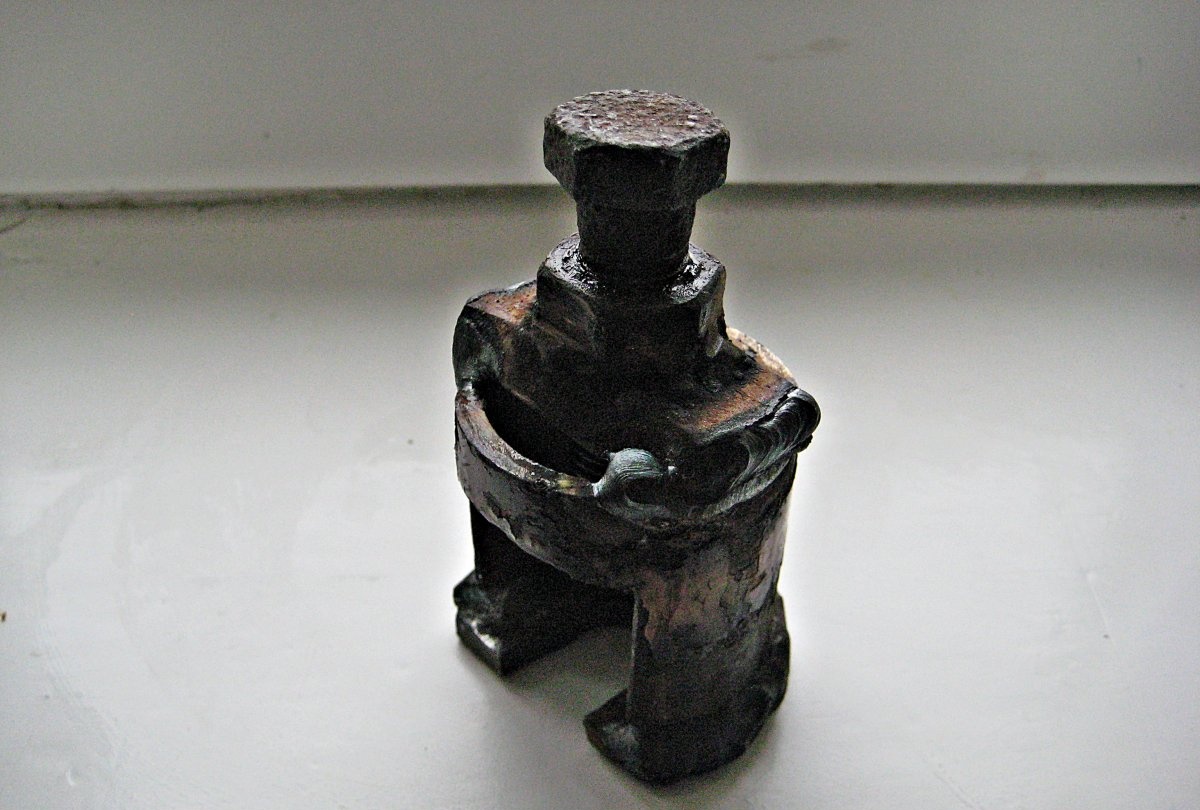
8. Next, weld the nut to the pipe.
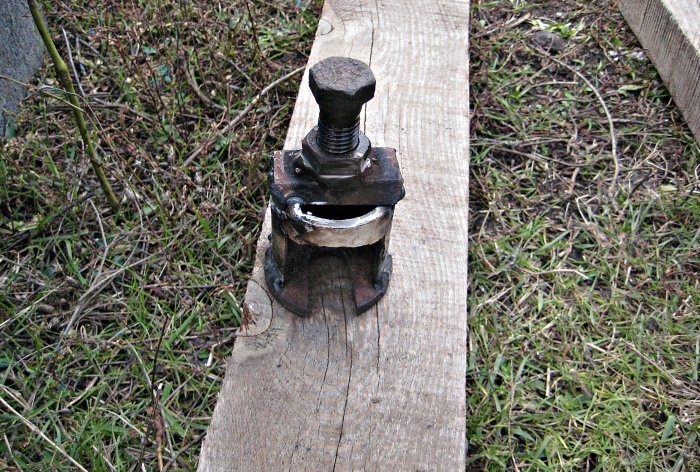
9. After all the parts are welded, it is necessary to cut off the sharp parts of the washer.
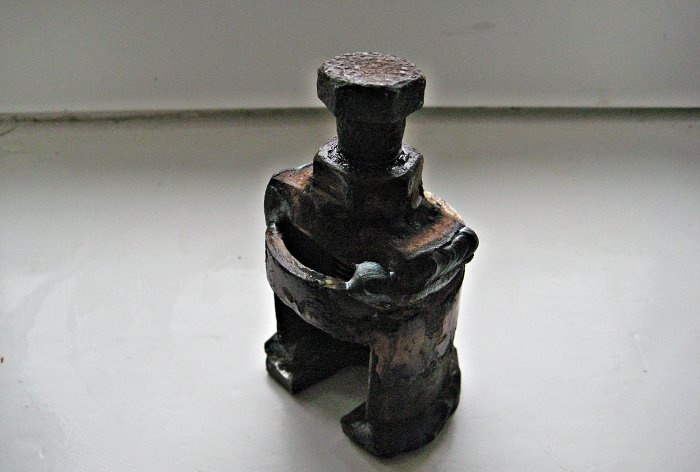
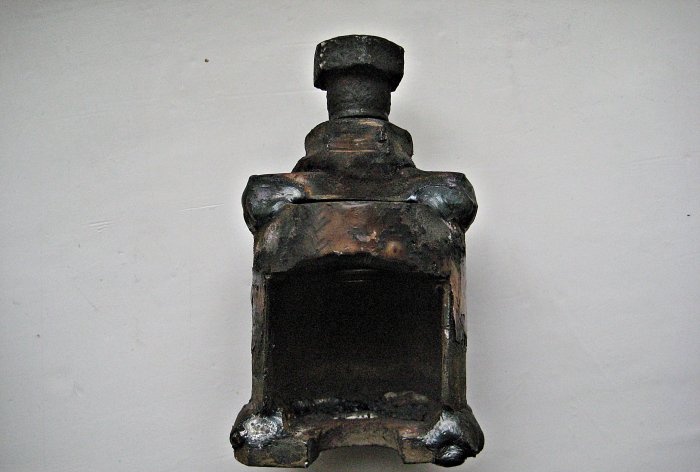
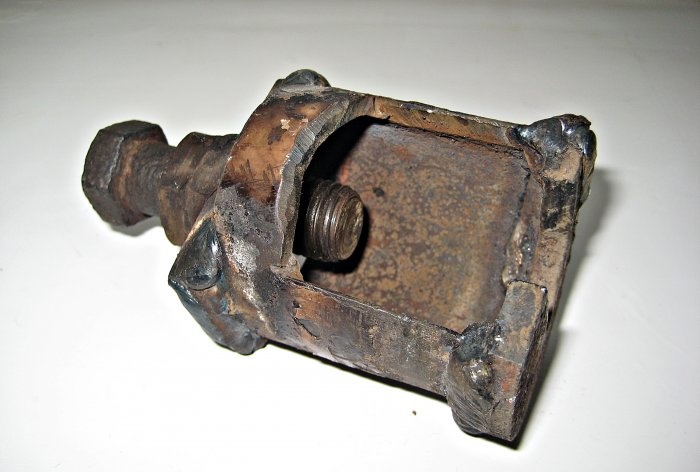
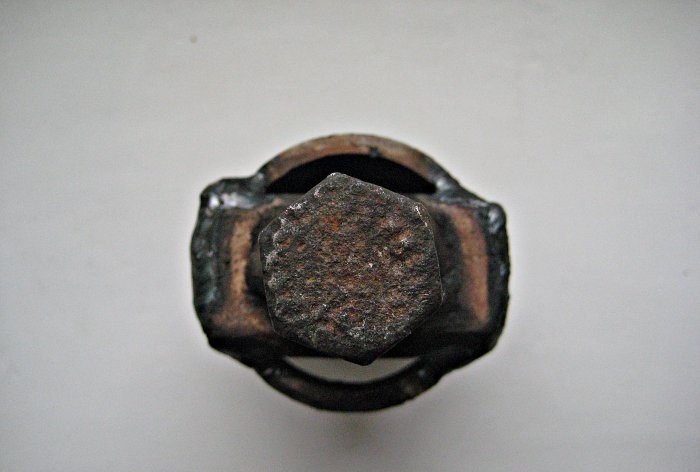
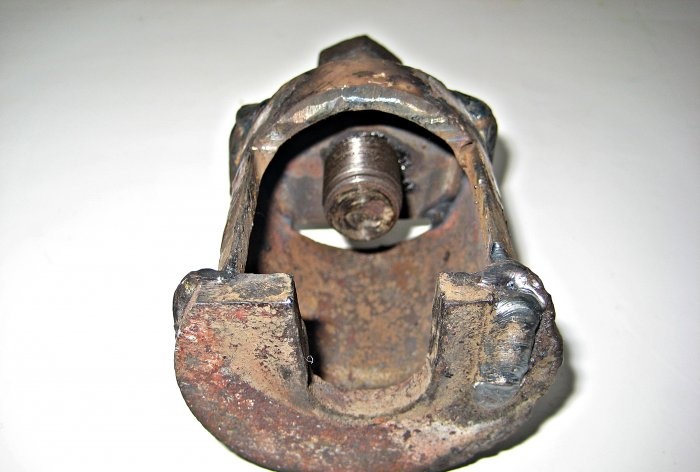
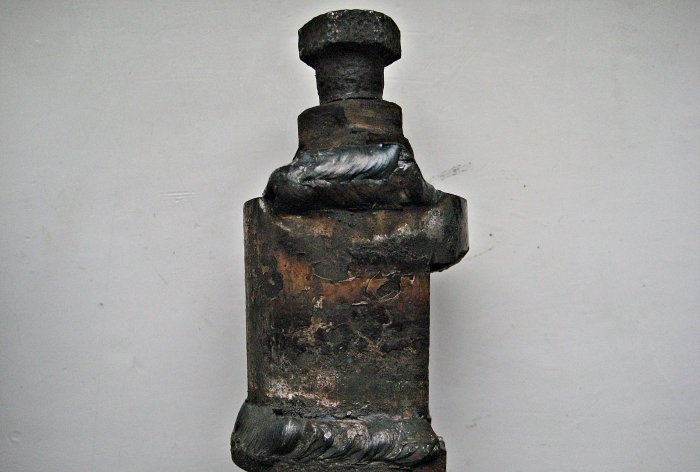
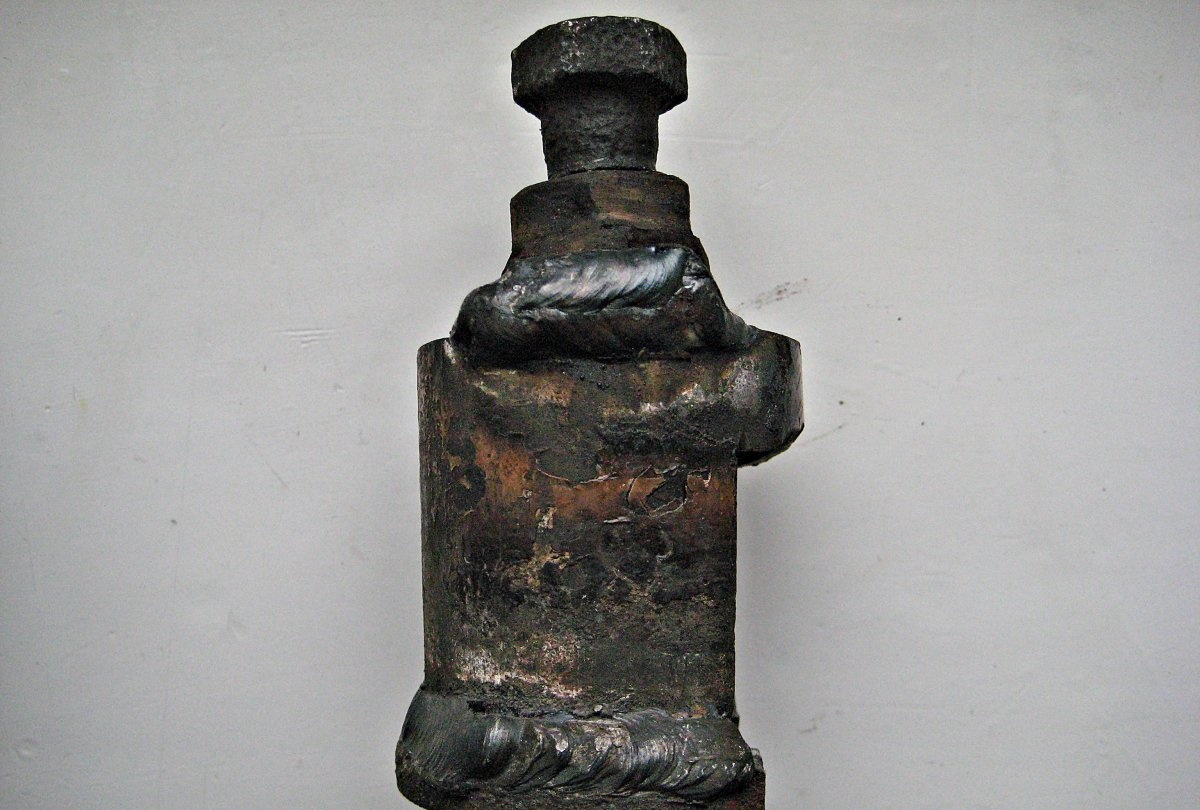
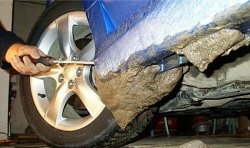
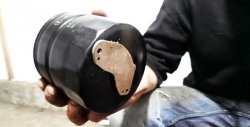
10. The finished puller looks like:

Thanks to its design feature, namely the cone-shaped base, the support (tip) is securely fixed in its seat.

During prolonged operation of the vehicle, the shrinkage of the support increases many times. The working surfaces of the supports and the mounting socket stick very closely to each other. In addition, moisture can form between the base and the seat, which subsequently causes corrosion. As a result of this, the contact becomes even more dense.
Therefore, to remove chassis elements, special devices are used - pullers, which help remove the finger.
Puller manufacturing process
1. First, we need a washer with a thickness of 5 mm or more (sheet iron of the appropriate thickness).
2. We clamp the washer in the planks and make a cut, the width of which should be up to 2 cm.

3. Next you will need a 19mm nut.

4. We weld the nut to the sheet iron, having previously drilled a hole in the iron for the passage of the bolt (in this case, a ready-made hexagon with a nut is used, which has been cut to the required dimensions).

5. Next you need to take a piece of pipe. The diameter of the pipe should be 50 mm and the length 55-60 mm. We make a cut in the pipe 42 mm wide and 45 mm deep.

6. We place the prepared pipe on a washer with a cutout through washers at least 1 mm thick. This is done in order to provide a gap between the pipe and the washer, for good welding and filling the seam with metal. We install the pipe and washer with the cut in accordance with the photo.

7. After the pipe with the washer has been secured by welding, remove the washers and weld the seam well.

8. Next, weld the nut to the pipe.

9. After all the parts are welded, it is necessary to cut off the sharp parts of the washer.
10. The finished puller looks like:

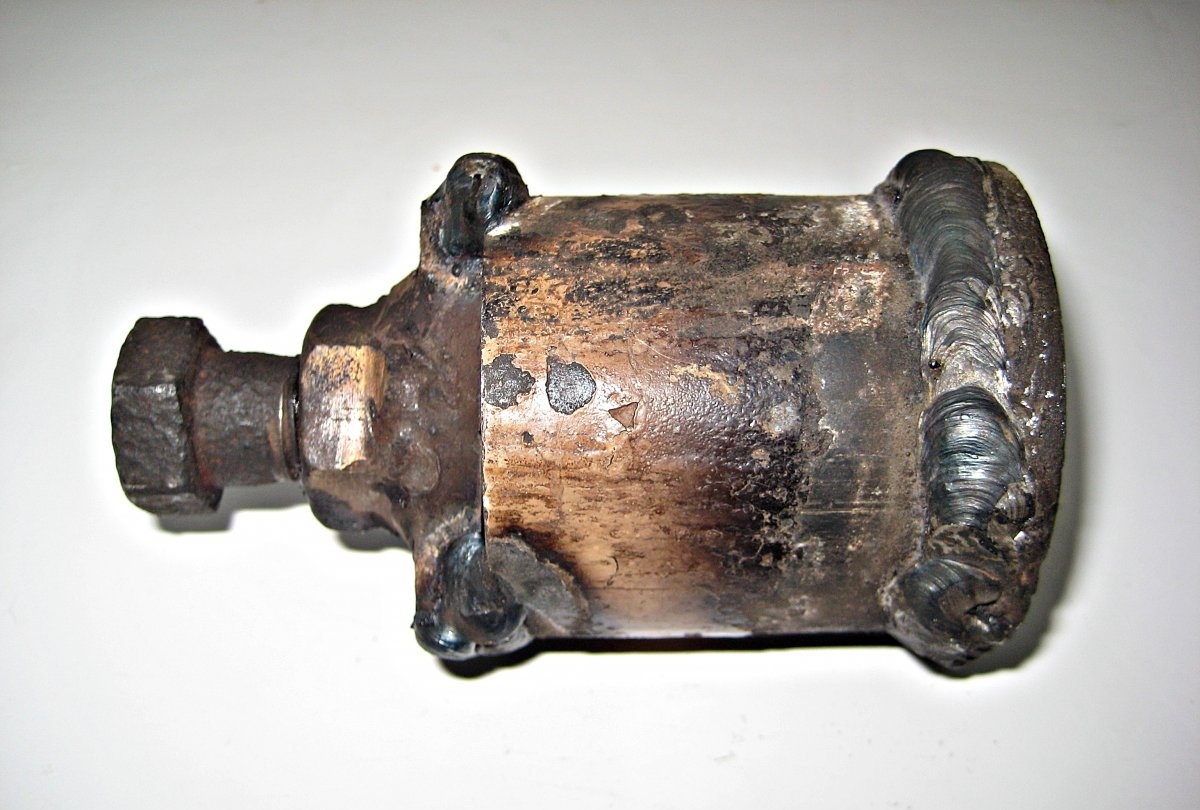
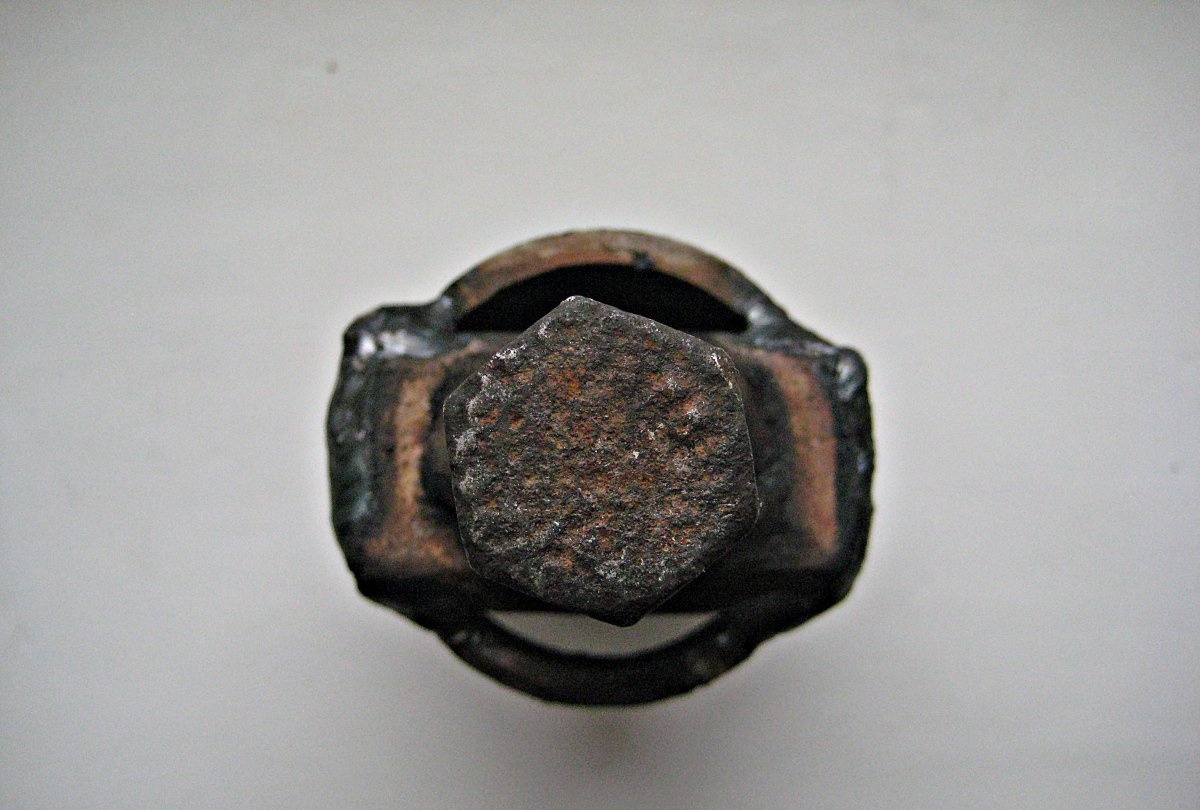
View of the puller from different sides:

Similar master classes
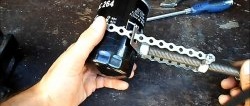
Homemade crimp for crimping tubular lugs on a cable
How to remove glue after removing tinting from car windows
Replacing the valve in 20 seconds without removing the wheel
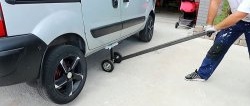
A lift for instantly jacking up a car with your own
A simple DIY oil filter remover
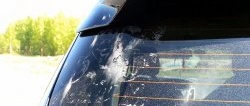
How to remove sticker marks on car glass in 1 minute
Particularly interesting
Comments (2)
