Finish with plastic
The plastic finish looks fashionable and modern. Hides many imperfections, from the curvature of the walls to holes in them. This method of interior wall decoration has many advantages, the only significant disadvantage is the relative high cost of the finishing material.
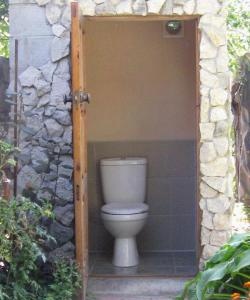
I'll tell you how I personally decorated one of the most necessary rooms))) to which the popular path never becomes overgrown - the toilet.
TOOL. First of all, if you are going to do something like this, I would advise you to acquire or borrow as many power tools as possible, such as a hammer drill, a screwdriver, a jigsaw, and the like. If this is not taken care of, then you can mess around with this finish for up to a month. I want to say that I got it all done in three days.
In addition to everything, you need a measuring instrument such as all sorts of LEVELS, rulers, protractors, 90 degree angles and others.
MATERIAL. Well, I think you will choose the colors yourself, but it’s worth thinking about the quality and be sure to pay attention to the evenness of the slabs, the color scheme (so that all stripes are the same). The corners of the panels must be undamaged, otherwise they will have to be cut.In general, look with your eyes, touch with your hands, don’t be shy, ask the seller. Naturally, before purchasing, make a complete list, taking into account everything from finishing materials to fasteners and all kinds of bolts, screws, and adhesives.

Reiki. I bought it at a sawmill for pennies.


Here's what happened at the very beginning:


On the first day I assembled the frame. I took quite detailed photos, so everything should be without unnecessary explanation.


Second day. I trimmed half of it. The sheets are firmly held on staples, which are driven in using a furniture stapler.


Well, on the third day I finished all the remaining work.


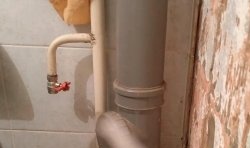
The result, I think, is obvious to everyone. I would like to give advice: before you start decorating such a room, think about whether it is worth replacing some hose or tap before finishing.
Good luck with construction and finishing work!
I'll tell you how I personally decorated one of the most necessary rooms))) to which the popular path never becomes overgrown - the toilet.
TOOL. First of all, if you are going to do something like this, I would advise you to acquire or borrow as many power tools as possible, such as a hammer drill, a screwdriver, a jigsaw, and the like. If this is not taken care of, then you can mess around with this finish for up to a month. I want to say that I got it all done in three days.
In addition to everything, you need a measuring instrument such as all sorts of LEVELS, rulers, protractors, 90 degree angles and others.
MATERIAL. Well, I think you will choose the colors yourself, but it’s worth thinking about the quality and be sure to pay attention to the evenness of the slabs, the color scheme (so that all stripes are the same). The corners of the panels must be undamaged, otherwise they will have to be cut.In general, look with your eyes, touch with your hands, don’t be shy, ask the seller. Naturally, before purchasing, make a complete list, taking into account everything from finishing materials to fasteners and all kinds of bolts, screws, and adhesives.

Reiki. I bought it at a sawmill for pennies.


Here's what happened at the very beginning:


On the first day I assembled the frame. I took quite detailed photos, so everything should be without unnecessary explanation.


Second day. I trimmed half of it. The sheets are firmly held on staples, which are driven in using a furniture stapler.


Well, on the third day I finished all the remaining work.


The result, I think, is obvious to everyone. I would like to give advice: before you start decorating such a room, think about whether it is worth replacing some hose or tap before finishing.
Good luck with construction and finishing work!
Similar master classes
Particularly interesting
Comments (3)


