Connecting a three-phase electric motor to a single-phase network
A 3-phase motor can be used to operate from a single-phase household AC network with a voltage of 220 volts. Rework is possible even if there is no extensive experience in electrical work with minimal installation skills. The costs of additional circuit elements are low.
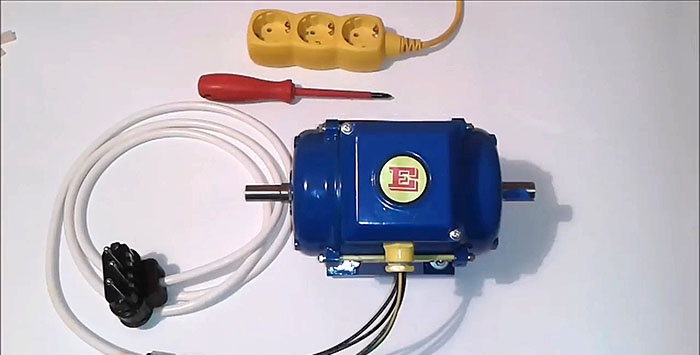
A three-phase motor contains a stator - a stationary part with fixed wire coils. They are offset relative to each other along the circumference by 120 angular degrees. Alternating current, passing through the windings, creates a changing magnetic field that pushes the moving part of the engine - the rotor, or as it was called before - the armature.
There are two known ways to connect windings to each other:
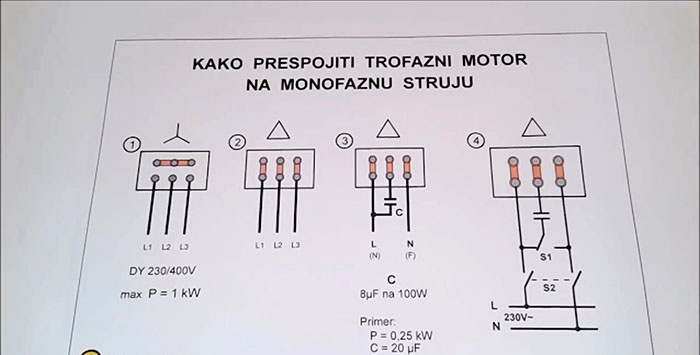
1. Having carefully examined the electric motor, find a socket (usually an aluminum plate) with information about the parameters.There is no need to undertake modifications to a motor with a power of more than 1 kW (1kW). The inscription DY 220/400 means that the motor can be turned on in both the triangle (D) and star (Y) configurations. The operating voltage is 220 volts single/or 400 three-phase. Terminals marked L(1÷3) for connecting phases.
2. As a standard, the coils of a 3-phase electric motor are star-connected. Changing the position of the strip jumpers will create a "triangle" pattern.
3. After this, connect L1 to the phase conductor, and L3 to the neutral wire. We connect the middle terminal (L2) to a shifting capacitor, the second terminal of which is connected to phase or zero. This determines the direction of rotation of the armature. A motor power of 100 W will require a capacitance of 8÷10 µF, for 0.25 kW a capacitor of 20 µF is needed.
4. It is convenient to quickly change the direction of rotation by switching the capacitor from the phase conductor to the neutral conductor. A two-pole switch will supply power to the motor.
Remove the cover of the electric motor junction box, gaining access to the jumpers.
Having previously unscrewed the fastening nuts, change the position of the jumpers, changing the connection diagram of the windings to a “triangle”. After this, tighten the nuts securely and replace the box cover, noting the 1st, 2nd and 3rd phase connection wires.
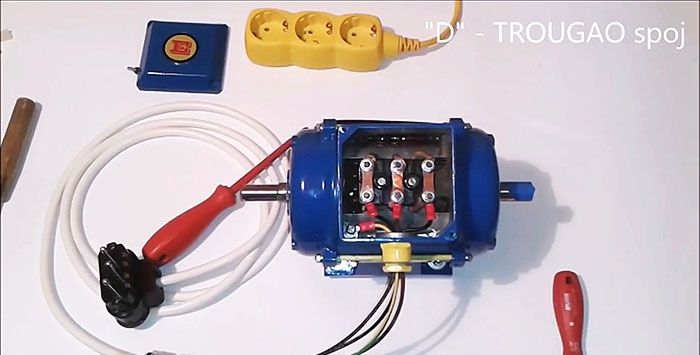
Determine the middle winding, cut the core, strip the insulation. Crimp the ends with a terminal lug, if any, and connect a capacitor into the gap.
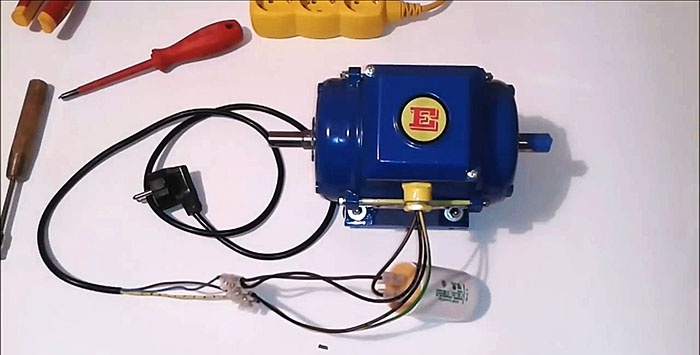
It is convenient and reliable to connect the circuit using terminal pairs. By connecting the wires from the motor and capacitor to the connector, ground, phase and neutral are supplied from the other end. Carefully tightening the terminal screws will ensure reliable electrical contact.
IMPORTANT! The motor has a conductor with yellow-green insulation. It is connected to the body.Connected through the third contacts of the cord plug and socket with grounding, it protects against voltage breakdown across the motor mass. You cannot connect other electrical wires to it - only the yellow-green end of the power plug.
The functionality of the circuit can be checked by connecting the wire from the capacitor to the phase and turning on the power 220. If all parts are in good condition, the motor should rotate the rotor in one direction.
Having removed the power, we switch the capacitor to the neutral conductor - the motor rotates in the opposite direction. Having chosen the appropriate direction, we leave the desired connection constant.
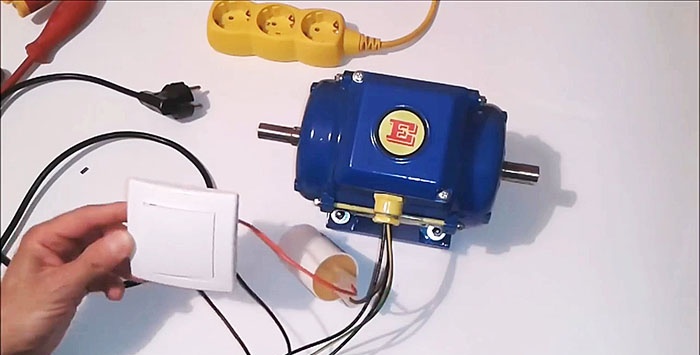
A quick change of the direction of rotation to the opposite one will be provided by a switch connecting the capacitor to phase or zero.
IMPORTANT! Changing direction is allowed only after the power is turned off and the rotor has completely stopped.
Reworking the electric motor involves working on a 220 volt network. Careless handling or carelessness in work is associated with a threat to life or health. Do not leave connections without proper insulation. Restrict access of unauthorized persons to the installation until it is completed.

Types of winding connections
A three-phase motor contains a stator - a stationary part with fixed wire coils. They are offset relative to each other along the circumference by 120 angular degrees. Alternating current, passing through the windings, creates a changing magnetic field that pushes the moving part of the engine - the rotor, or as it was called before - the armature.
There are two known ways to connect windings to each other:

- Star - the first ends of the windings are connected to each other, and the phase conductors of the network are connected to the second terminals of the coils.
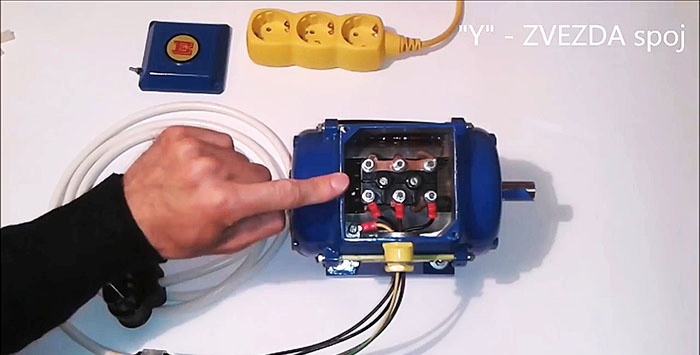
- Triangle - the coils are connected in series one after another, the end of the third winding is connected to the beginning of the first. Schematically they form a triangle, to the vertices of which the phases are connected.

Stages of work:
1. Having carefully examined the electric motor, find a socket (usually an aluminum plate) with information about the parameters.There is no need to undertake modifications to a motor with a power of more than 1 kW (1kW). The inscription DY 220/400 means that the motor can be turned on in both the triangle (D) and star (Y) configurations. The operating voltage is 220 volts single/or 400 three-phase. Terminals marked L(1÷3) for connecting phases.
2. As a standard, the coils of a 3-phase electric motor are star-connected. Changing the position of the strip jumpers will create a "triangle" pattern.
3. After this, connect L1 to the phase conductor, and L3 to the neutral wire. We connect the middle terminal (L2) to a shifting capacitor, the second terminal of which is connected to phase or zero. This determines the direction of rotation of the armature. A motor power of 100 W will require a capacitance of 8÷10 µF, for 0.25 kW a capacitor of 20 µF is needed.
4. It is convenient to quickly change the direction of rotation by switching the capacitor from the phase conductor to the neutral conductor. A two-pole switch will supply power to the motor.
Connection to a single-phase network
Remove the cover of the electric motor junction box, gaining access to the jumpers.
Having previously unscrewed the fastening nuts, change the position of the jumpers, changing the connection diagram of the windings to a “triangle”. After this, tighten the nuts securely and replace the box cover, noting the 1st, 2nd and 3rd phase connection wires.

Determine the middle winding, cut the core, strip the insulation. Crimp the ends with a terminal lug, if any, and connect a capacitor into the gap.

It is convenient and reliable to connect the circuit using terminal pairs. By connecting the wires from the motor and capacitor to the connector, ground, phase and neutral are supplied from the other end. Carefully tightening the terminal screws will ensure reliable electrical contact.
IMPORTANT! The motor has a conductor with yellow-green insulation. It is connected to the body.Connected through the third contacts of the cord plug and socket with grounding, it protects against voltage breakdown across the motor mass. You cannot connect other electrical wires to it - only the yellow-green end of the power plug.
The functionality of the circuit can be checked by connecting the wire from the capacitor to the phase and turning on the power 220. If all parts are in good condition, the motor should rotate the rotor in one direction.
Having removed the power, we switch the capacitor to the neutral conductor - the motor rotates in the opposite direction. Having chosen the appropriate direction, we leave the desired connection constant.

A quick change of the direction of rotation to the opposite one will be provided by a switch connecting the capacitor to phase or zero.
IMPORTANT! Changing direction is allowed only after the power is turned off and the rotor has completely stopped.
Safety
Reworking the electric motor involves working on a 220 volt network. Careless handling or carelessness in work is associated with a threat to life or health. Do not leave connections without proper insulation. Restrict access of unauthorized persons to the installation until it is completed.
Watch the video
Similar master classes
Connecting a three-phase motor according to a star and delta circuit
How to connect a star-delta motor

Starting a three-phase motor from a single-phase network without a capacitor
How to connect the motor from a washing machine to 220 V
How to start a stepper motor without electronics
How to get three phases from one
Particularly interesting
Comments (12)


