How to make a sawmill from scrap materials
Not everyone has the financial opportunity to purchase a factory-made sawmill for their household. But if you look around, you can find a lot of materials from which you can assemble a homemade sawmill.
There may be some costs associated with the purchase of an electric motor (a used one, but in good working order, will do) and hole saws, but they will still be incomparably less than the cost of a factory sawmill.
It will be a frame structure made of rectangular pipes and corners, providing sufficient rigidity and strength. Initially, a belt drive was planned from the electric motor to the hole saw drive pulley, but then this option had to be abandoned due to its complexity and lack of reliability.
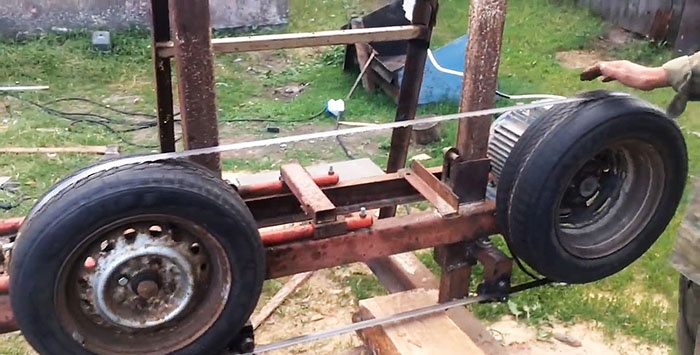
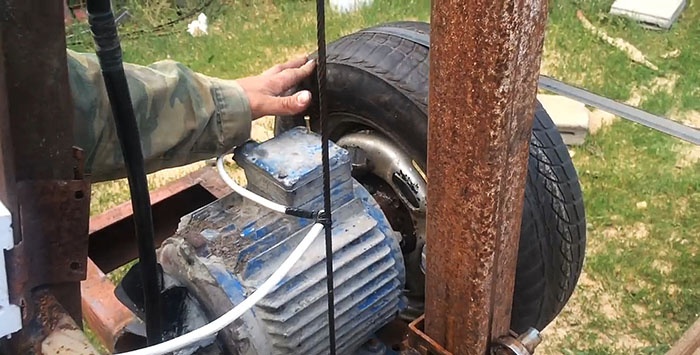
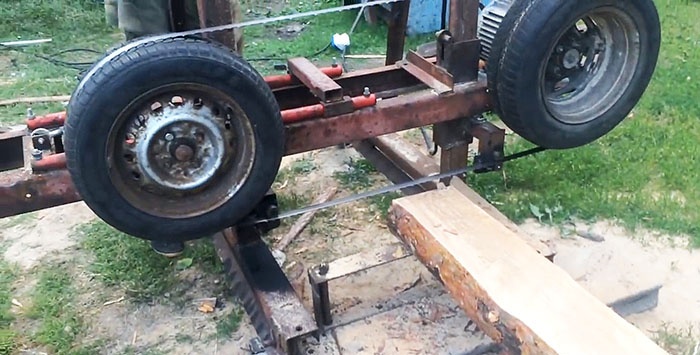
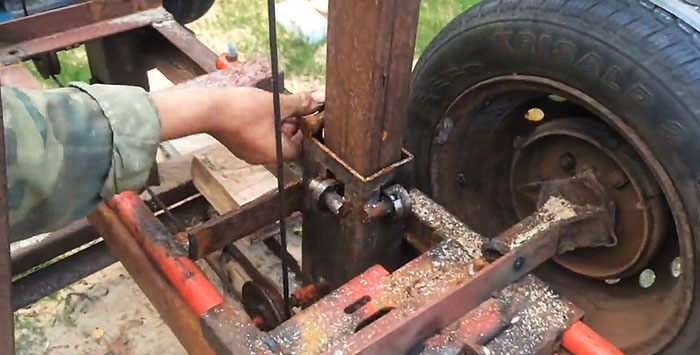
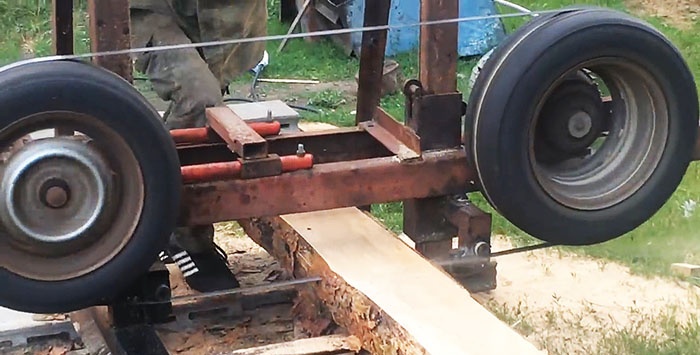
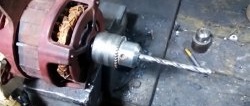
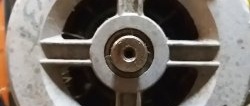
In the final version, the drive pulley (a wheel assembly from a passenger car size R13 or R14 with a fully inflated tire) was rigidly mounted on the electric motor shaft.
The driven pulley is exactly the same wheel, mounted on a movable carriage, with the help of which the tension of the hole saw can be adjusted.
This design of the pulleys along which the hole saw moves solves two important problems:
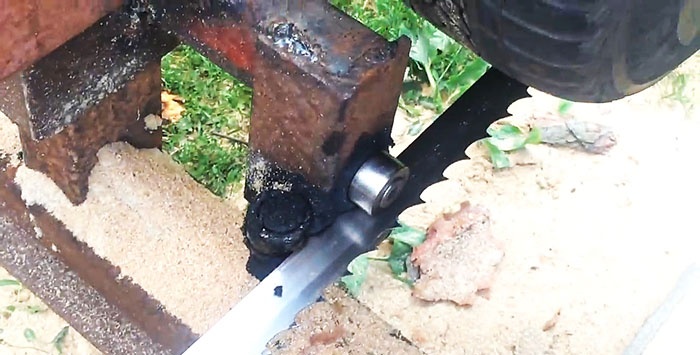
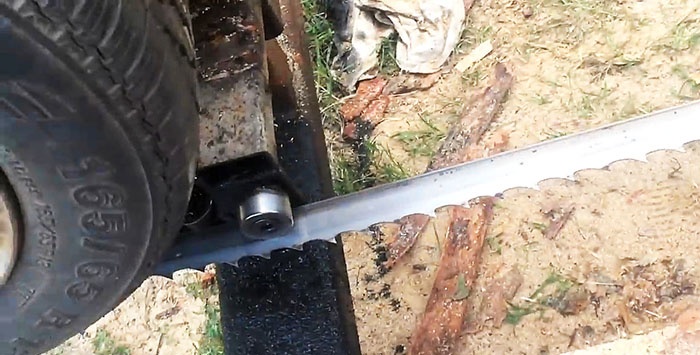
Behind the driving wheel and in front of the driven wheel, bearings are installed in pairs vertically, between which the descending branch of the hole saw passes, which dampens its vibrations and gives it direction.
The lifting mechanism is assembled on the basis of a cable winch and two pulleys.

With its help, you can raise or lower the cutting unit and, thereby, adjust the thickness of the resulting board and raise the saw at the end point to return the cutting unit to its initial position.
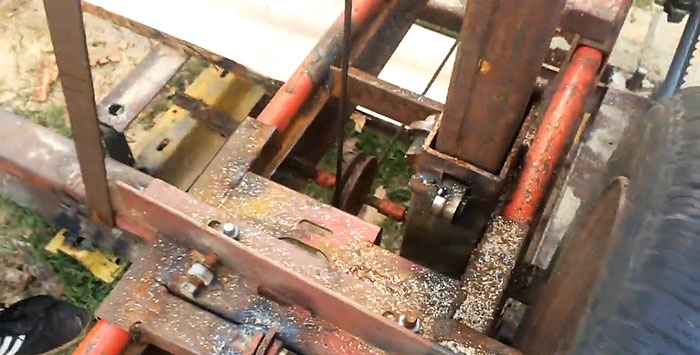
To ensure that the racks of the cutting unit move easily in the guides and there is no play, they have 4 bearings welded on top and bottom of the axles.
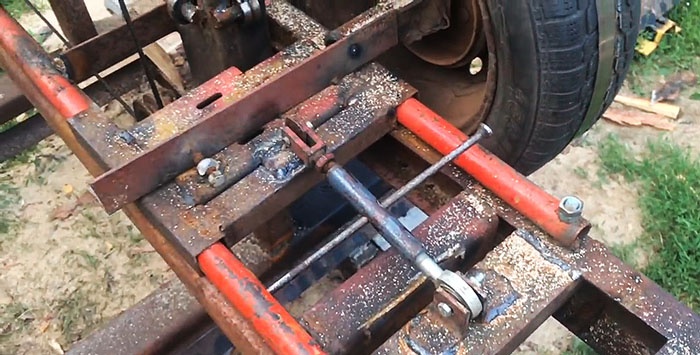
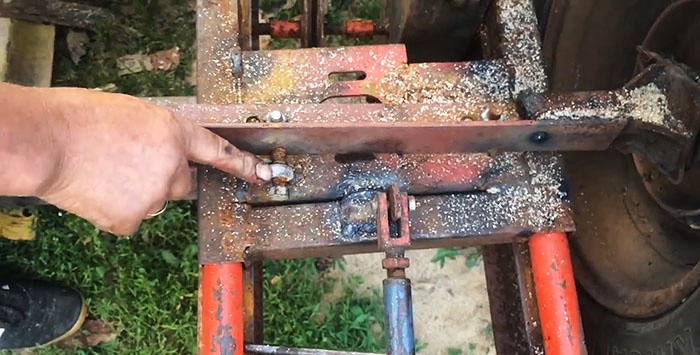
A simple hole saw tensioning unit was also made based on an adjustable rod removed from old agricultural machinery.
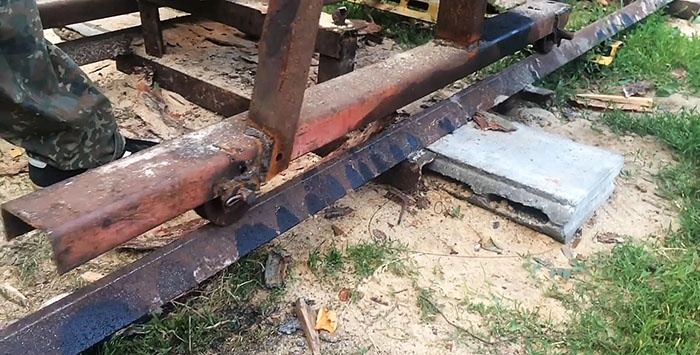
The cutting unit, together with the saw, winch, electric motor, driving and driven pulleys (wheels), moves on 4 rollers along two longitudinal angles, placed at an angle to the top on a reliable base.
Servicing a homemade sawmill in the process of dissolving timber or small-diameter round timber into boards is not particularly difficult.
The sequence of basic operations is as follows:
1. The cutting unit is installed in its original position so that the working (lower) branch of the hole saw is located before the unraveling mass, which must be securely fastened to prevent its longitudinal and transverse movement.
2.Using a cable winch, raising or lowering the cutting unit, we set the thickness of the board that is required.
3. A small amount of water is supplied to the lower branch of the cutting tool in the cutting area, but preferably a soap solution or diesel fuel (less desirable due to rubber deterioration) to cool the saw and extend its service life.
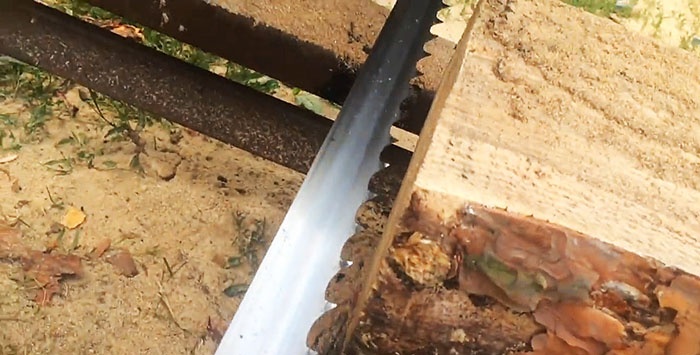
4. The electric motor is turned on, the moving lower branch of the saw is brought to the end of the array, which, together with the cutting unit, manually moves along the guides from the beginning to the end of the cut.

5. At the end of the passage, the board cut off from the array is removed, the cutting unit is lifted up by a winch and returned to its original position. The device is ready for use again.
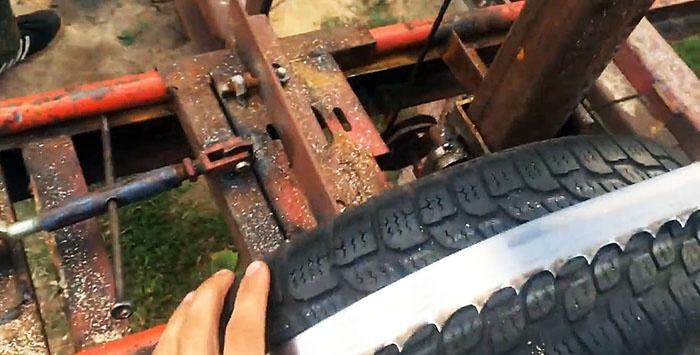
To prevent the hole saw from sliding off the driven wheel, a bolt is installed on the carriage, with which you can change within small limits the direction of the axis of the driven pulley and, thereby, prevent the saw from moving to the side.
Result:


The boards are even and smooth.
For the safety of those operating such a homemade sawmill, the hole saw should be enclosed in a protective casing in case it ruptures and to prevent its fragments from causing injury to people.
There may be some costs associated with the purchase of an electric motor (a used one, but in good working order, will do) and hole saws, but they will still be incomparably less than the cost of a factory sawmill.
Construction of a homemade sawmill
It will be a frame structure made of rectangular pipes and corners, providing sufficient rigidity and strength. Initially, a belt drive was planned from the electric motor to the hole saw drive pulley, but then this option had to be abandoned due to its complexity and lack of reliability.
In the final version, the drive pulley (a wheel assembly from a passenger car size R13 or R14 with a fully inflated tire) was rigidly mounted on the electric motor shaft.
The driven pulley is exactly the same wheel, mounted on a movable carriage, with the help of which the tension of the hole saw can be adjusted.
This design of the pulleys along which the hole saw moves solves two important problems:
- the stability of the cutting tool is ensured during operation, i.e. the saw does not slip off the pulleys due to the high friction force between the rubber and metal of the tool;
- random peak loads are absorbed, for example, when the saw passes through the knot area, due to the elastic properties of rubber.
Behind the driving wheel and in front of the driven wheel, bearings are installed in pairs vertically, between which the descending branch of the hole saw passes, which dampens its vibrations and gives it direction.
The lifting mechanism is assembled on the basis of a cable winch and two pulleys.
With its help, you can raise or lower the cutting unit and, thereby, adjust the thickness of the resulting board and raise the saw at the end point to return the cutting unit to its initial position.
To ensure that the racks of the cutting unit move easily in the guides and there is no play, they have 4 bearings welded on top and bottom of the axles.
A simple hole saw tensioning unit was also made based on an adjustable rod removed from old agricultural machinery.
The cutting unit, together with the saw, winch, electric motor, driving and driven pulleys (wheels), moves on 4 rollers along two longitudinal angles, placed at an angle to the top on a reliable base.
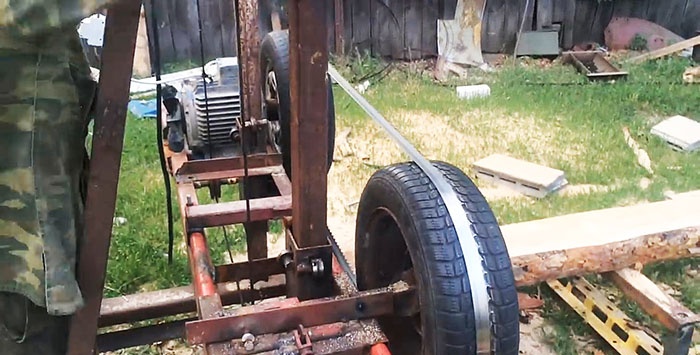
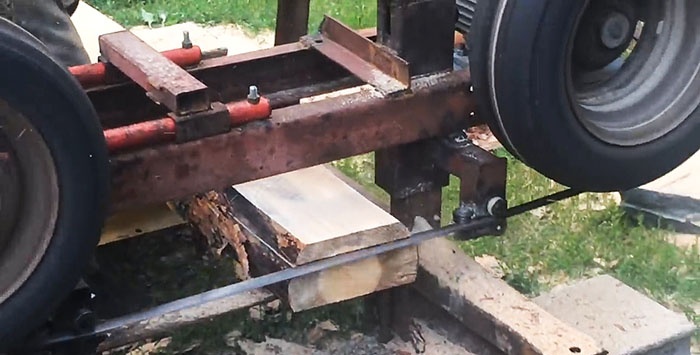
Sawmill at work
Servicing a homemade sawmill in the process of dissolving timber or small-diameter round timber into boards is not particularly difficult.
The sequence of basic operations is as follows:
1. The cutting unit is installed in its original position so that the working (lower) branch of the hole saw is located before the unraveling mass, which must be securely fastened to prevent its longitudinal and transverse movement.
2.Using a cable winch, raising or lowering the cutting unit, we set the thickness of the board that is required.
3. A small amount of water is supplied to the lower branch of the cutting tool in the cutting area, but preferably a soap solution or diesel fuel (less desirable due to rubber deterioration) to cool the saw and extend its service life.
4. The electric motor is turned on, the moving lower branch of the saw is brought to the end of the array, which, together with the cutting unit, manually moves along the guides from the beginning to the end of the cut.
5. At the end of the passage, the board cut off from the array is removed, the cutting unit is lifted up by a winch and returned to its original position. The device is ready for use again.
To prevent the hole saw from sliding off the driven wheel, a bolt is installed on the carriage, with which you can change within small limits the direction of the axis of the driven pulley and, thereby, prevent the saw from moving to the side.
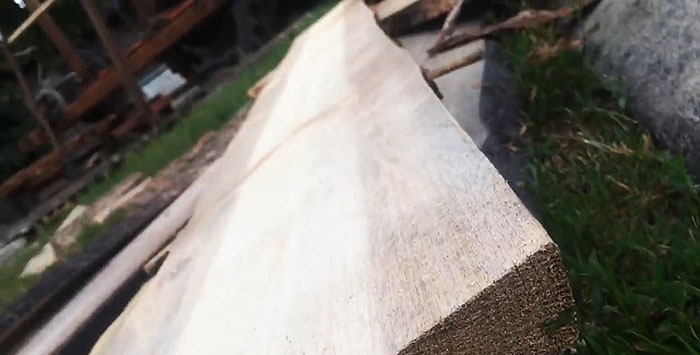
Result:
The boards are even and smooth.
Final Note
For the safety of those operating such a homemade sawmill, the hole saw should be enclosed in a protective casing in case it ruptures and to prevent its fragments from causing injury to people.
Watch the video
Similar master classes
How to remove a pressed pulley from an electric motor and install

How to turn an electric motor armature into an effective tool

Working design of a homemade lathe
How to drill an electric motor shaft straight without a lathe

Complete check of the motor rotor

Homemade hydroelectric power station from an old washing machine
Particularly interesting


Comments (1)
