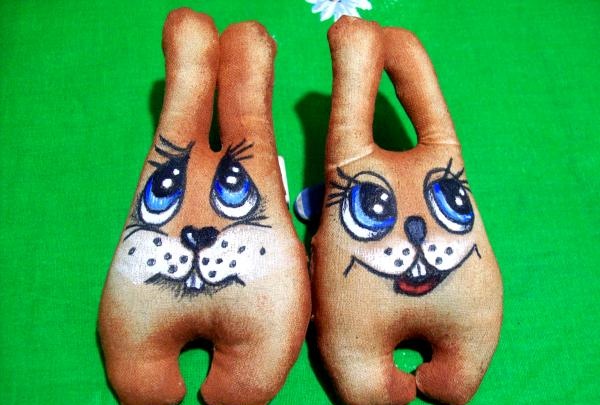
Master class of coffee toys “Snobbish Bunnies”
Such small (11 cm) scented souvenirs are easy to make and can be used in various situations.
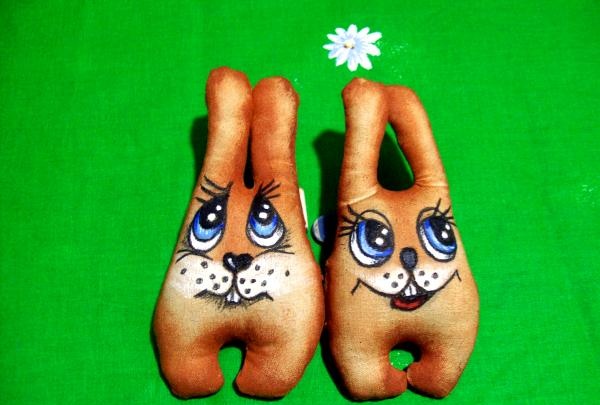
For work we take materials:
- sewing machine.
- scissors.
- acrylic paints.
- black gel pen.
- a little white thick fabric.
- thin brush.
- a piece of foam rubber.
- pencil.
- coffee solution (1 tablespoon each of instant coffee and PVA glue, a packet of vanillin and 100 ml of warm water).
- thin cord 30 cm long.
- filler for toys.
- essential oil of cinnamon and vanilla.
- needle and thread.
- empty small medical syringe.
But before we start, let’s draw a template shape of two bunnies.
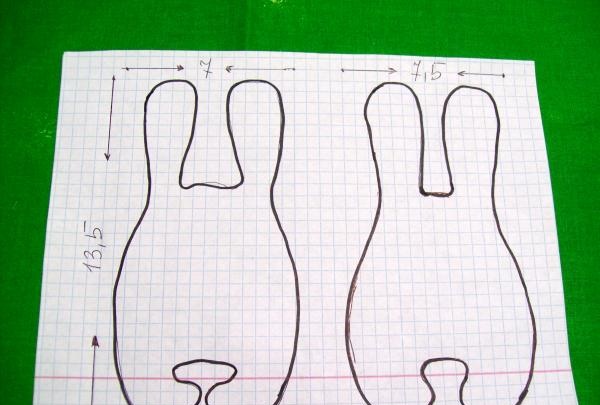
Now take the prepared fabric and fold it in half along the grain. It needs to stretch in width, not in length. We attach the cut out templates and trace them with a simple pencil. And we cut it out with allowances for the seams.
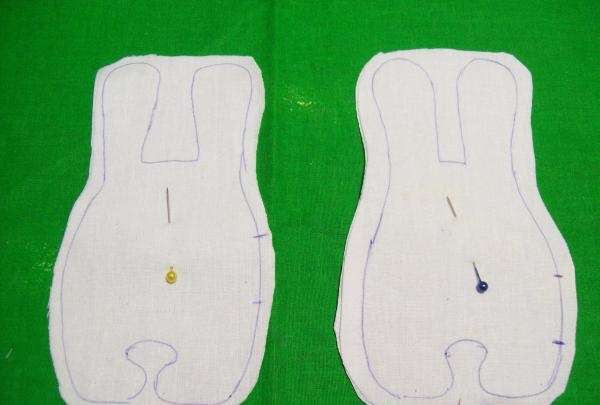
We put marks for the holes through which we will fill the products.
Now we take a sewing machine and sew along the contour, leaving only the intended segments untouched. After this, we cut notches in the curved places of the patterns so that it turns out well when turning.
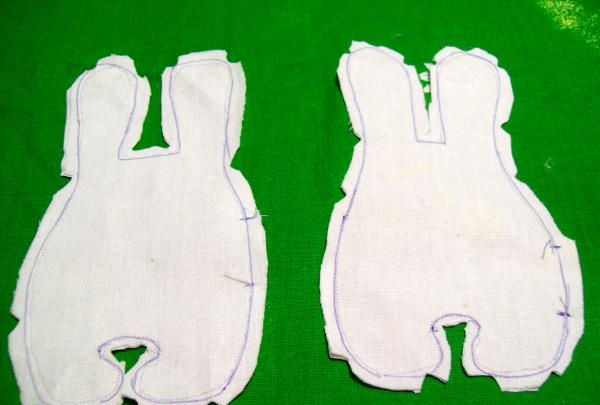
Now turn it inside out using a pencil.
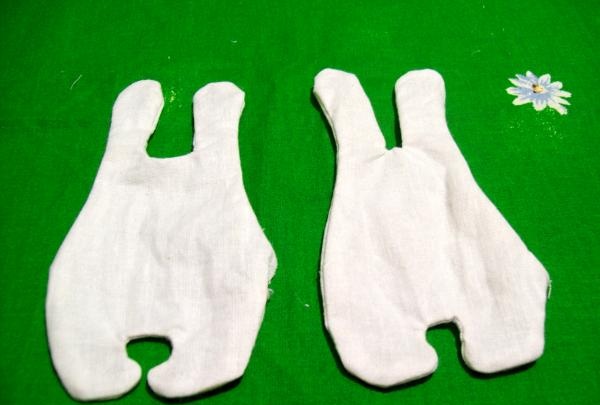
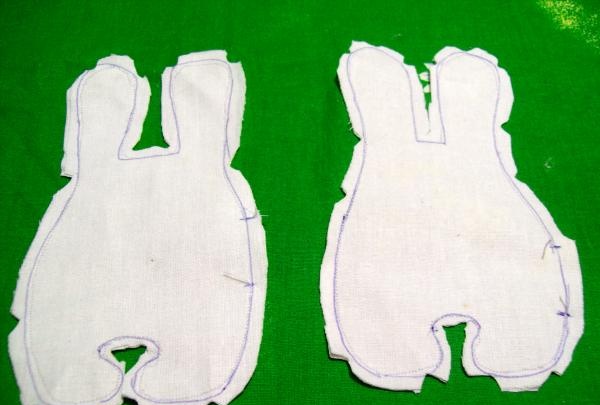
We straightened out all the bends and started filling. To fill the bunnies, you can use padding polyester, padding polyester, or hololfiber. When filling, we also use a pencil. We do not stuff it too tightly.
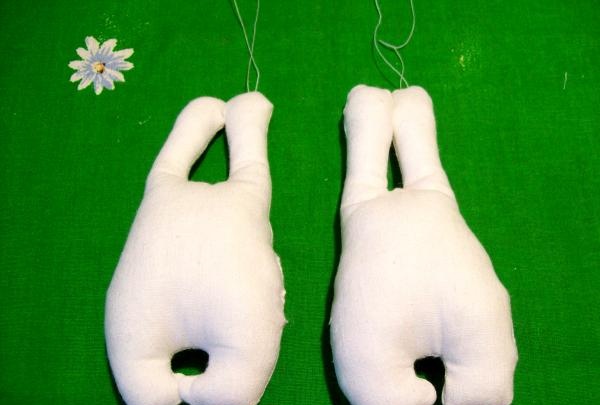
Now we sew up our free holes with a needle and thread. Then we make loops on the ears from threads for drying. And with a simple pencil we outline the main location of the future eyes.
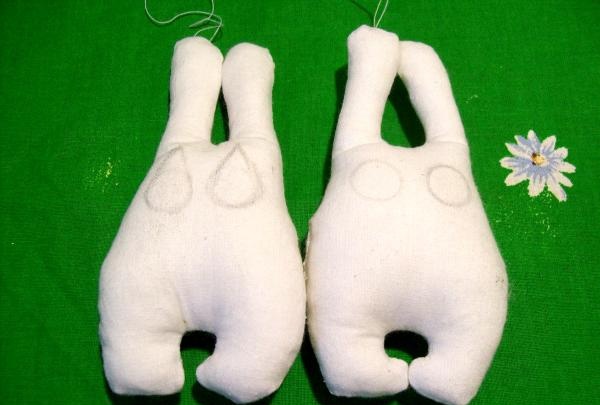
It's time for some coffee tinting. The solution itself is not difficult to prepare. Dissolve 1 tablespoon of coffee and the same amount of PVA glue in 100 ml of not very hot water, stir well, then add a pack of vanillin. When the solution is ready, take a piece of foam rubber and coat the bunnies on all sides and all the seams with it. And hang it up to dry. You can leave it in the air for 2 hours or in the oven for 10-15 minutes.
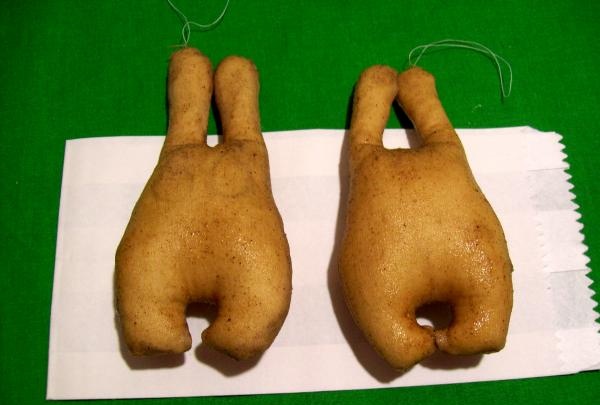
Some time passed and the products dried. We take acrylic paints. We use brown color first, dilute it with water and use a piece of foam rubber to tint along the seams. The drawn base for the eyes is visible and now with a pencil we continue to outline all the details of the muzzle.
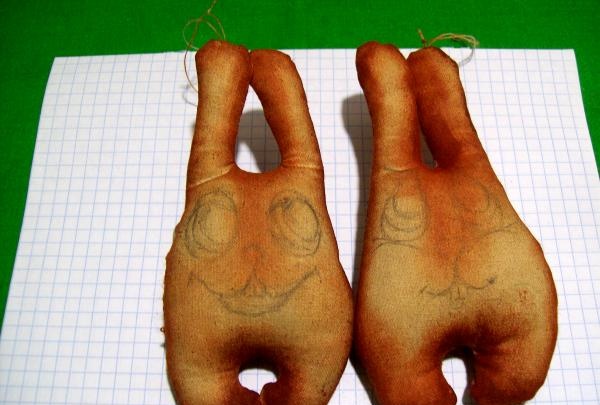
When the seams are dry, take a black gel pen and draw the entire face along the outlined contours.
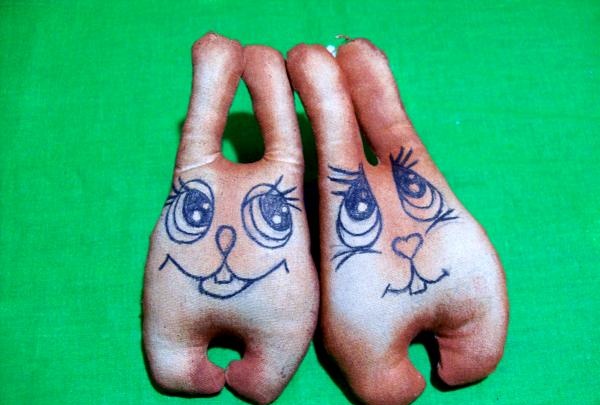
Now take a thin brush and paint the eyes. We draw three contours, first white at the bottom, then blue and black. We put white dots on the pupil. We also paint the bunny's nose black. We draw the cheeks white. Give it time to dry.
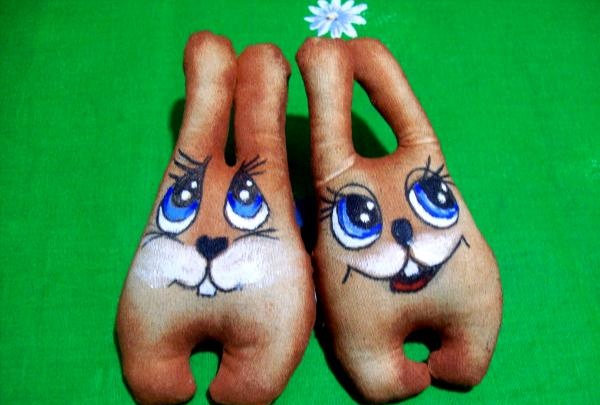
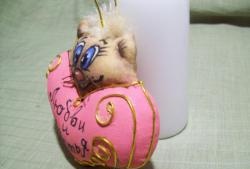
And then we go over all the contours again with a gel pen, adding antennae dots on the cheeks. All the faces are ready. Now take a 30 cm cord and divide it in half. Using a needle, attach the pendant loops on the back side between the ears. Now the coffee flavored bunnies are ready.And there was a small detail left: use a regular syringe to inject a few drops of vanilla and cinnamon into the body of the toy for aroma.
Good luck to all!

For work we take materials:
- sewing machine.
- scissors.
- acrylic paints.
- black gel pen.
- a little white thick fabric.
- thin brush.
- a piece of foam rubber.
- pencil.
- coffee solution (1 tablespoon each of instant coffee and PVA glue, a packet of vanillin and 100 ml of warm water).
- thin cord 30 cm long.
- filler for toys.
- essential oil of cinnamon and vanilla.
- needle and thread.
- empty small medical syringe.
But before we start, let’s draw a template shape of two bunnies.

Now take the prepared fabric and fold it in half along the grain. It needs to stretch in width, not in length. We attach the cut out templates and trace them with a simple pencil. And we cut it out with allowances for the seams.

We put marks for the holes through which we will fill the products.
Now we take a sewing machine and sew along the contour, leaving only the intended segments untouched. After this, we cut notches in the curved places of the patterns so that it turns out well when turning.

Now turn it inside out using a pencil.


We straightened out all the bends and started filling. To fill the bunnies, you can use padding polyester, padding polyester, or hololfiber. When filling, we also use a pencil. We do not stuff it too tightly.

Now we sew up our free holes with a needle and thread. Then we make loops on the ears from threads for drying. And with a simple pencil we outline the main location of the future eyes.

It's time for some coffee tinting. The solution itself is not difficult to prepare. Dissolve 1 tablespoon of coffee and the same amount of PVA glue in 100 ml of not very hot water, stir well, then add a pack of vanillin. When the solution is ready, take a piece of foam rubber and coat the bunnies on all sides and all the seams with it. And hang it up to dry. You can leave it in the air for 2 hours or in the oven for 10-15 minutes.

Some time passed and the products dried. We take acrylic paints. We use brown color first, dilute it with water and use a piece of foam rubber to tint along the seams. The drawn base for the eyes is visible and now with a pencil we continue to outline all the details of the muzzle.

When the seams are dry, take a black gel pen and draw the entire face along the outlined contours.

Now take a thin brush and paint the eyes. We draw three contours, first white at the bottom, then blue and black. We put white dots on the pupil. We also paint the bunny's nose black. We draw the cheeks white. Give it time to dry.

And then we go over all the contours again with a gel pen, adding antennae dots on the cheeks. All the faces are ready. Now take a 30 cm cord and divide it in half. Using a needle, attach the pendant loops on the back side between the ears. Now the coffee flavored bunnies are ready.And there was a small detail left: use a regular syringe to inject a few drops of vanilla and cinnamon into the body of the toy for aroma.

Good luck to all!
Similar master classes
Particularly interesting
Comments (0)

