Fabric frog princesses
Master class on fabric frog princess toys. The product is 11 cm high and made using the primed textile technique.
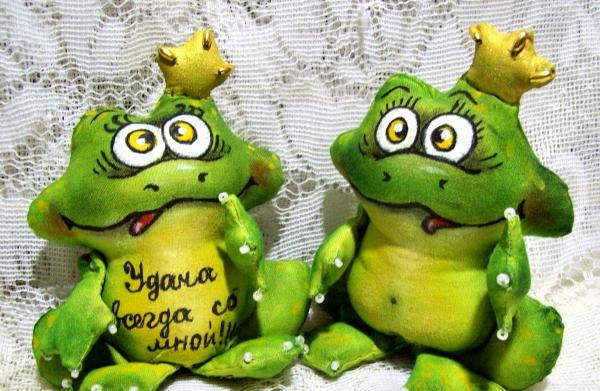
To complete this we take the following materials:
- dense plain fabric of green color.
- scissors.
- pencil.
- two types of beads.
- needle and thread.
- filler for toys.
- acrylic paints.
- brushes for paints.
- black helium pen.
- a little gold paint.
- a piece of foam rubber.
- sewing machine.
- glue suitable for fabric.
- makeup shadows.
Before starting any work, draw a template for the future frog and cut out the template. The height with crown will be 13 cm, and the width will be about 11 cm. There are front and back legs.
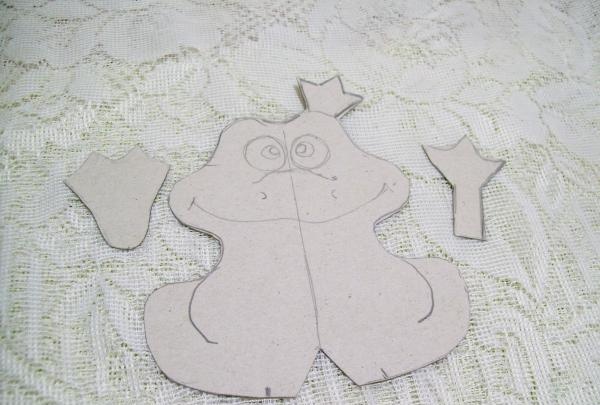
So that the frog can sit, we outline a dart at the bottom. And using the templates from green fabric, we cut out all the parts in two pieces, not forgetting to make fabric allowances for the seams. At the bottom of the cut we mark the place that we will not stitch up. We sew on a typewriter.
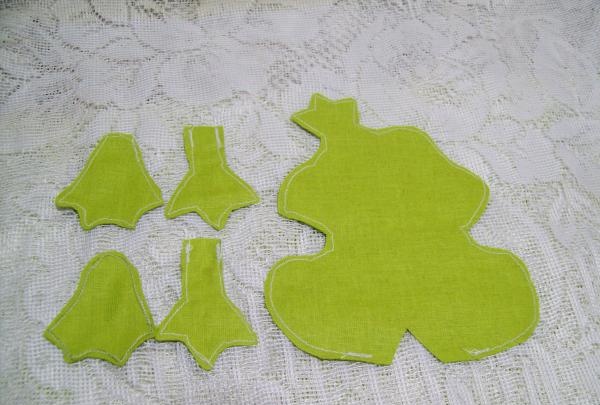
Then carefully turn out all the parts and straighten them well. In the lower legs we make an additional small cut in the middle, capturing only one layer of fabric.
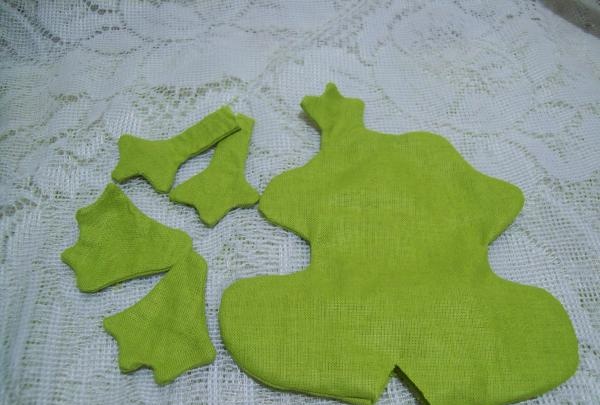
Now we take any filler and fill the toy. Let's start with the paws.In the front, you only need to enlarge the palms quite a bit. And we don’t fill the back ones tightly either.
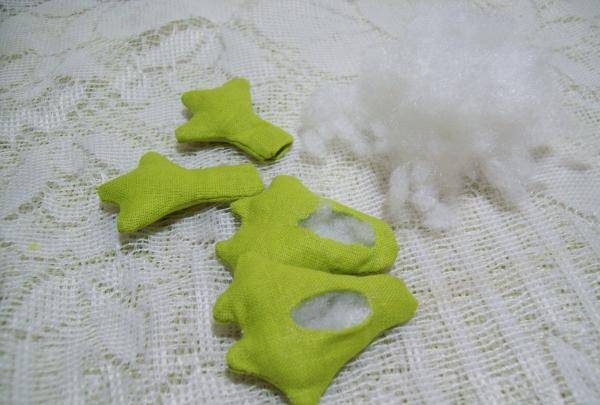
But we fill the entire base of the toy tightly.
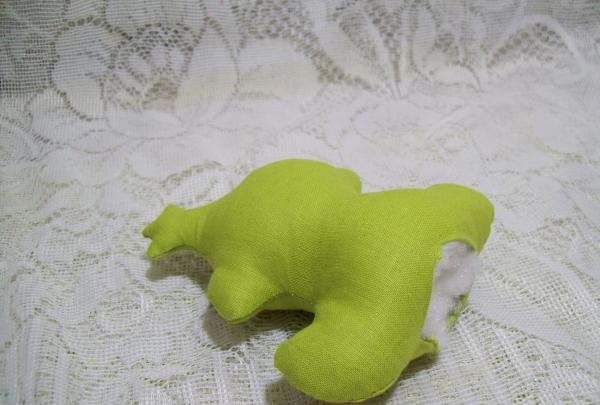
Then, using green thread, sew up the side seams a little, and then the darts on both sides. The result is a cross-shaped seam.
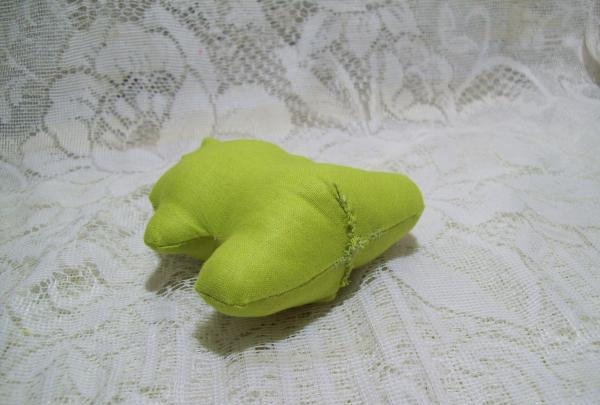
Now let's move on to small tightenings. First, with a pencil, draw a line separating the head from the crown. Then we outline two rounded lines emphasizing the shape of the frog’s tummy. We apply them on both sides in a mirror image. And then, using a green thread, we sew small stitches completely through the entire toy, slightly tightening the seam.

On the lower legs we sew up the hole for filling. And for neatness of work, we cut out a strip of fabric from small pieces and glue it carefully.
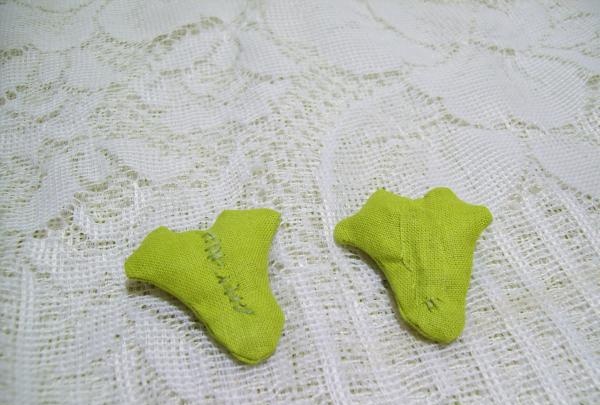
To ensure that the bottom of the toy is well processed, strips of fabric should also be attached.
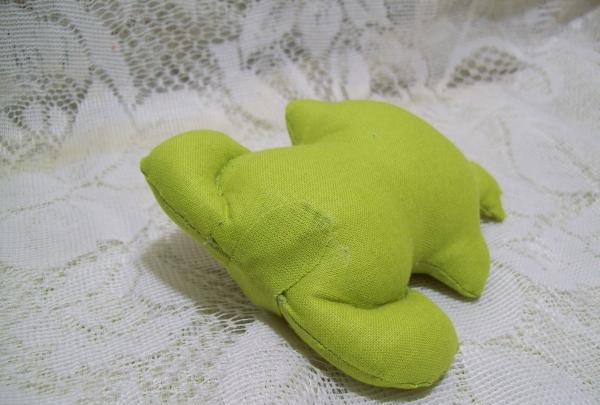
Now all that remains is to sew on the legs so that the frog can sit on its own. You should first try on everything and arrange it.
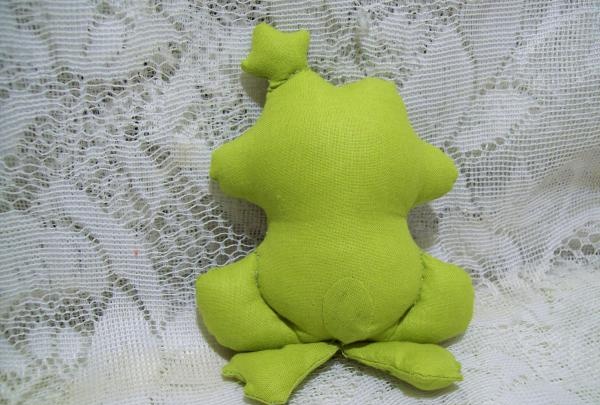
Next we move on to drawing the face of the toy. We outline all the details with a pencil. We draw a wide mouth with a protruding tongue, a nose with nostrils, large bulging eyes with eyelashes.
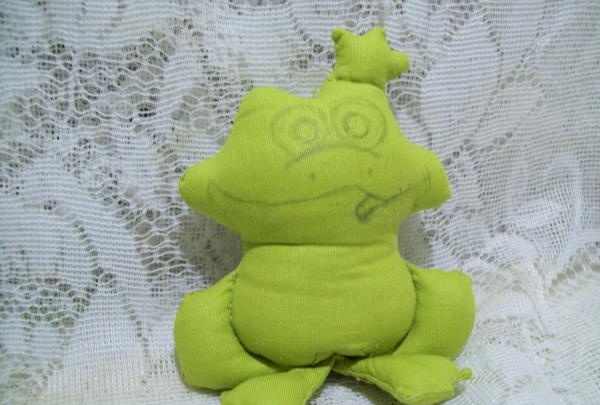
And let's move on to coloring. Take green paint, add a little brown and use a piece of foam rubber to paint the top of the head up to the mouth, around the eyes. Let's touch on all the paws a little.
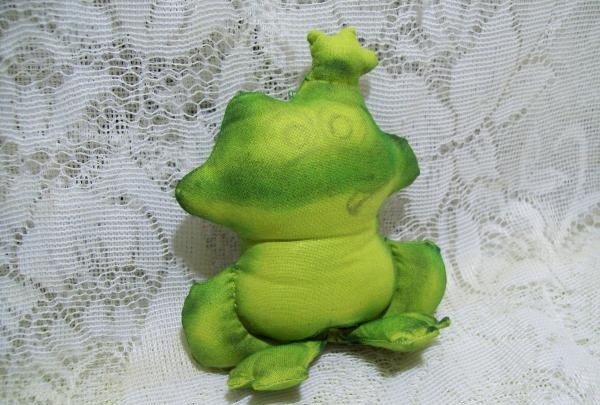
And the back can be painted almost all over.
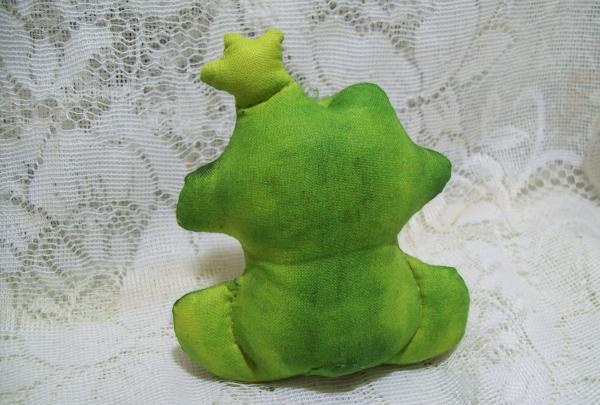
Now, using a brush with yellow paint, we paint the iris of the eyes.
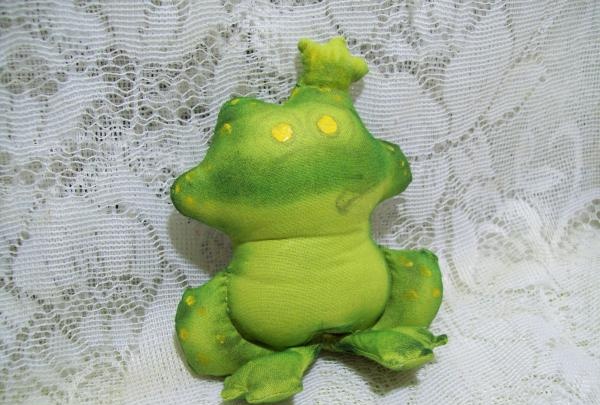
And we also put dots all over the frog’s body, not necessarily clearly round ones.
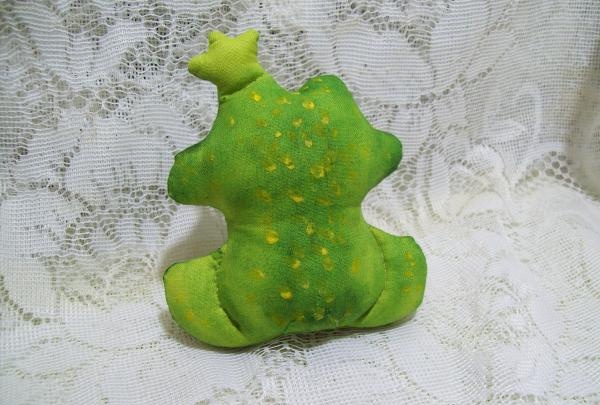
Next we continue to outline the eyeballs with white paint. And a red tongue.
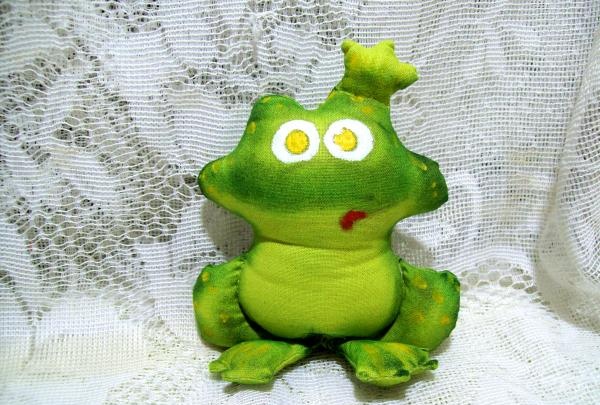
The frog's tummy should be outlined in yellow in front. And also use white makeup shadows to tint the middle of the entire front of the toy.
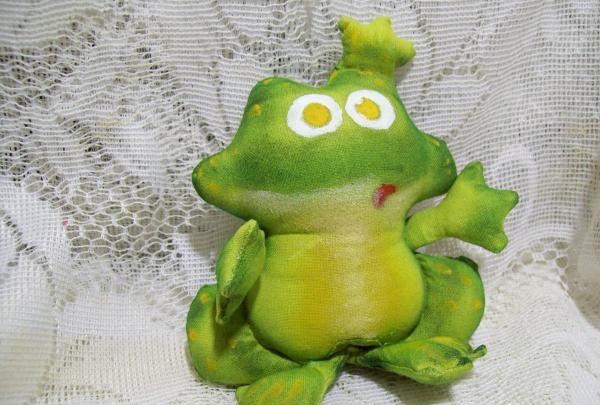
Only the crown remains unpainted and needs to be made gold with paint.
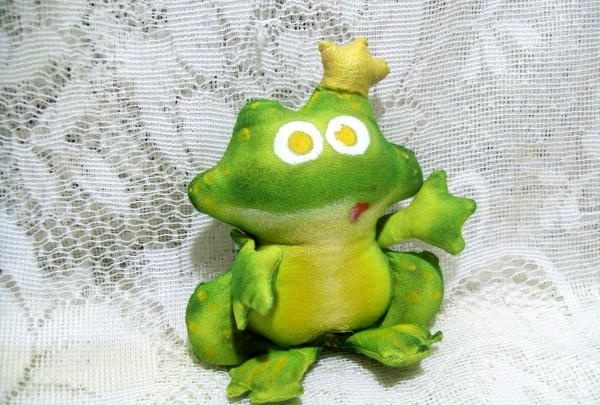
Meanwhile, the eyes dried up.Now, with a black pen, we outline all the contours of the muzzle and draw the pupils with paint. Add eyelashes to the eyes.
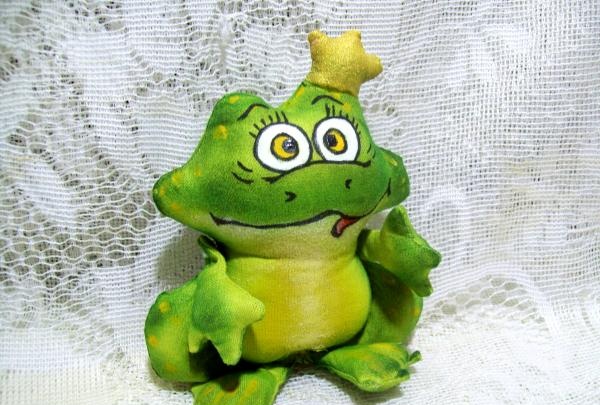
All that remains is to add shadows around the eyes and nose with a pencil. And a little more at the mouth and tongue.
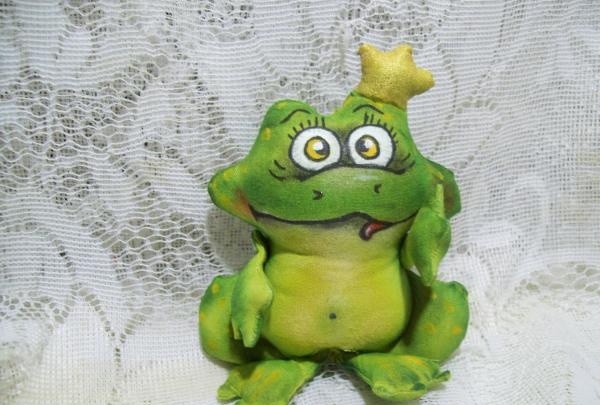
Next you will need to sew small beads on the paws, on each corner. And for the crown it is advisable to choose long gold-colored beads.
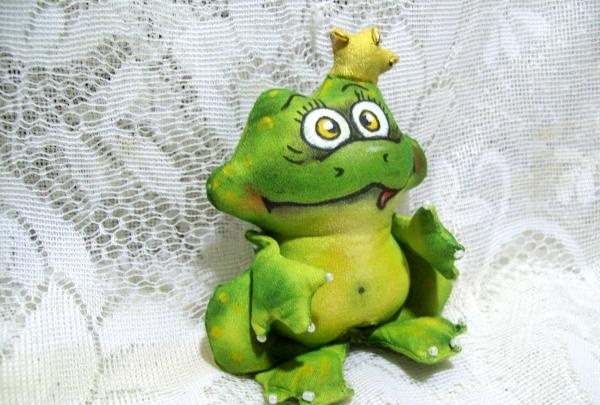
Such toys serve as souvenirs, so you can use various inscriptions. Write on your stomach with a gel pen. And with that our frogs are ready.
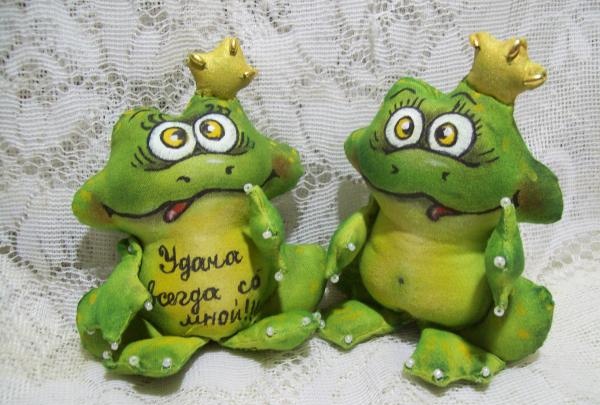
Good luck to all!

To complete this we take the following materials:
- dense plain fabric of green color.
- scissors.
- pencil.
- two types of beads.
- needle and thread.
- filler for toys.
- acrylic paints.
- brushes for paints.
- black helium pen.
- a little gold paint.
- a piece of foam rubber.
- sewing machine.
- glue suitable for fabric.
- makeup shadows.
Before starting any work, draw a template for the future frog and cut out the template. The height with crown will be 13 cm, and the width will be about 11 cm. There are front and back legs.

So that the frog can sit, we outline a dart at the bottom. And using the templates from green fabric, we cut out all the parts in two pieces, not forgetting to make fabric allowances for the seams. At the bottom of the cut we mark the place that we will not stitch up. We sew on a typewriter.

Then carefully turn out all the parts and straighten them well. In the lower legs we make an additional small cut in the middle, capturing only one layer of fabric.

Now we take any filler and fill the toy. Let's start with the paws.In the front, you only need to enlarge the palms quite a bit. And we don’t fill the back ones tightly either.

But we fill the entire base of the toy tightly.

Then, using green thread, sew up the side seams a little, and then the darts on both sides. The result is a cross-shaped seam.

Now let's move on to small tightenings. First, with a pencil, draw a line separating the head from the crown. Then we outline two rounded lines emphasizing the shape of the frog’s tummy. We apply them on both sides in a mirror image. And then, using a green thread, we sew small stitches completely through the entire toy, slightly tightening the seam.

On the lower legs we sew up the hole for filling. And for neatness of work, we cut out a strip of fabric from small pieces and glue it carefully.

To ensure that the bottom of the toy is well processed, strips of fabric should also be attached.

Now all that remains is to sew on the legs so that the frog can sit on its own. You should first try on everything and arrange it.

Next we move on to drawing the face of the toy. We outline all the details with a pencil. We draw a wide mouth with a protruding tongue, a nose with nostrils, large bulging eyes with eyelashes.

And let's move on to coloring. Take green paint, add a little brown and use a piece of foam rubber to paint the top of the head up to the mouth, around the eyes. Let's touch on all the paws a little.

And the back can be painted almost all over.

Now, using a brush with yellow paint, we paint the iris of the eyes.

And we also put dots all over the frog’s body, not necessarily clearly round ones.

Next we continue to outline the eyeballs with white paint. And a red tongue.

The frog's tummy should be outlined in yellow in front. And also use white makeup shadows to tint the middle of the entire front of the toy.

Only the crown remains unpainted and needs to be made gold with paint.

Meanwhile, the eyes dried up.Now, with a black pen, we outline all the contours of the muzzle and draw the pupils with paint. Add eyelashes to the eyes.

All that remains is to add shadows around the eyes and nose with a pencil. And a little more at the mouth and tongue.

Next you will need to sew small beads on the paws, on each corner. And for the crown it is advisable to choose long gold-colored beads.

Such toys serve as souvenirs, so you can use various inscriptions. Write on your stomach with a gel pen. And with that our frogs are ready.

Good luck to all!
Similar master classes
Particularly interesting
Comments (0)

