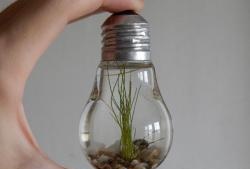
Mini terrarium in a light bulb
The popularity of small, homemade terrariums is increasing. A very useful and cute invention that does not require material investments, effort or special skills.
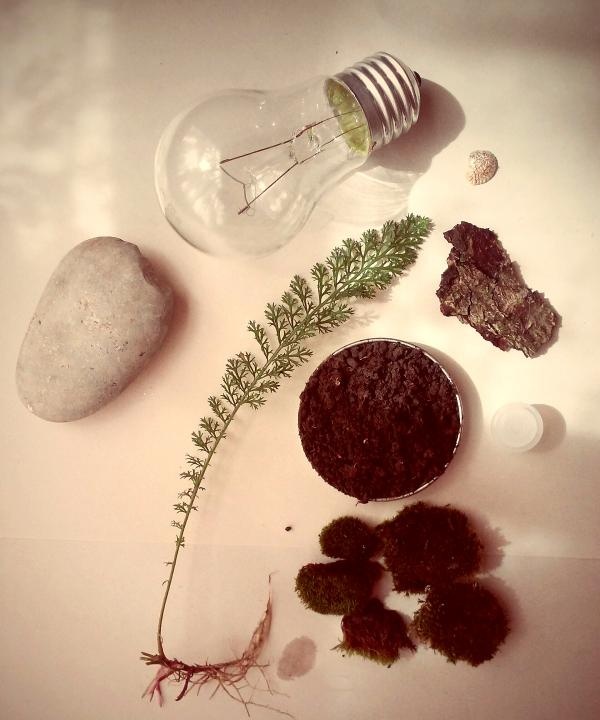
All you need to create a green eco-friendly object is desire, as well as tools. So, for a home terrarium you will need:
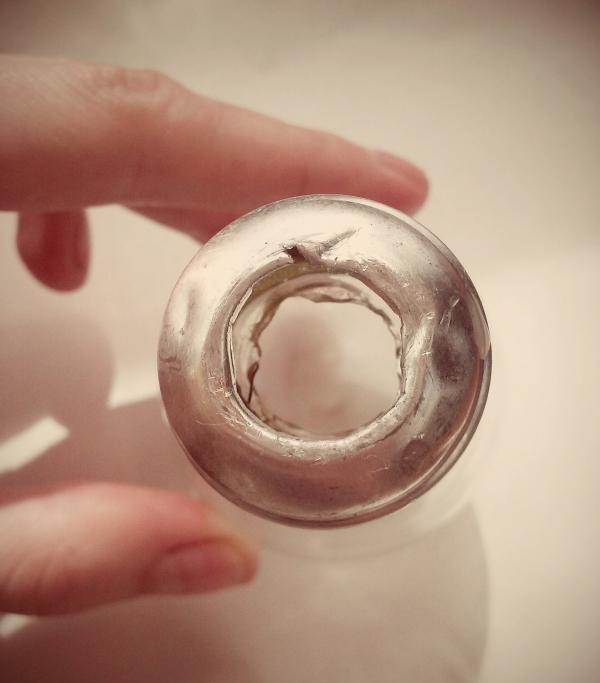
1. The very first stage of creating a small terrarium is preparing a light bulb. Before you begin, spread out the newspaper and put on gloves to protect yourself from splinters. The difficulty of this stage is that it is quite difficult to clean the light bulb.If you can't do it the first time, get a friend or brother to help you clean the light bulb. This is true if the terrarium is made by a fragile girl.
2.Use pliers to open the top part of the light bulb, remove the contents with them, take out everything that was there very carefully, carefully collect the fragments so as not to get hurt.
3.Wipe the inside walls of the light bulb with a long cotton swab.
4.Next we proceed to filling the light bulb. Take sifted earth and sand. Use the second one as drainage. It is best if the amount of sand exceeds the amount of soil. This is necessary in order not to create an atmosphere of rotting in a closed space. If there is no sand, you can only use soil, but then you need to water it just a little.
5. First fill the light bulb with sand (a little), add earth and small stones. Level it out, try to create a composition using your imagination. The sand must first be washed and dried in the oven.
6.Next, insert the moss into the terrarium using tweezers or a long stick and “sit” it in the sand and soil.
7.Now it’s the plant’s turn. Carefully plant it in the ground next to the moss, being careful not to damage the leaves and roots.
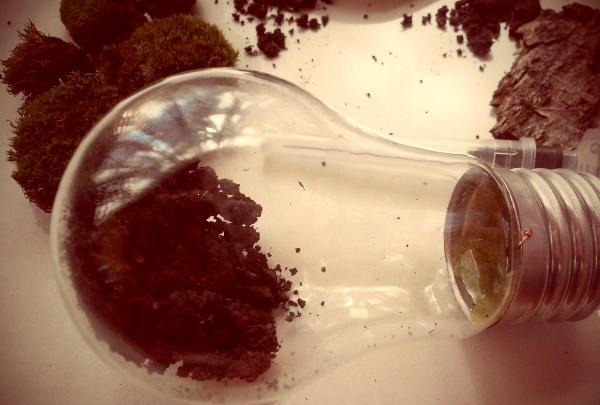
8.Add tree bark, plastic figurines, or small shells to bring the terrarium to life.
9.After the composition is built, water the plants using a syringe and close the lid tightly. The lid can be taken from a cone with valerian, or you can use nuts or pebbles in the form of a plug.
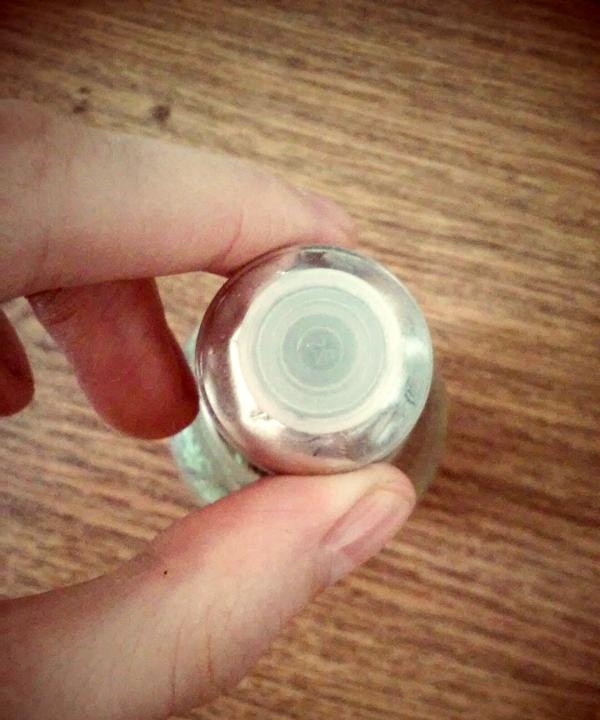
10.For stability, the lamp can be placed on silicone legs, hung or glued to a stone.
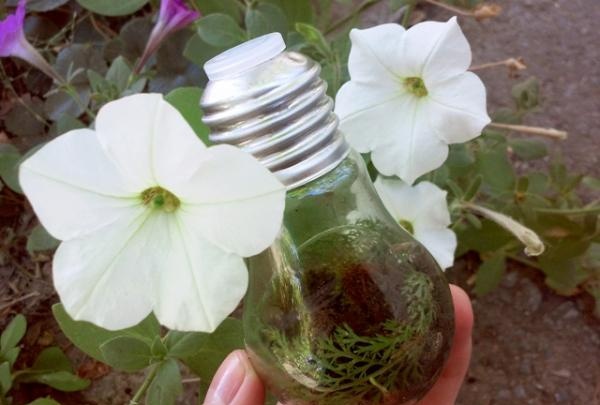
It is better to place such a terrarium in a dark place where there is no direct sunlight.It can be placed on a desk, windowsill, shelf. It will please the eye, will be an excellent gift or a mini home ecosystem that lives by its own laws. The light bulb forms its own cycle of water, which, evaporating in a closed space without air access, again turns into drops of liquid. They, in turn, feed plants, which release carbon dioxide. Thus, life in the terrarium develops.

All you need to create a green eco-friendly object is desire, as well as tools. So, for a home terrarium you will need:
- An ordinary light bulb. You can take a standard “Ilyich lamp”, or a special one for lighting large rooms. She is bigger and looks more attractive. The main thing is that the lamp is transparent.
- A stone, stand or silicone pads that need to be attached to the bottom of the light bulb so that it is stable and does not fall.
- Tree bark, small pebbles, shells, sand for filling, drainage and decoration.
- Sifted soil, moss, small plants with root systems.
- A cover to cover the light bulb.
- Tools: scissors, forceps, pliers, tweezers, screwdriver, syringe with water.

1. The very first stage of creating a small terrarium is preparing a light bulb. Before you begin, spread out the newspaper and put on gloves to protect yourself from splinters. The difficulty of this stage is that it is quite difficult to clean the light bulb.If you can't do it the first time, get a friend or brother to help you clean the light bulb. This is true if the terrarium is made by a fragile girl.
2.Use pliers to open the top part of the light bulb, remove the contents with them, take out everything that was there very carefully, carefully collect the fragments so as not to get hurt.
3.Wipe the inside walls of the light bulb with a long cotton swab.
4.Next we proceed to filling the light bulb. Take sifted earth and sand. Use the second one as drainage. It is best if the amount of sand exceeds the amount of soil. This is necessary in order not to create an atmosphere of rotting in a closed space. If there is no sand, you can only use soil, but then you need to water it just a little.
5. First fill the light bulb with sand (a little), add earth and small stones. Level it out, try to create a composition using your imagination. The sand must first be washed and dried in the oven.
6.Next, insert the moss into the terrarium using tweezers or a long stick and “sit” it in the sand and soil.
7.Now it’s the plant’s turn. Carefully plant it in the ground next to the moss, being careful not to damage the leaves and roots.

8.Add tree bark, plastic figurines, or small shells to bring the terrarium to life.
9.After the composition is built, water the plants using a syringe and close the lid tightly. The lid can be taken from a cone with valerian, or you can use nuts or pebbles in the form of a plug.

10.For stability, the lamp can be placed on silicone legs, hung or glued to a stone.

It is better to place such a terrarium in a dark place where there is no direct sunlight.It can be placed on a desk, windowsill, shelf. It will please the eye, will be an excellent gift or a mini home ecosystem that lives by its own laws. The light bulb forms its own cycle of water, which, evaporating in a closed space without air access, again turns into drops of liquid. They, in turn, feed plants, which release carbon dioxide. Thus, life in the terrarium develops.
Similar master classes
Particularly interesting
Comments (3)

