DIY electric spark pencil
Making an inscription on metal can sometimes be interesting. Especially when giving a gift to a loved one, so that he is happy and, most importantly, does not forget who gave him the gift and why.
You don’t want to deal with high and dangerous voltage, and it’s dangerous, but it’s nice to make a device yourself that works and isn’t complicated.
So, for production you will need:
I bought the simplest and smallest relay for other purposes.

I was making an automatic feeder for a cat, but it turned out that when it comes into contact with metal, it sparks perfectly. For an electric pencil, this is what you need. To apply beautiful inscriptions, it is important to have a comfortable pencil shape. It should be comfortable to hold in your hand, and what is more convenient than a handle for such a task? We take a thicker handle to fit the relay into it. I had a 10-bar pen. She looked something like this.
The handle is good, but in children's hands it quickly broke. Her main advantage is that she is plump.Why didn't I throw it away? Because a relay can fit into it. The relay did not fit and we had to make cutouts in the handle body so that the corners of the rectangular relay would fit into place.
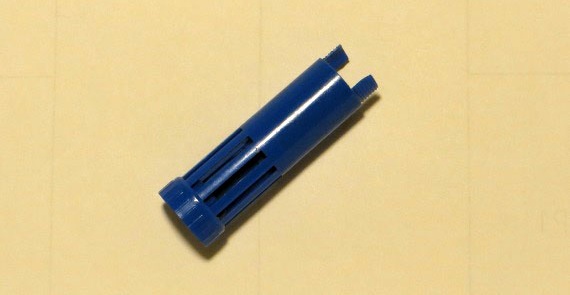
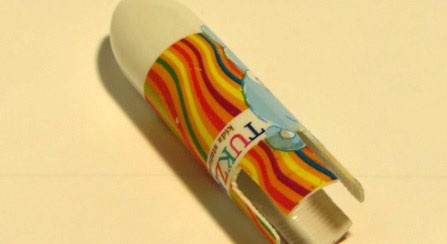
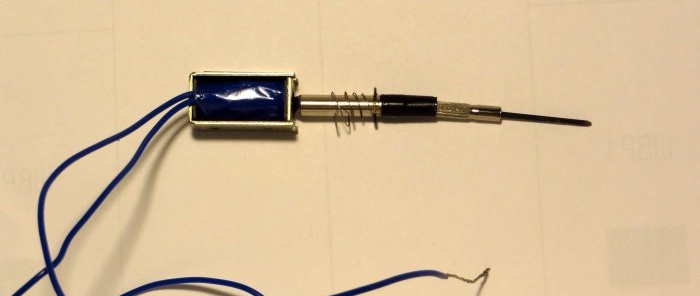
You need to attach a rod to the relay, which will directly write. I used a small screwdriver for small jobs. It still turned in the handle for a long time and did not work. Why didn't I throw it away? Because with a little modification it can be used as a rod for an electric pencil.
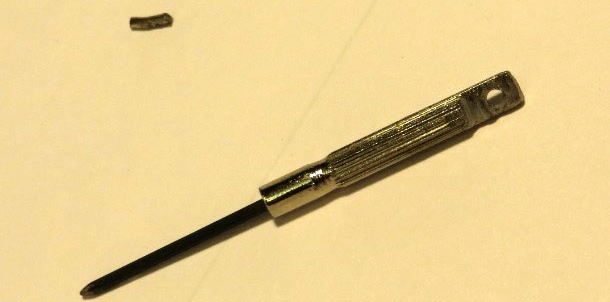
The modified rod was connected to the relay rod with a piece of wire 5 mm long from a large paper clip and wrapped with electrical tape so that it did not fall out.
In general, instead of a screwdriver, you can use an unbent large paper clip or wire with a diameter of 1.5 ... 2.0 mm. Bend the wire at the end into a ring.
All that remains is to collect everything.

My relay was inserted into both halves quite tightly and did not have to be strengthened, but if it is a little loose, you can strengthen everything with electrical tape or tape. Connect one wire to the metal part of the relay housing, and release the second wire outside and attach the alligator clip to it. Oh yes - you need to sharpen the tip of the rod a little more and, if you used wire, screw on a small thickening of electrical tape.
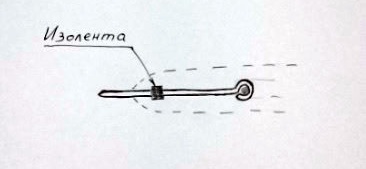
The thickening will prevent the nib from sticking out too far from the pen. The rod, when fully retracted, should stick out approximately 10 mm and extend another 5 mm. It’s just the thickening that shouldn’t fit into the nose of the handle inside.
You can start writing. Or for drawing, but an electric pencil needs voltage and a battery from a screwdriver is perfect for these purposes.
It's always useful to give your battery a boost. So that it does not stagnate and lose its shape. Connect the pencil to the battery.We connect the second wire from the battery to the metal object on which our artwork will be, and write.
An electromagnetic relay does not have a connection polarity, but for a pencil it is important to connect the plus and minus correctly.
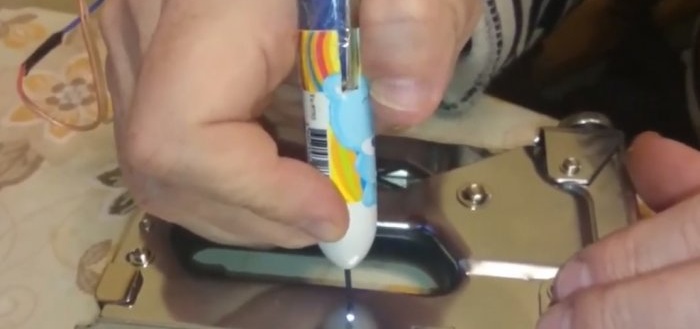
When we touch an object connected to another terminal with a connected pencil, a spark occurs and the circuit closes. The relay is activated and draws the pen rod into the pen. The chain opens again with caviar. The relay turns off and the spring pushes the pen out until it touches the object. The circuit closes, opens and everything sparks and sparks. The cycle repeats as long as you hold the handle in place. And you don’t keep it in place, but already write, write.
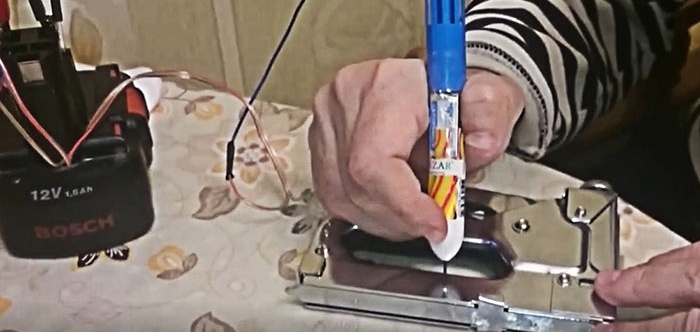
A spark is a small arc of plasma and it leaves a clearly visible mark on the metal. If you move the pen slowly, the inscription will be more pronounced; if you move it quickly, it will be less noticeable. A minute of work and already visible excellent results.
Thank you.
You can see how quickly and easily an excellent, long-lasting inscription is obtained.
You don’t want to deal with high and dangerous voltage, and it’s dangerous, but it’s nice to make a device yourself that works and isn’t complicated.
So, for production you will need:
- 12V Solenoid Solenoid Relay (HCNE1-0530);
- The body of a ballpoint pen is thicker;
- Metal rod with a diameter of about 2 mm;
- Alligator contacts for connecting to a voltage source;
- The voltage source itself is 12 V.
I bought the simplest and smallest relay for other purposes.

I was making an automatic feeder for a cat, but it turned out that when it comes into contact with metal, it sparks perfectly. For an electric pencil, this is what you need. To apply beautiful inscriptions, it is important to have a comfortable pencil shape. It should be comfortable to hold in your hand, and what is more convenient than a handle for such a task? We take a thicker handle to fit the relay into it. I had a 10-bar pen. She looked something like this.
The handle is good, but in children's hands it quickly broke. Her main advantage is that she is plump.Why didn't I throw it away? Because a relay can fit into it. The relay did not fit and we had to make cutouts in the handle body so that the corners of the rectangular relay would fit into place.


You need to attach a rod to the relay, which will directly write. I used a small screwdriver for small jobs. It still turned in the handle for a long time and did not work. Why didn't I throw it away? Because with a little modification it can be used as a rod for an electric pencil.

The modified rod was connected to the relay rod with a piece of wire 5 mm long from a large paper clip and wrapped with electrical tape so that it did not fall out.
In general, instead of a screwdriver, you can use an unbent large paper clip or wire with a diameter of 1.5 ... 2.0 mm. Bend the wire at the end into a ring.
All that remains is to collect everything.

My relay was inserted into both halves quite tightly and did not have to be strengthened, but if it is a little loose, you can strengthen everything with electrical tape or tape. Connect one wire to the metal part of the relay housing, and release the second wire outside and attach the alligator clip to it. Oh yes - you need to sharpen the tip of the rod a little more and, if you used wire, screw on a small thickening of electrical tape.

The thickening will prevent the nib from sticking out too far from the pen. The rod, when fully retracted, should stick out approximately 10 mm and extend another 5 mm. It’s just the thickening that shouldn’t fit into the nose of the handle inside.
You can start writing. Or for drawing, but an electric pencil needs voltage and a battery from a screwdriver is perfect for these purposes.
It's always useful to give your battery a boost. So that it does not stagnate and lose its shape. Connect the pencil to the battery.We connect the second wire from the battery to the metal object on which our artwork will be, and write.
An electromagnetic relay does not have a connection polarity, but for a pencil it is important to connect the plus and minus correctly.
When we touch an object connected to another terminal with a connected pencil, a spark occurs and the circuit closes. The relay is activated and draws the pen rod into the pen. The chain opens again with caviar. The relay turns off and the spring pushes the pen out until it touches the object. The circuit closes, opens and everything sparks and sparks. The cycle repeats as long as you hold the handle in place. And you don’t keep it in place, but already write, write.

A spark is a small arc of plasma and it leaves a clearly visible mark on the metal. If you move the pen slowly, the inscription will be more pronounced; if you move it quickly, it will be less noticeable. A minute of work and already visible excellent results.
Thank you.
Watch the video
You can see how quickly and easily an excellent, long-lasting inscription is obtained.
Antonov Alexander
G. Samara.
G. Samara.
Similar master classes
Particularly interesting
Comments (0)

