Doll "Nurse"
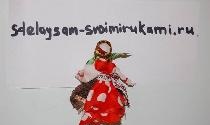
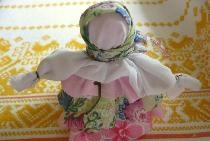
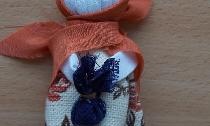
The “Nurse” doll was known among the Russian people, one of its names was “Cabbage”, and among the Finno-Ugric people it was called “Vepsian tornka”.
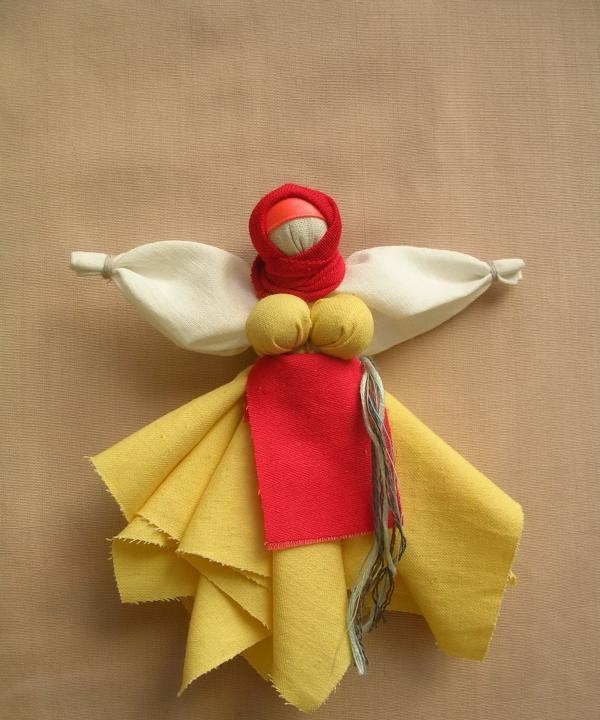
Why is it called so funny? This is explained by the historical technology of making the pupa. It certainly had to be done by manually tearing old clothes into rags. To prevent the owner's life from becoming stabbed or cut, the doll was made without scissors. Times are changing: they are unlikely to want to present souvenir made from old torn fabric. Therefore, modern protective dolls are made from new fabric using scissors.
To make the “Feeder” you will need:
Completing of the work.
1. First the head is made. Take a square of white fabric, place a ball of padding material (cotton wool, foam rubber) in its center, tie it tightly with bobbin thread, tie it with 2-3 knots, cut it (this is how the thread is secured throughout the entire craft).
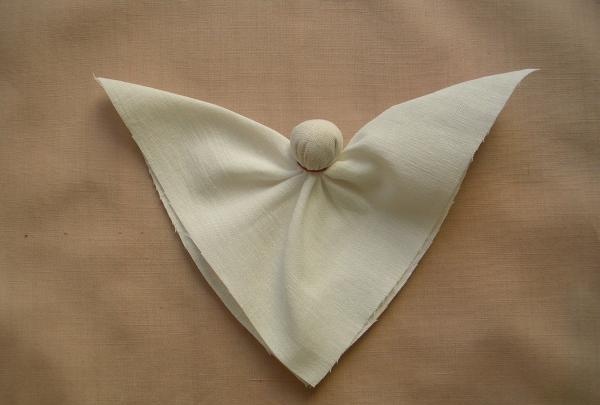
2. The resulting shape is folded into a triangle and leveled. You need to pull the two ends of the triangle lying on either side of the head to make them the same.
3. Making hands. The trimmed part of the square on both sides is evenly placed inside the future sleeves. The very tips of the sleeves are folded inward by 1.5 cm. On the outer side of the arms, 0.5 cm away from the folded edge, the palms are tightly pulled together and twisted with a thread. The result is hands.
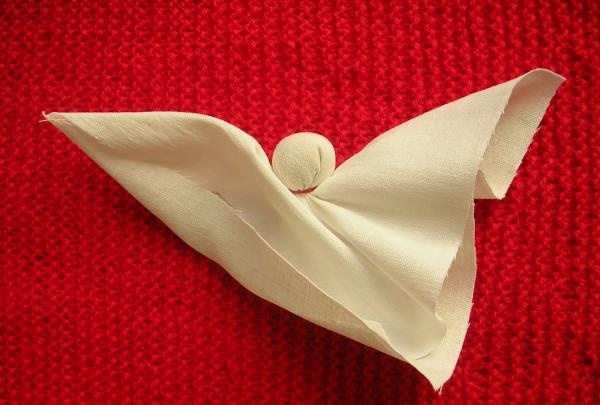
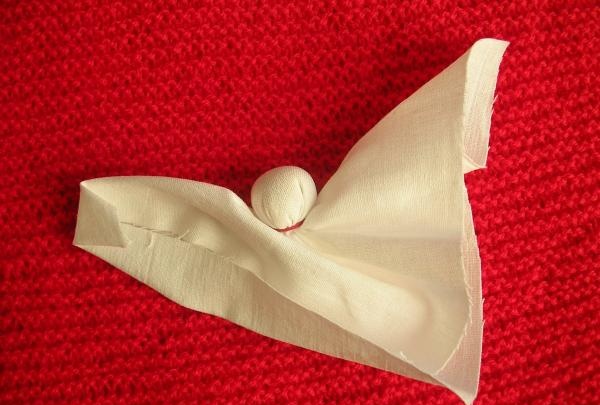
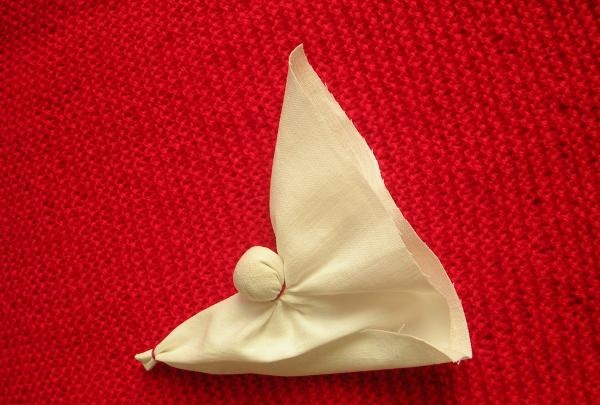
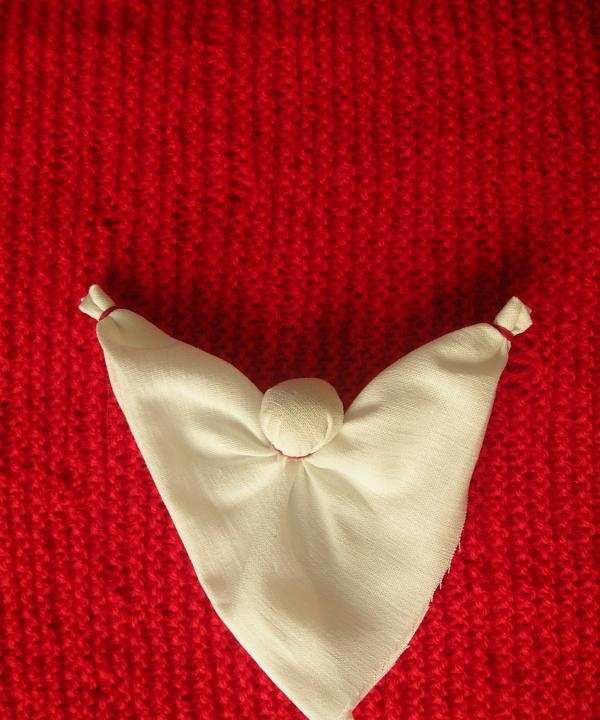
4. Body shaping. The workpiece is leveled again. The edges of the two ends hanging freely from the hands are tucked inward. Then the fabric of the proposed back is wrapped around the front of the back on both sides along the line of the future waist. This will give the doll a good posture. When the body is defined, the waist is wrapped several times with thread.
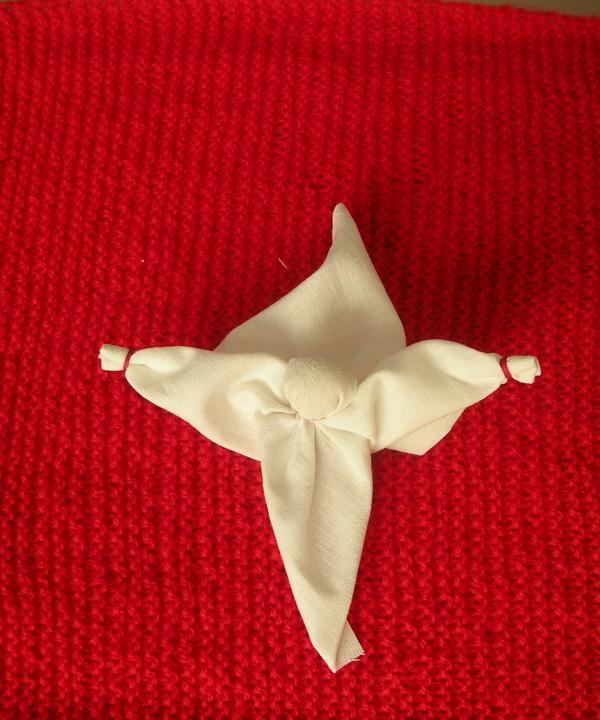
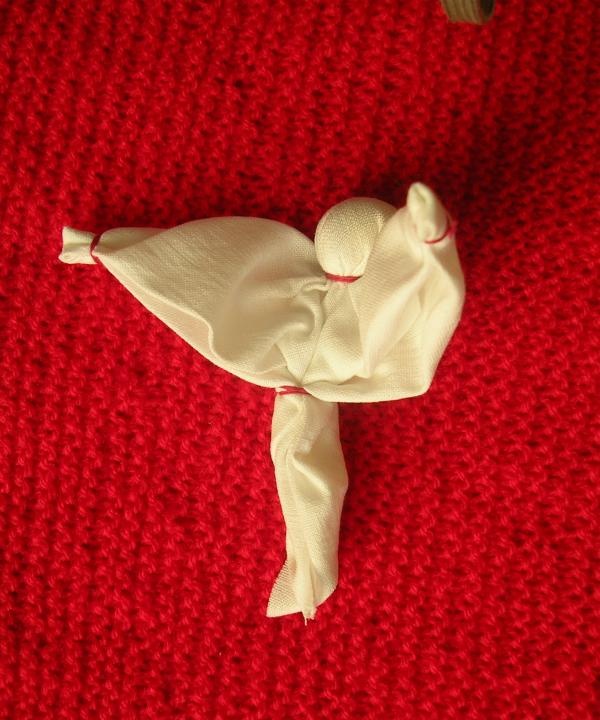
5. Making a sundress. The chest is made from two squares of brightly colored fabric using the head technology (point 1), only the balls are rolled into smaller ones.
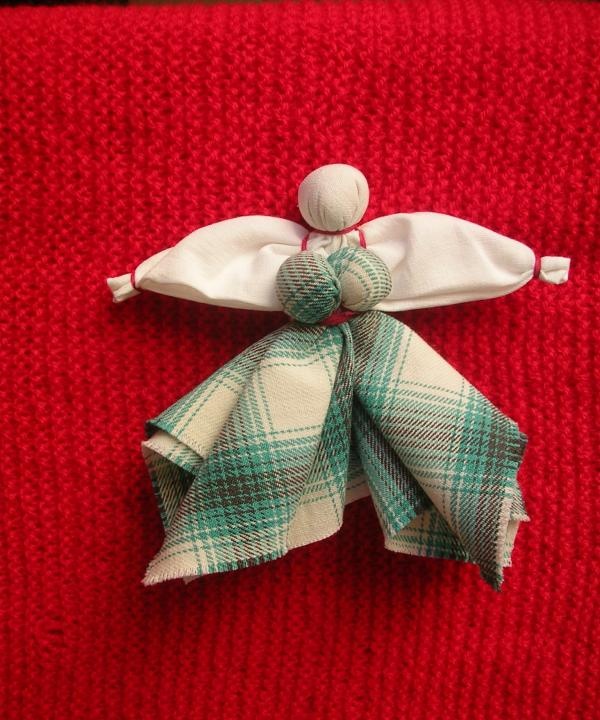
6. The chest is tied with thread around the waist in such a way as to imitate a sundress. Parallel “straps” run along the shoulders in front, and on the back they intersect, creating a protective red cross.
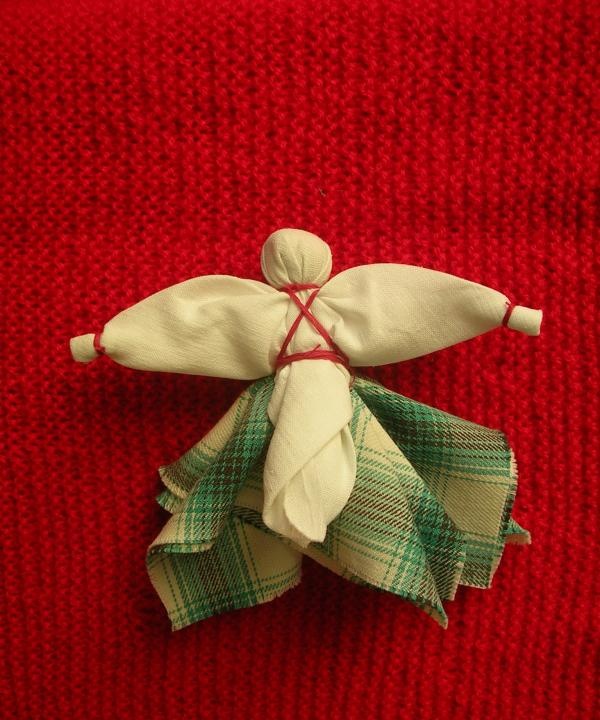
7. The last square of brightly colored fabric is folded diagonally, and the resulting triangle is again folded into a square so that all the fabric sections remain on two adjacent sides.
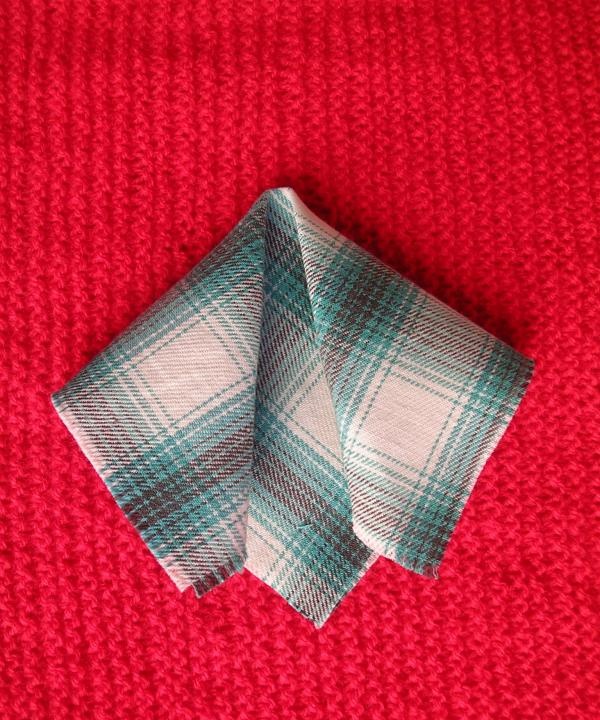
8. The tip of the square with folds is placed on the back so that it is 1.5 cm above the waist; it is tightly wound around the waist, covering the protective cross.
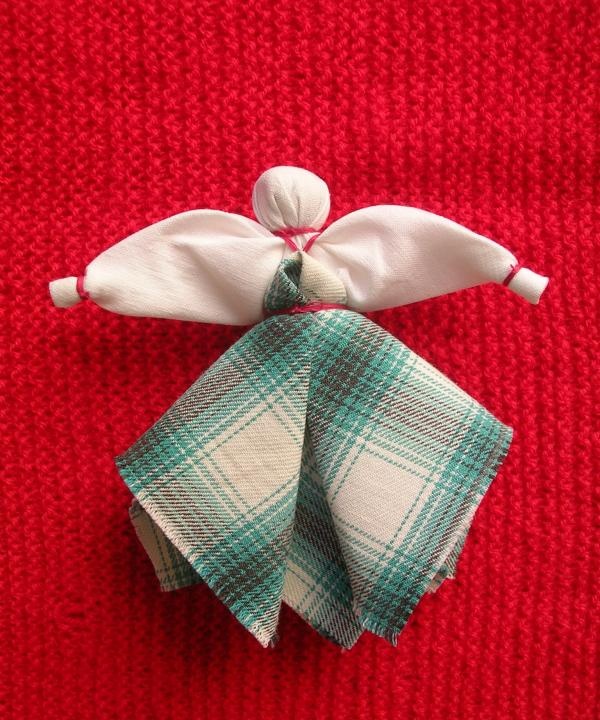
9. Attaching the apron. An apron is placed along the front of the waist, with the wrong side up and the bottom up, on the waist. Its edge should lie 1.5 cm below the waist. The apron is tied with a thread to the waist and unfolded onto the skirt panel.
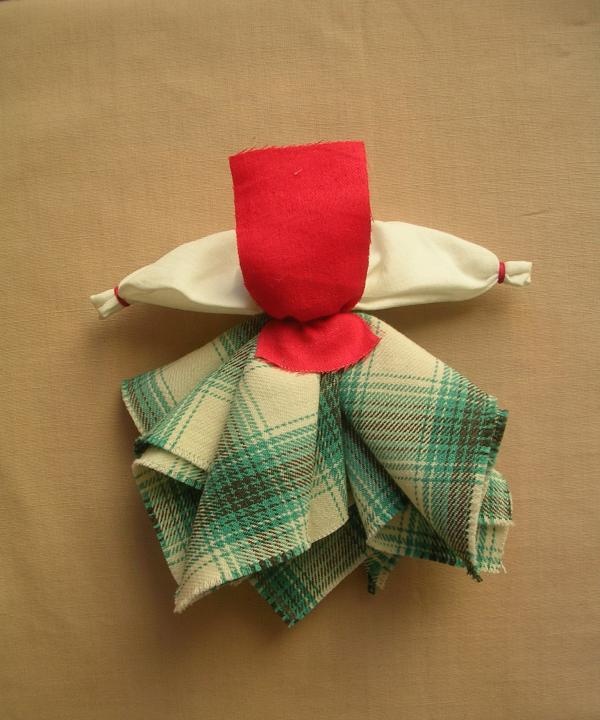
10. After the sundress is aligned, the apron is laid down, and the sleeves are evenly straightened, a belt consisting of several multi-colored threads is tied around the waist (so it looks more like a woven protective belt).

11. Head design. A ribbon is tied on the forehead, and at the back of the head it is tied with several knots. The head is tied with a scarf “like an old lady” around the neck. The edge of the scarf going along the head is folded inward by 1 cm - for strength. The face of the protective doll is not drawn. It is believed that an evil spirit will then move into her, and she will lose her protective qualities.
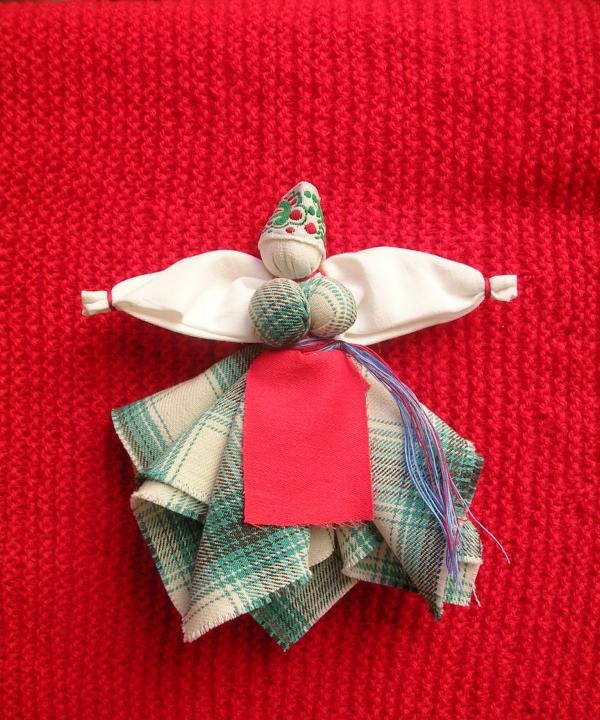

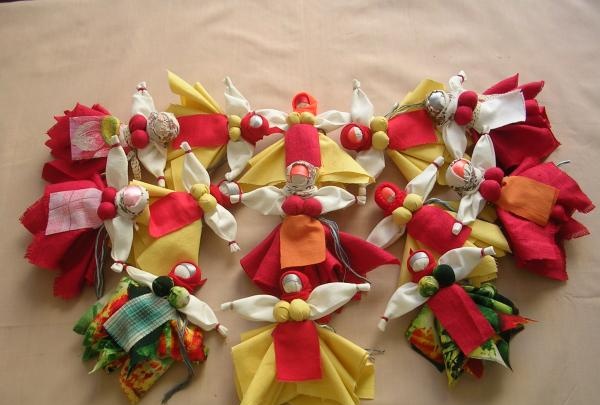
The “Nurse” doll is ready. It can be given to any girl or woman so that the work in her hands will work better, her face will become more beautiful, and people will love her even more.

Why is it called so funny? This is explained by the historical technology of making the pupa. It certainly had to be done by manually tearing old clothes into rags. To prevent the owner's life from becoming stabbed or cut, the doll was made without scissors. Times are changing: they are unlikely to want to present souvenir made from old torn fabric. Therefore, modern protective dolls are made from new fabric using scissors.
To make the “Feeder” you will need:
- 1 square 15x15 made of white fabric;
- 3 squares 15x15 made of brightly colored fabric;
- 7-10 cm ribbons or lace 1 cm wide;
- triangle 7x7x10 knitted fabric;
- a 3x6 cm rectangle of fabric in a different bright color;
- red bobbin thread;
- multi-colored threads in several folds 20-26 cm long;
- stuffing material.
Completing of the work.
1. First the head is made. Take a square of white fabric, place a ball of padding material (cotton wool, foam rubber) in its center, tie it tightly with bobbin thread, tie it with 2-3 knots, cut it (this is how the thread is secured throughout the entire craft).

2. The resulting shape is folded into a triangle and leveled. You need to pull the two ends of the triangle lying on either side of the head to make them the same.
3. Making hands. The trimmed part of the square on both sides is evenly placed inside the future sleeves. The very tips of the sleeves are folded inward by 1.5 cm. On the outer side of the arms, 0.5 cm away from the folded edge, the palms are tightly pulled together and twisted with a thread. The result is hands.


4. Body shaping. The workpiece is leveled again. The edges of the two ends hanging freely from the hands are tucked inward. Then the fabric of the proposed back is wrapped around the front of the back on both sides along the line of the future waist. This will give the doll a good posture. When the body is defined, the waist is wrapped several times with thread.


5. Making a sundress. The chest is made from two squares of brightly colored fabric using the head technology (point 1), only the balls are rolled into smaller ones.

6. The chest is tied with thread around the waist in such a way as to imitate a sundress. Parallel “straps” run along the shoulders in front, and on the back they intersect, creating a protective red cross.

7. The last square of brightly colored fabric is folded diagonally, and the resulting triangle is again folded into a square so that all the fabric sections remain on two adjacent sides.

8. The tip of the square with folds is placed on the back so that it is 1.5 cm above the waist; it is tightly wound around the waist, covering the protective cross.

9. Attaching the apron. An apron is placed along the front of the waist, with the wrong side up and the bottom up, on the waist. Its edge should lie 1.5 cm below the waist. The apron is tied with a thread to the waist and unfolded onto the skirt panel.

10. After the sundress is aligned, the apron is laid down, and the sleeves are evenly straightened, a belt consisting of several multi-colored threads is tied around the waist (so it looks more like a woven protective belt).

11. Head design. A ribbon is tied on the forehead, and at the back of the head it is tied with several knots. The head is tied with a scarf “like an old lady” around the neck. The edge of the scarf going along the head is folded inward by 1 cm - for strength. The face of the protective doll is not drawn. It is believed that an evil spirit will then move into her, and she will lose her protective qualities.


The “Nurse” doll is ready. It can be given to any girl or woman so that the work in her hands will work better, her face will become more beautiful, and people will love her even more.
Similar master classes
Particularly interesting
Comments (0)

