Sleeping baby doll
I would like to bring to your attention the making of a sleeping baby doll. It is very easy to make; those who have not yet made a soft toy can safely take up the work. The main thing in this matter is to choose the right material, namely fleece. It will take a little fabric, a 30/100 cut is enough. In this case, your baby doll will be slightly smaller in size than a newborn baby - 38 cm.
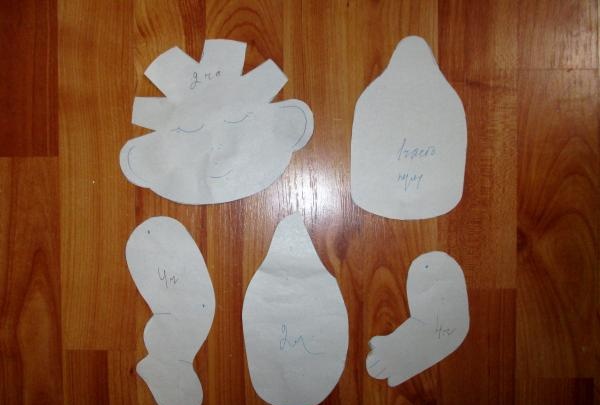
Increase the pattern so that the head from ear to ear is 16 cm, then the baby doll will be 38.
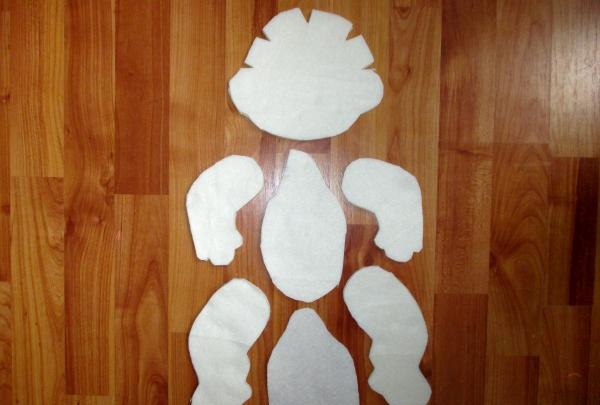
Attach the pattern to the fabric, secure with needles and cut with seam allowance. You won't be able to trace with a pencil. Since fleece fabric is soft, loose and with lint. When cutting, be sure to take into account the direction of the grain thread so that parts of our little baby’s body do not become distorted in the future.
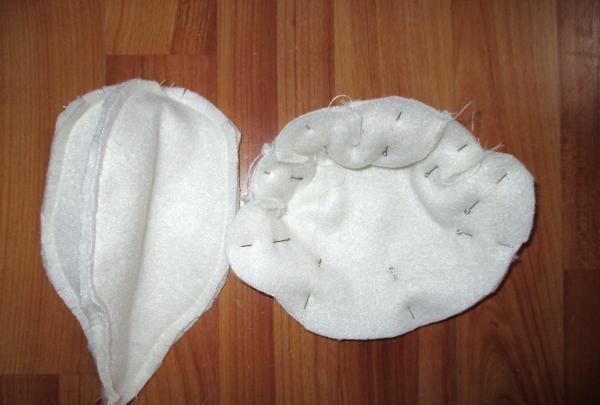
Start sewing with the body and head. In the head, first sew all the cuts, then sew along the contour, leaving a small hole on the crown for filling with holofiber. For notes, don’t be afraid to use safety pins, they are very convenient and you can stitch with them. First sew the back along the least rounded part, then pin it to the front and sew it too.
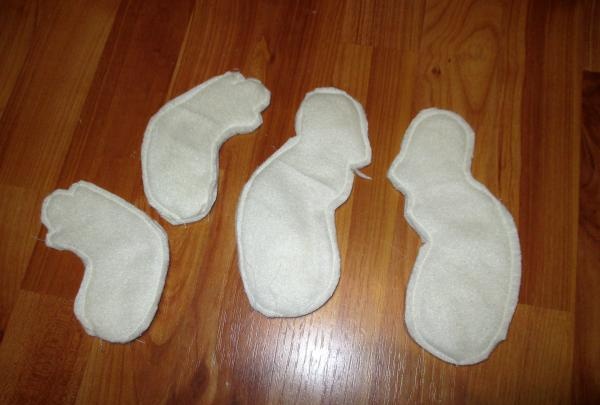
Do the same with the cut out parts of the arms and legs. Before turning, make notches along the contours of all parts, this is important.
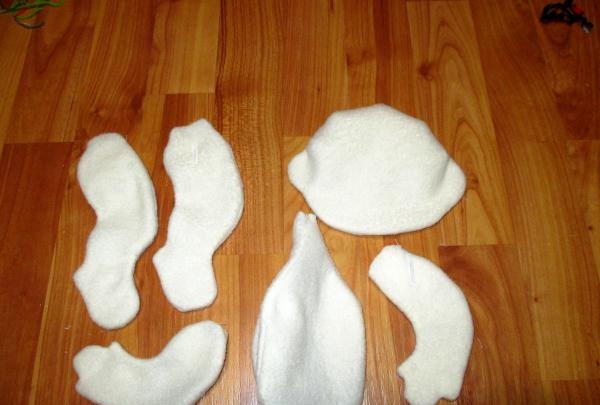
Turn out all the parts; to do this, make cuts in the arms and legs from the intended inner side. When you fill them with holofiber or padding polyester, carefully sew them up; they will not be visible in the finished product.
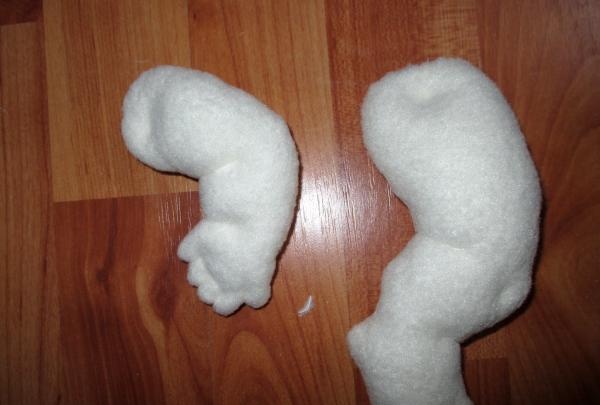
Shape the arms and legs according to the pattern. Where there is a point, tighten it with a knot. Where there is a fold, use a matching thread to tighten it. The fingers are made in the same way, they are pulled through the part.
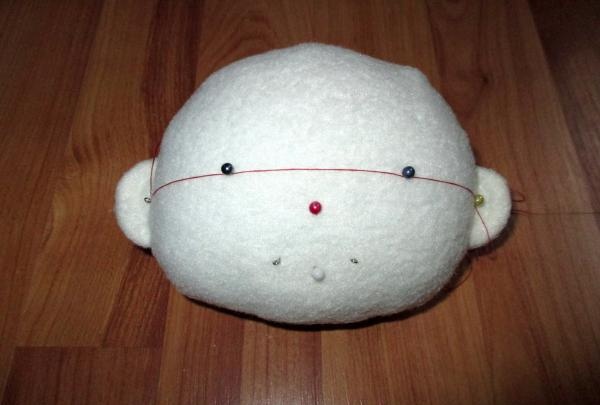
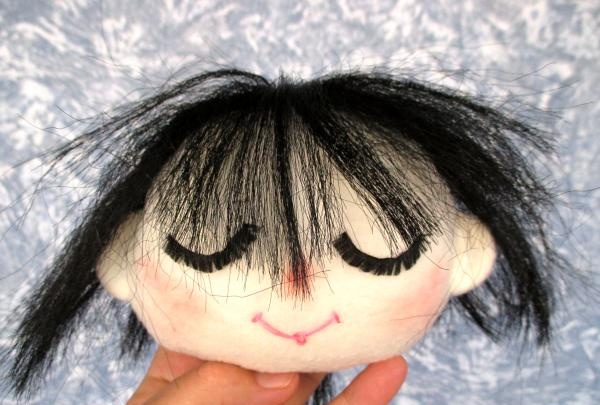
Form the ears using a regular seam in a circle forward with a needle. Then mark the face using pins. Since this is a sleeping baby doll, there is no need to sew on its eyes, just glue on the eyelashes. You can either buy them ready-made or make them from a narrow satin ribbon. To do this, cut 6 cm of tape for two eyelashes, then cut off the compacted part of the tape on one side and remove the silk fibers almost to the end. Leave 1mm for gluing. Embroider the mouth and shape the nose using the tightening technique. Dust your nose and cheeks with pink powder, and sew the hair onto the crown of your head in a small bun. I have them from Kanekalon, but you can get by with any thread that matches your eyelashes. Then fluff them all over your head and glue them in a circle with moment-crystal gel glue.
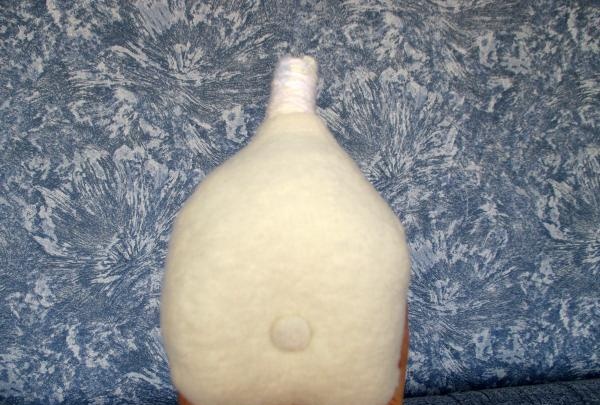
Insert a cardboard tube into the neck, covered with padding polyester and secured with threads. Wrap the upper fabric of the neck tightly around the tube so that the fixation is tight.
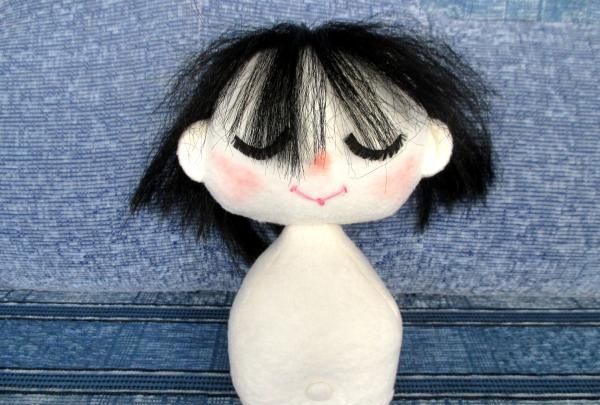
Make a cross-shaped cut at the bottom of the head, leaving a seam in front for the chin. Place the head on, first making a hole inward with scissors. Sew with a blind stitch. This head will never fall off.
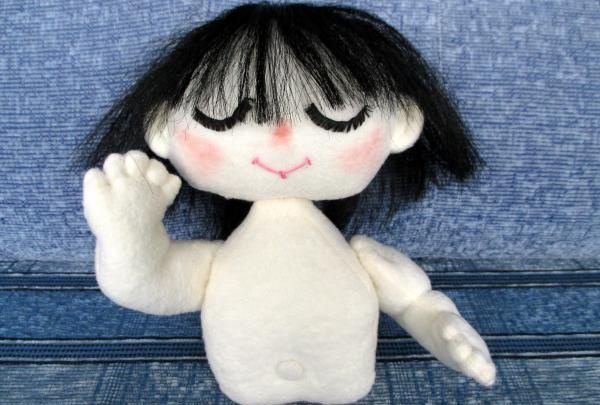
Sew on the arms.
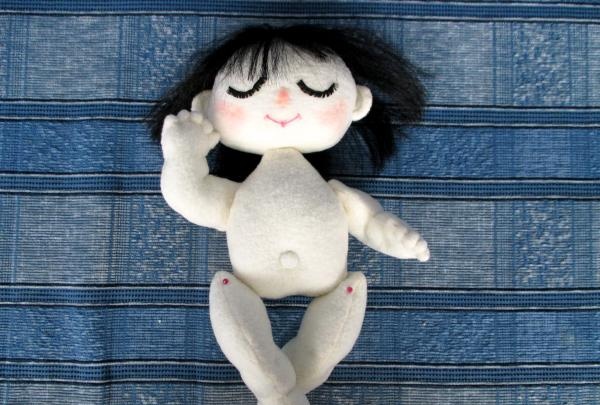
Before sewing, attach the legs to the body. I offer three options. The baby doll is sitting.
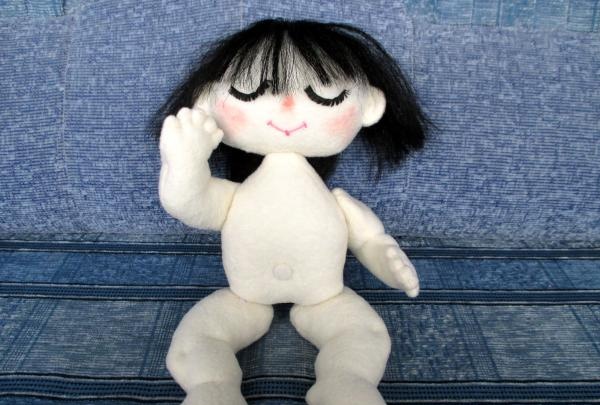
The baby doll lies with its legs extended along the body.
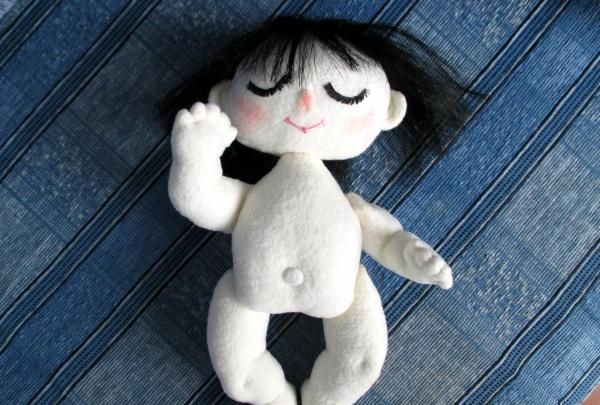
One leg is higher than the other. Pose of a baby swinging his legs. But then you need to keep your eyes open. Let's focus on the first option.
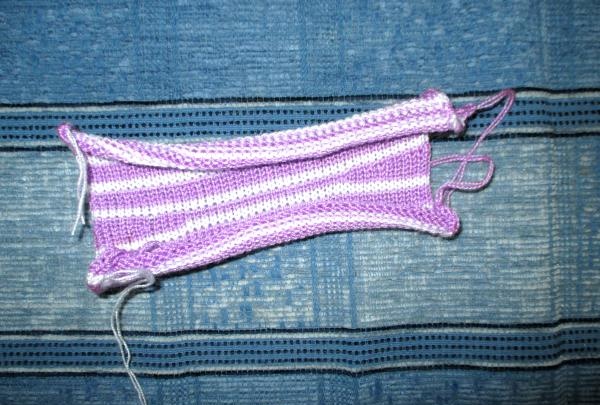
We will dress him in panties or diapers, socks and a hat. I suggest knitting this by machine, but you can also knit it by hand. We knit socks for 35 loops 35 rows from acrylic thread 500 m per 100 g in ordinary stocking stitch. The effect of twisting the canvas plays into our hands here.
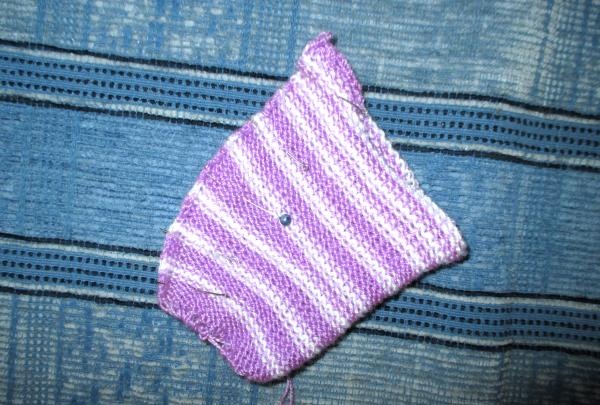
We tighten one part a little, and sew the seam on a machine, having first pinned the edge.
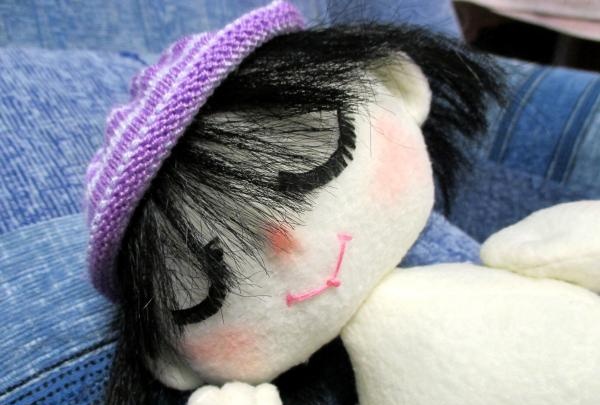
We knit the hat and panties in the same way, cast on 80 loops, knit 48 rows. We tighten the cap at the top with a thread. And first we put on the panties, and then we sew up the twisted edge.
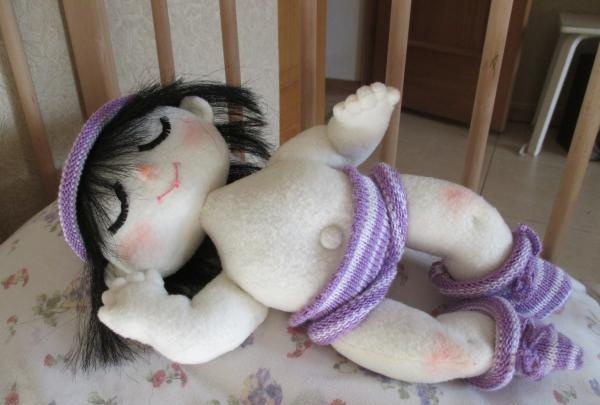
The baby is ready. Can be placed in a crib.

Increase the pattern so that the head from ear to ear is 16 cm, then the baby doll will be 38.

Attach the pattern to the fabric, secure with needles and cut with seam allowance. You won't be able to trace with a pencil. Since fleece fabric is soft, loose and with lint. When cutting, be sure to take into account the direction of the grain thread so that parts of our little baby’s body do not become distorted in the future.

Start sewing with the body and head. In the head, first sew all the cuts, then sew along the contour, leaving a small hole on the crown for filling with holofiber. For notes, don’t be afraid to use safety pins, they are very convenient and you can stitch with them. First sew the back along the least rounded part, then pin it to the front and sew it too.

Do the same with the cut out parts of the arms and legs. Before turning, make notches along the contours of all parts, this is important.

Turn out all the parts; to do this, make cuts in the arms and legs from the intended inner side. When you fill them with holofiber or padding polyester, carefully sew them up; they will not be visible in the finished product.

Shape the arms and legs according to the pattern. Where there is a point, tighten it with a knot. Where there is a fold, use a matching thread to tighten it. The fingers are made in the same way, they are pulled through the part.

Form the ears using a regular seam in a circle forward with a needle. Then mark the face using pins. Since this is a sleeping baby doll, there is no need to sew on its eyes, just glue on the eyelashes. You can either buy them ready-made or make them from a narrow satin ribbon. To do this, cut 6 cm of tape for two eyelashes, then cut off the compacted part of the tape on one side and remove the silk fibers almost to the end. Leave 1mm for gluing. Embroider the mouth and shape the nose using the tightening technique. Dust your nose and cheeks with pink powder, and sew the hair onto the crown of your head in a small bun. I have them from Kanekalon, but you can get by with any thread that matches your eyelashes. Then fluff them all over your head and glue them in a circle with moment-crystal gel glue.


Insert a cardboard tube into the neck, covered with padding polyester and secured with threads. Wrap the upper fabric of the neck tightly around the tube so that the fixation is tight.

Make a cross-shaped cut at the bottom of the head, leaving a seam in front for the chin. Place the head on, first making a hole inward with scissors. Sew with a blind stitch. This head will never fall off.

Sew on the arms.

Before sewing, attach the legs to the body. I offer three options. The baby doll is sitting.

The baby doll lies with its legs extended along the body.

One leg is higher than the other. Pose of a baby swinging his legs. But then you need to keep your eyes open. Let's focus on the first option.

We will dress him in panties or diapers, socks and a hat. I suggest knitting this by machine, but you can also knit it by hand. We knit socks for 35 loops 35 rows from acrylic thread 500 m per 100 g in ordinary stocking stitch. The effect of twisting the canvas plays into our hands here.

We tighten one part a little, and sew the seam on a machine, having first pinned the edge.

We knit the hat and panties in the same way, cast on 80 loops, knit 48 rows. We tighten the cap at the top with a thread. And first we put on the panties, and then we sew up the twisted edge.

The baby is ready. Can be placed in a crib.
Similar master classes
Particularly interesting
Comments (0)

