Foamiran hair elastic
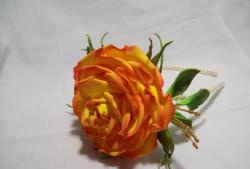
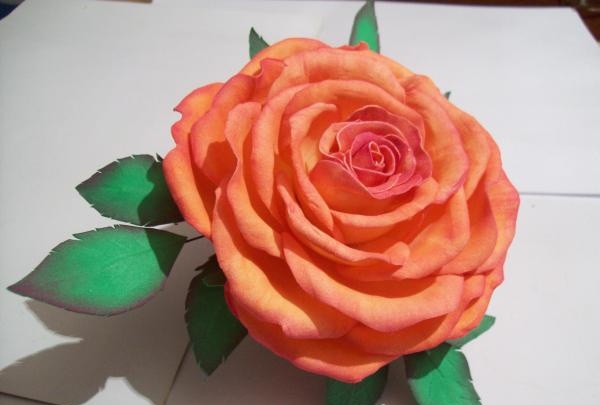
This decoration with a diameter of 11-12 cm will be an excellent addition to your wardrobe. Foamiran is not afraid of either water or sun.
To work on the rose we will need the following materials:
- plastic suede in lemon and green colors.
- dry pastel orange and crimson colors.
- wet wipes.
- thin floral wire.
- iron.
- scissors.
- glue gun.
- toothpick.
- a large hair tie.
Now let’s draw the templates for the elastic band. For the flower itself you will need 4 types of droplet-shaped petals. The smallest one will be 4x4 cm in size, you need 12 of them. The average petal measures 4.5x4.5 cm, and you will need 10 of them. Large petals will need 7 pieces measuring 5.5x5.5 cm. And another huge 5 pieces measuring 6.5x6.5 cm. For a rose you will also need a backing of 2 pieces with a diameter of 11 cm. And additionally leaves of two sizes, 2 pieces per width 5.5x3 cm and 8 pieces 4.5x2 cm.

Using these templates, we cut out all the petals from lemon-colored plastic suede. We apply the template to the suede and trace it with a toothpick, then cut out these blanks.From green foamiran we cut out blanks of leaves and a flower base.
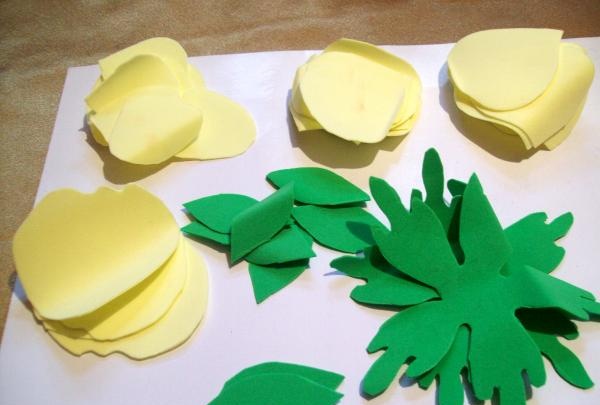
When all the templates are ready, we begin to tint them. We take dry pastel, first orange, then raspberry.
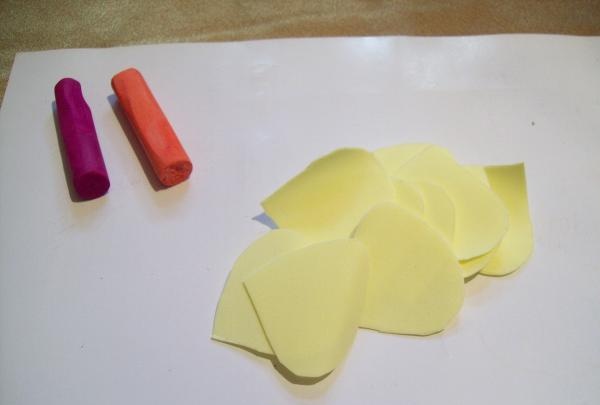
We put a damp napkin on our finger and put orange pastel on it, using the method of rubbing it over the paint. Then we take the petal blanks one by one and start painting them along the wide edge.
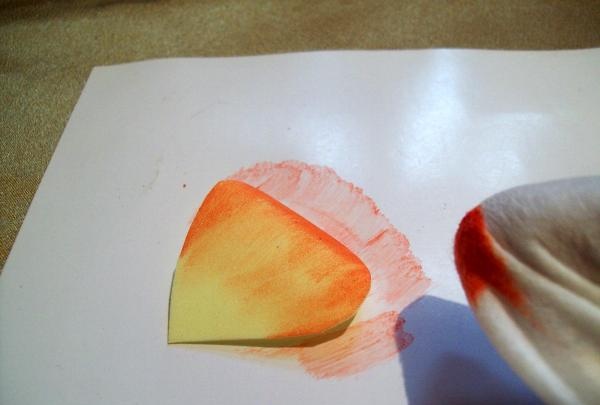
All petals will have orange edges. We process them on both sides and let them dry well.
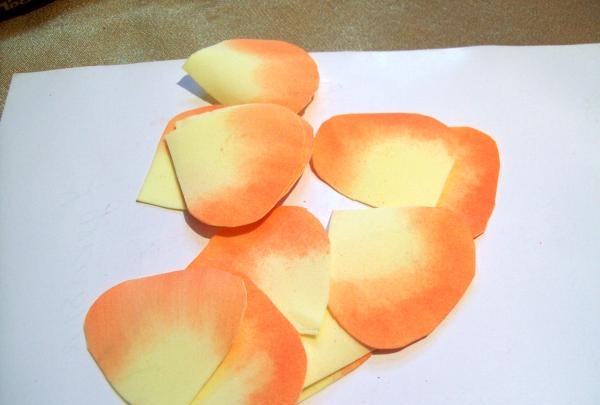
Now we begin to paint over all the blanks with raspberry pastels. But in this case, we tint only the edge, capturing the petals quite a bit.
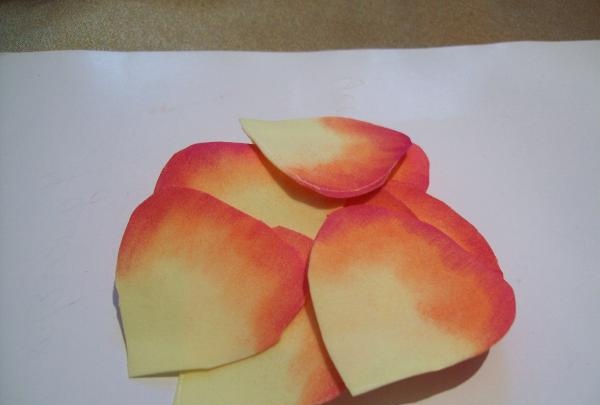
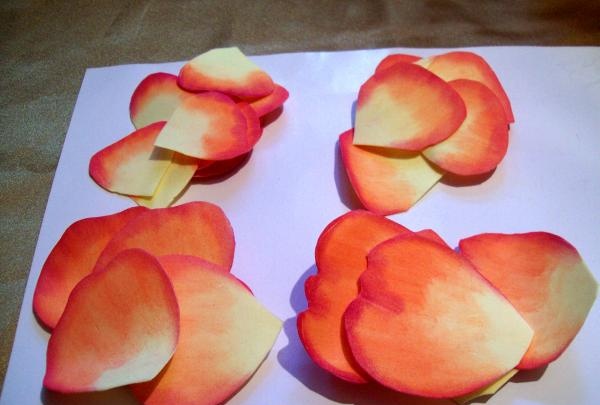
We also process all workpieces and always on both sides.
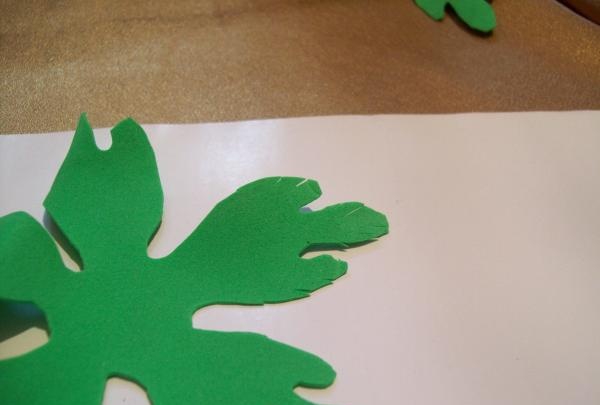
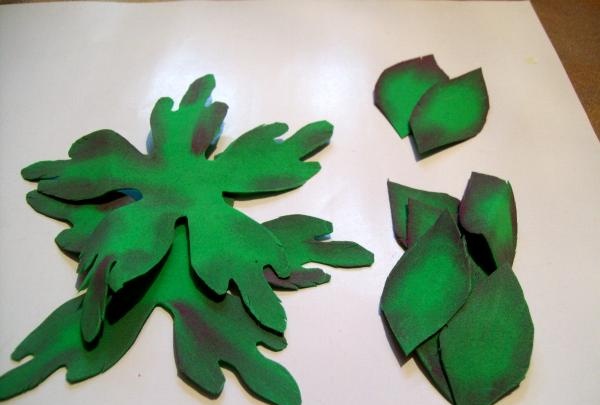
We continue to work with the blanks. We take a green substrate. And with scissors we make cuts along the edges.
We also cut notches on the leaves.
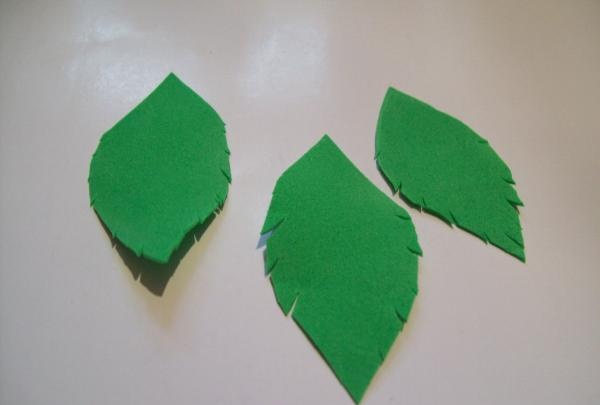
When all the leaves are processed, we begin to color them. We also take a napkin and a crimson pastel. We pass all green blanks with a napkin with paint along the edge on both sides. Let them dry.
We continue to work on the petals. They need to be given a new shape. We will use the heat of the iron on position 2 or wool. Let's start again with the smallest pieces. Apply one at a time to the iron. Then quickly fold it into an accordion.
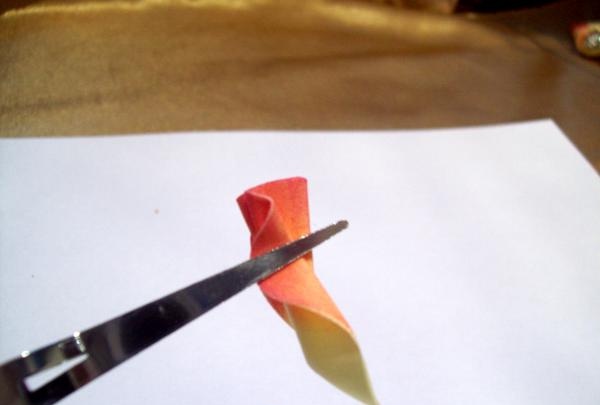
Scroll the top edge of the petal a little with your fingers. Then we straighten it and stretch the petal in the middle with our fingers, making a depression like a boat.
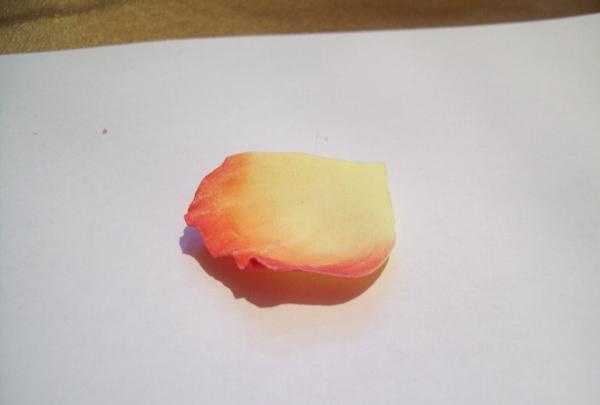
Thus, we process small petals. And all the other flower blanks will have a stronger indentation, and in addition to this, we will also bend the upper edges with our fingers in the direction from the middle. We will get an even deeper boat with curved edges.
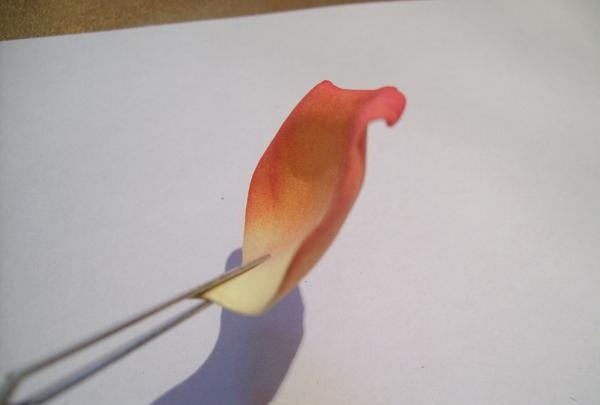
And thus, we process all the remaining rose petals.
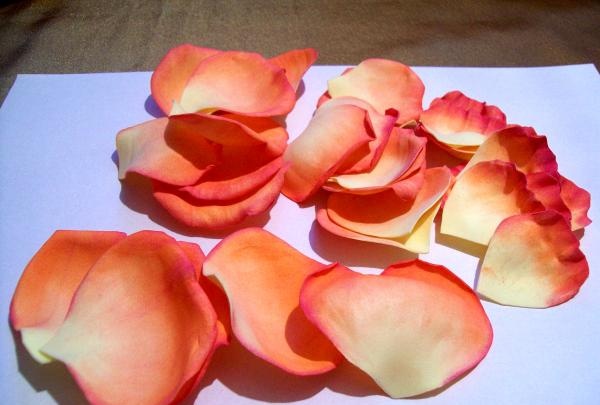
When everything for the rose is ready, we proceed to give a new shape to the base. We have 2 of them. We heat it on the iron and quickly fold it, then scroll it with our fingers.
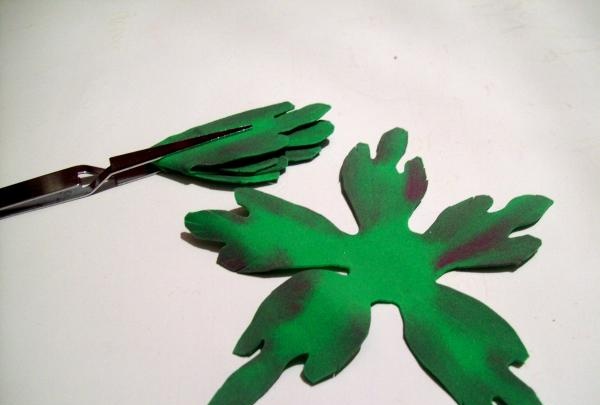
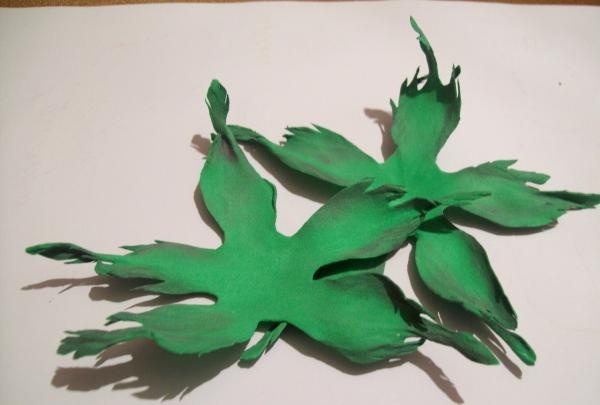
We process both sepals.
It's time for green leaves. You will need a plastic sheet from old flowers; the veins are clearly visible in it. We take a blank sheet, heat it on an iron and quickly apply a mass sheet onto the layer, press it well with our fingers along the veins so that they are imprinted on the suede sheet. So, we process all the leaves.
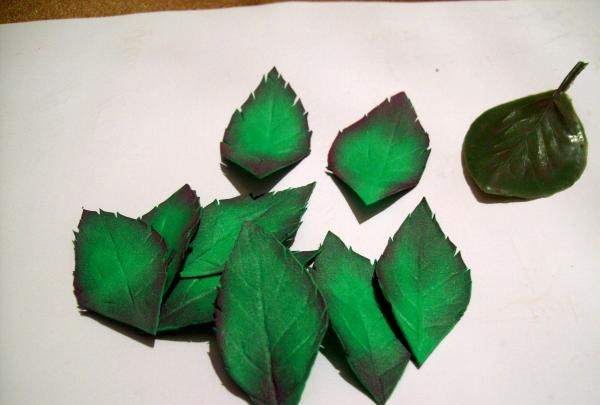
When the leaves are ready, we begin to apply green floral wire to them from the wrong side. We cut a piece 7 cm long and attach it to each leaf blank.
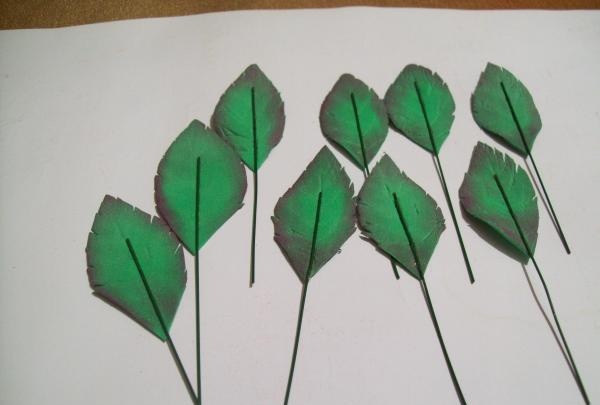
Then we connect 3 leaves into a bundle, the top one will be slightly higher than the others, and twist the 3 wires together 1 cm from the last leaf.
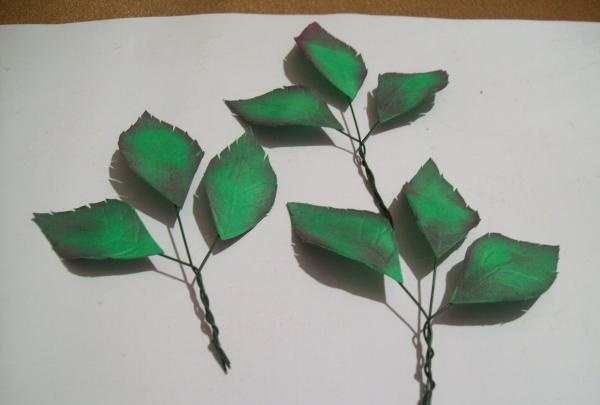
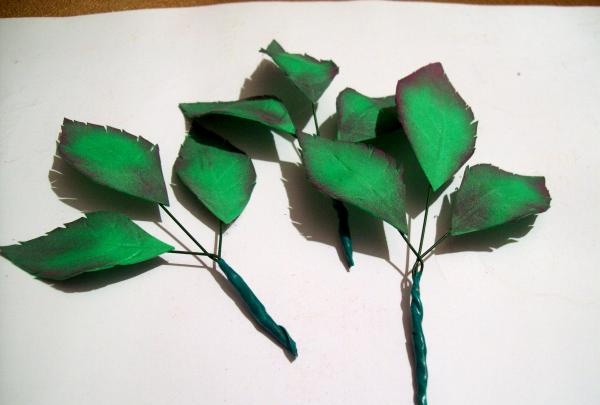
And all that remains is to cover the twisted wire with a special floral tape or corrugated paper.
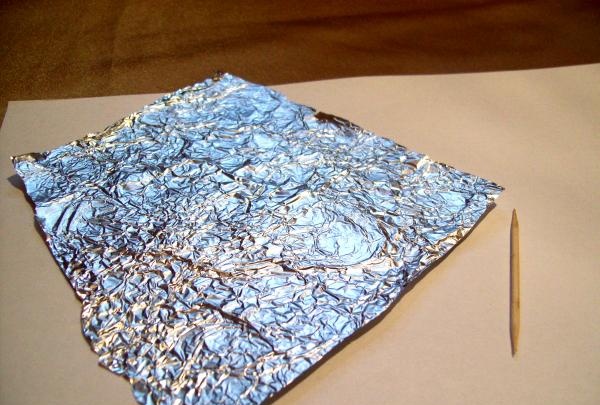
It's time for a rose. Take a piece of foil measuring 11x11cm and a toothpick.
First we twist the foil into a ball, then we form a droplet measuring 3 cm in height and 2 cm in width. Glue the toothpick into the middle with a glue gun.
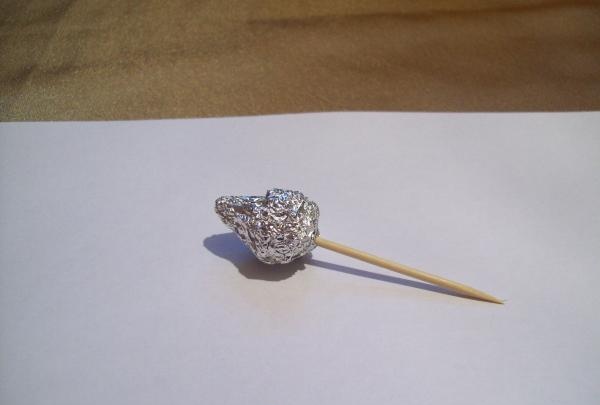
We start with small petals, there will be 12 of them. We glue the first one completely to the foil, folding the top edge tightly into a tube.
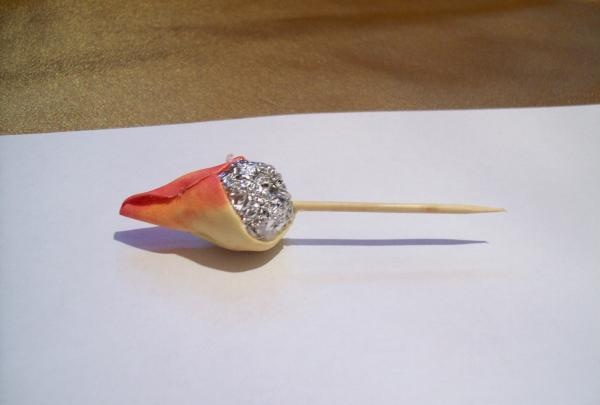
Glue another petal onto it on the opposite side, also folding it tightly.
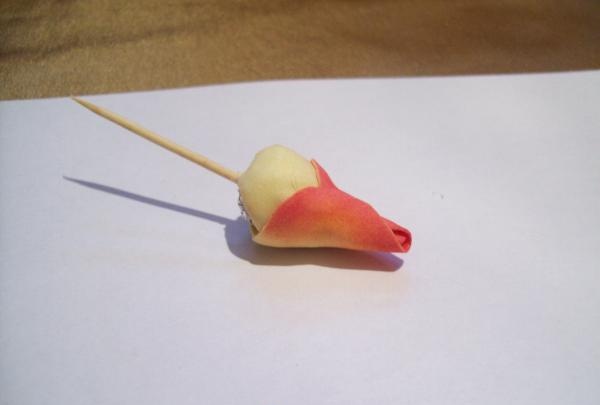
Glue the next two petals, applying glue in the middle of the petal and above the middle along the edges.
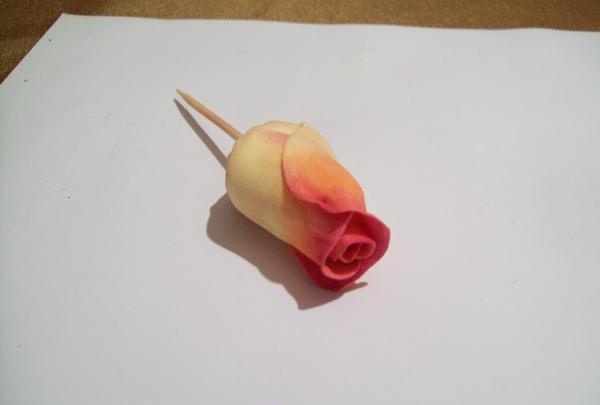
We try to glue all the small petals closer to each other, moving in a spiral.
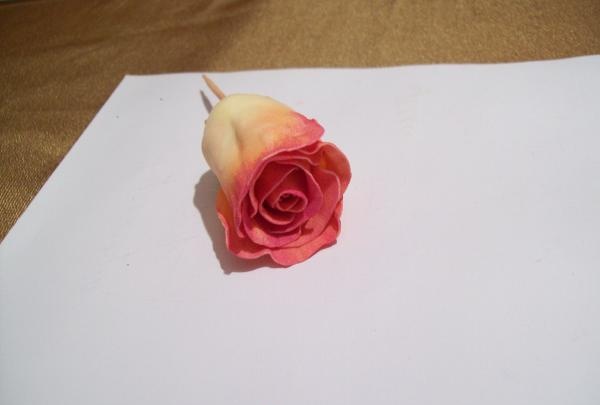
Let's move on to the medium-sized petals, of which there are 10 pieces. We also glue them in a spiral, but now we make the rose bloom.To do this, apply glue in the petals to the very bottom and side to the middle of the petal.
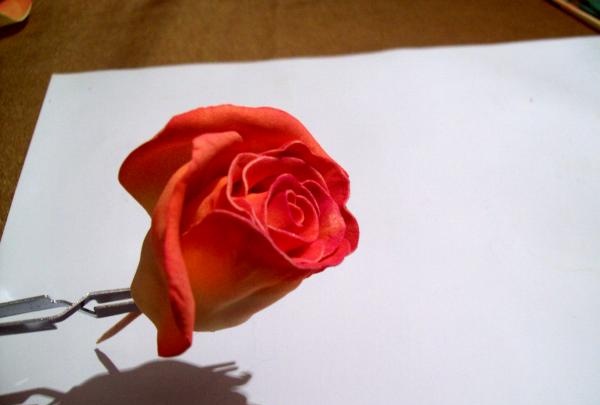
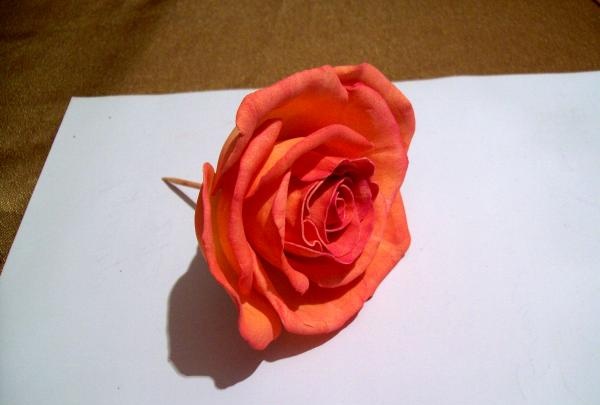
Now we glue the large petals from only 7 pieces. But they will stick only to the bottom of the workpiece.
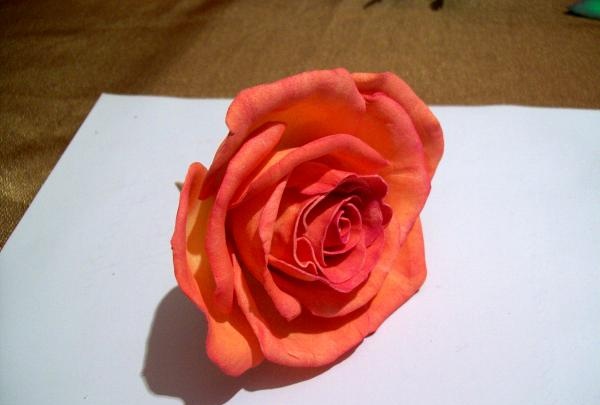
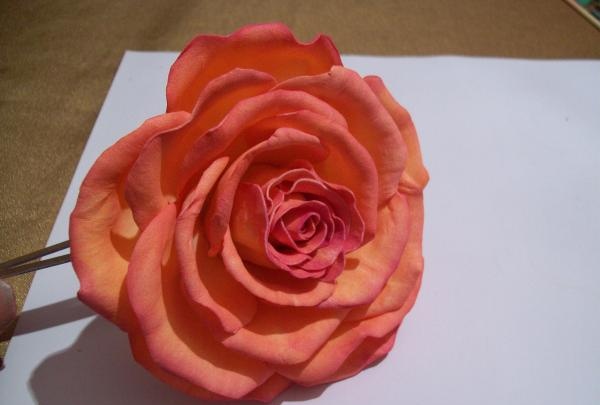
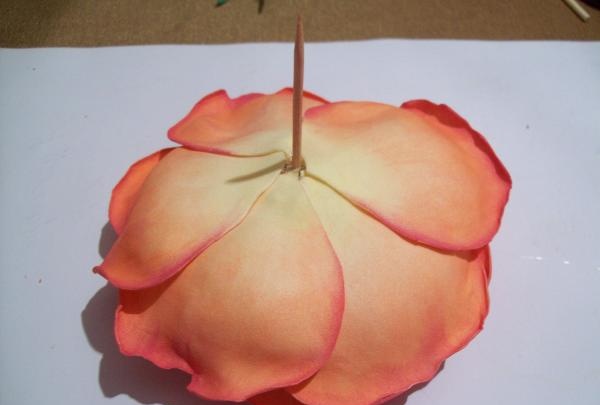
The turn came to the huge petals, we only have 5 of them. We turn the rose upside down and glue the petals, placing them one after another on top of each other, that is, each new petal begins from the middle of the previous one. We glue these petals only to the very bottom edge, which is near the toothpick.
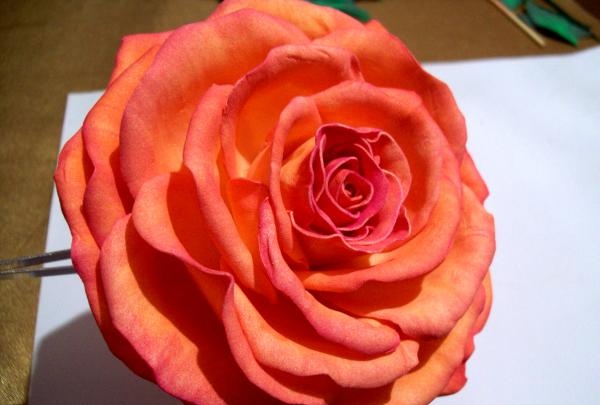
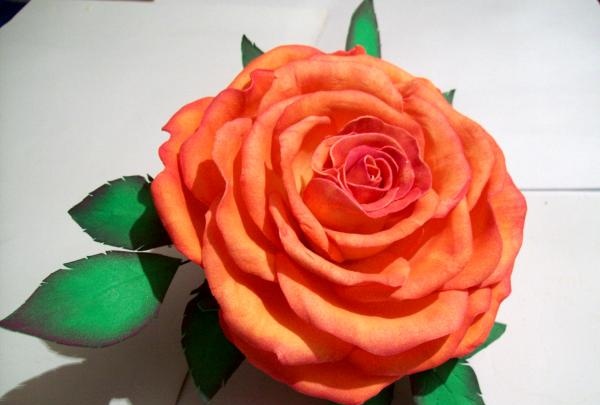
The rose turns out lush due to the correct application of the petals. It measures 11 cm in diameter.
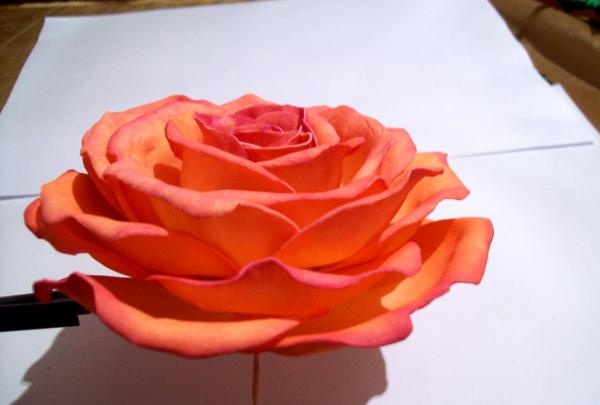
The rose is ready, but you should cut off the toothpick and glue the finished flower bases in its place. We fix them in a checkerboard pattern.
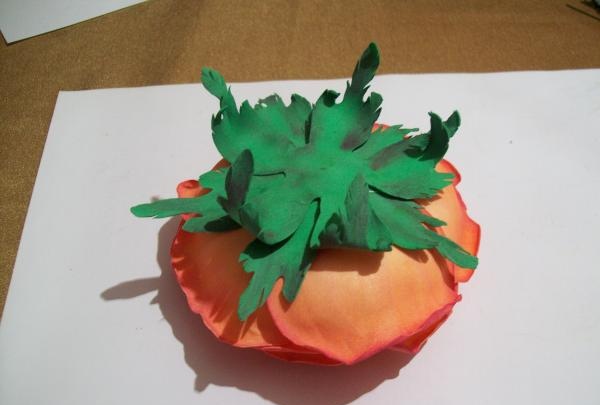
Now we glue 3 branches with leaves.
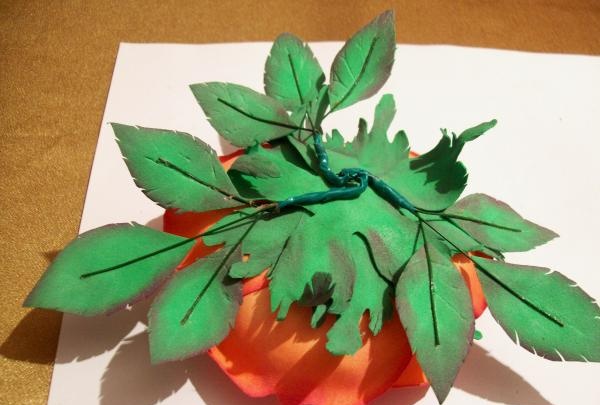
Apply glue to secure it and immediately insert a hair elastic into it.
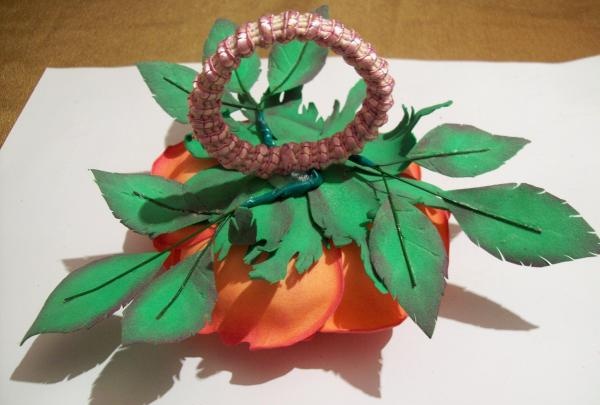
Take some green tape to cover the adhesive joints. We also secure it with a glue gun.
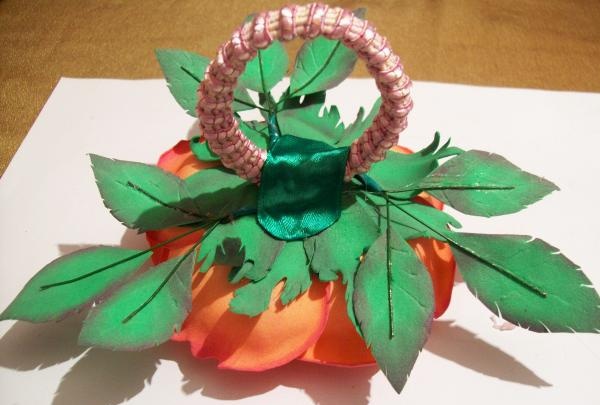
OK it's all over Now. Our hair elastic “Veronica” is ready.
Good luck to all.

To work on the rose we will need the following materials:
- plastic suede in lemon and green colors.
- dry pastel orange and crimson colors.
- wet wipes.
- thin floral wire.
- iron.
- scissors.
- glue gun.
- toothpick.
- a large hair tie.
Now let’s draw the templates for the elastic band. For the flower itself you will need 4 types of droplet-shaped petals. The smallest one will be 4x4 cm in size, you need 12 of them. The average petal measures 4.5x4.5 cm, and you will need 10 of them. Large petals will need 7 pieces measuring 5.5x5.5 cm. And another huge 5 pieces measuring 6.5x6.5 cm. For a rose you will also need a backing of 2 pieces with a diameter of 11 cm. And additionally leaves of two sizes, 2 pieces per width 5.5x3 cm and 8 pieces 4.5x2 cm.

Using these templates, we cut out all the petals from lemon-colored plastic suede. We apply the template to the suede and trace it with a toothpick, then cut out these blanks.From green foamiran we cut out blanks of leaves and a flower base.

When all the templates are ready, we begin to tint them. We take dry pastel, first orange, then raspberry.

We put a damp napkin on our finger and put orange pastel on it, using the method of rubbing it over the paint. Then we take the petal blanks one by one and start painting them along the wide edge.

All petals will have orange edges. We process them on both sides and let them dry well.

Now we begin to paint over all the blanks with raspberry pastels. But in this case, we tint only the edge, capturing the petals quite a bit.

We also process all workpieces and always on both sides.

We continue to work with the blanks. We take a green substrate. And with scissors we make cuts along the edges.

We also cut notches on the leaves.

When all the leaves are processed, we begin to color them. We also take a napkin and a crimson pastel. We pass all green blanks with a napkin with paint along the edge on both sides. Let them dry.

We continue to work on the petals. They need to be given a new shape. We will use the heat of the iron on position 2 or wool. Let's start again with the smallest pieces. Apply one at a time to the iron. Then quickly fold it into an accordion.

Scroll the top edge of the petal a little with your fingers. Then we straighten it and stretch the petal in the middle with our fingers, making a depression like a boat.

Thus, we process small petals. And all the other flower blanks will have a stronger indentation, and in addition to this, we will also bend the upper edges with our fingers in the direction from the middle. We will get an even deeper boat with curved edges.

And thus, we process all the remaining rose petals.

When everything for the rose is ready, we proceed to give a new shape to the base. We have 2 of them. We heat it on the iron and quickly fold it, then scroll it with our fingers.

We process both sepals.

It's time for green leaves. You will need a plastic sheet from old flowers; the veins are clearly visible in it. We take a blank sheet, heat it on an iron and quickly apply a mass sheet onto the layer, press it well with our fingers along the veins so that they are imprinted on the suede sheet. So, we process all the leaves.

When the leaves are ready, we begin to apply green floral wire to them from the wrong side. We cut a piece 7 cm long and attach it to each leaf blank.

Then we connect 3 leaves into a bundle, the top one will be slightly higher than the others, and twist the 3 wires together 1 cm from the last leaf.

And all that remains is to cover the twisted wire with a special floral tape or corrugated paper.

It's time for a rose. Take a piece of foil measuring 11x11cm and a toothpick.

First we twist the foil into a ball, then we form a droplet measuring 3 cm in height and 2 cm in width. Glue the toothpick into the middle with a glue gun.

We start with small petals, there will be 12 of them. We glue the first one completely to the foil, folding the top edge tightly into a tube.

Glue another petal onto it on the opposite side, also folding it tightly.

Glue the next two petals, applying glue in the middle of the petal and above the middle along the edges.

We try to glue all the small petals closer to each other, moving in a spiral.

Let's move on to the medium-sized petals, of which there are 10 pieces. We also glue them in a spiral, but now we make the rose bloom.To do this, apply glue in the petals to the very bottom and side to the middle of the petal.


Now we glue the large petals from only 7 pieces. But they will stick only to the bottom of the workpiece.


The turn came to the huge petals, we only have 5 of them. We turn the rose upside down and glue the petals, placing them one after another on top of each other, that is, each new petal begins from the middle of the previous one. We glue these petals only to the very bottom edge, which is near the toothpick.


The rose turns out lush due to the correct application of the petals. It measures 11 cm in diameter.

The rose is ready, but you should cut off the toothpick and glue the finished flower bases in its place. We fix them in a checkerboard pattern.

Now we glue 3 branches with leaves.

Apply glue to secure it and immediately insert a hair elastic into it.

Take some green tape to cover the adhesive joints. We also secure it with a glue gun.

OK it's all over Now. Our hair elastic “Veronica” is ready.

Good luck to all.
Similar master classes
Particularly interesting
Comments (0)


