Dishes for indoor plants
Hello. If you are a big fan of indoor plants, this way to decorate your home may interest you.
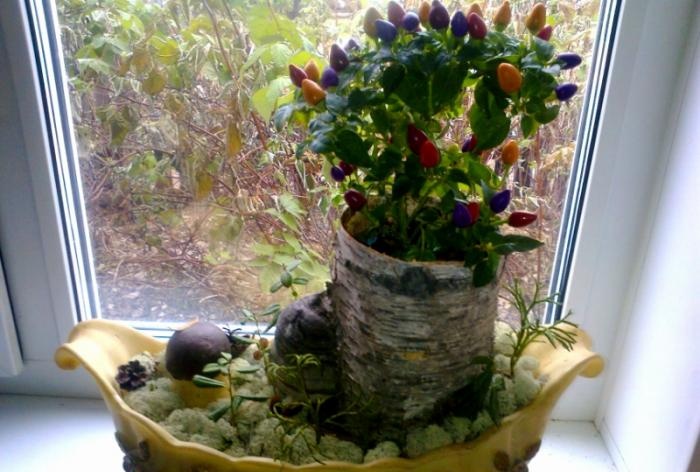
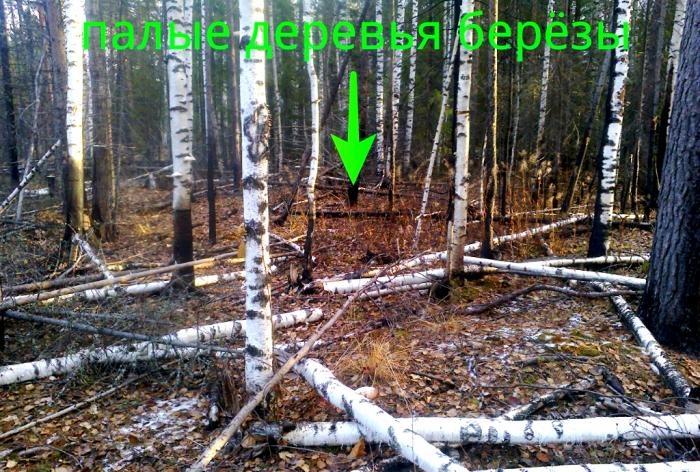
So, you are tired of the monotonous and gray selection of dishes in stores for your green pets, or you just decided to save money - it doesn’t matter. The main thing is the result. First of all, you need to take a walk through the forest or the nearest forest belt. It is desirable that it be a birch grove - then it will take less time to find the required material. And we will need a fallen tree, that is, a birch tree or a birch trunk lying on the ground (and preferably, it should be an old tree that has been lying for quite a LONG time), a little thicker than the thickness of a two-liter plastic bottle, or a mayonnaise bucket. Birch bark is a very durable natural material, and even if a piece of trunk has lain on the ground for several years, it will not rot, unlike the wood inside. This is exactly what we need! Remember, the longer the tree has been lying on the ground, the less effort and time it will take you to remove the wood from the bark.
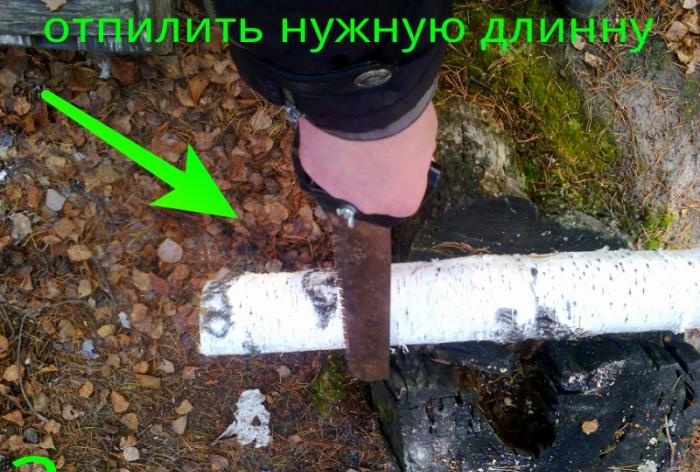
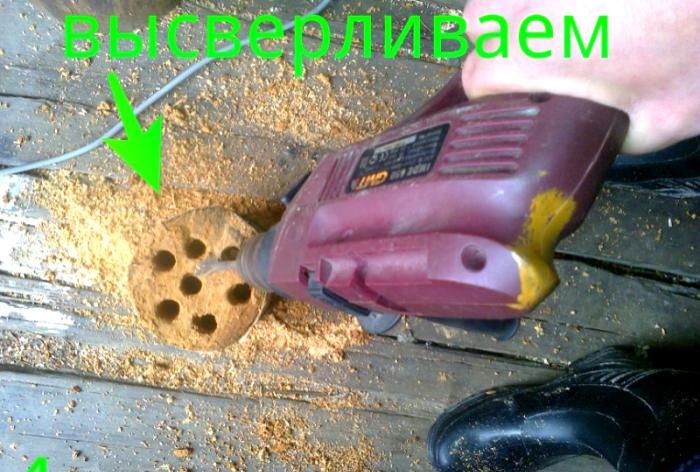
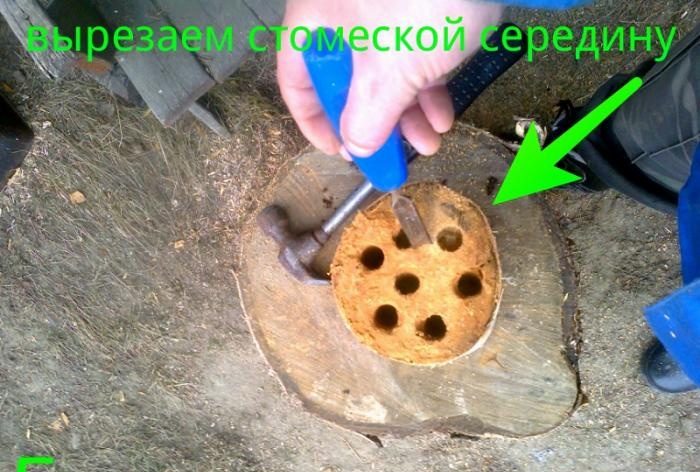
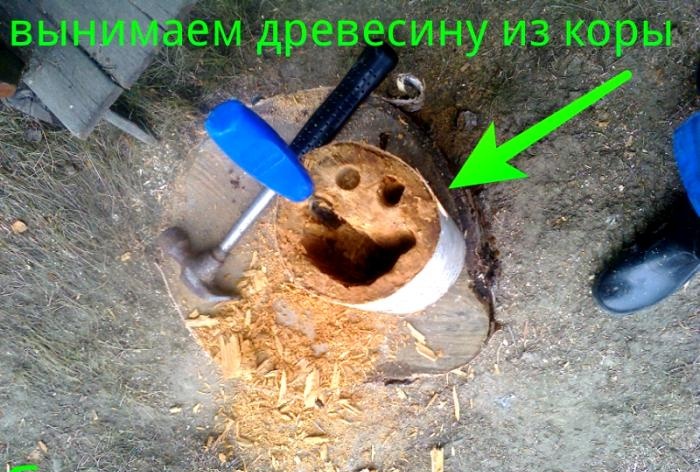
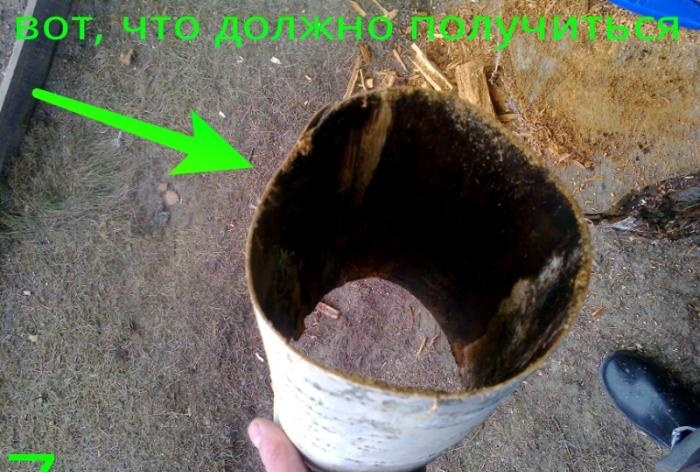
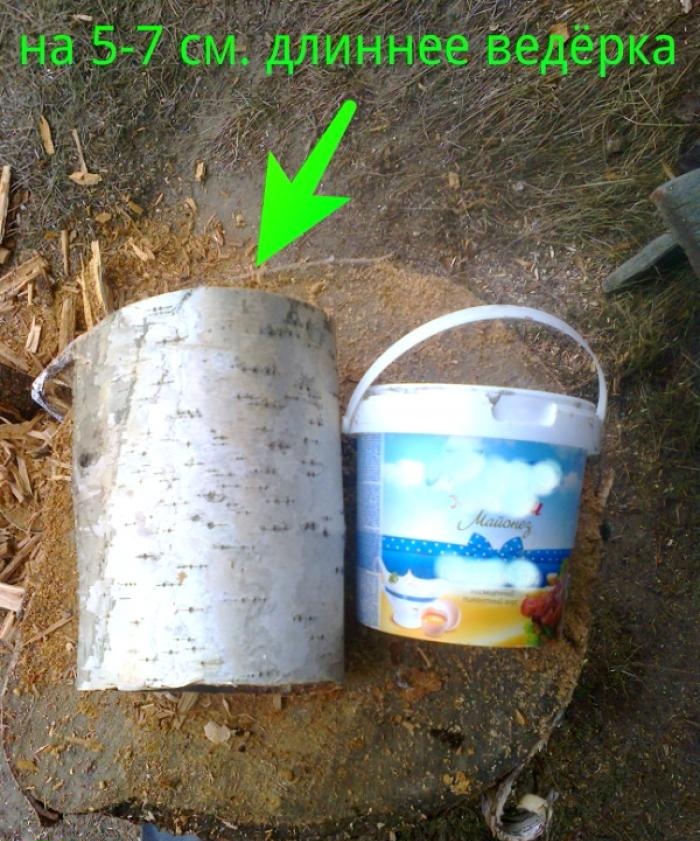
Next, we cut off a chock from the trunk, slightly longer (5-7 cm) in height than the piece of plastic two-liter bottle or bucket you selected.Using a chisel and a hammer (you can use a drill with a large-caliber pen), we remove the wood from the bark. The work should be carried out extremely carefully and carefully so as not to damage the integrity of the resulting “pipe” of bark, avoiding torn scratches and cuts on the outside.
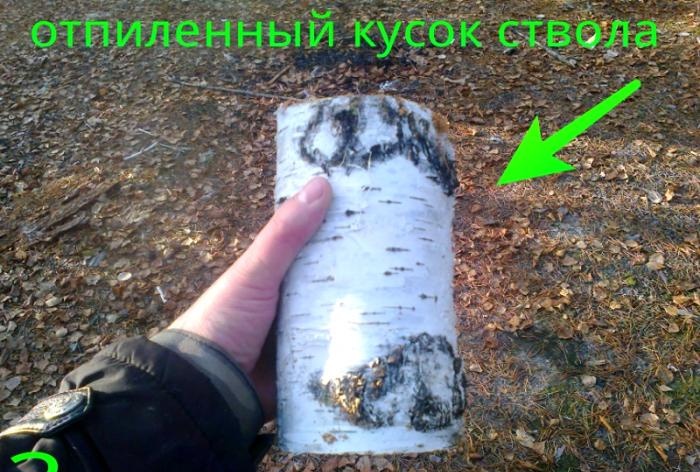
So, they cleared it. If the “pipe” turns out to be a little larger in caliber than the bottle, bucket or other vessel you have chosen, it’s okay, you can wrap it (the vessel) with paper until it fits the “pipe” perfectly. For now we put the “pipe” aside. We take our plant (in my case it’s a decorative indoor pepper) and carefully (MAXIMUM caution!) remove the root system along with the soil from the old pot. By the way, if the old pot is plastic, that’s great; You can tap on its walls so that the soil moves away from the inner walls. Holding the plant at the base of the trunk, turn it on its side, or (if the plant is not very large and lush) down “head” and take it out of the old container. Then, we transplant the plant into the prepared section of the bottle or bucket. Remember; The less you disturb the root system, the less your pet will get sick after the “relocation”.
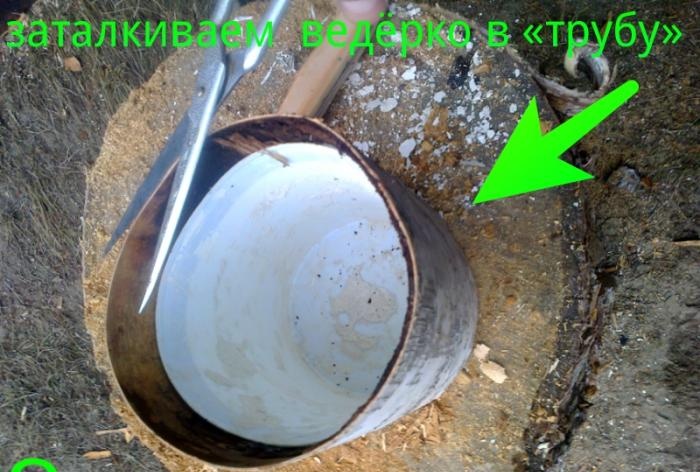
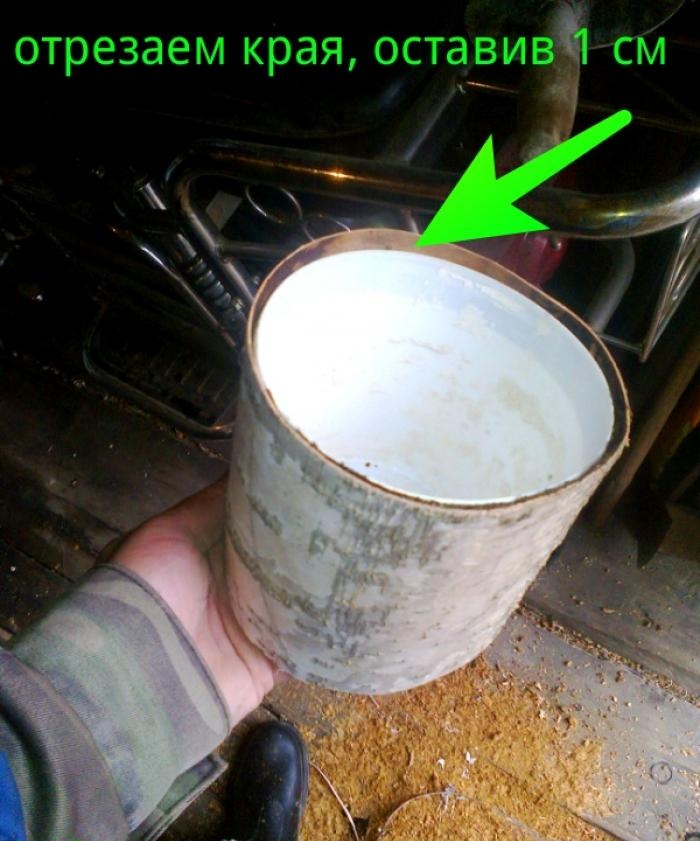
Transplanted? Then we take scissors and carefully trim the edges of the birch “pipe”, making them as even as possible. If desired, the resulting product can be decorated with moss or birch tinder (a parasitic fungus). Or cover it with varnish, but I’m not a supporter of chemistry, after all, the plant will live there! The only thing left is to insert the container with the plant into our “pipe”. All. Ready.
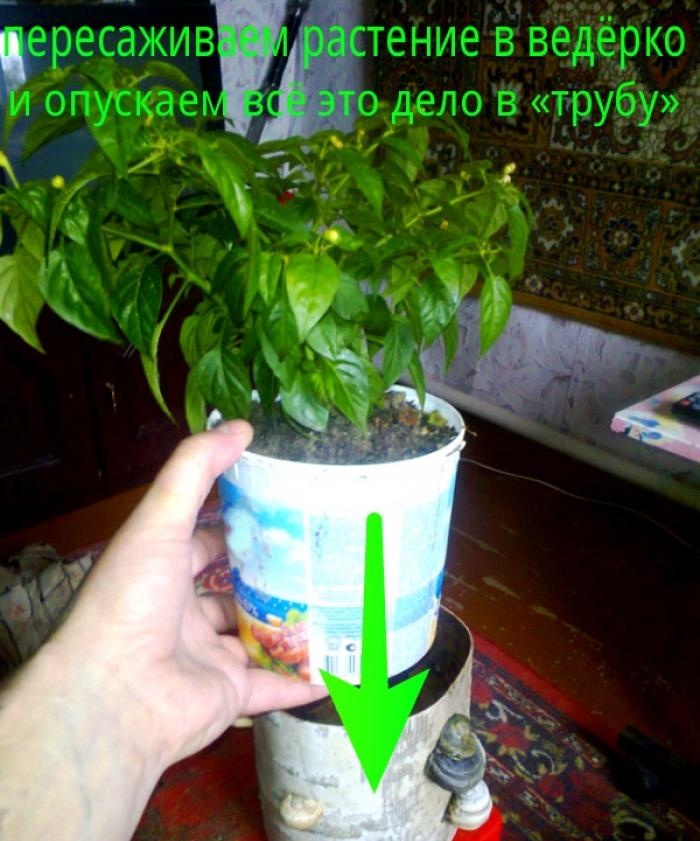
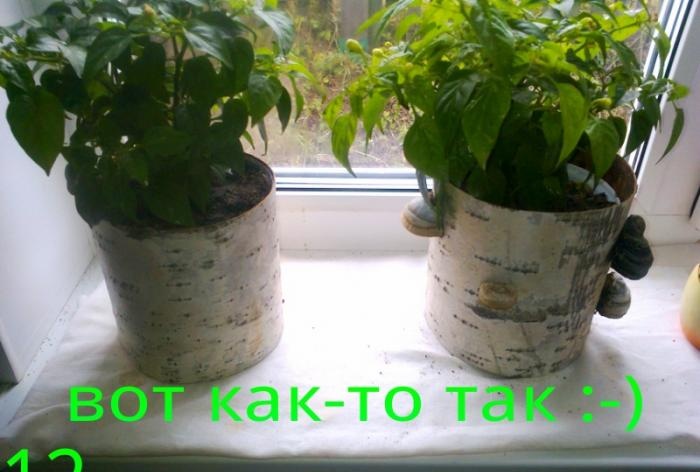
By the way, such things can be made in a wide variety of calibers, from the thinnest to the thickest barrels you can find.
Happy crafting!

So, you are tired of the monotonous and gray selection of dishes in stores for your green pets, or you just decided to save money - it doesn’t matter. The main thing is the result. First of all, you need to take a walk through the forest or the nearest forest belt. It is desirable that it be a birch grove - then it will take less time to find the required material. And we will need a fallen tree, that is, a birch tree or a birch trunk lying on the ground (and preferably, it should be an old tree that has been lying for quite a LONG time), a little thicker than the thickness of a two-liter plastic bottle, or a mayonnaise bucket. Birch bark is a very durable natural material, and even if a piece of trunk has lain on the ground for several years, it will not rot, unlike the wood inside. This is exactly what we need! Remember, the longer the tree has been lying on the ground, the less effort and time it will take you to remove the wood from the bark.


Next, we cut off a chock from the trunk, slightly longer (5-7 cm) in height than the piece of plastic two-liter bottle or bucket you selected.Using a chisel and a hammer (you can use a drill with a large-caliber pen), we remove the wood from the bark. The work should be carried out extremely carefully and carefully so as not to damage the integrity of the resulting “pipe” of bark, avoiding torn scratches and cuts on the outside.


So, they cleared it. If the “pipe” turns out to be a little larger in caliber than the bottle, bucket or other vessel you have chosen, it’s okay, you can wrap it (the vessel) with paper until it fits the “pipe” perfectly. For now we put the “pipe” aside. We take our plant (in my case it’s a decorative indoor pepper) and carefully (MAXIMUM caution!) remove the root system along with the soil from the old pot. By the way, if the old pot is plastic, that’s great; You can tap on its walls so that the soil moves away from the inner walls. Holding the plant at the base of the trunk, turn it on its side, or (if the plant is not very large and lush) down “head” and take it out of the old container. Then, we transplant the plant into the prepared section of the bottle or bucket. Remember; The less you disturb the root system, the less your pet will get sick after the “relocation”.


Transplanted? Then we take scissors and carefully trim the edges of the birch “pipe”, making them as even as possible. If desired, the resulting product can be decorated with moss or birch tinder (a parasitic fungus). Or cover it with varnish, but I’m not a supporter of chemistry, after all, the plant will live there! The only thing left is to insert the container with the plant into our “pipe”. All. Ready.


By the way, such things can be made in a wide variety of calibers, from the thinnest to the thickest barrels you can find.
Happy crafting!
Similar master classes
Particularly interesting
Comments (0)


