Adding a solar panel to your smartphone
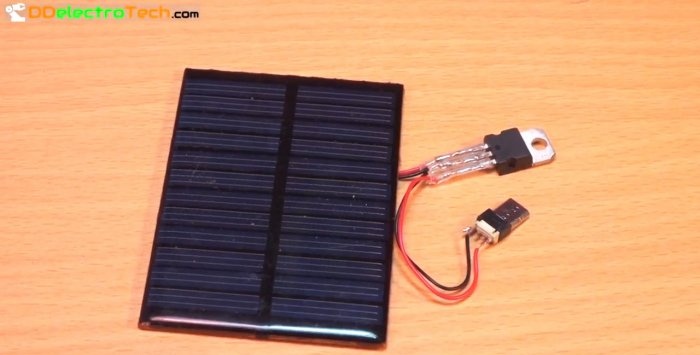
In this article we will look at how to make a solar cell phone charger. This device is easy to manufacture, has low weight and dimensions, but performs a very useful function. It will become an indispensable assistant when traveling, and your gadgets will always be charged. With its help you can power any device, be it a mobile phone, tablet, MP3 player or even a Power Bank. The speed of operation will depend on the size and power of the solar battery you will use during assembly. A pleasant feature will be the extremely low cost of parts.
For production you will need:
The only tools we need are a soldering iron, a knife or scissors.
I bought all the components on Ali Express. There are a lot of options to choose from; you can experiment with the size of the solar cells or choose a different connector if, for example, you have an iPhone.
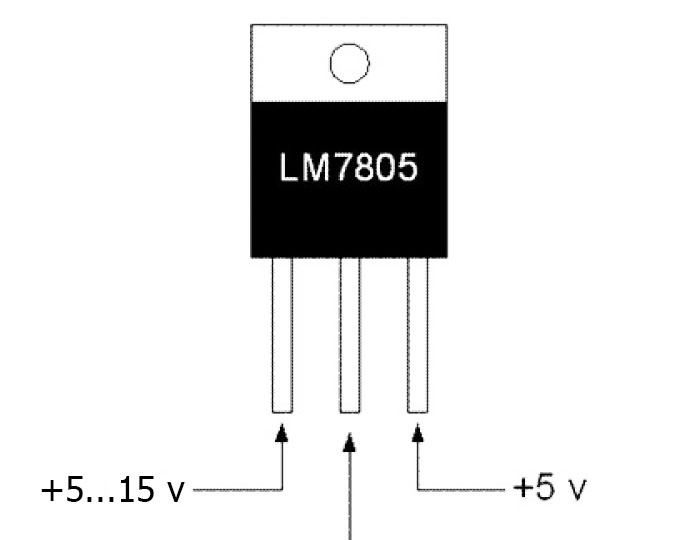
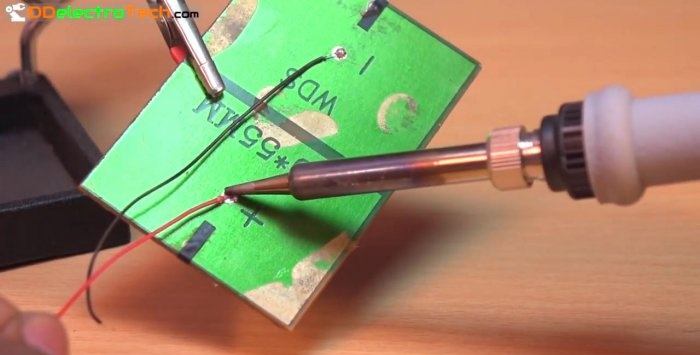
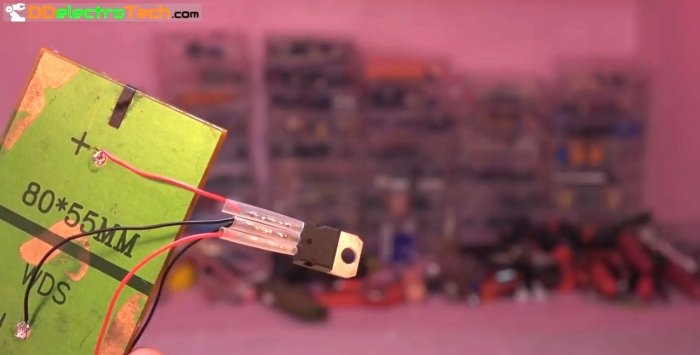
Solder the wires to the plus and minus on the battery.
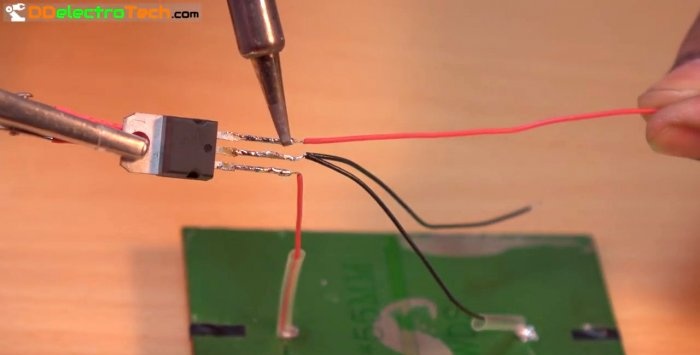
We solder another one in parallel to the negative one.Now the positive wire must be connected to the outer leg of the stabilizer, and the negative wire at the junction with the central one.
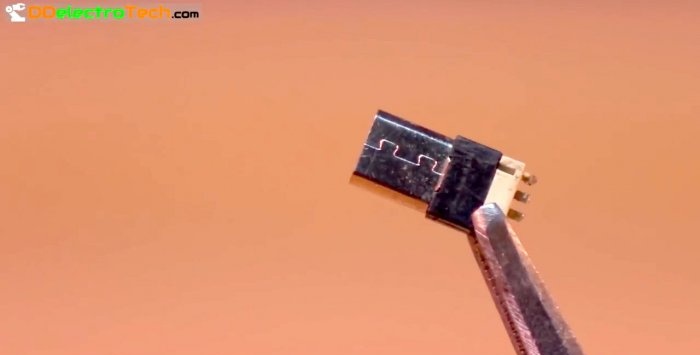
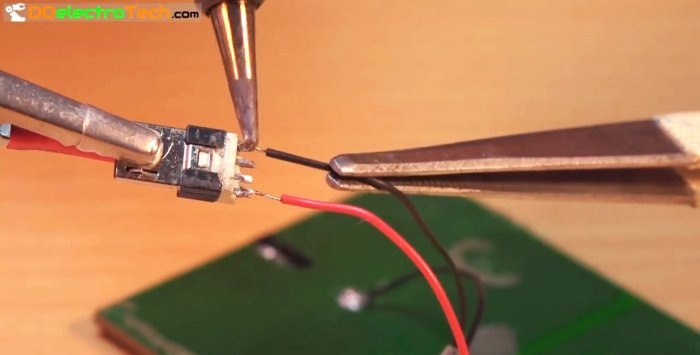
We connect the free leg to the outermost contact of the USB port. We solder the remaining wire to the second side contact of the connector.
Before assembly, it is necessary to put heat shrink on the wires in advance.
After soldering is completed, they need to be warmed up with a hairdryer or a simple lighter.
Having tweezers and a magnifying glass on hand will make the work easier, since all the parts are small in size and have small distances between the contacts. This also applies to the size of the soldering iron tip - the smaller the better.
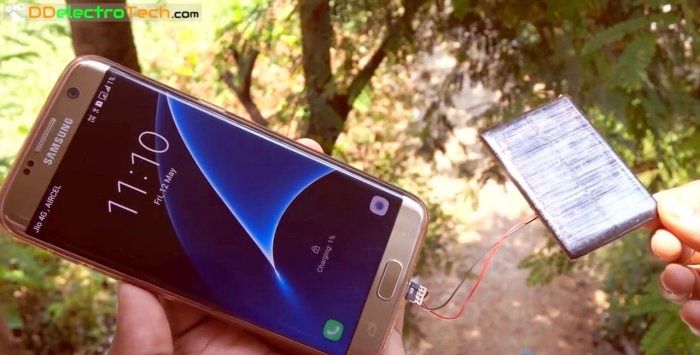
We insert the connector into the smartphone socket and place the battery in sunlight.
Discharge is underway. The device is ready to use!
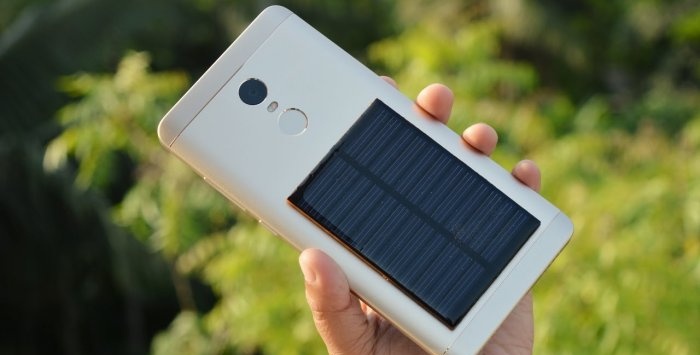
Now it would be a good idea to attach this charger to the back of the case or body of your cell phone or other device. This can be done using double-sided tape or hot glue. Using thin wires, route the power supply inside under the cover. For compactness, use a small-sized stabilizer chip housing 7805, then you can carefully install everything inside.
Now it will be impossible to forget the charger at home, and the charging process will become even easier. In cloudy weather it doesn't work as well as we would like, but it still works. But it’s worth noting that you will no longer be able to charge your device while on the beach or in the forest, especially for free.
Will need
For production you will need:
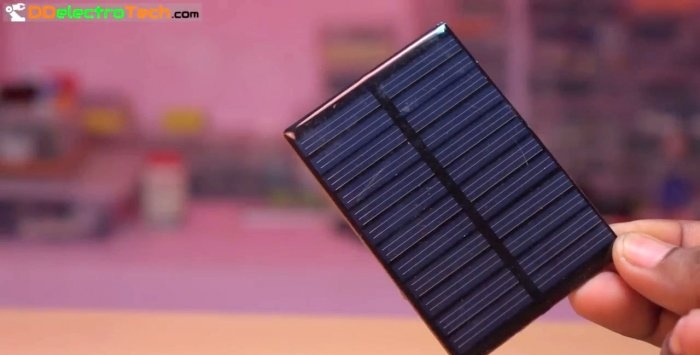
- 6V solar battery.
- Voltage stabilizer 7805.
- Micro USB connector.
- Heat shrinks, wires.
The only tools we need are a soldering iron, a knife or scissors.
I bought all the components on Ali Express. There are a lot of options to choose from; you can experiment with the size of the solar cells or choose a different connector if, for example, you have an iPhone.
Build process

Solder the wires to the plus and minus on the battery.
We solder another one in parallel to the negative one.Now the positive wire must be connected to the outer leg of the stabilizer, and the negative wire at the junction with the central one.
We connect the free leg to the outermost contact of the USB port. We solder the remaining wire to the second side contact of the connector.
Before assembly, it is necessary to put heat shrink on the wires in advance.
After soldering is completed, they need to be warmed up with a hairdryer or a simple lighter.
Having tweezers and a magnifying glass on hand will make the work easier, since all the parts are small in size and have small distances between the contacts. This also applies to the size of the soldering iron tip - the smaller the better.
We insert the connector into the smartphone socket and place the battery in sunlight.
Discharge is underway. The device is ready to use!
Now it would be a good idea to attach this charger to the back of the case or body of your cell phone or other device. This can be done using double-sided tape or hot glue. Using thin wires, route the power supply inside under the cover. For compactness, use a small-sized stabilizer chip housing 7805, then you can carefully install everything inside.
Now it will be impossible to forget the charger at home, and the charging process will become even easier. In cloudy weather it doesn't work as well as we would like, but it still works. But it’s worth noting that you will no longer be able to charge your device while on the beach or in the forest, especially for free.
Watch the video
Similar master classes
Particularly interesting
Comments (8)

