Fawn
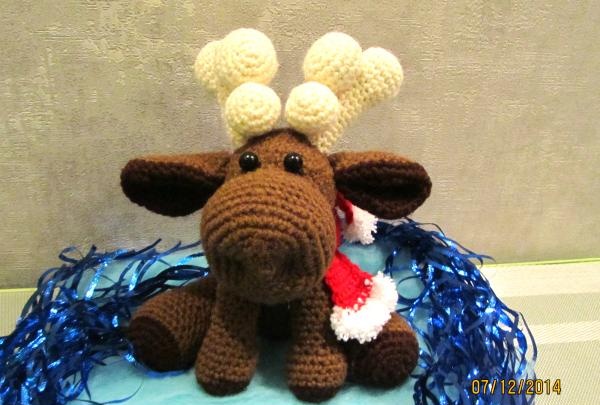
On the eve of the New Year holidays, I propose to knit a cute deer, which you can give to friends or keep for yourself as decoration, or simply make your child happy.
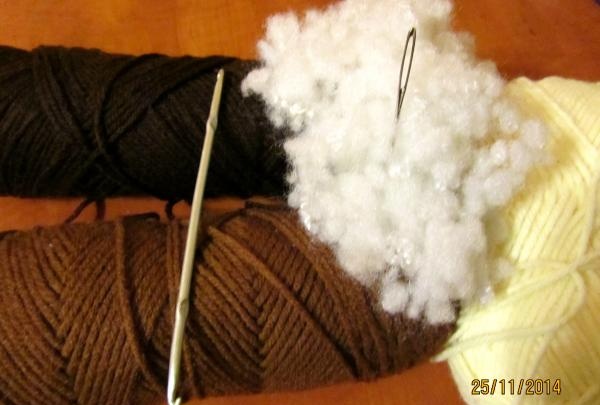
For this we need:
Legend:
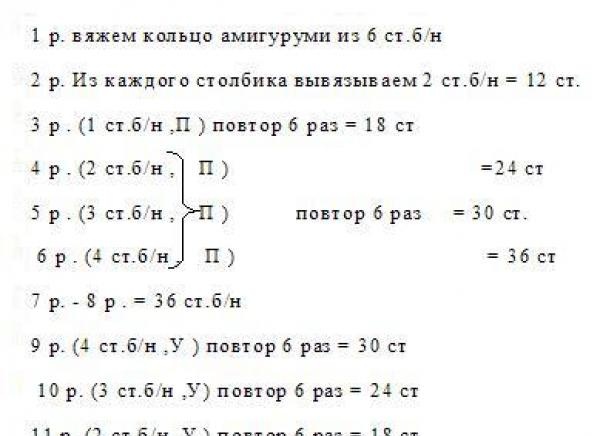
Let's start making crafts. Let's start, of course, with the head. Take a hook with brown yarn. The head consists of two parts. We knit the first part according to the pattern below:
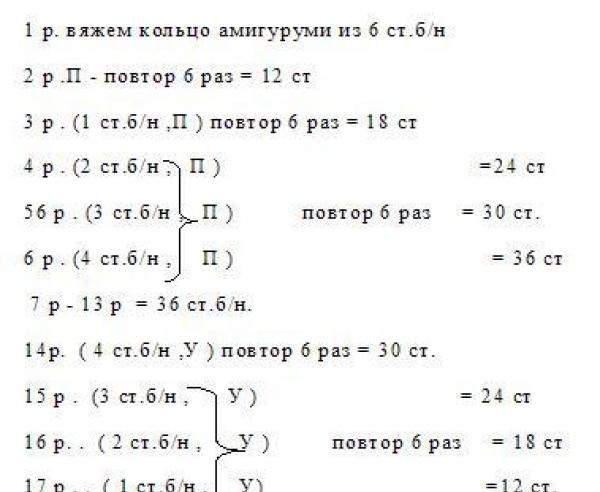
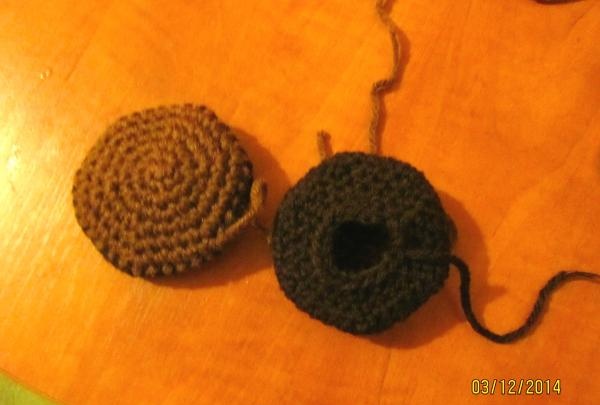
The first part is ready. This is the top part of the deer's head.
Now we begin to knit Rudolph's face. For work, we also take brown threads and knit according to the pattern:
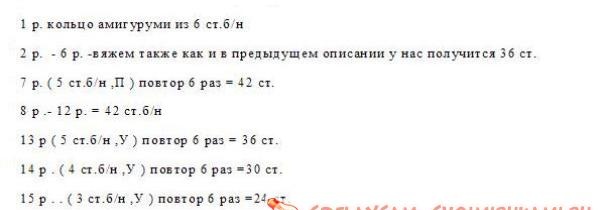
Having connected both parts, we fill them with padding polyester. Now the muzzle is almost ready.
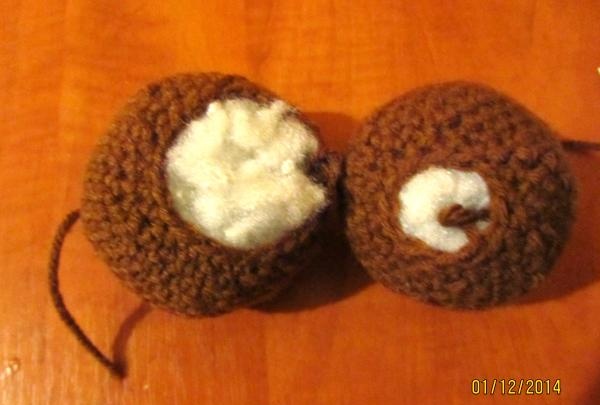
Now you need to connect these parts together. We carefully sew them together with brown thread, making sure that the filler does not show through. The result is a head like the one in the photo.
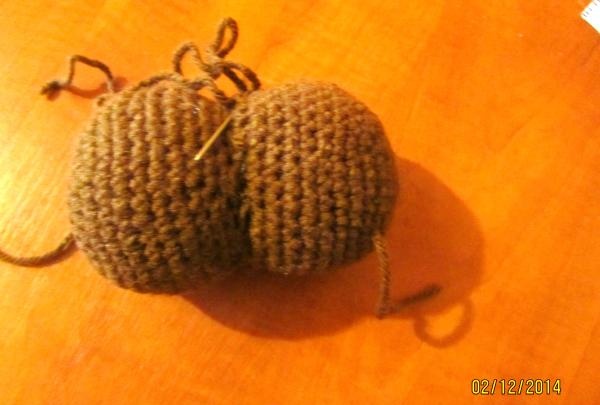
Then we make a tightening, stitching with thread.
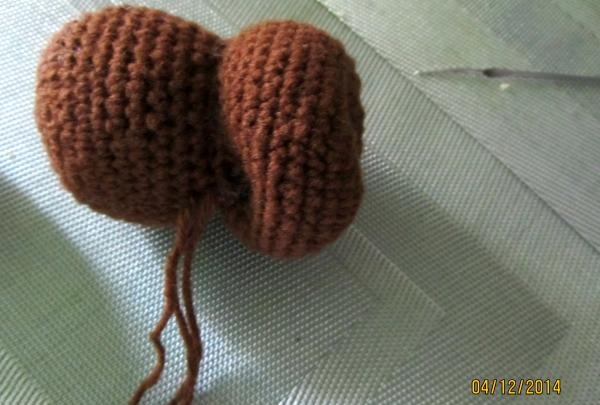
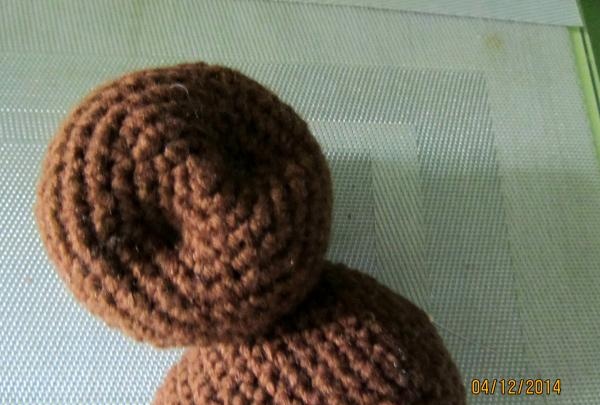
For now we put the head aside and then knit the body. We carry it out according to the following scheme:
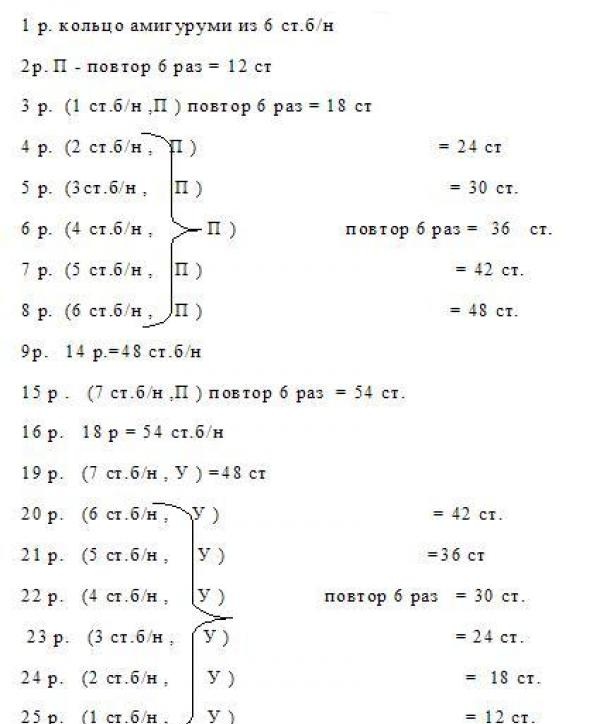
The second part of the deer is already ready - the body.
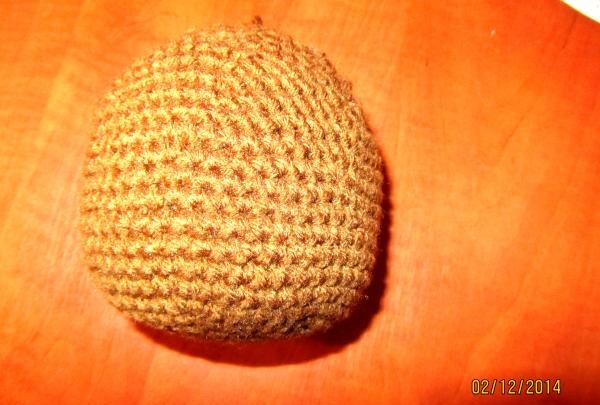
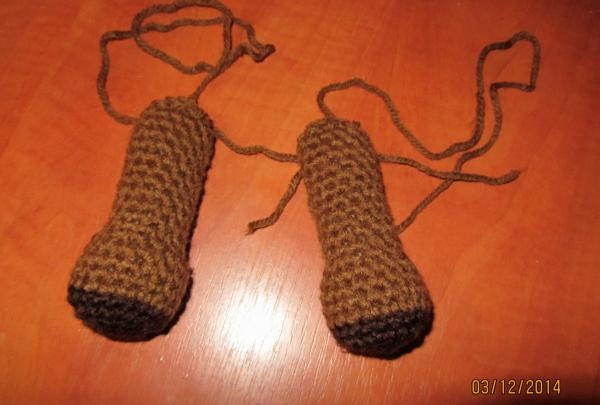
Now we knit the front legs. To make them we use threads of two colors - brown and dark brown. We knit, following the pattern with dark brown threads:
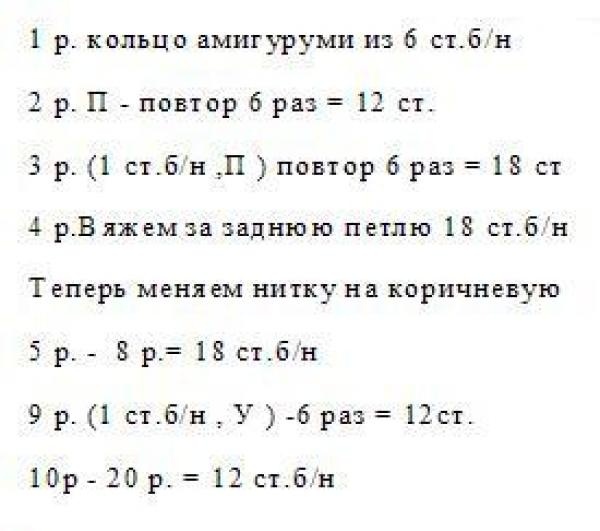
Fill the two knitted legs tightly with filler and close all the loops.
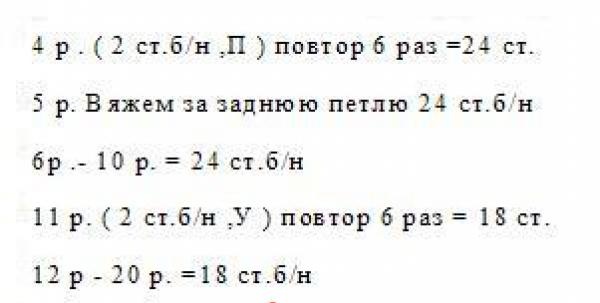
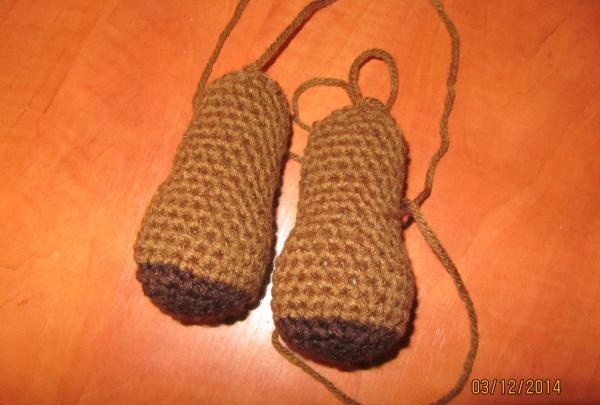
Let's start knitting the second pair of legs, that is, we make the back ones. From the first to the third rows we knit, like the front legs, starting with dark brown in the following sequence:
Fill both legs evenly with synthetic padding.
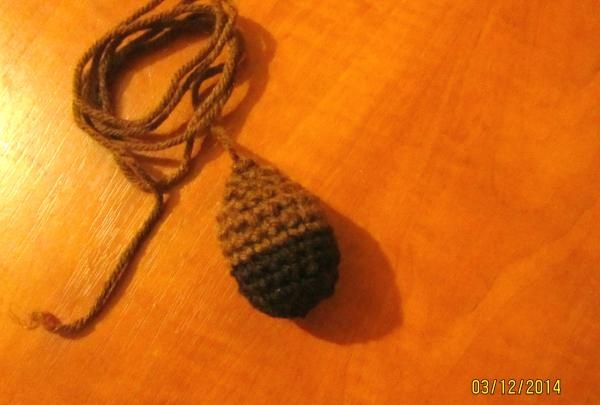
We knit the smallest part of the toy - the tail of a deer. We start with dark brown thread. From the first to the third rows we knit both the front and back legs. Then we change the color of the yarn to brown and knit the 4th row of 18 tbsp behind the back wall of the loop. From the fifth to the seventh row there are 18 single crochets. We fill the knitted tail and close the loops.
All the main details are connected. Now let’s start decorating the head and knitting the ears according to the pattern:
These are the double-sided ears that came out. There is no need to fill them with padding polyester.
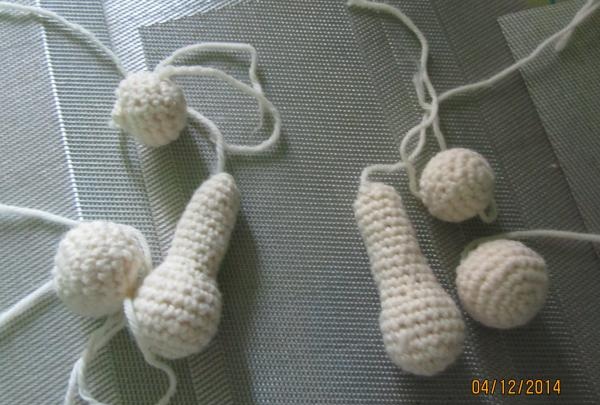
We make horns. They consist of three separate parts. The first part is the base on which the balls will be attached. We work with white threads.

Fill with toy stuffing, then close the loops. Then we knit large balls (2 pieces) in the presented sequence. Having knitted it, fill it with padding polyester and close the loops.
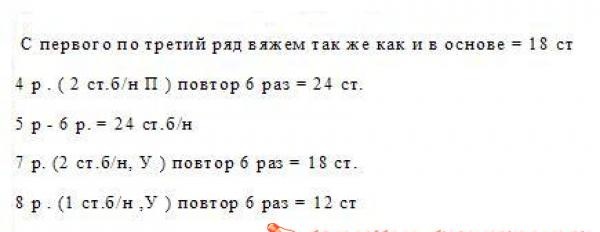
And the last detail is the smaller balls. We knit, like the previous large balls, first three rows = 18 stitches. Then from the fourth to the sixth rows = 18 tbsp. And the seventh row is 1 dc, repeat 6 times = 12 stitches. Fill the finished balls and close. Here's what we got:

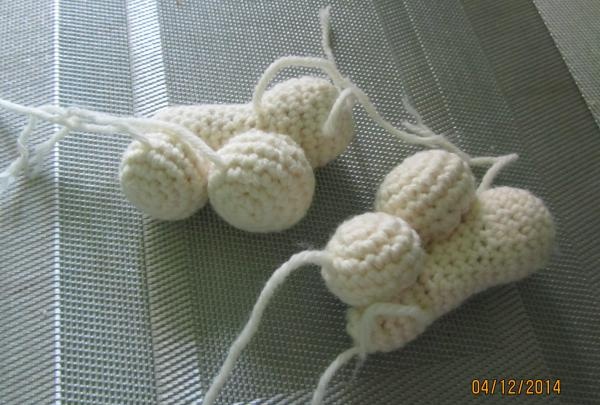
Now we connect the related parts, as shown in the photo below, and we get these horns:
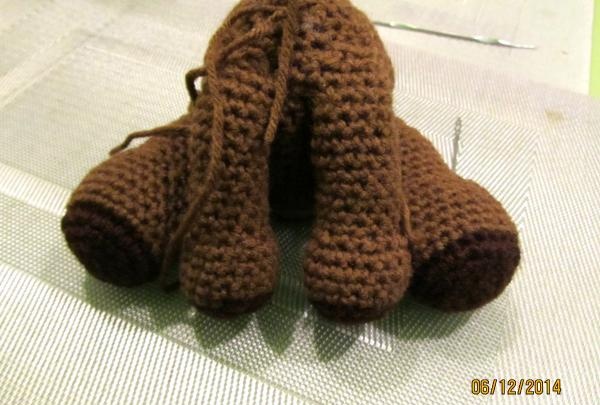
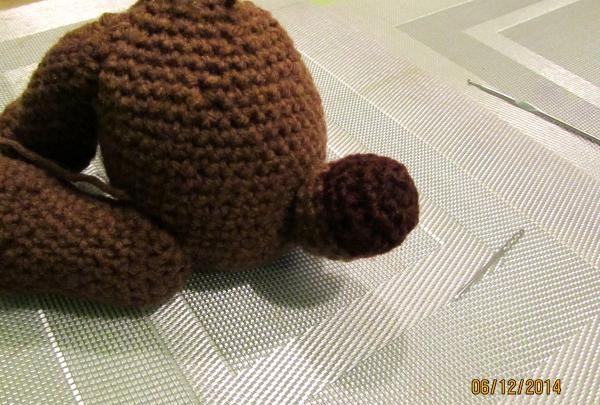
Now we sew the legs to the body so that the deer sits and the tail.
We sew horns, ears and eyes to the head. It turns out to be such a cheerful face.
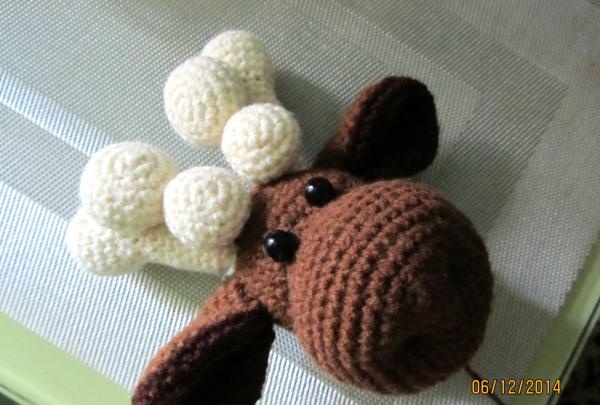
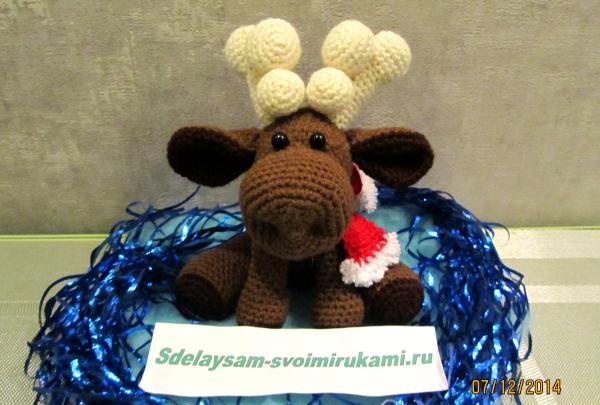
And the last stage is connecting the head to the body. For decoration we knit a red scarf.
For this we need:
- brown, dark brown and white yarn;
- filler for toys;
- beads for eyes;
- a needle with a large eye for connecting parts;
- Crochet hook;
- and also some red yarn for a scarf.

Legend:
- VP - air loop.
- Double crochet - single crochet.
- P – increase.
- U - decrease.
Let's start making crafts. Let's start, of course, with the head. Take a hook with brown yarn. The head consists of two parts. We knit the first part according to the pattern below:

The first part is ready. This is the top part of the deer's head.
Now we begin to knit Rudolph's face. For work, we also take brown threads and knit according to the pattern:

Having connected both parts, we fill them with padding polyester. Now the muzzle is almost ready.

Now you need to connect these parts together. We carefully sew them together with brown thread, making sure that the filler does not show through. The result is a head like the one in the photo.

Then we make a tightening, stitching with thread.


For now we put the head aside and then knit the body. We carry it out according to the following scheme:

The second part of the deer is already ready - the body.

Now we knit the front legs. To make them we use threads of two colors - brown and dark brown. We knit, following the pattern with dark brown threads:

Fill the two knitted legs tightly with filler and close all the loops.

Let's start knitting the second pair of legs, that is, we make the back ones. From the first to the third rows we knit, like the front legs, starting with dark brown in the following sequence:

Fill both legs evenly with synthetic padding.

We knit the smallest part of the toy - the tail of a deer. We start with dark brown thread. From the first to the third rows we knit both the front and back legs. Then we change the color of the yarn to brown and knit the 4th row of 18 tbsp behind the back wall of the loop. From the fifth to the seventh row there are 18 single crochets. We fill the knitted tail and close the loops.

All the main details are connected. Now let’s start decorating the head and knitting the ears according to the pattern:

These are the double-sided ears that came out. There is no need to fill them with padding polyester.

We make horns. They consist of three separate parts. The first part is the base on which the balls will be attached. We work with white threads.

Fill with toy stuffing, then close the loops. Then we knit large balls (2 pieces) in the presented sequence. Having knitted it, fill it with padding polyester and close the loops.

And the last detail is the smaller balls. We knit, like the previous large balls, first three rows = 18 stitches. Then from the fourth to the sixth rows = 18 tbsp. And the seventh row is 1 dc, repeat 6 times = 12 stitches. Fill the finished balls and close. Here's what we got:

Now we connect the related parts, as shown in the photo below, and we get these horns:

Now we sew the legs to the body so that the deer sits and the tail.


We sew horns, ears and eyes to the head. It turns out to be such a cheerful face.

And the last stage is connecting the head to the body. For decoration we knit a red scarf.


Similar master classes
Particularly interesting
Comments (0)

