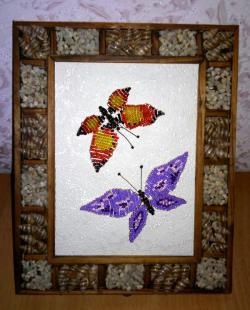
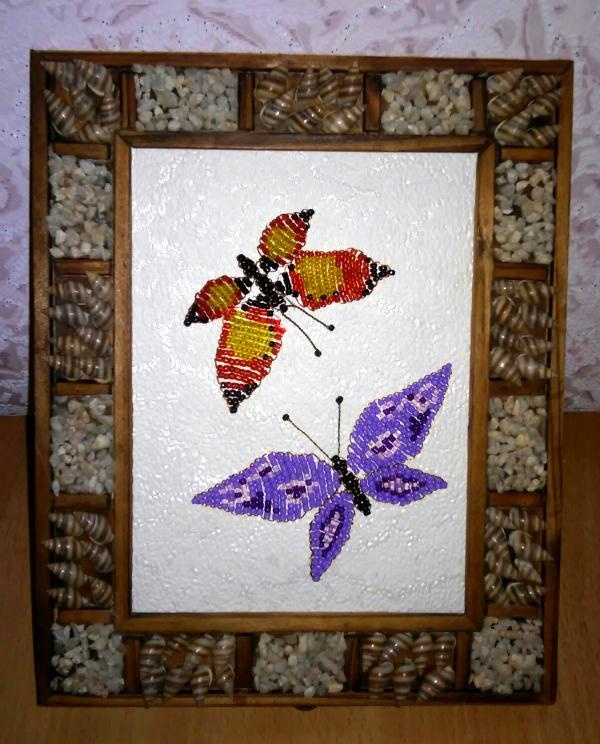
Panel "Butterflies" made of beads
Technique – parallel weaving.
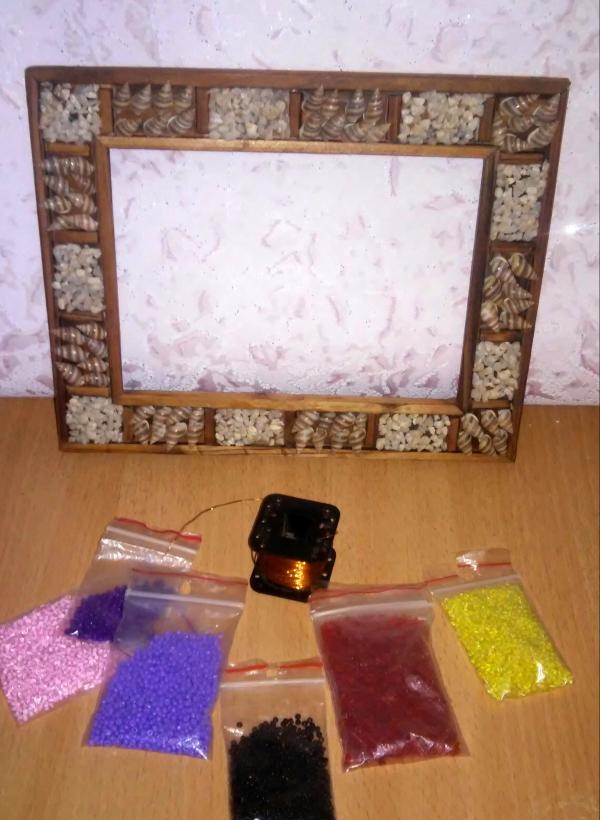
To work you need:
• wire with a diameter of 0.3 mm;
• beads for 1 butterfly: purple, lilac, pink, black (large);
• beads for 2 butterflies: yellow, red, black (small and large);
• 2-3 invisible needles;
• small frame.
The butterfly consists of:
• upper wings (2 pieces);
• lower wings (2 pieces);
• torso.
Butterfly No. 1
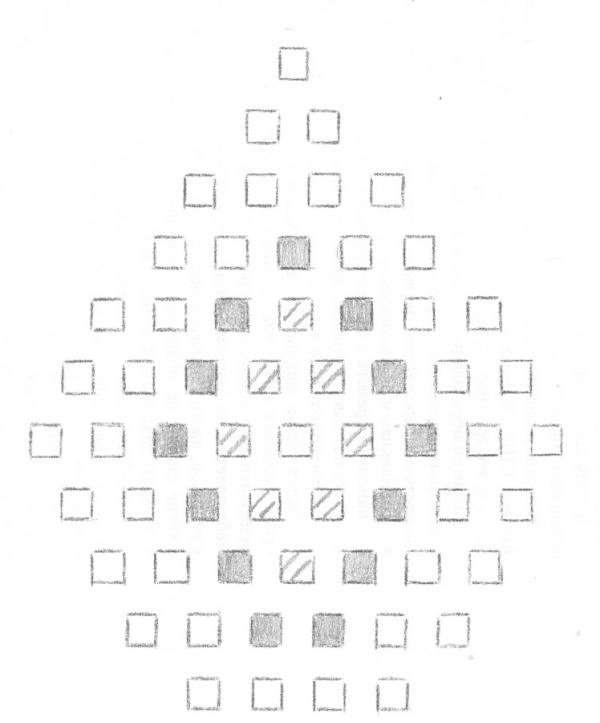
Step 1. Upper wing. We prepare 1 meter of wire and weave according to scheme No. 1.
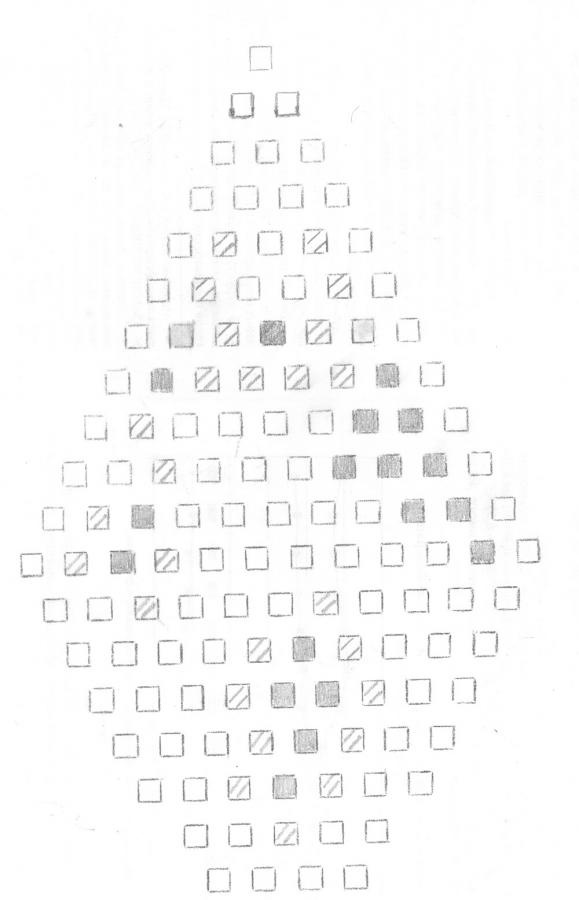
Bead colors used:
• lilac;
• pink;
• violet.
According to this scheme you will get a wing like this:
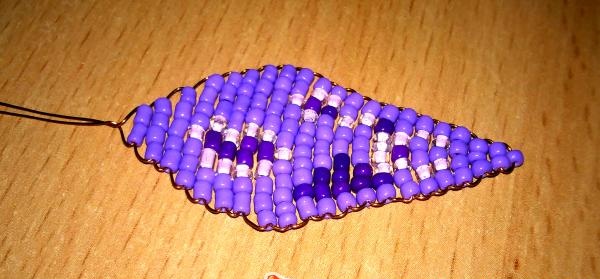
For one butterfly you need to make 2 such wings.
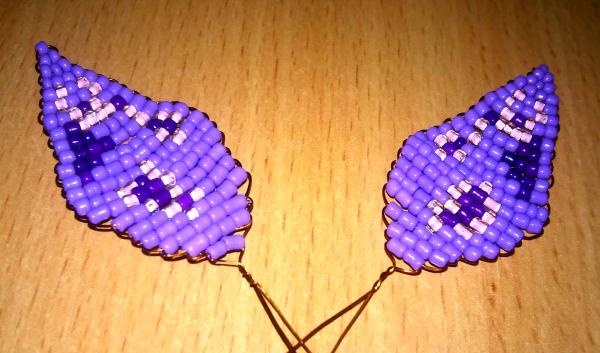
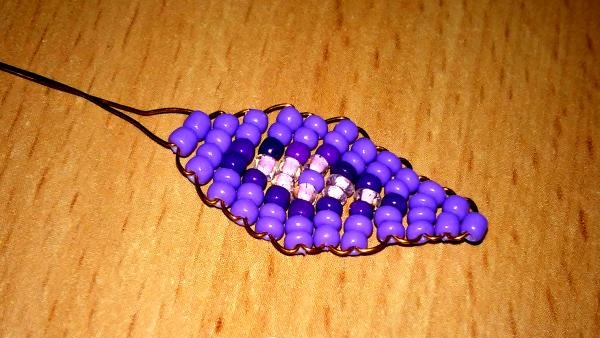
Step 2. Lower wing You will need a wire 80 cm long. We make the wing according to scheme No. 2.
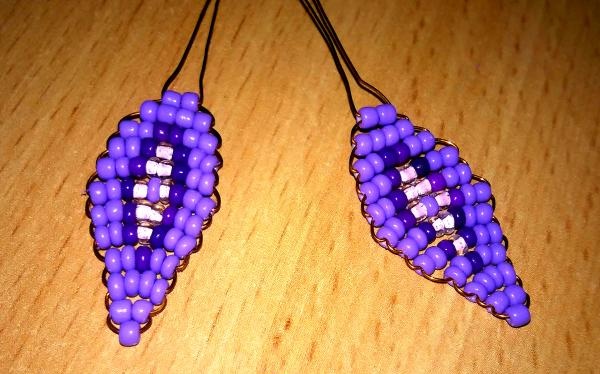
The bottom wing should look like this:
We make 2 of them.
Step 3. Torso. We make the body of the butterfly from black beads according to pattern No. 3, weaving from bottom to top. Wire length 20 cm.

The result is a body like this:
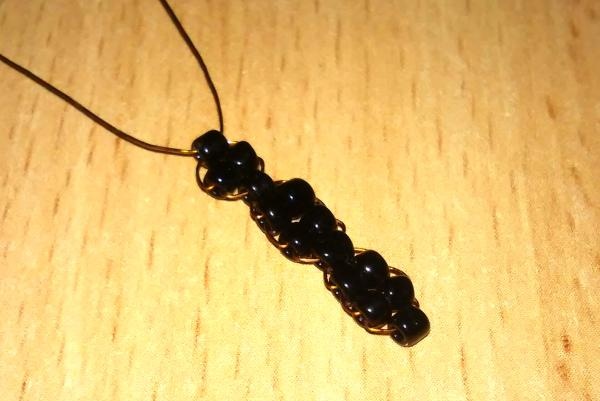
We make antennae from the ends of the wire.To do this, thread one black bead onto each wire, and twist each end of the wire at a distance of 2 cm from the body.
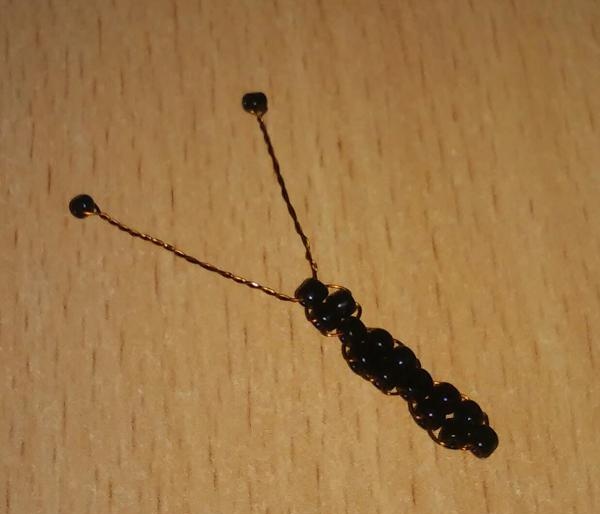
Note: for the body of the butterfly, it is advisable to use beads with a large hole diameter, since 2 or 3 wires will need to be threaded into one hole.
Step #4. Assembling a butterfly.
We pass the bottom wire of the upper wings through the 6th row of the body, and the top wire through the 7th row.
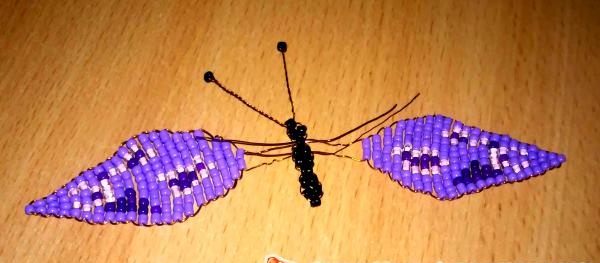
We tighten the wires, twist them on the reverse side and cut them. We thread the bottom wire of the lower wings into the 4th row, and the top wire into the 5th.
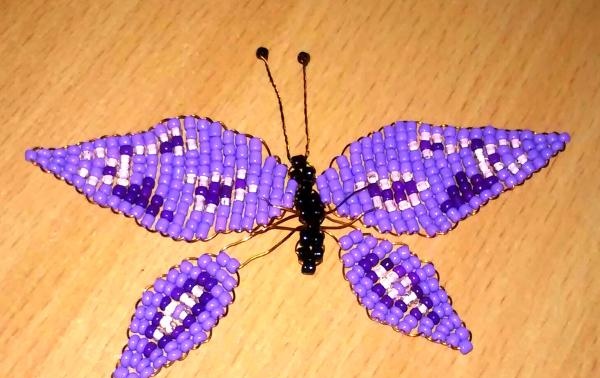
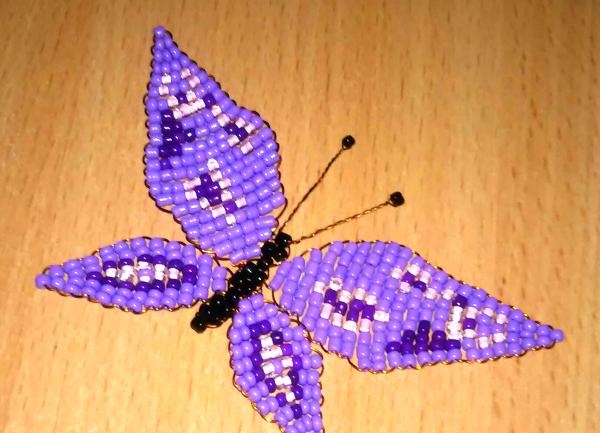
We tighten the wires, twist them and cut them. The first butterfly is ready!
Butterfly No. 2.
Step 1. Upper wing. We measure the wire 80 cm long and weave according to scheme No. 1.
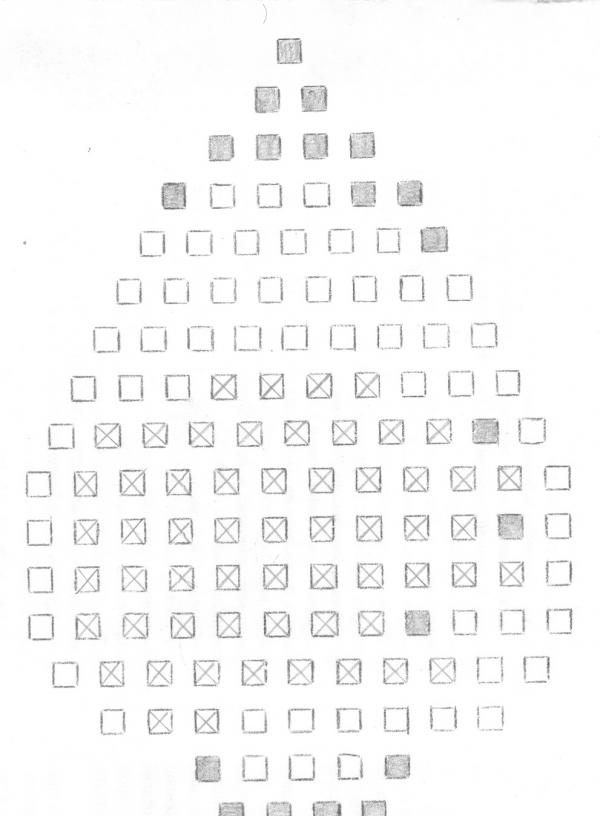
Bead colors used:
• red;
• yellow;
• black.
The wing should look like this:
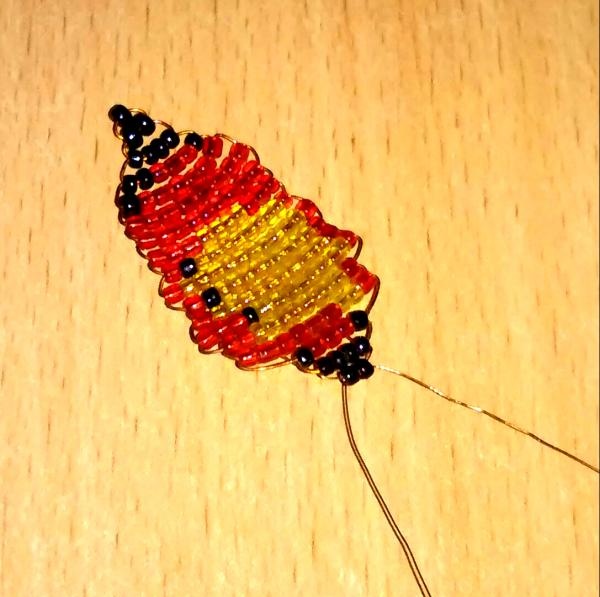
For the butterfly we make 2 upper wings.
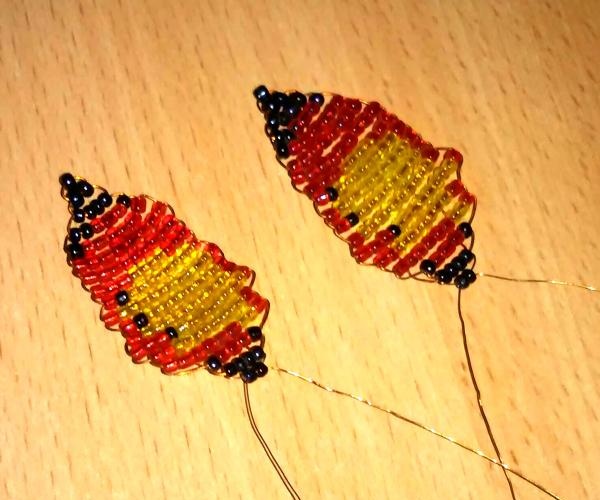
Step 2. Lower wing. We cut the wire 80 cm long and weave the wing according to scheme No. 2.
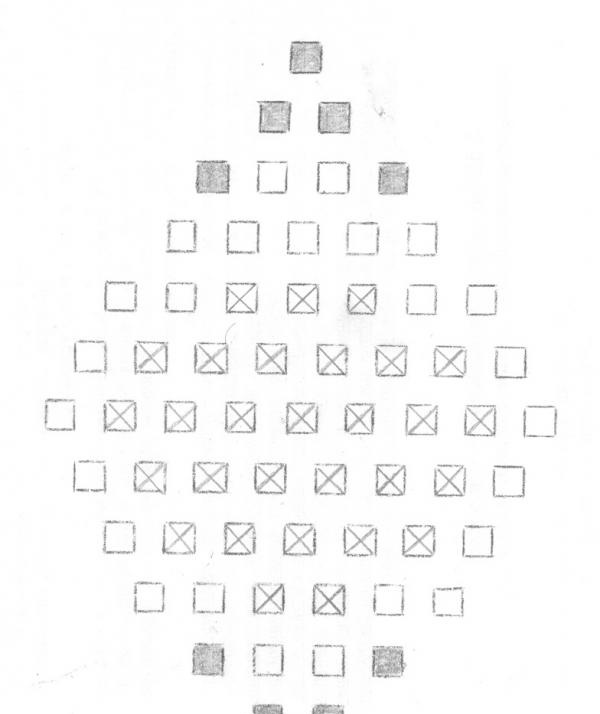
You will get this bottom wing:
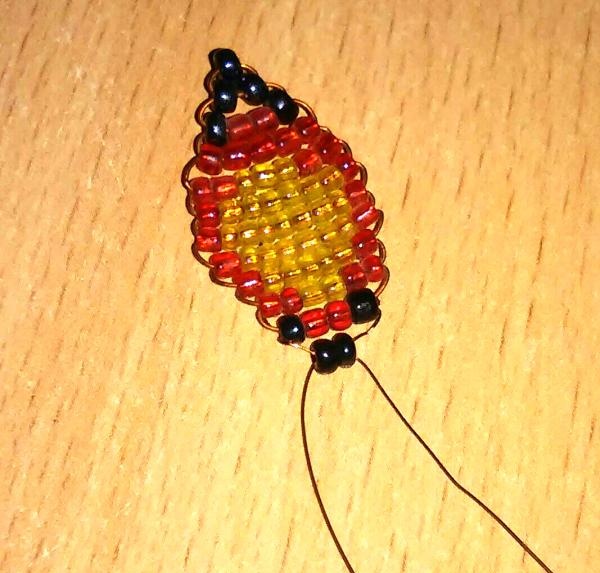
We weave 2 lower wings.
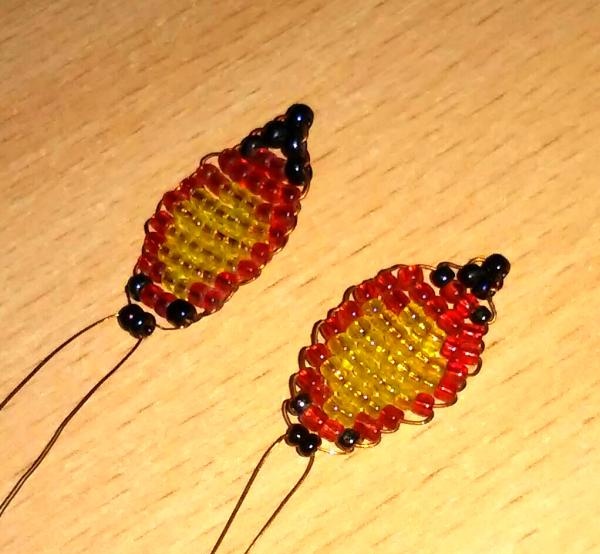
Step 3. Torso. The body of this butterfly is woven similarly to the body of butterfly No. 1.
Step #4. Assembling a butterfly. We thread the wires of the upper wings into the 6th and 7th row of the butterfly’s body, and the wires of the lower wings into the 4th and 5th row.
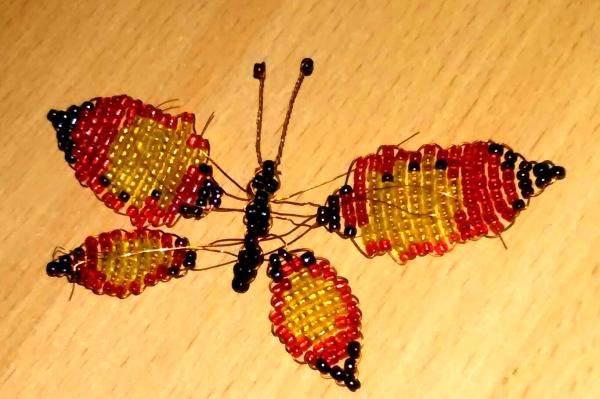
We tighten the wires, twist them and cut them. The second butterfly is ready!
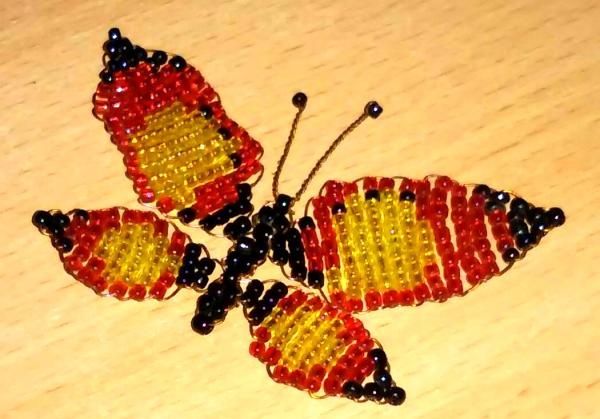
Note: in nature there are no two identical butterflies, so when working with beads you can show your imagination and create your own, individual butterfly. Good luck!
Based on the size of the frame, we select a background from any material: colored cardboard, fabric, wallpaper, etc. We place the material in a frame, strengthen it, and attach butterflies on top using invisible butterfly needles. Our panel is ready!
To work you need:
• wire with a diameter of 0.3 mm;
• beads for 1 butterfly: purple, lilac, pink, black (large);
• beads for 2 butterflies: yellow, red, black (small and large);
• 2-3 invisible needles;
• small frame.

The butterfly consists of:
• upper wings (2 pieces);
• lower wings (2 pieces);
• torso.
Butterfly No. 1
Step 1. Upper wing. We prepare 1 meter of wire and weave according to scheme No. 1.

Bead colors used:
• lilac;
• pink;
• violet.
According to this scheme you will get a wing like this:

For one butterfly you need to make 2 such wings.

Step 2. Lower wing You will need a wire 80 cm long. We make the wing according to scheme No. 2.

The bottom wing should look like this:

We make 2 of them.

Step 3. Torso. We make the body of the butterfly from black beads according to pattern No. 3, weaving from bottom to top. Wire length 20 cm.

The result is a body like this:

We make antennae from the ends of the wire.To do this, thread one black bead onto each wire, and twist each end of the wire at a distance of 2 cm from the body.

Note: for the body of the butterfly, it is advisable to use beads with a large hole diameter, since 2 or 3 wires will need to be threaded into one hole.
Step #4. Assembling a butterfly.
We pass the bottom wire of the upper wings through the 6th row of the body, and the top wire through the 7th row.

We tighten the wires, twist them on the reverse side and cut them. We thread the bottom wire of the lower wings into the 4th row, and the top wire into the 5th.

We tighten the wires, twist them and cut them. The first butterfly is ready!

Butterfly No. 2.
Step 1. Upper wing. We measure the wire 80 cm long and weave according to scheme No. 1.

Bead colors used:
• red;
• yellow;
• black.
The wing should look like this:

For the butterfly we make 2 upper wings.

Step 2. Lower wing. We cut the wire 80 cm long and weave the wing according to scheme No. 2.

You will get this bottom wing:

We weave 2 lower wings.

Step 3. Torso. The body of this butterfly is woven similarly to the body of butterfly No. 1.
Step #4. Assembling a butterfly. We thread the wires of the upper wings into the 6th and 7th row of the butterfly’s body, and the wires of the lower wings into the 4th and 5th row.

We tighten the wires, twist them and cut them. The second butterfly is ready!

Note: in nature there are no two identical butterflies, so when working with beads you can show your imagination and create your own, individual butterfly. Good luck!
Based on the size of the frame, we select a background from any material: colored cardboard, fabric, wallpaper, etc. We place the material in a frame, strengthen it, and attach butterflies on top using invisible butterfly needles. Our panel is ready!

Similar master classes
Particularly interesting
Comments (0)

