We sew a developmental napkin for a baby
To make a textile educational napkin for a baby, you should prepare the following materials and tools:
1. Old jeans as a base material;
2. Any fabric for lining;
3. Two types of cotton, with printed designs on a marine theme;
4. Felt in rich blue color, green in two shades, pink;
5.Doll eyes with moving pupils, 3 pairs of different diameters;
6. Labels from clothes, 3 pcs. different;
7. Nylon cord, 20 cm long, 1 pc.;
8.Steel half rings, 2 pcs.;
9. Bead – rattle, 1 pc.;
10. Narrow tape for attaching a rattle, 10 cm long;
11. A variety of buttons, including those with a marine design;
12. Compass button, diameter 2 cm, 1 pc.;
13. A piece of white rigid mesh;
14. Knitted bead with a diameter of 2 cm;
15. Ballpoint pen, black and red;
16. Acrylic paints “metallic” and with glitter;
17. Paint brush, water container;
18. Pieces of lace, braid;
19. Beads, beads;
20. Shells;
21. Plastic case – packaging (for example, a yogurt lid), 1 pc.;
22. Large cabochon made of epoxy resin;
23. Sew-on buttons with a diameter of 7 mm, 2 pcs.;
24. Iron;
25.Needle for handwork;
26. Scissors;
27. Steamer;
28. Ruler;
29. Chalk for cutting;
30. Sewing machine;
31. Transparent glue “Moment Crystal”.
First of all, you need to prepare for work, namely, unrip your jeans. For the base of a napkin measuring 30*30 cm you will need 1 trouser leg, as well as 1 patch pocket, belt loops and a zipper.
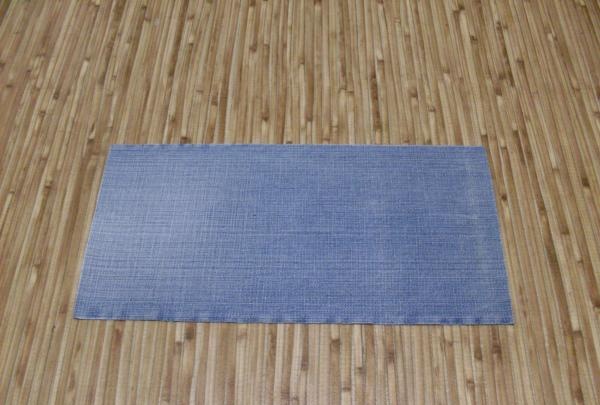
From denim fabric, cut out 2 pieces of the napkin base measuring 17*32 cm.
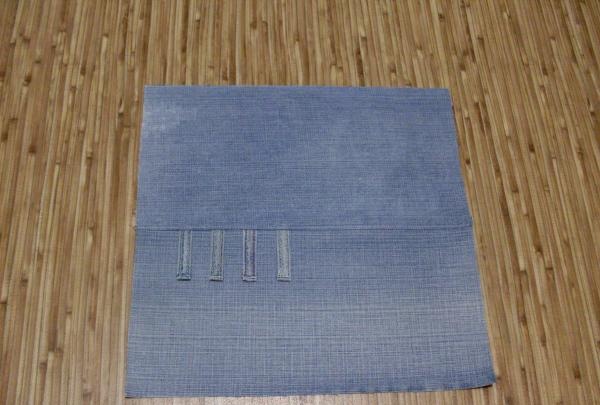
The base parts should be sewn together along long sections with a 1 cm seam, the seam should be ironed. On the left side of the future napkin you need to sew 4 belt loops from jeans.
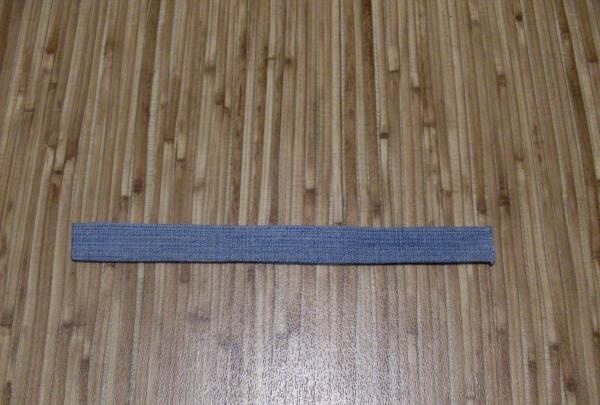
You need to sew a strap from a piece of denim fabric. In cut it is a rectangle 48*3.5 cm. This strip needs to be folded in half, stitched on the sides with a seam 7 mm wide and turned right side out. When finished, the strap must be ironed.
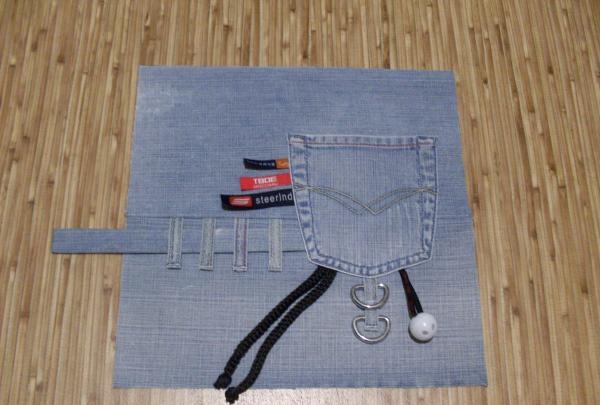
The finished strap, as well as the patch pocket from the jeans, should be stitched onto a napkin, as shown in the photo. Under the pocket stitching seam, you also need to put clothes strips, another loop for half rings, a nylon cord and a ribbon with a rattle bead.
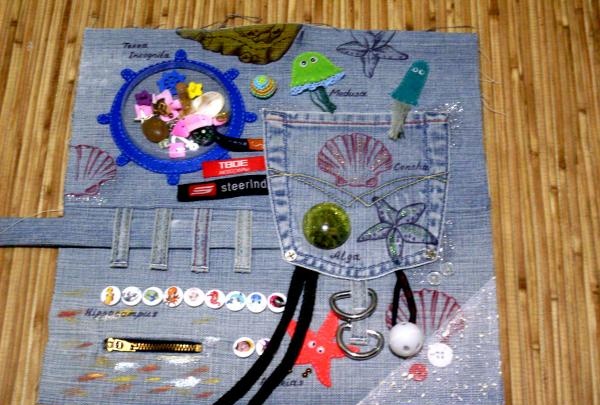
Next, you can start decorating the napkin.
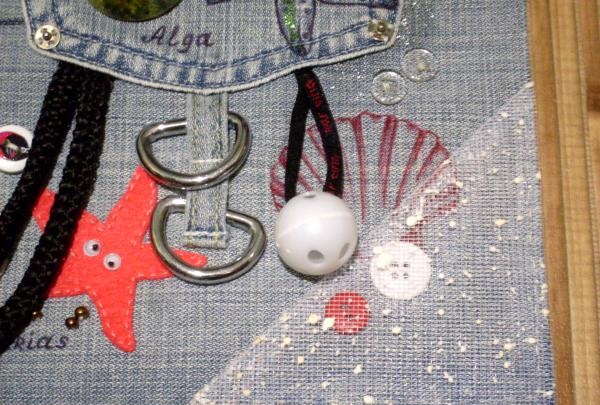
In the lower right corner you need to sew a piece of mesh, after hiding the buttons under it. By moving them with your finger, the child will develop fine motor skills.
Nearby you can sew a couple of transparent buttons that imitate air bubbles under water.
A little to the left you can sew a pink starfish made of felt. She will definitely attract the baby's attention with her eyes with moving pupils. Next to it you can write its name in Latin.
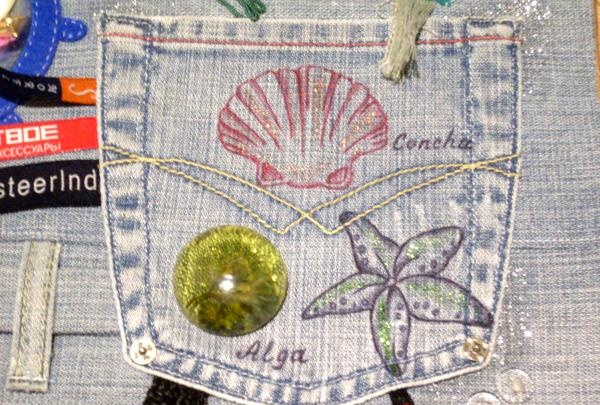
In the same part of the napkin you can draw a shell using a red ballpoint pen.For convenience, you can use a printed template with its image.
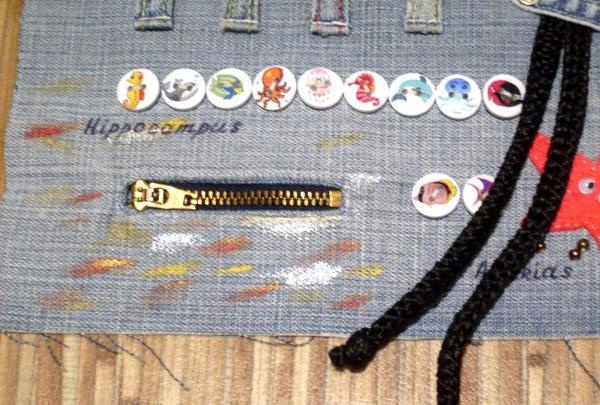
In the lower left corner of the napkin you need to process a fake pocket with a jeans zipper, and also sew buttons with marine patterns.
Using acrylic paints you can add bright sparkles and strokes to fabric.
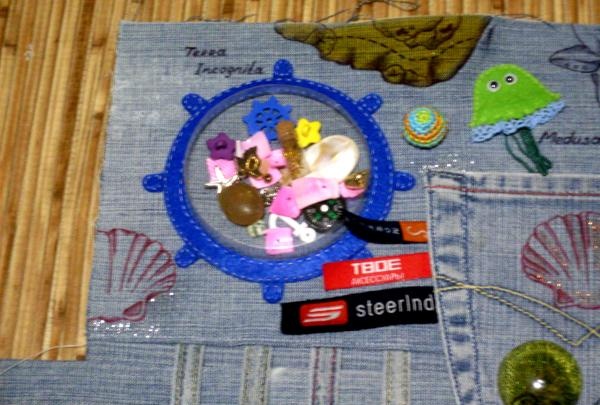
In the upper left corner you should sew an improvised steering wheel, the basis of which will be a plastic transparent body.
Under the transparent base you can put a lot of things that are interesting to the baby’s eye - a mini-compass, a bottle of beads, shells, beads, buttons, a coin, etc.
Here you can draw another shell, as well as a piece of an old map signed “Terra Incognita”, which means “Unknown Land”.
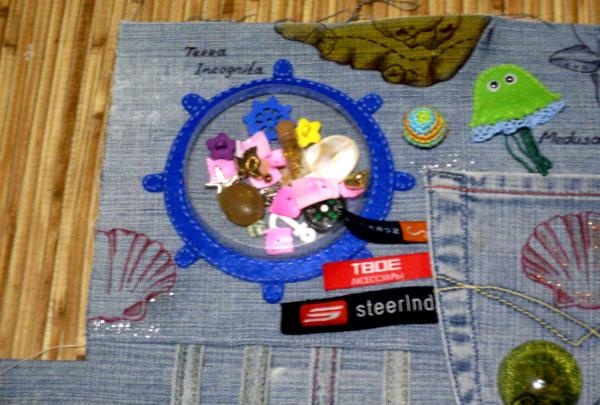
The upper right corner of the napkin can be decorated with two green jellyfish, an improvised sea pebble - a knitted bead.
Here you can also draw starfish, a shell, and decorate the background with sparkles.
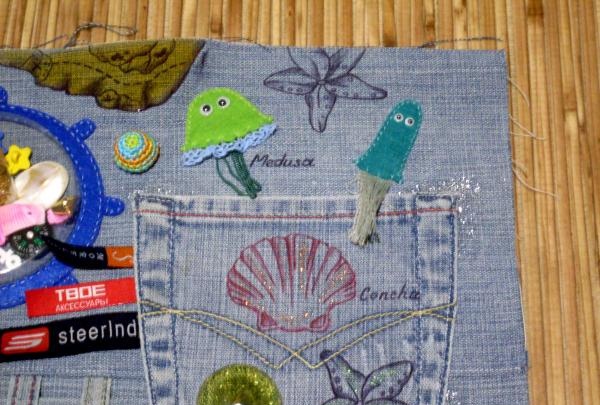
You can stick a large transparent cabochon made of epoxy resin on your pocket with some kind of plant – “algae” – embedded in it.
Next to the drawings or decor, you can place captions for them in Latin. Over time, this will definitely arouse the child’s interest, and then it will be possible to conduct a real “scientific research” with him in order to find out more about sea inhabitants, their names, history, etc.
The corners of the pocket can be decorated with sewn buttons.
By touching small elements on a napkin with his fingers, the child will become familiar with materials of different textures and properties, which will enrich his tactile experience and develop motor skills.
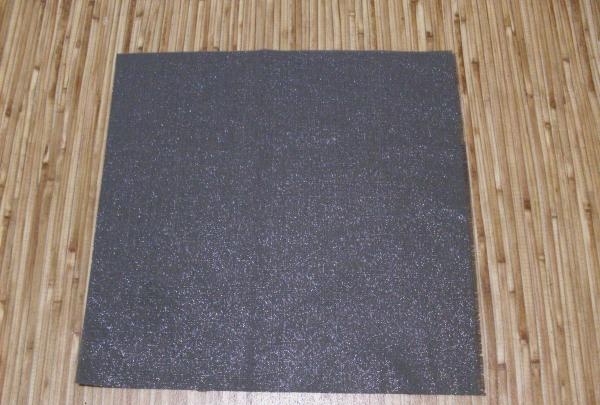
You should cut out a lining for a napkin from any dense fabric. Its size should be 32*32 cm.
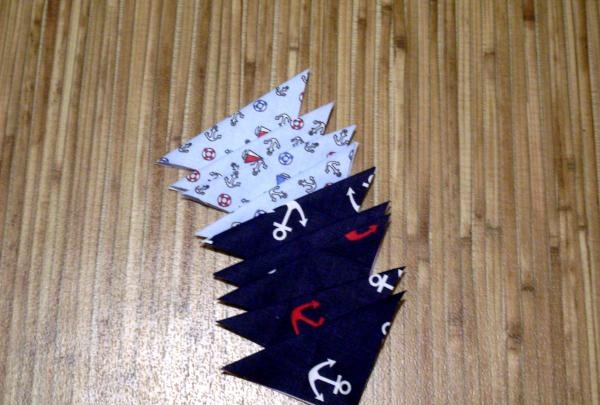
From cotton, cut out squares with an edge of 6.5 cm, which should be ironed twice diagonally. These corners will decorate the sides of the napkin.
The prepared corners need to be basted on the sides of the napkin, the lining should be placed on top face to face and sewn around the perimeter with a centimeter seam, leaving the area in the lower part unsewn.
Through it, the napkin should be turned right side out.
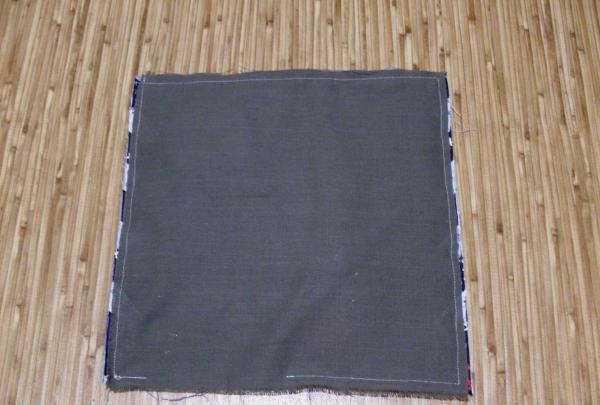
The hole needs to be sewn up and the napkin carefully ironed along the edges. If necessary, a finishing stitch can be laid around the perimeter.
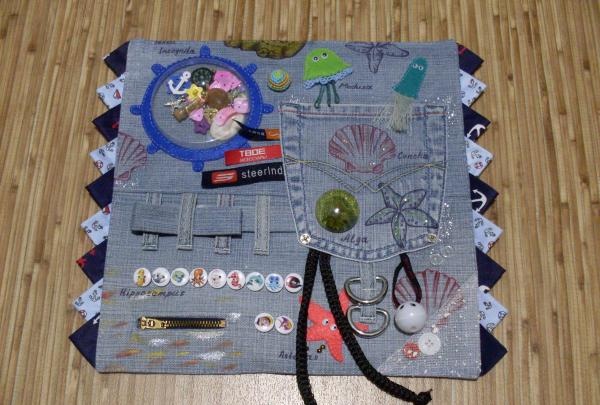
The educational textile napkin for the baby is ready!
1. Old jeans as a base material;
2. Any fabric for lining;
3. Two types of cotton, with printed designs on a marine theme;
4. Felt in rich blue color, green in two shades, pink;
5.Doll eyes with moving pupils, 3 pairs of different diameters;
6. Labels from clothes, 3 pcs. different;
7. Nylon cord, 20 cm long, 1 pc.;
8.Steel half rings, 2 pcs.;
9. Bead – rattle, 1 pc.;
10. Narrow tape for attaching a rattle, 10 cm long;
11. A variety of buttons, including those with a marine design;
12. Compass button, diameter 2 cm, 1 pc.;
13. A piece of white rigid mesh;
14. Knitted bead with a diameter of 2 cm;
15. Ballpoint pen, black and red;
16. Acrylic paints “metallic” and with glitter;
17. Paint brush, water container;
18. Pieces of lace, braid;
19. Beads, beads;
20. Shells;
21. Plastic case – packaging (for example, a yogurt lid), 1 pc.;
22. Large cabochon made of epoxy resin;
23. Sew-on buttons with a diameter of 7 mm, 2 pcs.;
24. Iron;
25.Needle for handwork;
26. Scissors;
27. Steamer;
28. Ruler;
29. Chalk for cutting;
30. Sewing machine;
31. Transparent glue “Moment Crystal”.
First of all, you need to prepare for work, namely, unrip your jeans. For the base of a napkin measuring 30*30 cm you will need 1 trouser leg, as well as 1 patch pocket, belt loops and a zipper.

From denim fabric, cut out 2 pieces of the napkin base measuring 17*32 cm.

The base parts should be sewn together along long sections with a 1 cm seam, the seam should be ironed. On the left side of the future napkin you need to sew 4 belt loops from jeans.

You need to sew a strap from a piece of denim fabric. In cut it is a rectangle 48*3.5 cm. This strip needs to be folded in half, stitched on the sides with a seam 7 mm wide and turned right side out. When finished, the strap must be ironed.

The finished strap, as well as the patch pocket from the jeans, should be stitched onto a napkin, as shown in the photo. Under the pocket stitching seam, you also need to put clothes strips, another loop for half rings, a nylon cord and a ribbon with a rattle bead.

Next, you can start decorating the napkin.

In the lower right corner you need to sew a piece of mesh, after hiding the buttons under it. By moving them with your finger, the child will develop fine motor skills.
Nearby you can sew a couple of transparent buttons that imitate air bubbles under water.
A little to the left you can sew a pink starfish made of felt. She will definitely attract the baby's attention with her eyes with moving pupils. Next to it you can write its name in Latin.
In the same part of the napkin you can draw a shell using a red ballpoint pen.For convenience, you can use a printed template with its image.

In the lower left corner of the napkin you need to process a fake pocket with a jeans zipper, and also sew buttons with marine patterns.
Using acrylic paints you can add bright sparkles and strokes to fabric.

In the upper left corner you should sew an improvised steering wheel, the basis of which will be a plastic transparent body.
Under the transparent base you can put a lot of things that are interesting to the baby’s eye - a mini-compass, a bottle of beads, shells, beads, buttons, a coin, etc.
Here you can draw another shell, as well as a piece of an old map signed “Terra Incognita”, which means “Unknown Land”.

The upper right corner of the napkin can be decorated with two green jellyfish, an improvised sea pebble - a knitted bead.
Here you can also draw starfish, a shell, and decorate the background with sparkles.

You can stick a large transparent cabochon made of epoxy resin on your pocket with some kind of plant – “algae” – embedded in it.
Next to the drawings or decor, you can place captions for them in Latin. Over time, this will definitely arouse the child’s interest, and then it will be possible to conduct a real “scientific research” with him in order to find out more about sea inhabitants, their names, history, etc.
The corners of the pocket can be decorated with sewn buttons.
By touching small elements on a napkin with his fingers, the child will become familiar with materials of different textures and properties, which will enrich his tactile experience and develop motor skills.

You should cut out a lining for a napkin from any dense fabric. Its size should be 32*32 cm.

From cotton, cut out squares with an edge of 6.5 cm, which should be ironed twice diagonally. These corners will decorate the sides of the napkin.

The prepared corners need to be basted on the sides of the napkin, the lining should be placed on top face to face and sewn around the perimeter with a centimeter seam, leaving the area in the lower part unsewn.
Through it, the napkin should be turned right side out.

The hole needs to be sewn up and the napkin carefully ironed along the edges. If necessary, a finishing stitch can be laid around the perimeter.

The educational textile napkin for the baby is ready!
Similar master classes
Particularly interesting
Comments (0)

