Clothes dryer for mounting from plastic pipes
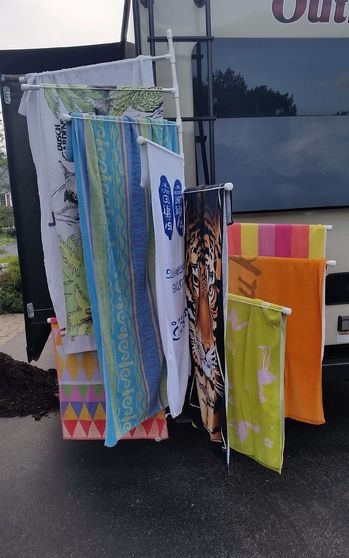
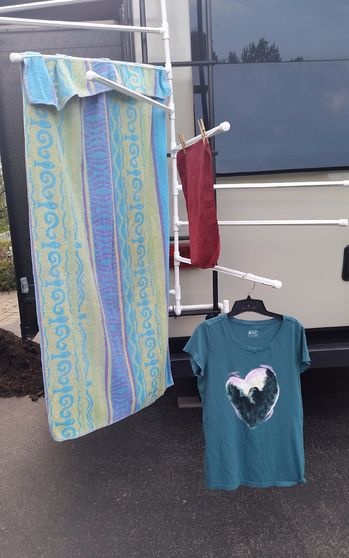
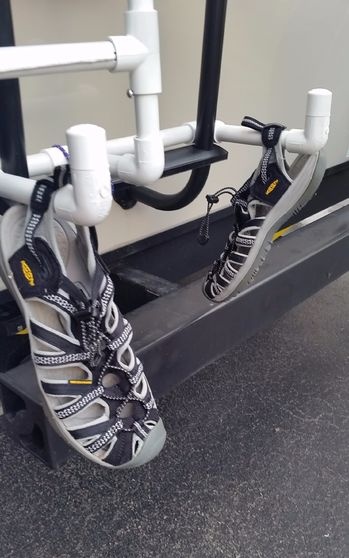
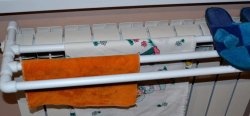
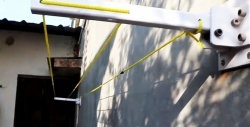
Make a portable clothes dryer that attaches to the ladder of your motorhome and has many undeniable advantages:
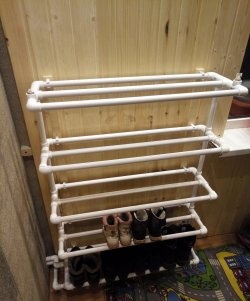
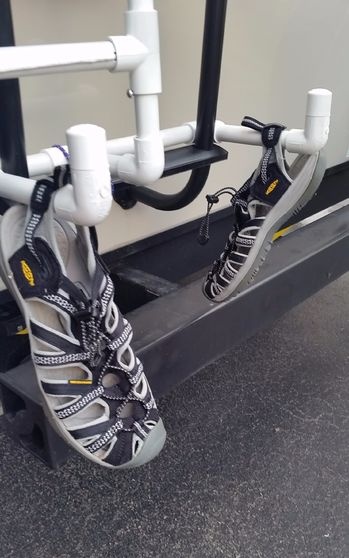
1. It is very durable and takes up little space, and you can hang quite a lot of clothes on it, especially using hangers and clothespins. There are even small hooks at the bottom of the drying rack for hanging shoes or small items.
2. It is lightweight, and when disassembled it is convenient to store and transport.
3. You can adjust the horizontal slats so that they do not block the window or door and do not dangle in the wind.
4. “Inconvenient” things can be hung between others, hiding them from prying eyes.
Let's get started!
Purchasing materials
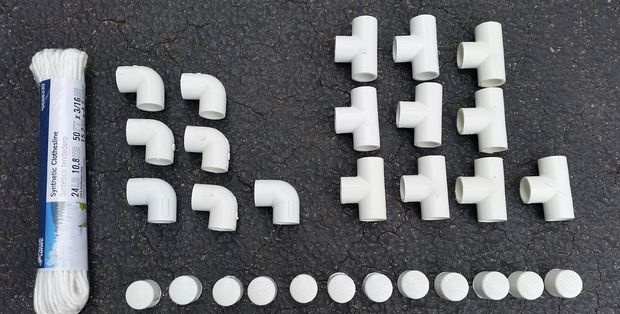
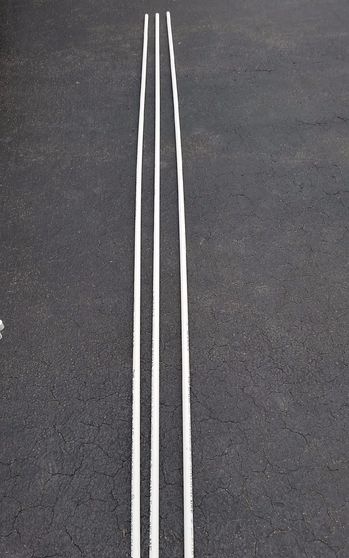
To make such a dryer, you will need:
- 7 PVC bends.
- 10 PVC tees.
- 12 PVC plugs.
- 3 PVC pipes 3 meters each.
- 15 meters of clothesline (uncoated) or other non-stretch rope.
- 9 aluminum screws.
- Acetone.
- A washcloth with steel thread.
- PVC glue.
- Drill bit 22 mm.
Erase markings from PVC parts
This can be done using acetone and steel wool.If the markings don't bother you, you can skip this step.
Making horizontal slats for underwear
Cut 2 three-meter PVC pipes into 4 parts, each 75 cm. From the third pipe, cut another piece 75 cm long. You will get 9 slats for hanging laundry. Parts of the vertical support will be cut out from the remainder of the pipe. This should be enough, but it's best to measure the ladder you plan to mount the dryer on before cutting the pieces.
Make a bottom support
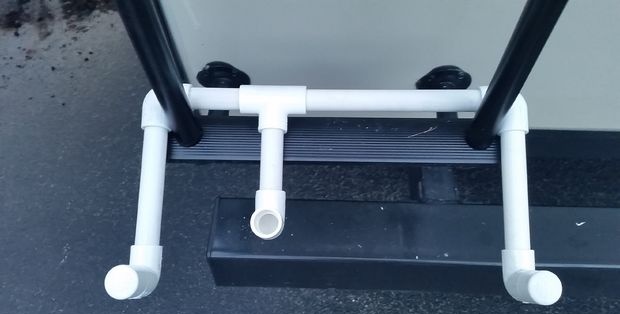
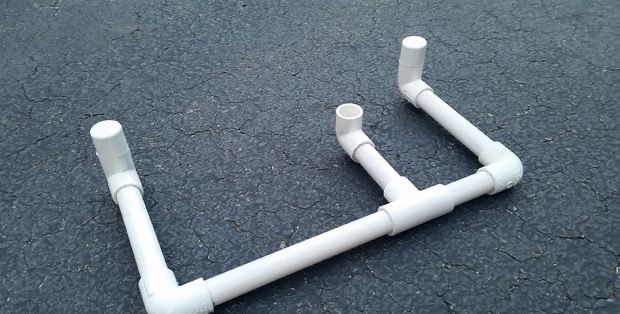
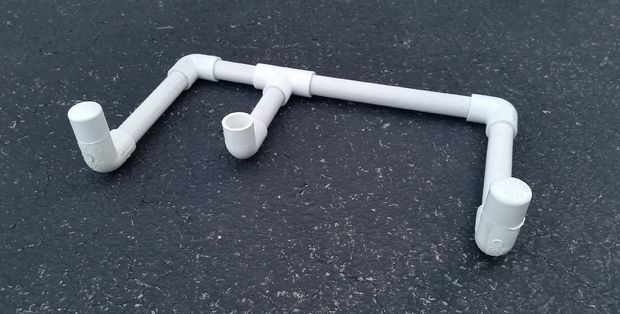
Measure the width of the stairs and cut two short sections that will sit behind the stairs and be connected by a tee. Please note that PVC pipes enter the mount approximately 2 cm.
Cut two identical pieces to make “hooks” that will protrude forward.
Finally, cut two short 3cm sections to fit the caps onto the ends of the hooks. Keep in mind that these parts are very small and will not be visible under the plugs.
In total, the lower support consists of five bends, two plugs, one tee and six short pieces of PVC pipe. Glue all the parts together as shown in the photo.
Make a top mount and a vertical base
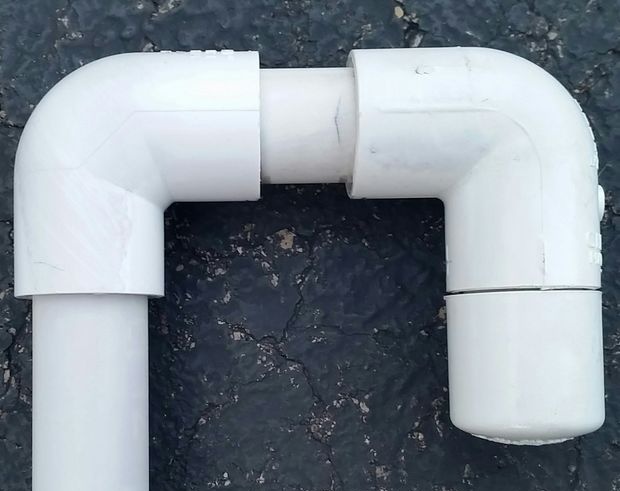
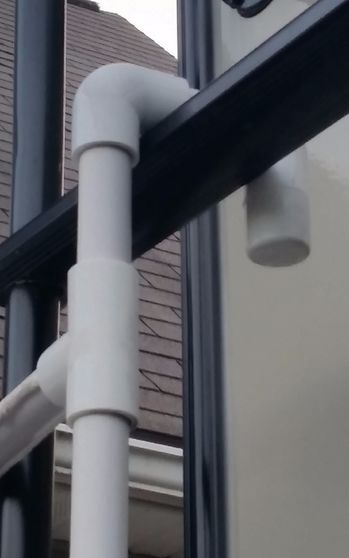
Cut one short piece of pipe the width of the step, on both sides of which there will be bends (keep in mind that PVC pipes enter the joints by about 2 cm).
Again, cut a small piece of pipe to fit the plug onto the elbow.
Glue together two elbows, pipe sections and a plug: you get a “hook” to hook the ladder to the step from above.
Install the top hook and bottom base onto the ladder and trim the remainder of the PVC pipe to create a vertical post connecting them.
Glue the vertical part to the top to make it easier to hang the dryer on a ladder and store the entire structure. There is no need to glue the bottom base to the vertical post.
Drill the remaining tees
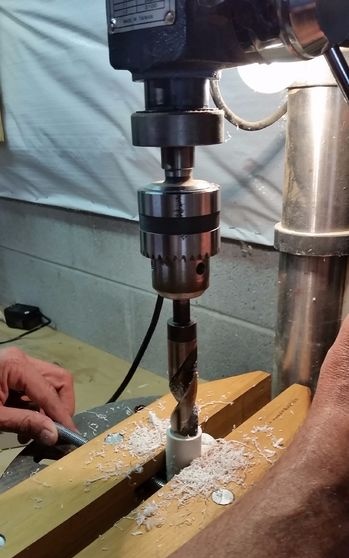
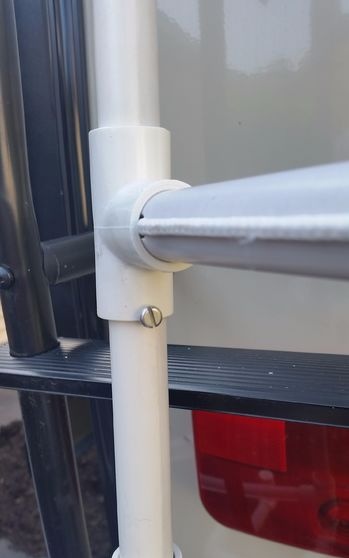
Drill through the remaining 9 PVC tees to remove the internal clamps so they will slide freely on the vertical section.
Use a drill to make a half-circle cut in the bottom of each tee. This hole will line up with a screw screwed into the vertical base to secure the tee in position.
Assembling vertical strips
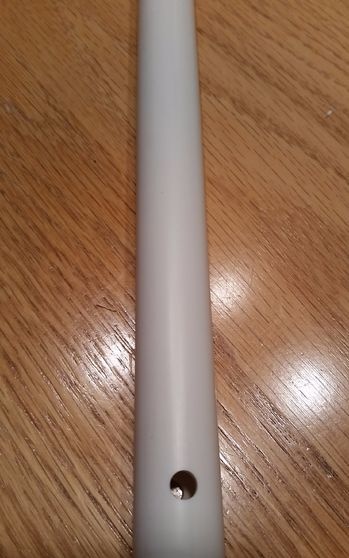
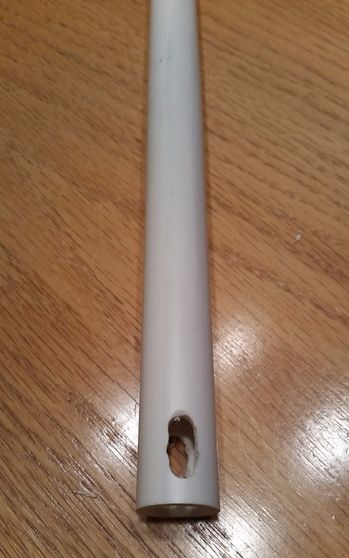
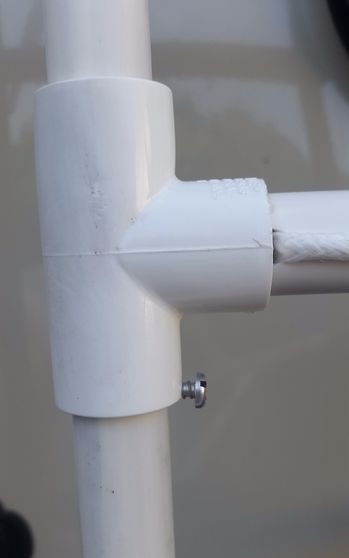
In each of the nine planks, drill a through hole at one end and a slot at the other (in the same plane).
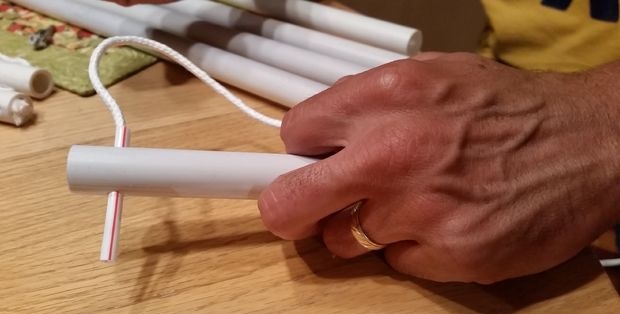
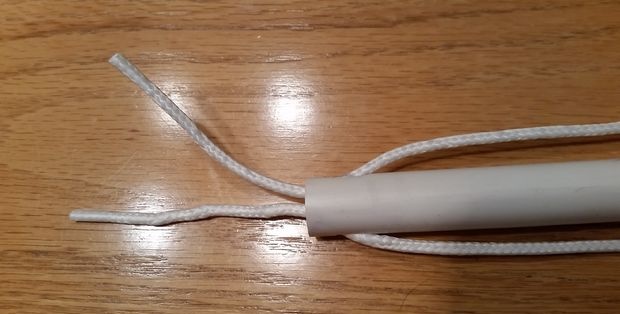
Starting from the inside of the plank, pass a piece of clothesline through the slot, then along the pipe, through the hole on the other side, along the pipe again, through the slot on the other side, and pull the ends out so that they stick out of the pipe (to make this easier, you can attach a rope to a plastic tube).
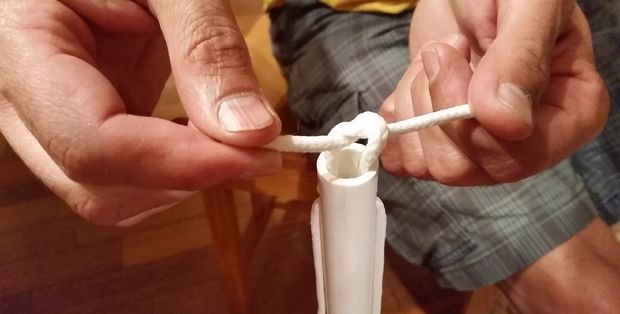
Tie two strong, flat knots, pulling as tight as possible, then trim off the excess rope and tuck the ends inside the pipe. It's easier to do this with someone's help.
Glue the plugs on the ends where the holes are located and the drilled tees on the other side. Align the tee so that the rope runs from the front and back of the vertical bar when the entire structure is assembled, as shown in the photo.
Assemble and align vertical strips
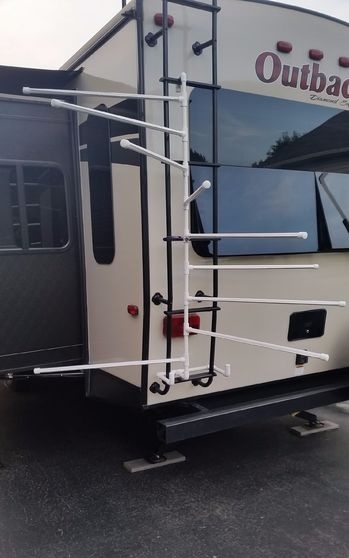
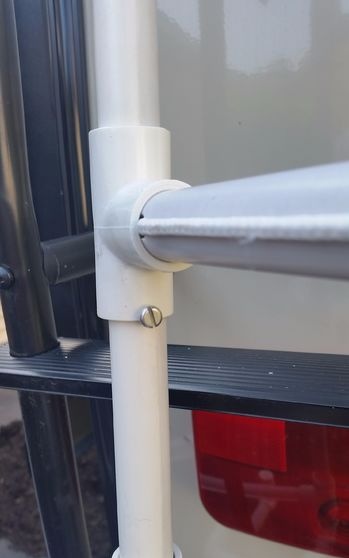
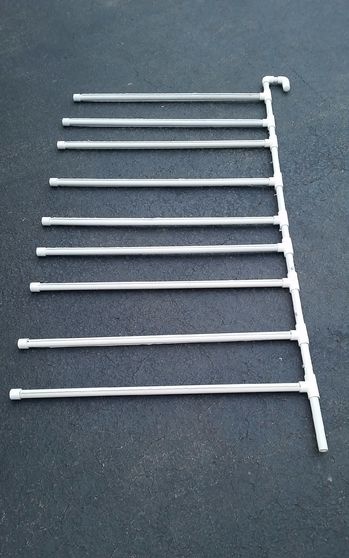
Hang the vertical piece on the ladder and slide all nine finished vertical strips onto it. Place a horizontal base underneath.
Move the tees so that they are evenly spaced along the vertical post, then rotate them so that the horizontal strips are oriented to your liking. Keep in mind that items will hang down and should not interfere with those on the lower slats or block the window.
Once you have the tees positioned the way you like them, drill a small hole where the semicircular cutout is on each tee and insert the aluminum screws. The screw will fix the bar in the desired position and prevent the wind from swinging it. But you can change the position of the bar by slightly moving the tee up and turning it around.
It is more convenient to store the dryer flat; to do this, simply slide the slats up and install them in the same plane along with the top hook.
Use your creation!
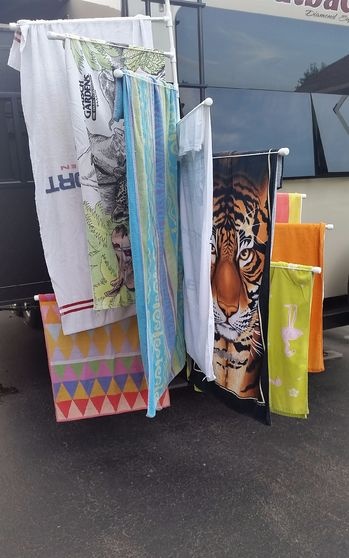
Assemble the structure completely and hang everything you need to dry!
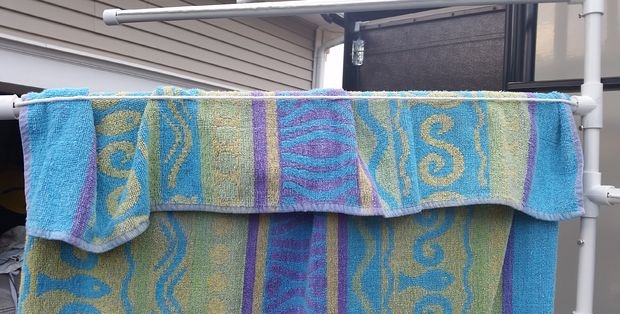
If you secure large items, such as towels, under a clothesline, it will hold them in place while they are spread out.
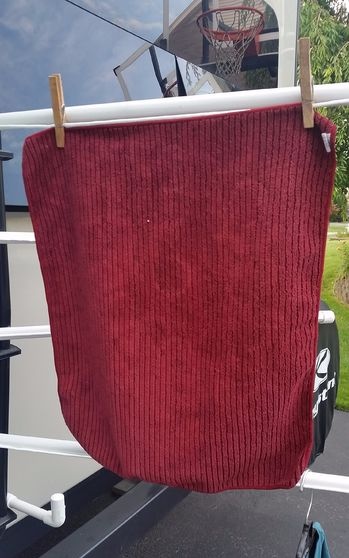
It is better to secure smaller items with clothespins.
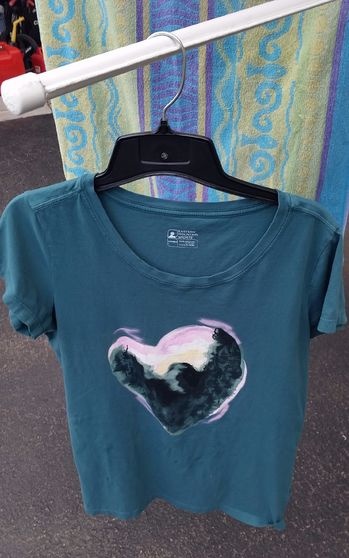
Some items are best dried on hangers, and the plugs at the ends of the pipes will prevent them from slipping off.
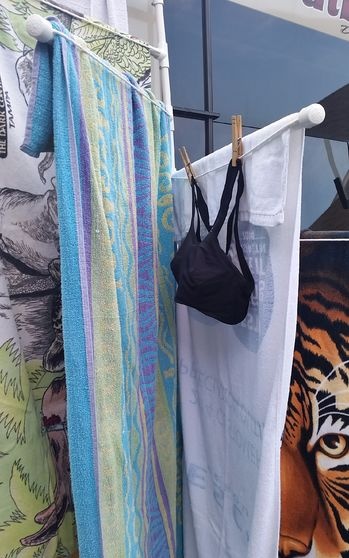
If you want to dry something discreetly, hang it on a line between two towels.
Use the bottom hooks for wet shoes or small items.
Enjoy a compact and convenient drying rack that can hold up to nine towels at once!
Original article in English
Similar master classes
Particularly interesting
Comments (0)

