Device for precise drilling at an angle of 90 degrees with a conventional drill
Maintaining a clear right angle when drilling with a drill is not so easy. Experienced craftsmen admit that such a habit is developed over the years, but still does not guarantee accurate drilling. After all, it is done by hand, which means there is always some probability that the mounting hole, for example, for furniture or mounting fittings, will not be correct.
This device is very simple, and is literally made from leftover building materials. Particular importance here is given to furniture telescopic guides for drawer drawers. It is with the help of them, and a couple of plumbing clamps, that we will make this device. Well, are you ready? Then let's get started!
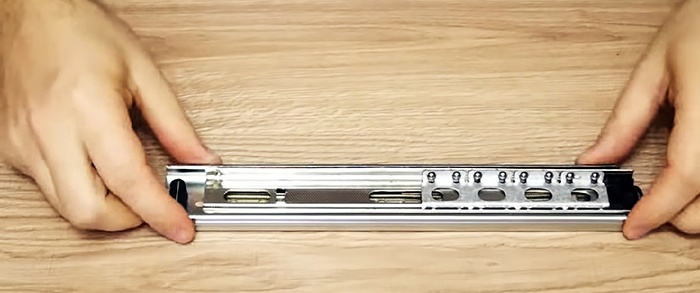
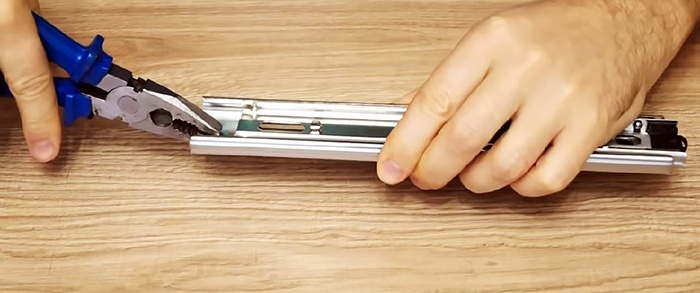
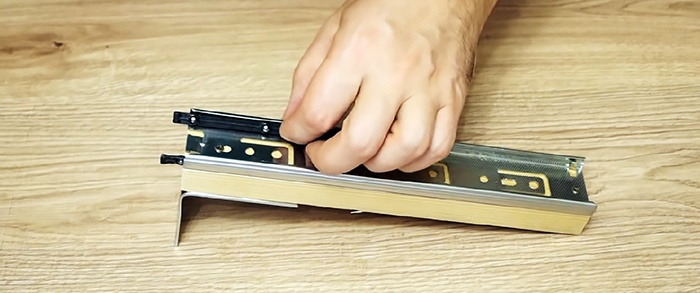
To prepare furniture guides for installation, they must be disassembled. Remove the locking plastic cap and bend the stopper with pliers. We disassemble the guides, separating the pads from each other, carefully maintaining the position of the balls.
We mark the movable block of guides for the mounting holes at a distance of 6 cm and 14 cm from the end of the body.
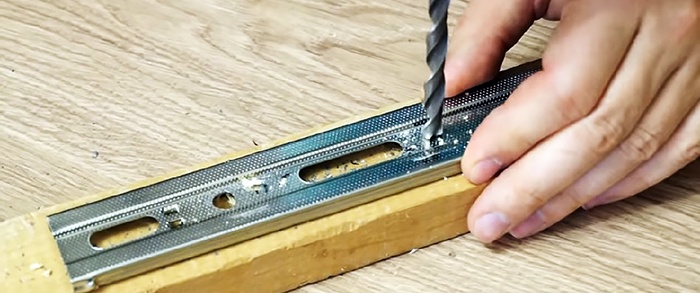
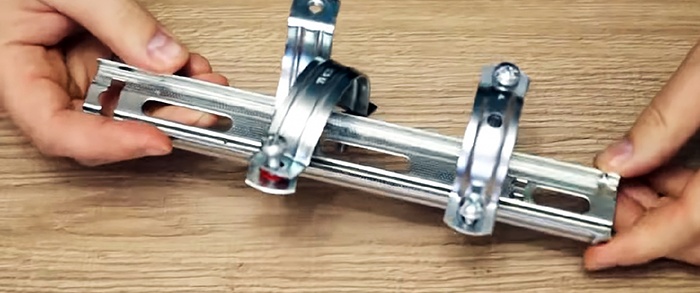
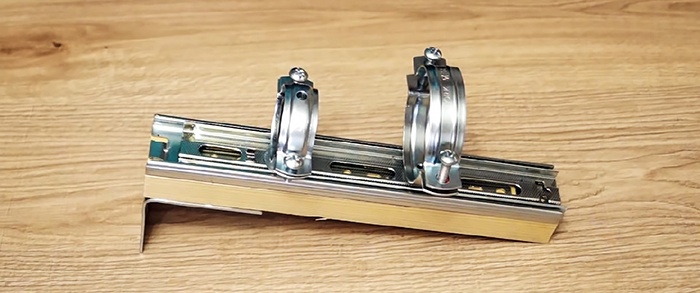
We first drill with a small drill (3-3.5 mm), and then with a larger one (8 mm) so that a screw for plumbing clamps fits through these holes. It must be cut to length, leaving only about 1 cm in length. We tighten the clamps in the correct order, determining the desired position of the drill.
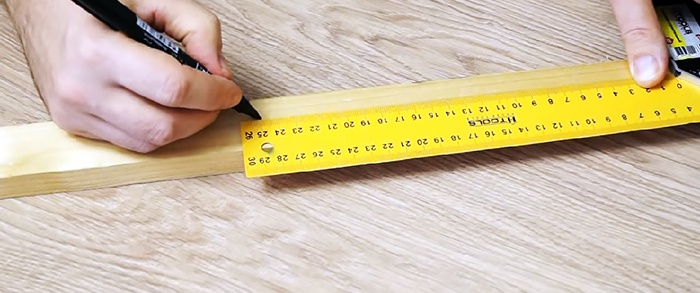
We mark the wooden slats to the size of the guides and saw off the excess.
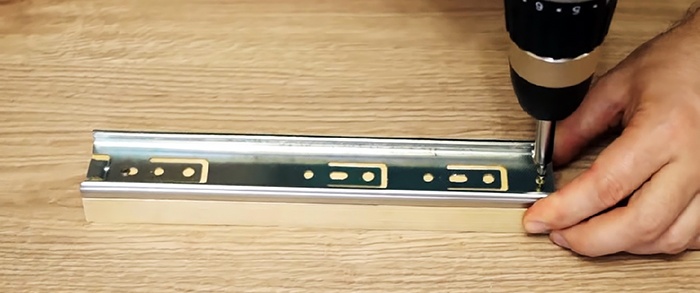
We screw the fixed block of guides to the rail with self-tapping screws through the prepared holes.
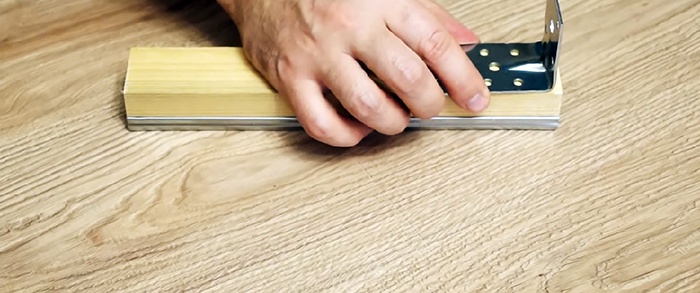
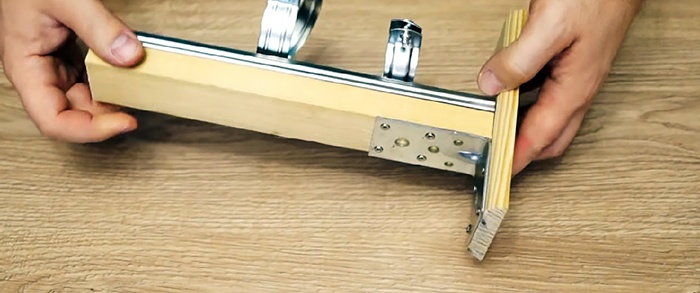
On the back side we attach the mounting angle. Use a square to check that the fasteners are seated correctly.
We assemble both guide blocks together and fasten them to a wooden frame (piece of casing).
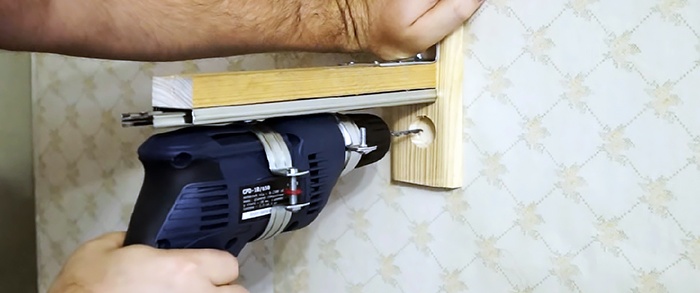
The device is ready, all that remains is to attach the drill to it, aligning it strictly perpendicular to the plane of the bed.
We clamp the drill into the chuck and check the accuracy of the drilling.
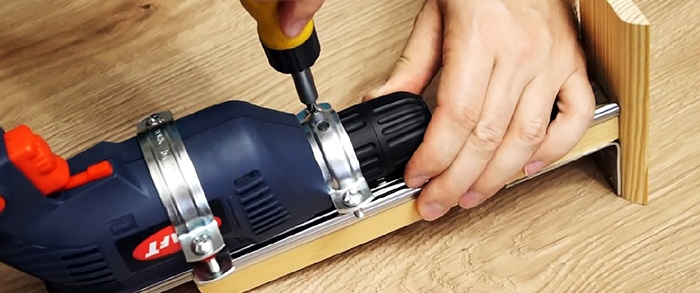
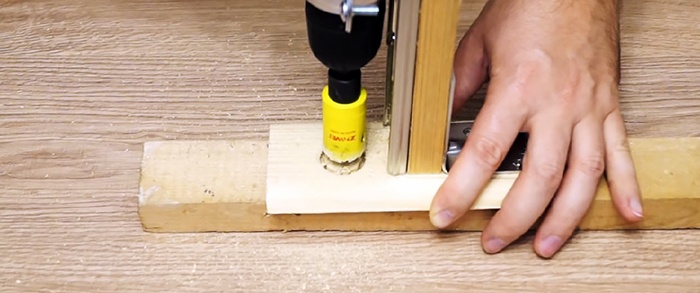
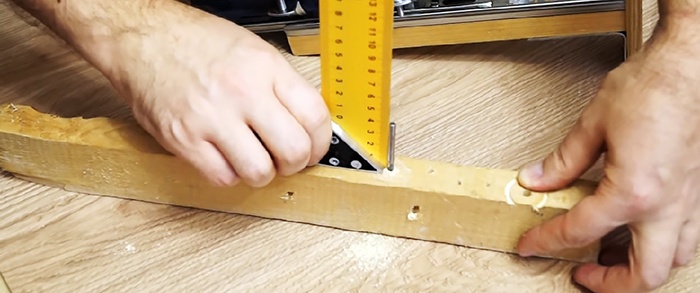
You certainly cannot achieve such precision by drilling by hand!

This device is very simple, and is literally made from leftover building materials. Particular importance here is given to furniture telescopic guides for drawer drawers. It is with the help of them, and a couple of plumbing clamps, that we will make this device. Well, are you ready? Then let's get started!

Accessories
- Furniture telescopic guides, length – 250 mm;
- Wooden slats 20x40x250 mm;
- A piece of wooden platband for the frame, length – 150 mm;
- Mounting corner – 50x50x40 mm;
- Furniture screws or press washer;
- Plumbing clamp (selected according to the size of the drill body) – 2 pcs.
Tools
- Drill with a set of drills and an attachment for the crosspiece of self-tapping screws;
- A crosscut saw, a jigsaw or a regular hacksaw for wood;
- Pliers;
- Marking tools: square, tape measure, marker.
Manufacturing (step by step instructions)
To prepare furniture guides for installation, they must be disassembled. Remove the locking plastic cap and bend the stopper with pliers. We disassemble the guides, separating the pads from each other, carefully maintaining the position of the balls.


We mark the movable block of guides for the mounting holes at a distance of 6 cm and 14 cm from the end of the body.
We first drill with a small drill (3-3.5 mm), and then with a larger one (8 mm) so that a screw for plumbing clamps fits through these holes. It must be cut to length, leaving only about 1 cm in length. We tighten the clamps in the correct order, determining the desired position of the drill.


We mark the wooden slats to the size of the guides and saw off the excess.

We screw the fixed block of guides to the rail with self-tapping screws through the prepared holes.

On the back side we attach the mounting angle. Use a square to check that the fasteners are seated correctly.

We assemble both guide blocks together and fasten them to a wooden frame (piece of casing).

The device is ready, all that remains is to attach the drill to it, aligning it strictly perpendicular to the plane of the bed.


We clamp the drill into the chuck and check the accuracy of the drilling.


You certainly cannot achieve such precision by drilling by hand!

Watch the video
Similar master classes

The simplest device for sharpening knives at 30 degrees
Drilling machine centering attachment for precision drilling

Homemade stand for a jigsaw - a device for perfect
A simple device for checking the correct angle when manually
How to quickly make a device for sharpening drills

A simple device for picking fruit from a height from a PVC pipe
Particularly interesting
Comments (4)


